Installing Odoo on Kubernetes with the Scaleway Easy Deploy feature
Are you prepared to elevate your business operations using the capabilities of open-source technology? Look no further than Odoo! This collection of business applications, coded in Python, encompasses a wide range of functionalities, including website development, e-commerce, HR management, and accounting, all conveniently bundled into an accessible and cost-effective package. With a user base exceeding 2 million worldwide, enterprises of all scales are capitalizing on Odoo's harmonious integration and modular structure to streamline their processes and enhance their profitability.
But how can you initiate your Odoo journey? Our guide will walk you through the process of setting up Odoo on a Scaleway Kubernetes Kapsule using the easy-deploy feature, easily accessible right from the Scaleway console. In minimal time, you will have Odoo up and operational, primed to advance your business endeavors. Just adhere to the steps outlined in the sidebar on the right to get started.
Before you start
To complete the actions presented below, you must have:
- A Scaleway account logged into the console
- Owner status or IAM permissions allowing you to perform actions in the intended Organization
- An SSH key
- A valid API key
- Installed Docker on your local computer
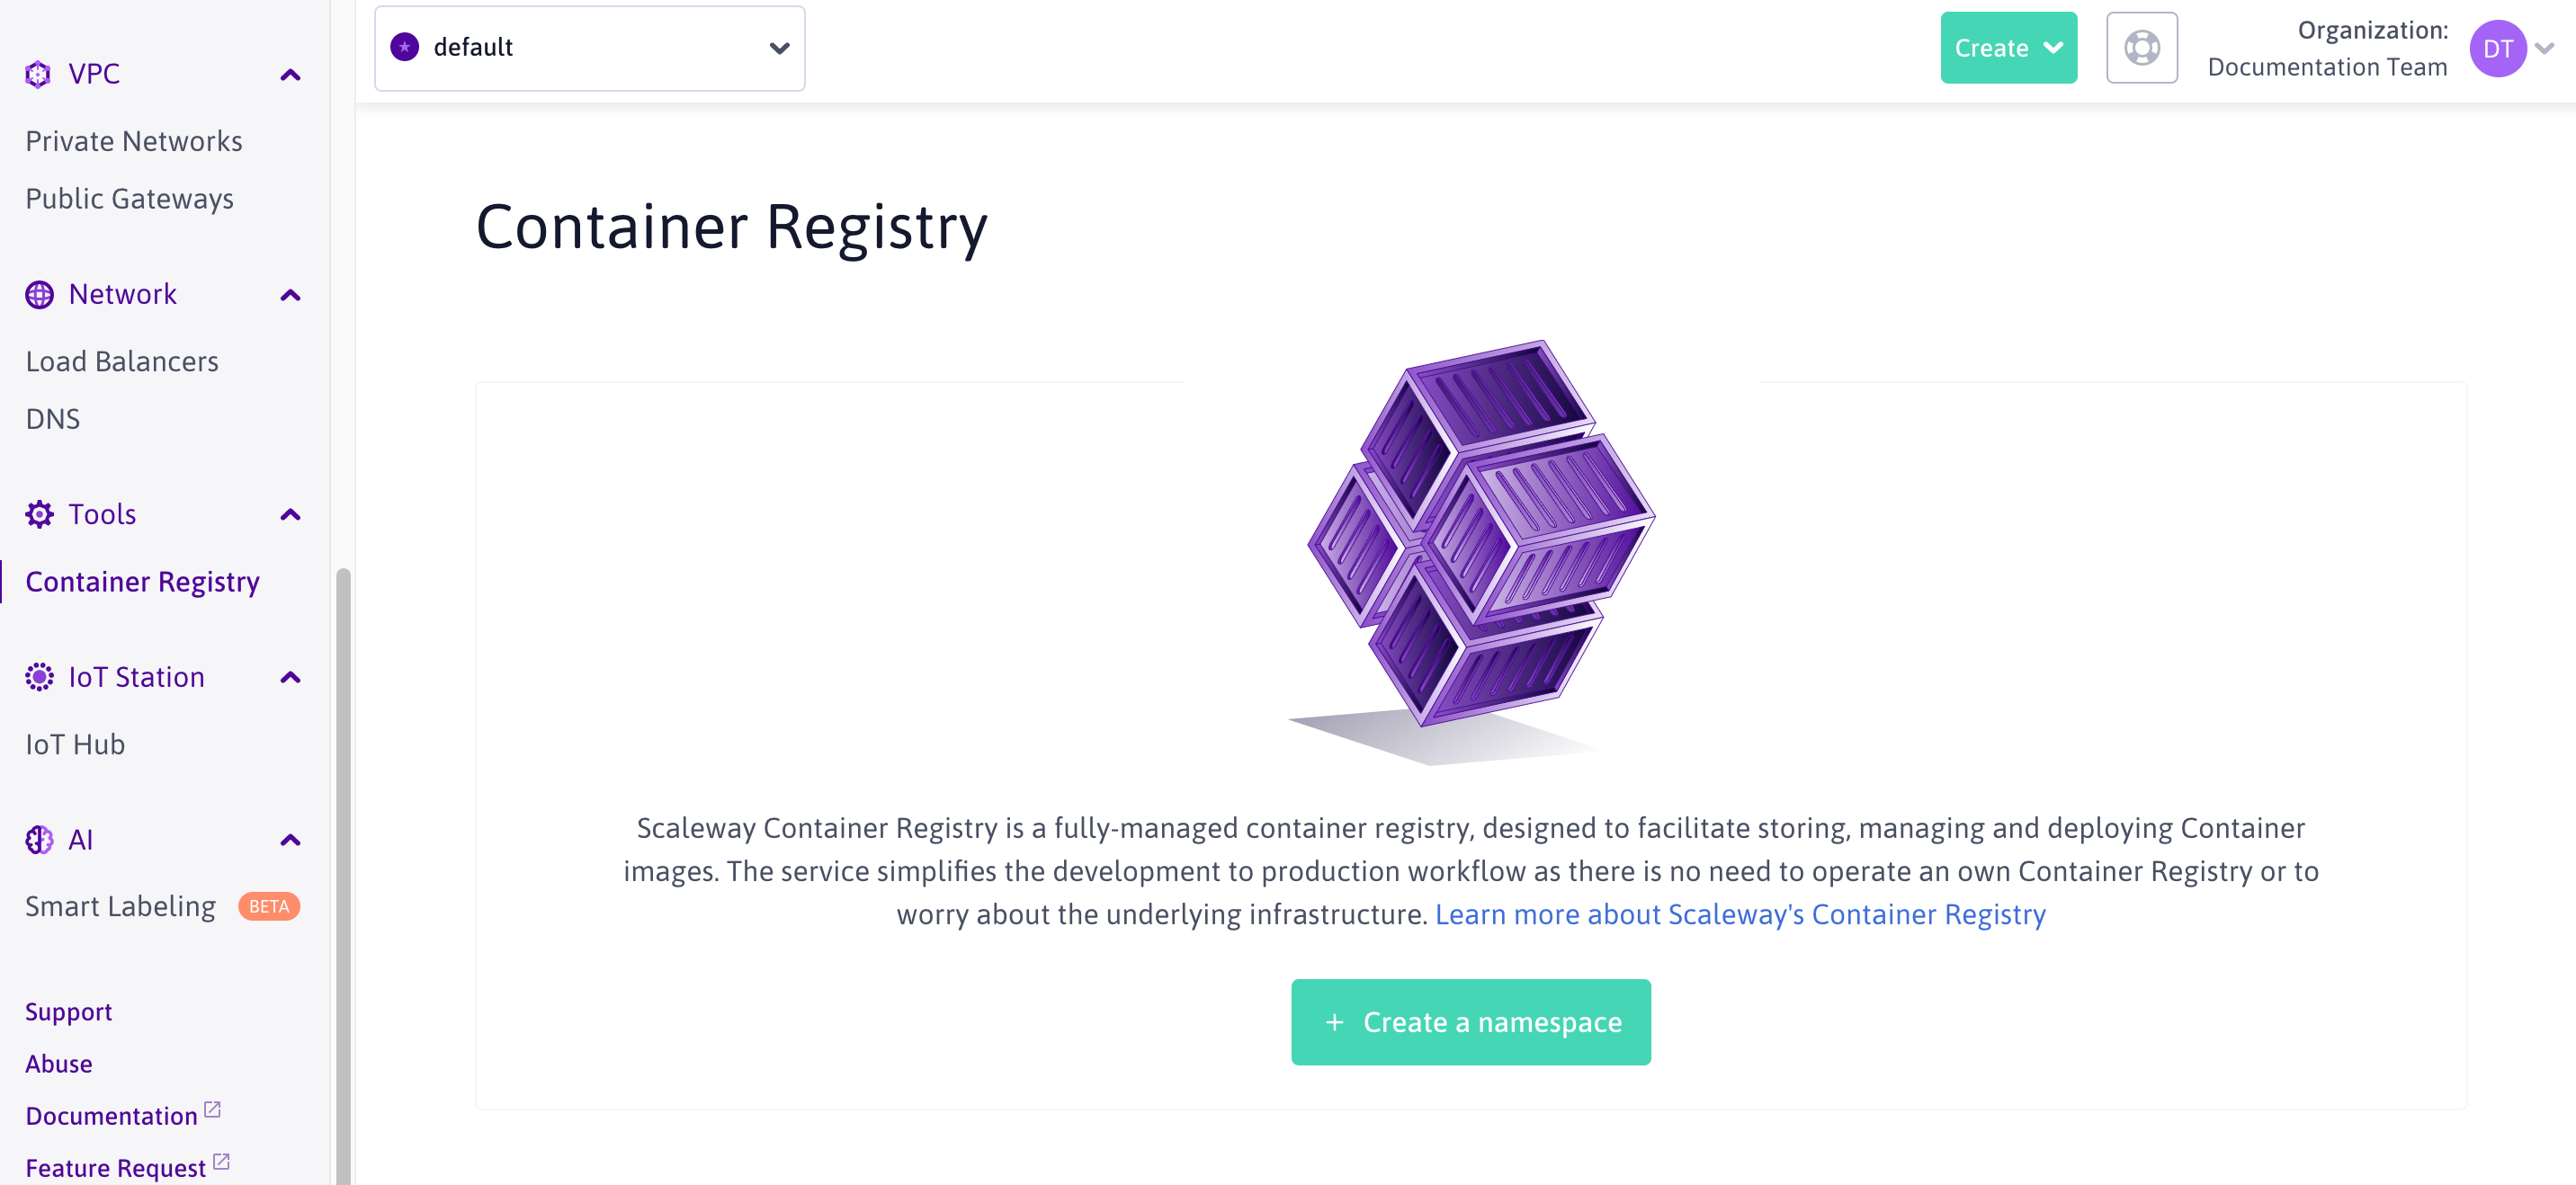
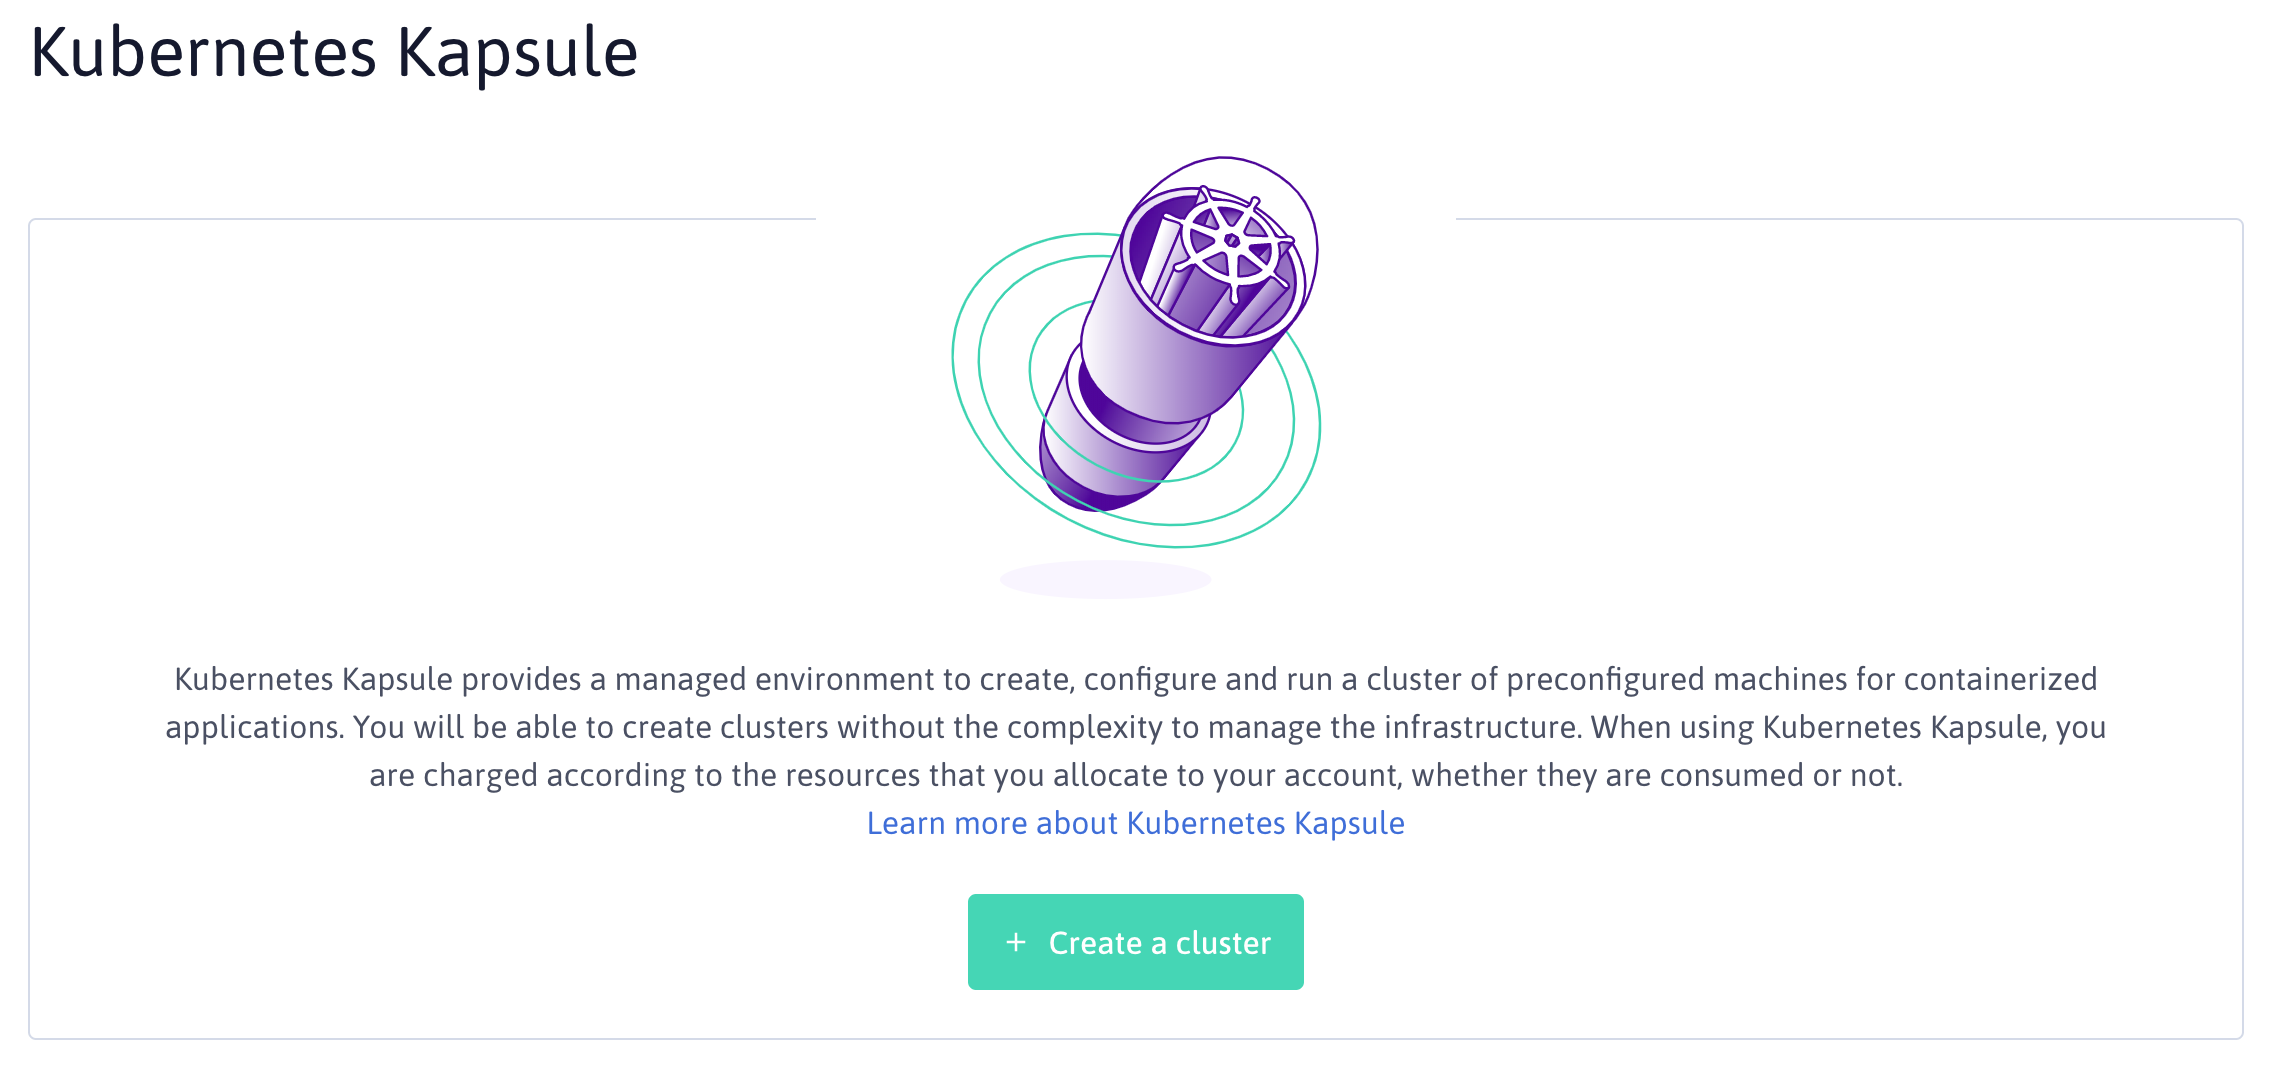
Creating a Scaleway Container Registry namespace
-
Go to the Container Registry dashboard in the Scaleway console, and click Create a namespace.
-
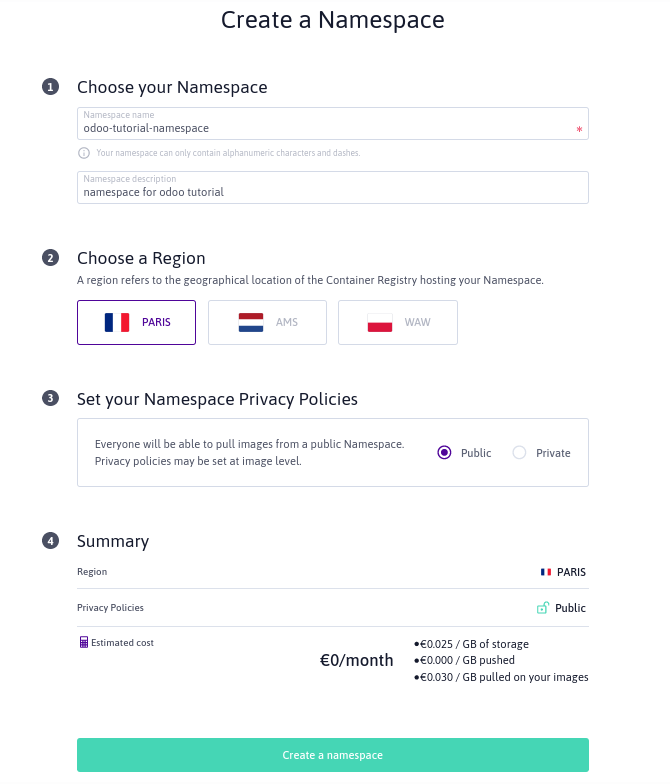
Complete the required information:
- Namespace name: any unique name of your choice (must contain only alphanumeric characters, dots, and dashes)
- Namespace description: a description for your Namespace
- Region: a geographical region for your namespace.
- Privacy Policy: you must select Public (currently the Easy-Deploy feature only works on public images)
-
Check the summary, then click Create a namespace.
The following screen displays:
Using Docker to get the official Odoo image and pushing it to your Scaleway Container Registry
-
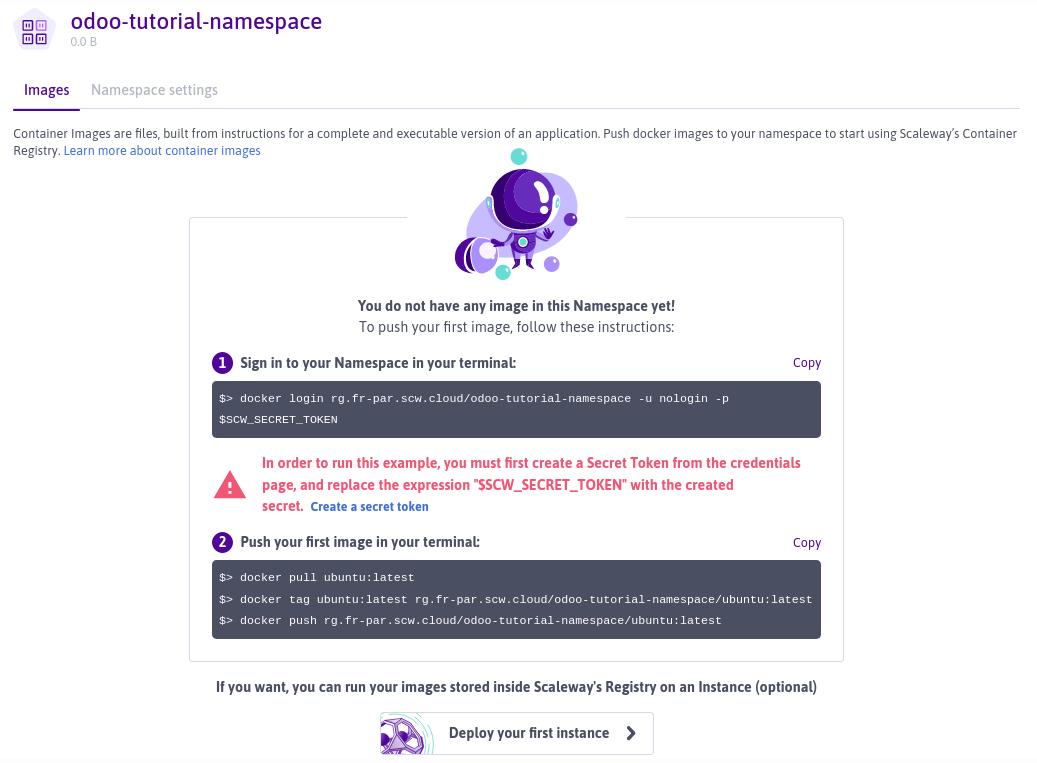
Open a terminal window on your local machine, and log in to your namespace with Docker.
docker login rg.fr-par.scw.cloud/odoo-tutorial-namespace -u nologin -p $SCW_SECRET_KEY -
Pull the latest official Odoo image.
docker pull odoo:latest -
Tag the image, ready to push it to your Container Registry.
docker tag odoo:latest rg.fr-par.scw.cloud/odoo-tutorial-namespace/odoo:latest -
Push the image to your Container Registry.
docker push rg.fr-par.scw.cloud/odoo-tutorial-namespace/odoo:latestThis process takes some minutes to complete.
-
Wait a minute, then go to the Container Registry dashboard to make sure the image has been successfully created.
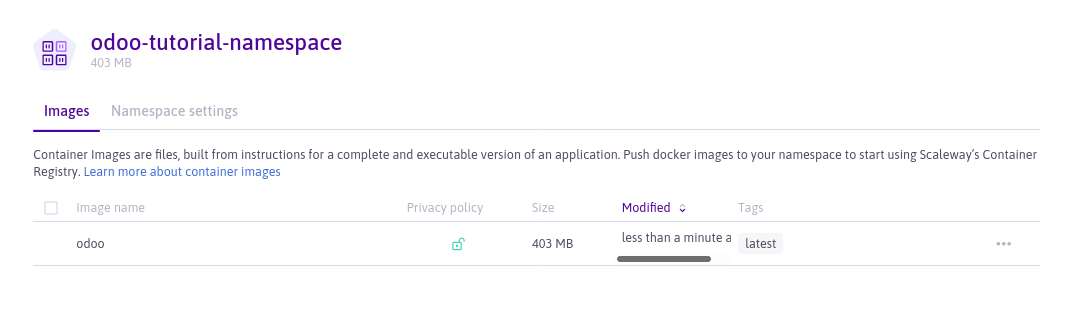
Now that the Odoo image is in our Container Registry, we can deploy it with Kubernetes.
Creating a Kubernetes Kapsule cluster and deploying Odoo
-
Go to the Kubernetes dashboard in the Scaleway console.
-
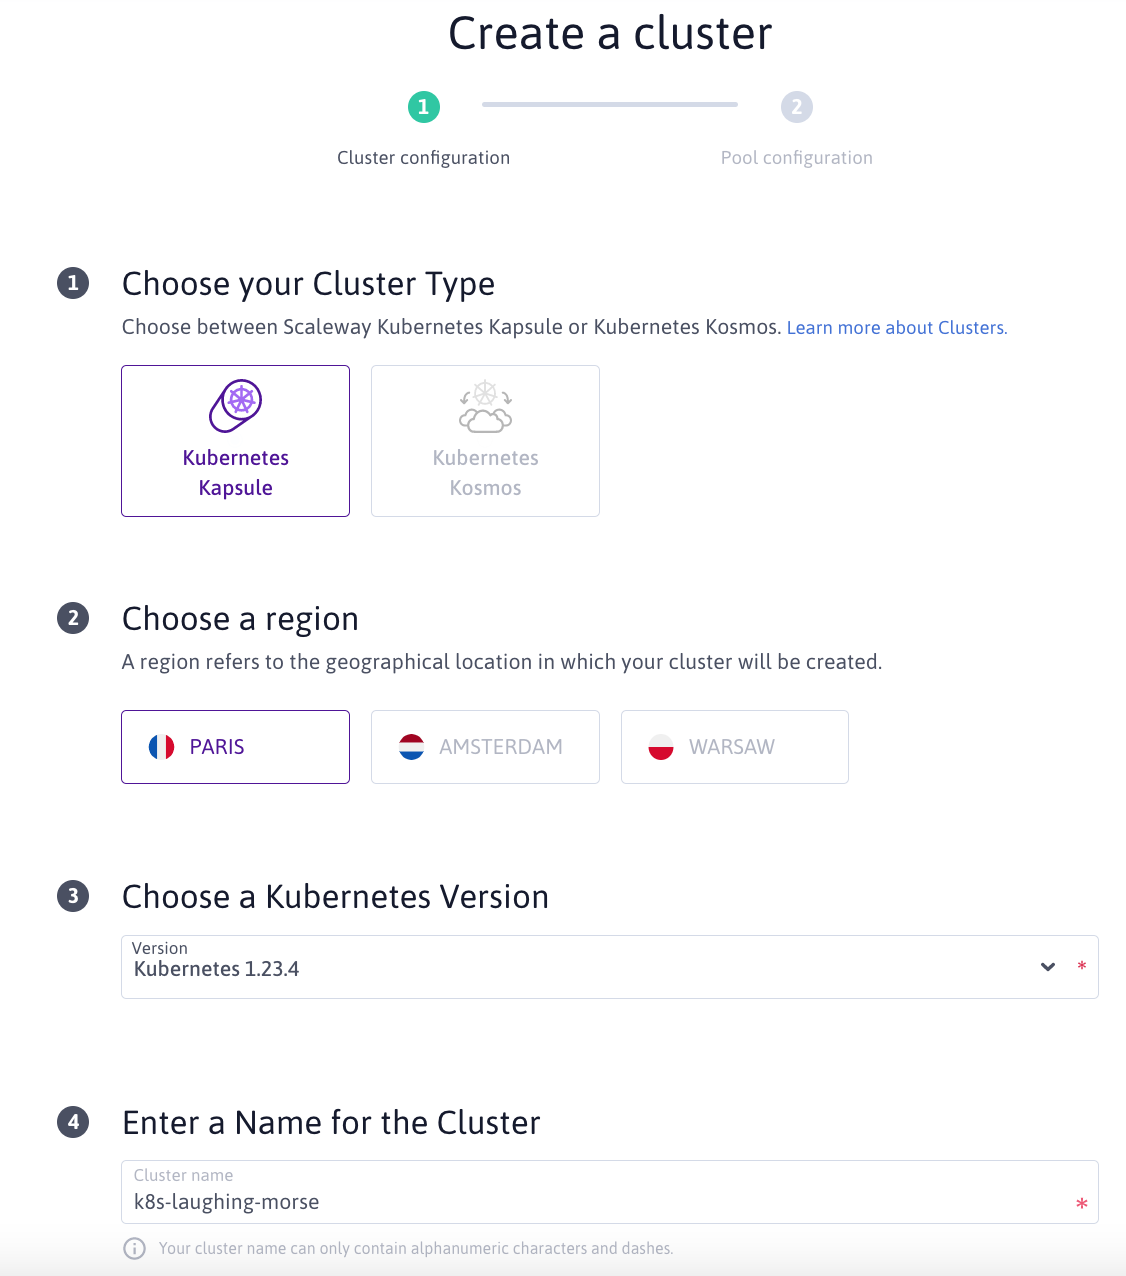
Click Create a cluster.
-
Enter the required information:
- Cluster type: select one between Kapsule or Kosmos (Multi-AZ)
- Cluster name: any identifying name of your choice (must contain only alphanumeric characters and dashes)
- Cluster description a description for your cluster
- Region: a geographical region for your cluster.
- Node type: the type of Instance you want for your cluster
- Node options: choose your required options, or leave at the default values
-
Check the summary, then click Create a cluster.
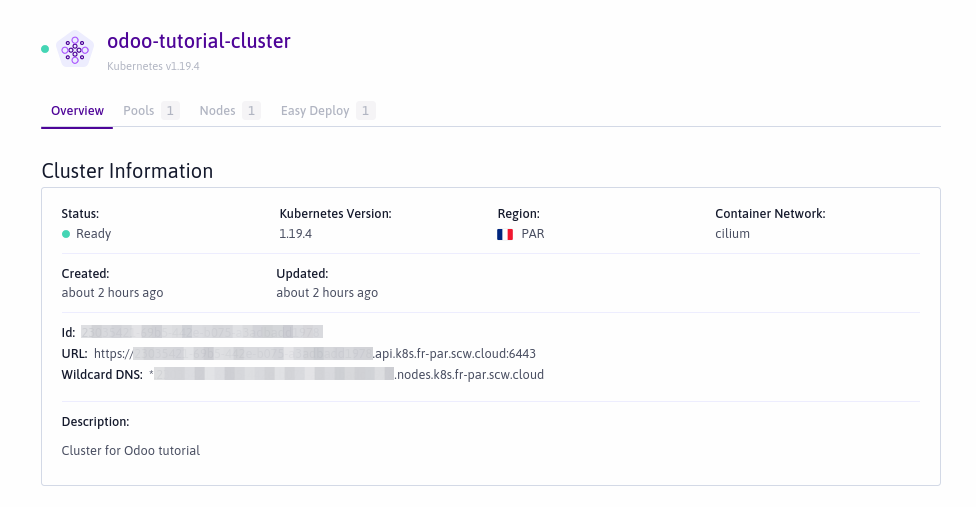
A process screen displays to inform you that your cluster is being created. You may also see an additional warning that some of your pools are not yet ready. After a few minutes, your cluster should be up and running and ready to use.

-
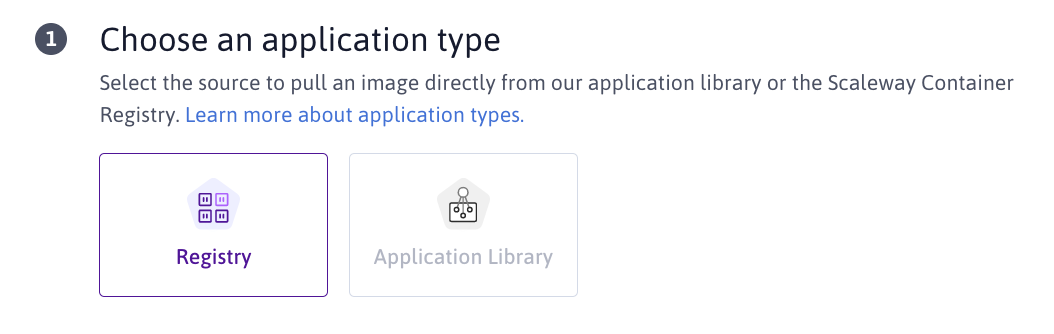
Click the Easy Deploy tab on the cluster information page. Select the Registry option.
-
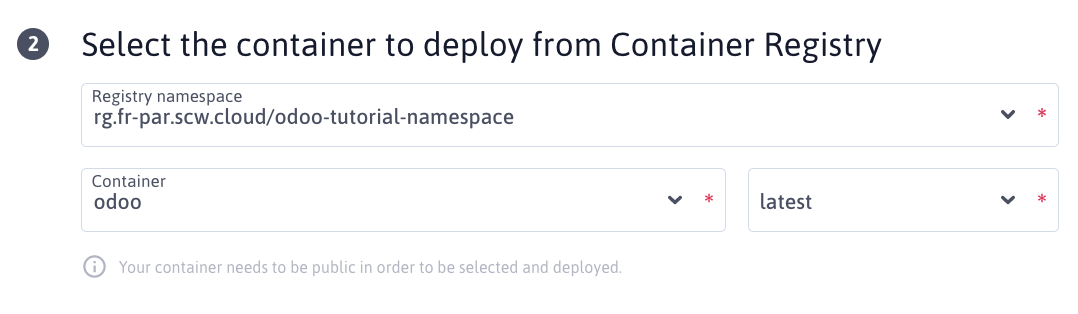
Select the namespace, the container, and its version to deploy:
-
Select the Deployment type for the container.
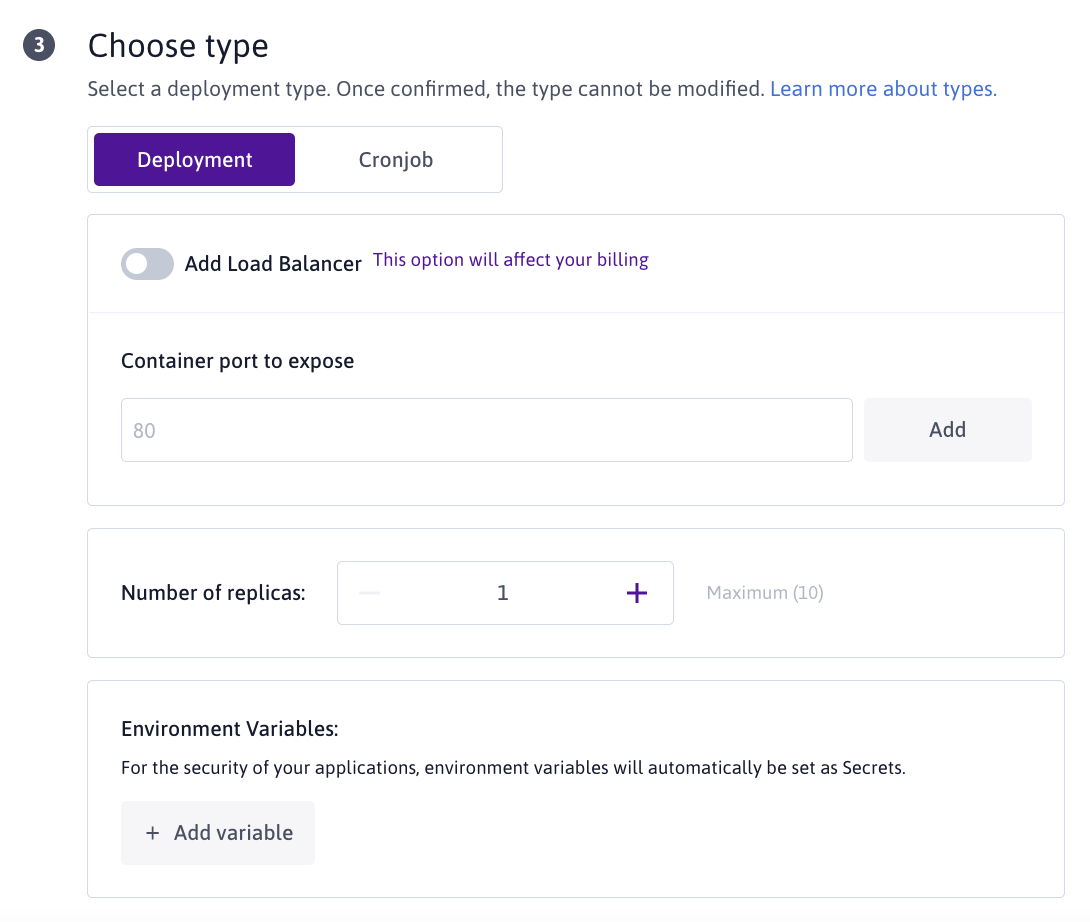
You can leave the other settings at the default values; we will return to them later.
-
Enter a name and a namespace for your application.
- Container name: any identifying name of your choice for your container (must contain only alphanumeric characters and dashes)
- Kubernetes namespace any identifying name of your choice for the Kubernetes namespace on which your container will run (must contain only alphanumeric characters and dashes)
-
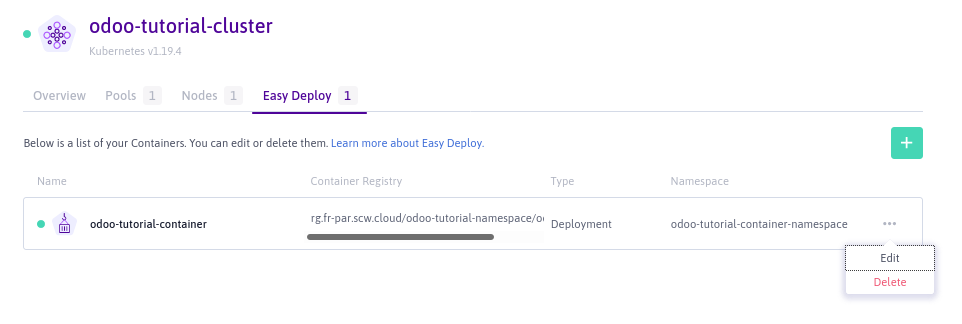
Click Deploy a container. The Easy Deploy overview page displays.
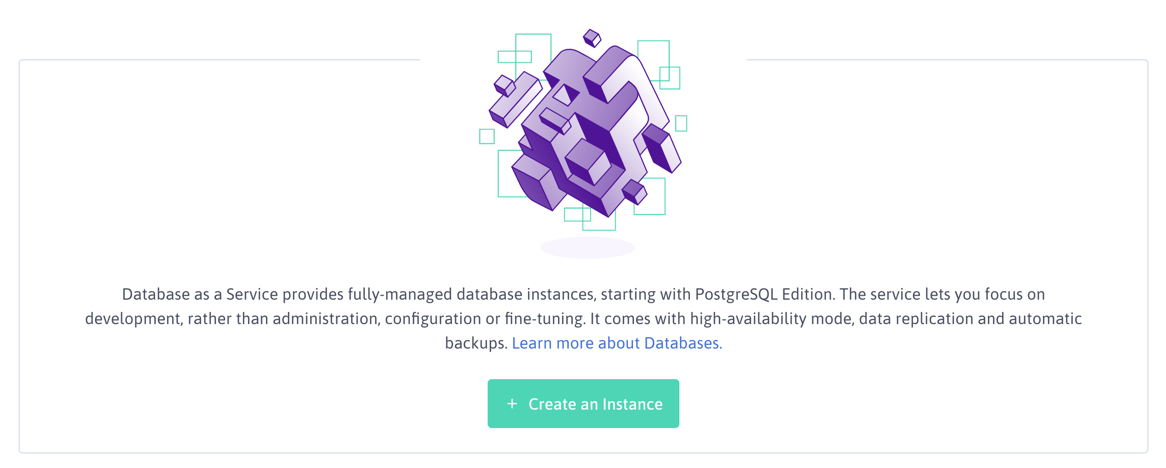
Installing a PostgreSQL database
The Odoo image documentation specifies that it requires a running PostgreSQL server, which we will now create:
-
Go to the Database dashboard in the Scaleway console.
-
Click Create an Instance.
-
Enter your Database Instance information. Select PostgreSQL-12 as your database engine. Select your region and node type (we recommend minimum
DB-DEV-L).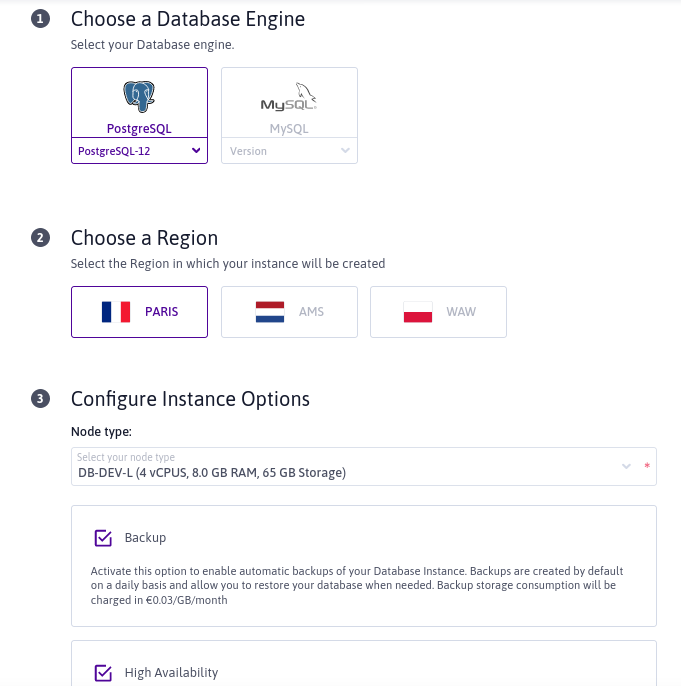
-
Enter a username and password in the Credentials section. Then, enter a name for your Database Instance. Note all of these down, as you will need them in a future step.

-
Check the summary and click Create an Instance.
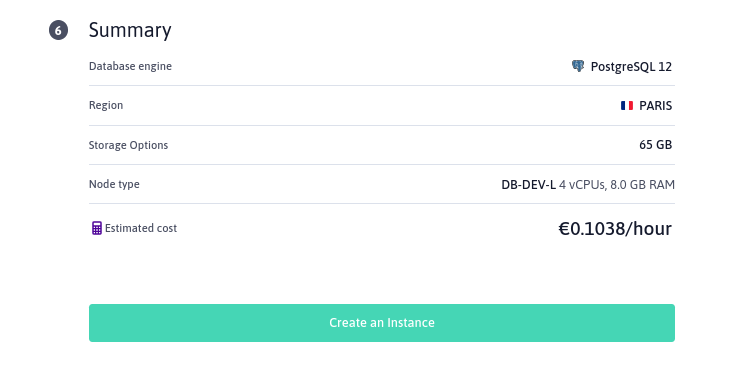
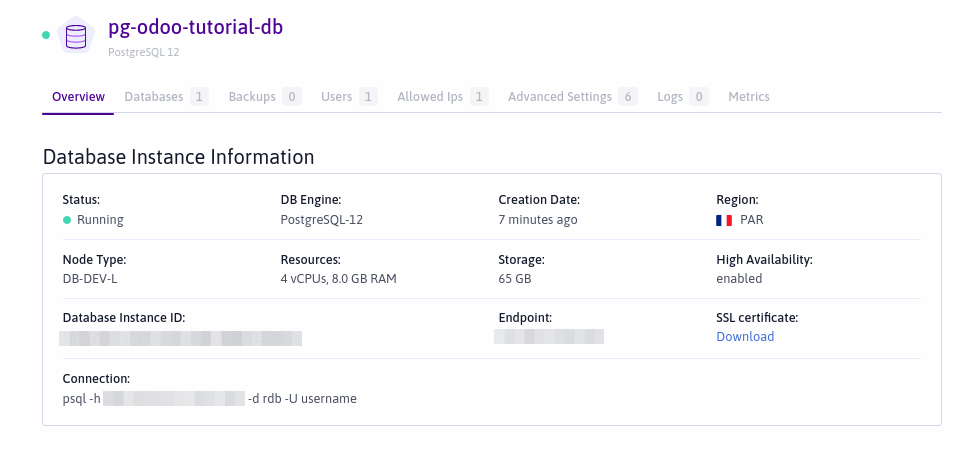
A screen reports the progress of the Database creation. After a minute or two, a screen similar to the following should confirm the creation of your Database Instance.
-
Take note of the endpoint information, as you will need it in the next step.
Connecting the Odoo application to the PostgreSQL server
The Odoo image documentation tells us that by modifying the application's environment variables HOST, PORT, USER, and PASSWORD we can easily connect it to a PostgreSQL server. We will expose our Odoo application with a Load Balancer, and set these environment variables so that it can connect to our newly created database.
-
Go to the Kubernetes dashboard in the Scaleway console and select the cluster you created and deployed your Odoo image on.
-
Click the Easy Deploy tab. Then click > Edit next to your Odoo container.
-
Click to Add Load Balancer.
-
Under Container port to expose, enter
80:8069and click Add.Your Load Balancer will map incoming traffic ports (80 is the default for
http, and you can use 443 forhttps) to your exposed container port (8069 being the default Odoo port).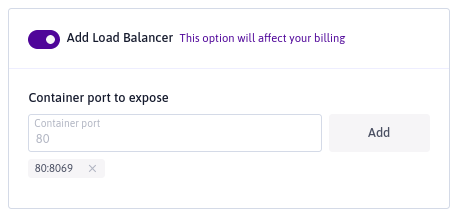
-
Leave the Number of replicas option at 1 (default) to avoid session token conflicts.
-
Click Add Variable under Environment Variables. Add four variables.
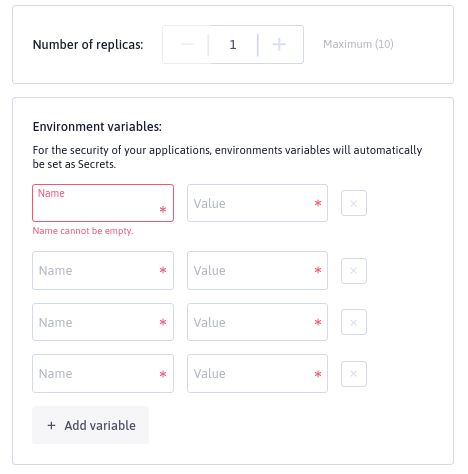
-
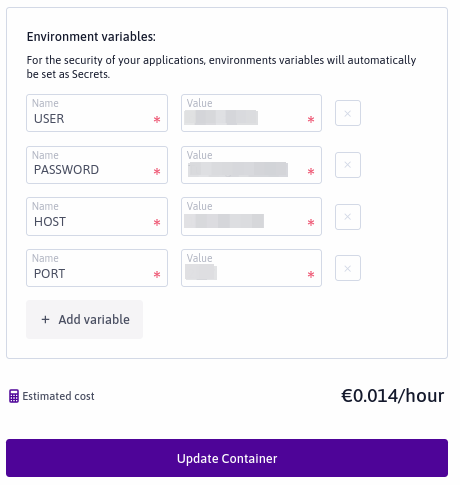
Add the following information for your variables.
- USER: the username that you set when creating your PostgreSQL database
- PASSWORD: the password that you set when creating your PostgreSQL database
- HOST: the first part of your database's endpoint, which you previously noted down. If your endpoint was
123.456.78.91:1011, then the host is123.456.78.91 - PORT: the second part of your database's endpoint. If your endpoint was
123.456.78.91:1011, then the port is1011
-
Click Update Container. The container information page displays.
-
Click Load Balancer on the side menu of the Scaleway console. A list of your Load Balancers displays.
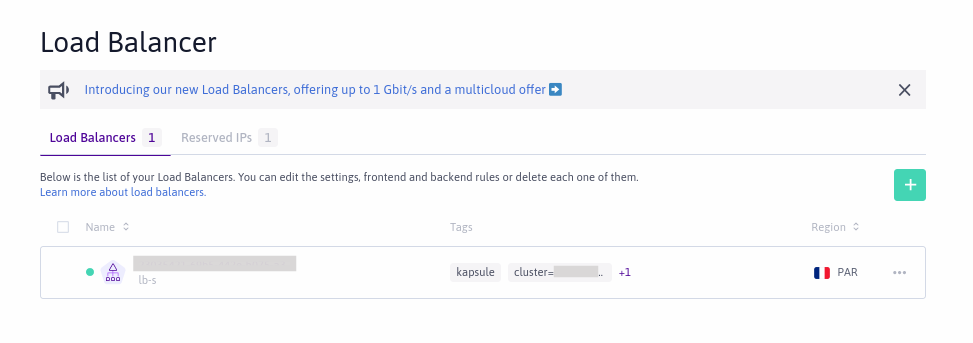
-
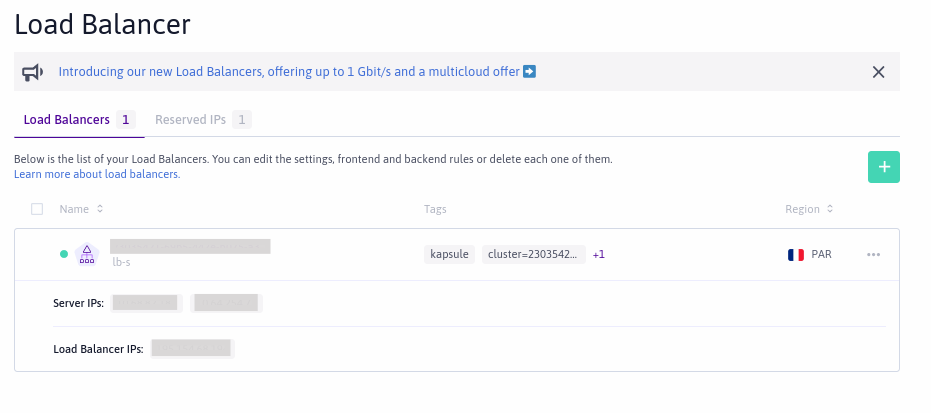
Click the name of the Load Balancer you added. Note the Load Balancer IP.
Launching Odoo in a browser
-
Enter the
Load Balancer IPin a new browser window. It will take you to the Odoo landing page: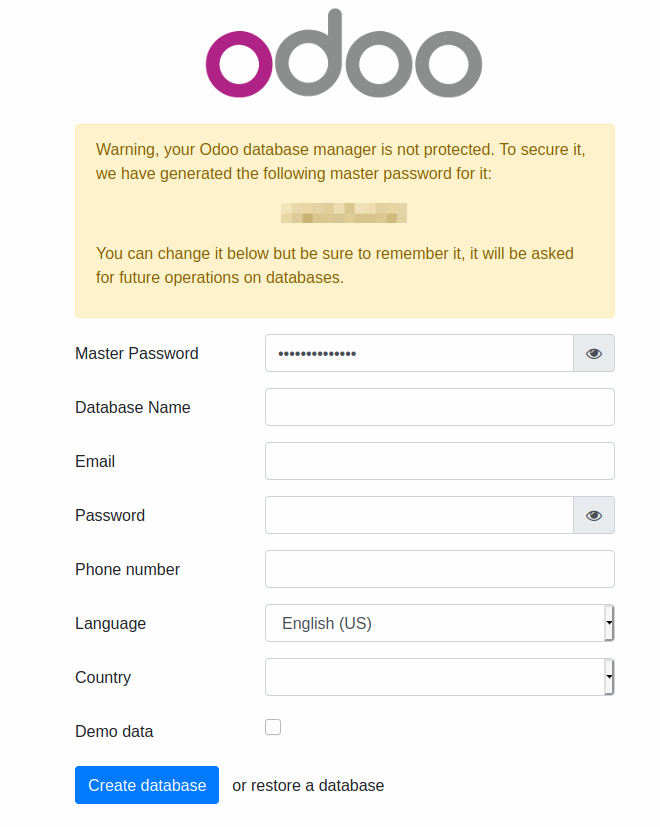
-
Enter the required information:
- Master Password: Odoo generates and auto-completes a master password for you (displayed at the top of the page), which you can change if you wish
- Database Name: Your choice of name
- Email: Your email address
- Password: Choose a password
- Phone Number: Your phone number
- Language: Your choice of language
- Country: Your country
- Demo data: If you check this box, the application will be populated with demo data (which you can later overwrite with your own data) as a guide.
The application may take a few minutes to launch.
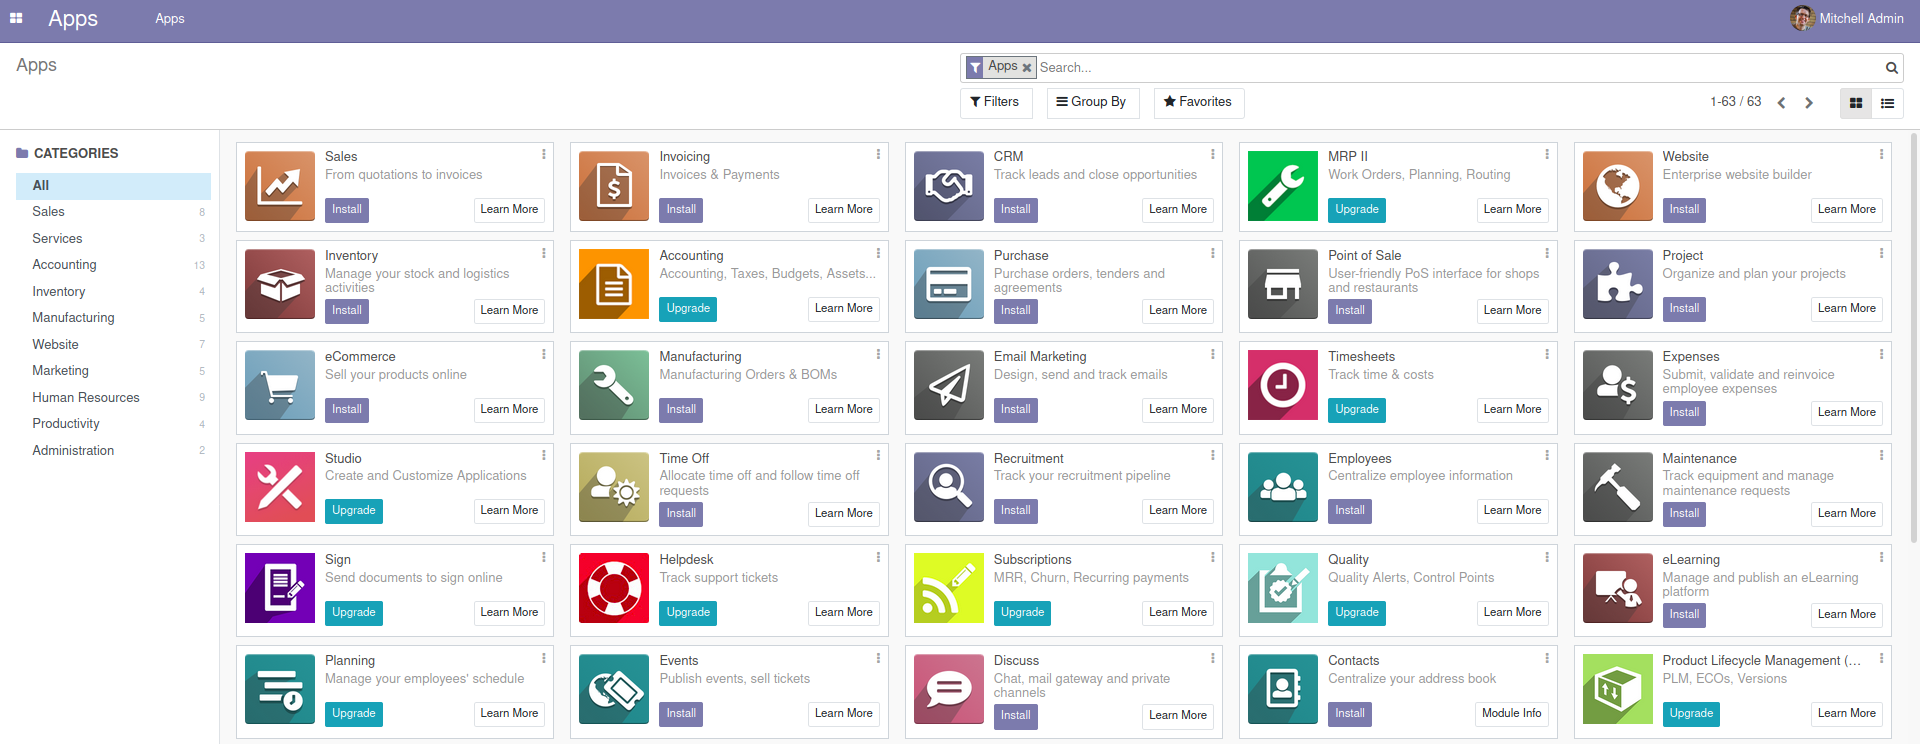
You can now start installing apps, configuring your settings, and using Odoo. Check out the official Odoo documentation for more help.
Visit our Help Center and find the answers to your most frequent questions.
Visit Help Center