Setting up a load-balanced WordPress
The capacity of a single server is limited. Once a website gains more and more attraction the Instance serving the site comes to a point where it can not handle any more users. The website starts to slow down or even become unavailable as the server goes down from the traffic.
This is the point where a Load Balancer enters the game. It allows spreading the "load" that all those visitors and their requests create to be "balanced" over a series of different Instances.
In case of increasing load on a setup, capacity can easily be increased by adding more Instances to the Load Balancer's backend. This allows you to scale your infrastructure without any downtime or delays whilst waiting for DNS zones to be updated.
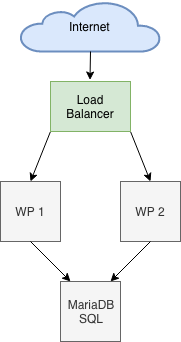
In this tutorial, you learn how to set up a Scaleway-managed Load Balancer with two WordPress Instances and one Database Instance running MariaDB. The final setup is visible in this schema:
Before you start
To complete the actions presented below, you must have:
- A Scaleway account logged into the console
- Owner status or IAM permissions allowing you to perform actions in the intended Organization
- An SSH key
Prework - Setting up the backend Instances
During the tutorial the following IPs are used:
10.45.2.3for the first WordPress instance10.45.2.4for the second WordPress instance10.46.5.6for the MariaDB instance51.51.51.51for the Load Balancer front-end IP Load Balancer supports private IPs of Scaleway Instances for backend servers, allowing you to deploy Instances without public IPv4.
- Follow this tutorial to start two Ubuntu Instances and install WordPress with LEMP on both of them.
- Set up a third Instance with a MariaDB database as explained in this tutorial.
Configuring a Load Balancer
-
Follow the instructions for creating a Load Balancer, with the following settings:
- The same Availability Zone as your Instances
- A frontend listening on port 80
- A backend using HTTP protocol, listening on port 80
- TLS encryption activated on the backend
- Proxy protocol deactivated on the backend
- The two WordPress Instances (
10.45.2.3and10.45.2.3) as backend server IPs - HTTP health check
-
Check the status of your Load Balancer's backend servers in the Scaleway console, by navigating to the Load Balancer's dashboard, then Backends > Backend name > Server list, where you can see the status of each server depending on its health check result.
Configuring WordPress
Update the configuration of each Instance now, so they will use the database on the dedicated MariaDB Instance instead of using a local database.
-
Connect to the Instance via SSH as
root. -
Open the file
/var/www/wp-config.phpin a text editor and edit the database section as follows:// ** MySQL settings - You can get this info from your web host ** // /** The name of the database for WordPress */ define('DB_NAME', 'wordpressdb'); /** MySQL database username */ define('DB_USER', 'wordpress'); /** MySQL database password */ define('DB_PASSWORD', '<yoursecretpassword>'); /** MySQL hostname */ define('DB_HOST', '10.46.5.6'); #IP of the MariaDB instance /** Database Charset to use in creating database tables. */ define('DB_CHARSET', 'utf8'); /** The Database Collate type. Do not change this if in doubt. */ define('DB_COLLATE', '');Once edited, save the file and exit the text editor.
When connecting to the Instance from a web browser, the content is taken from the database on the MariaDB server.
-
Log into the WordPress Admin interface and click Settings to configure WordPress.
- Enter the IP of one of your WordPress Instances (
10.45.2.3) in the field WordPress Address (URL) - Enter the Load Balancer's public (flexible) IP address (
51.51.51.51) or your domain name in the field Site Address (URL)
Save the form.
- Enter the IP of one of your WordPress Instances (
-
Redo this step on the second instance.
-
Type the Load Balancer's public (flexible) IP address or your domain name in your browser, and WordPress will appear :
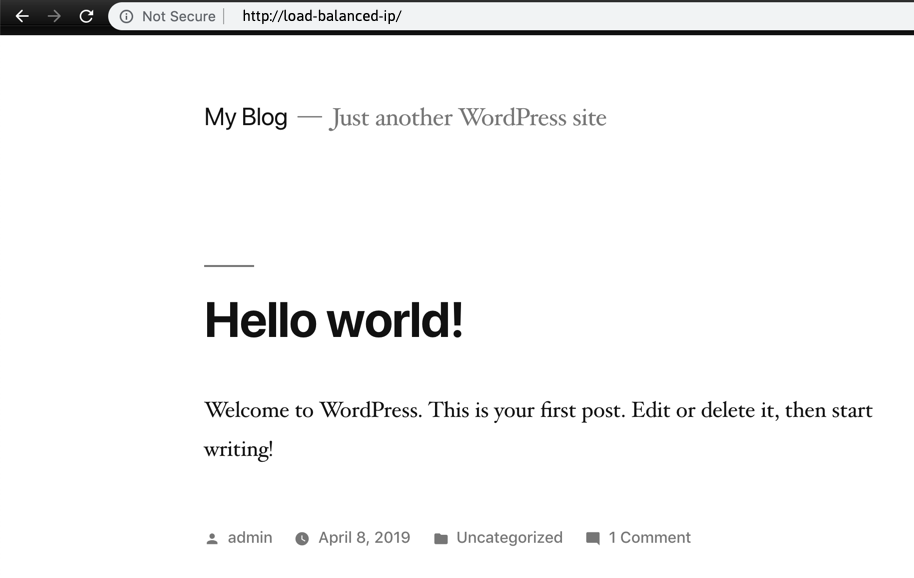
The Load Balancer is now automatically distributing the load between your Instances. To increase the computing power of the Load Balancer, simply snapshot an Instance and spin up a new one.
Visit our Help Center and find the answers to your most frequent questions.
Visit Help Center