Managing Serverless Jobs using Dagster
Dagster is an orchestrator designed for developing and maintaining data assets, such as tables, data sets, machine learning models, and reports.
It allows you to declare jobs that you want to run and the data assets that those jobs produce or update. Dagster then helps you run your jobs at the right time and keep your assets up-to-date.
In this tutorial, we will create a Serverless Job using Dagster to scrape the content of the Hacker News website to retrieve the title, author, and URL of the top articles.
First, we will initialize the Dagster project locally and add the scraper's source code to it. Then, we will set up the environment, build the image and push it to the Scaleway registry. Finally, we will execute Dagster locally to scrape the Hacker News top stories through the Dagster UI.
Before you start
To complete the actions presented below, you must have:
- A Scaleway account logged into the console
- Owner status or IAM permissions allowing you to perform actions in the intended Organization
- An API key
- A Container Registry namespace in the Paris region and have signed in to it
- A Serverless Database
- Installed Docker locally to build and push the image
- An Object Storage bucket in the Paris region
Creating the Dagster project
We will install Dagster using the pip package installer. Refer to the Dagster documentation for more information or alternative installation methods.
-
Run the following command to install the latest Dagster:
pip install dagster dagster-webserver -
Run following command to create the Dagster project:
dagster project scaffold --name my-dagster-project cd my-dagster-project -
Update the
install_requireslist in thesetup.pyfile with the code below to add the required dependencies to the project:install_requires=[ "dagster", "dagster-cloud", "dagster_aws", "dagster_scaleway~=0.1.3", "dagster_postgres", "pandas", "scaleway", "pendulum==2.0.3", ], -
Run the following command to install the dependencies locally:
pip install . -
Create the Dockerfile to build the container image:
cat <<EOF > Dockerfile FROM python:3.11-slim-bookworm WORKDIR /app COPY . . RUN pip install . EOF -
Copy the scraper code below and paste it into the
my-dagster-project/assets.pyfile:import pandas as pd import requests import os from dagster_aws.s3 import S3PickleIOManager, S3Resource from dagster import Definitions, asset, MetadataValue, Output import scaleway client = scaleway.Client.from_config_file_and_env() S3_BUCKET_NAME = os.getenv("S3_BUCKET_NAME") @asset def hackernews_top_story_ids(): """ Get top stories from the HackerNews top stories endpoint. API Docs: https://github.com/HackerNews/API#new-top-and-best-stories """ top_story_ids = requests.get( "https://hacker-news.firebaseio.com/v0/topstories.json" ).json() return top_story_ids[:10] # Asset dependencies can be inferred from parameter names @asset def hackernews_top_stories(hackernews_top_story_ids): """Get items based on story IDs from the Hacker News items endpoint""" results = [] for item_id in hackernews_top_story_ids: item = requests.get( f"https://hacker-news.firebaseio.com/v0/item/{item_id}.json" ).json() results.append(item) df = pd.DataFrame(results) # The recorded metadata can be customized metadata = { "num_records": len(df), "preview": MetadataValue.md(df[["title", "by", "url"]].to_markdown()), } return Output(value=df, metadata=metadata) defs = Definitions( assets=[hackernews_top_story_ids, hackernews_top_stories], resources={ "io_manager": S3PickleIOManager( s3_resource=S3Resource( region_name="fr-par", endpoint_url="https://s3.fr-par.scw.cloud", aws_access_key_id=client.access_key, aws_secret_access_key=client.secret_key, ), s3_bucket=S3_BUCKET_NAME, ), }, ) -
Replace the content of the
my-dagster-project/__init__.pyfile with the code below to load the definitions from theassets.pyfile:from dagster import Definitions, load_assets_from_modules from . import assets all_assets = load_assets_from_modules([assets]) defs = assets.defs
Setting up the environment and creating the image
-
Retrieve the following elements:
- your Serverless SQL Database connection string
- the project ID of the Scaleway project you want to use
- the access key and secret key for your API key
- the name of the Object Storage bucket you created
-
Export the environment variables below:
export PG_CONN_STRING=<your_serverless_database_connection_string> export SCW_DEFAULT_PROJECT_ID=<your_scaleway_project_id> export SCW_ACCESS_KEY=<your_scaleway_access_key> export SCW_SECRET_KEY=<your_scaleway_secret_key> export S3_BUCKET_NAME=<your_bucket_name> -
Build and push the image to your container registry namespace:
docker build -t rg.fr-par.scw.cloud/<your-namespace>/dagster-scaleway-example:latest . && docker push rg.fr-par.scw.cloud/<your-namespace>/dagster-scaleway-example:latest -
Create a
dagster.yamlfile at the root of the Dagster project to store the configuration, and replace the container image with the one you pushed:
run_launcher:
  module: dagster_scaleway
  class: ScalewayServerlessJobRunLauncher
  config:
    docker_image: rg.fr-par.scw.cloud/<your-namespace>/dagster-scaleway-example:latest
    env_vars:
    - PG_CONN_STRING
    - SCW_DEFAULT_PROJECT_ID
    - SCW_ACCESS_KEY
    - SCW_SECRET_KEY
    - S3_BUCKET_NAME

storage:
  postgres:
    postgres_url:
      # Can be obtained from the Scaleway Console
      env: PG_CONN_STRING
Executing Serverless Jobs using the Dagster interface
-
Run the command below to launch the Dagster user interface locally:
dagster devOnce the output displays the Dagster UI URL, copy it and open it in your browser.
-
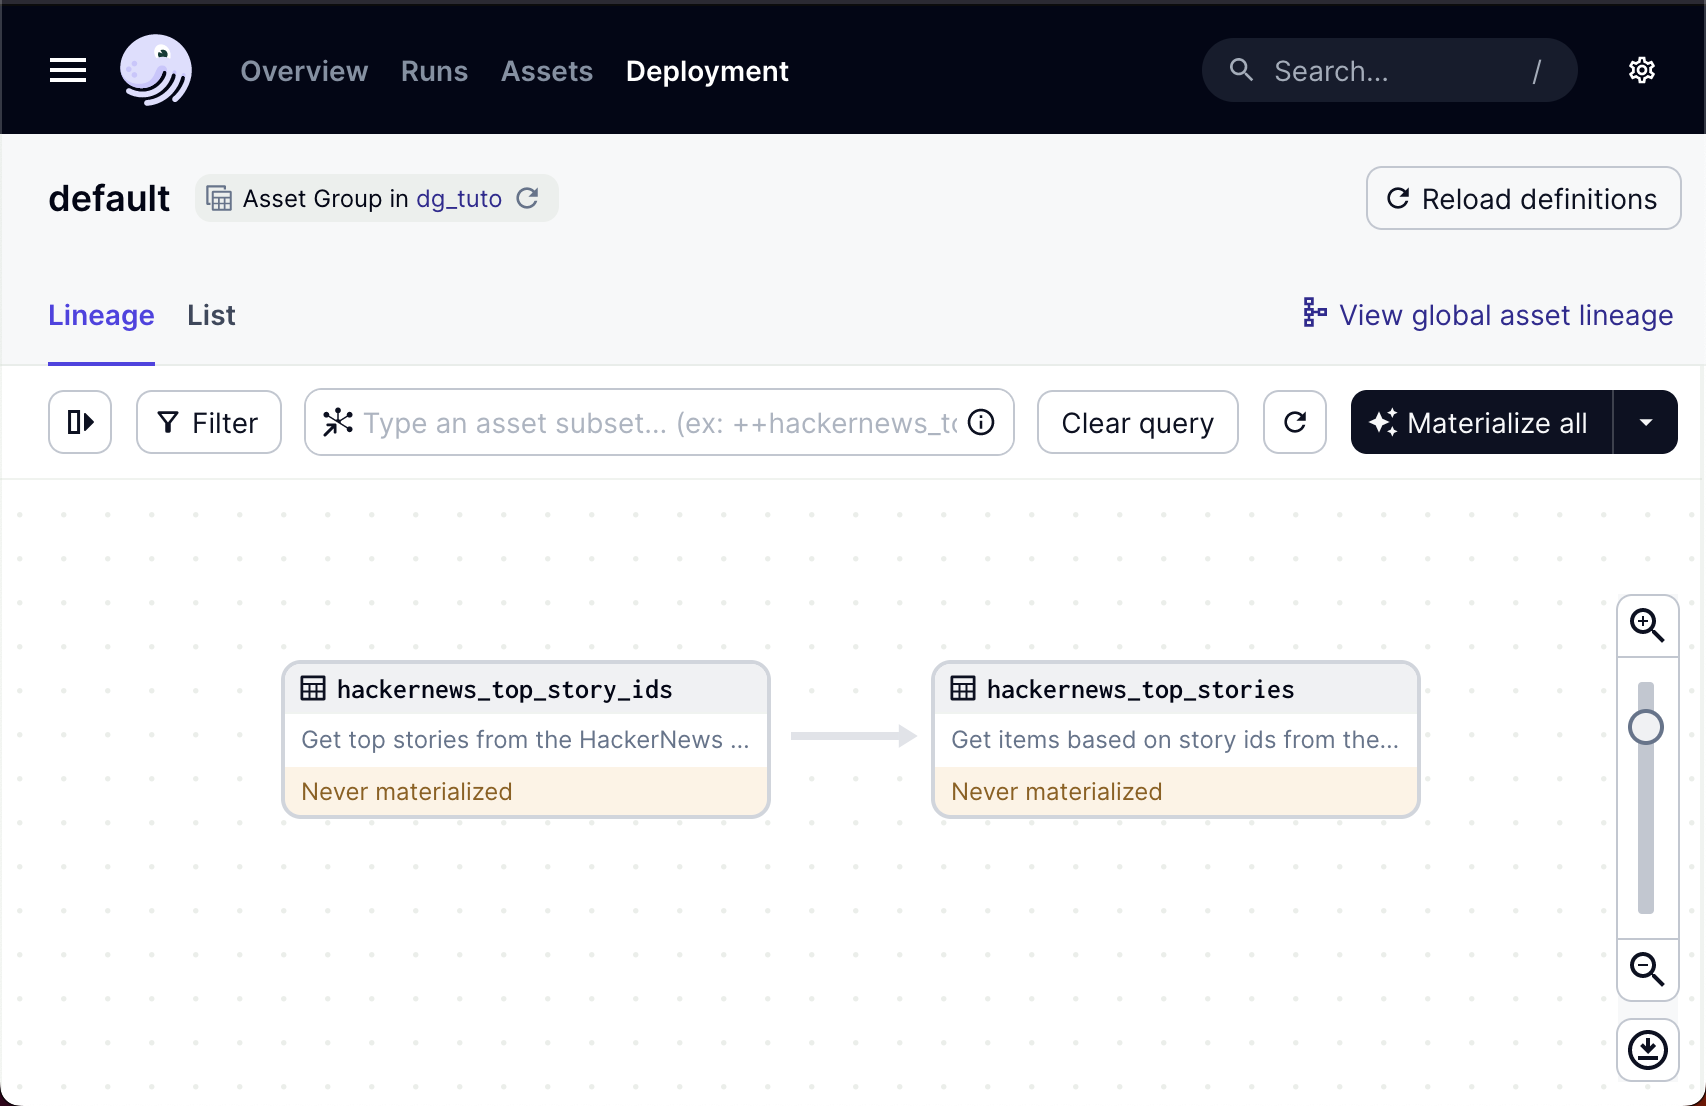
In the Dagster UI, click Materialize all on the right to create the Dagster assets and start your Serverless Job.
-
Click Runs in the top menu, to display the list of past and current job runs.
-
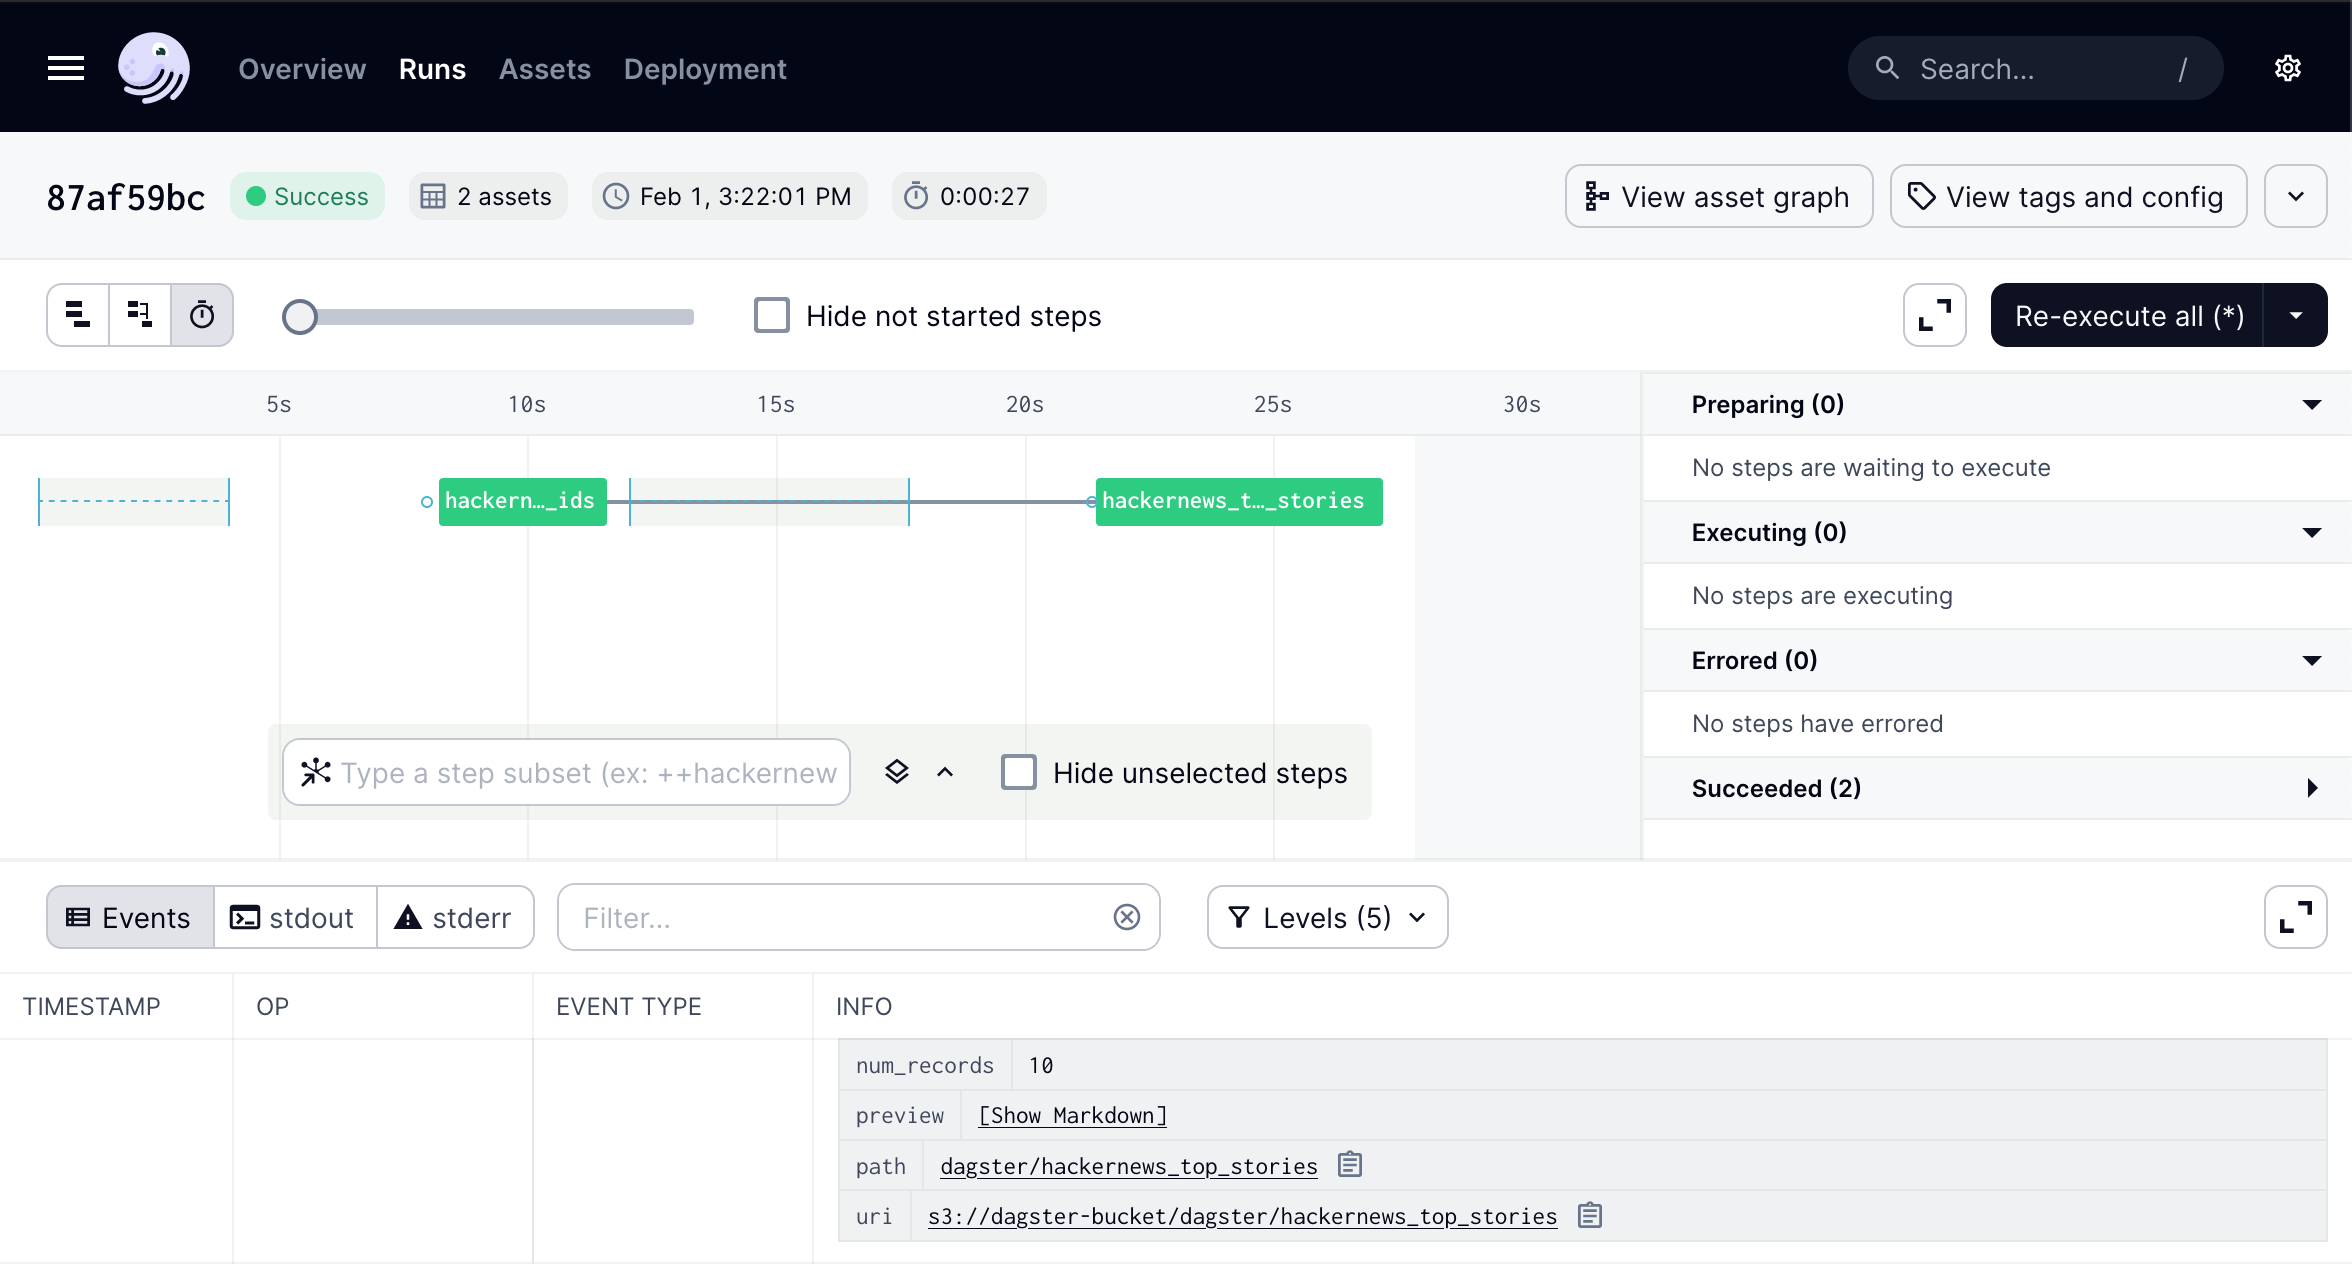
Click the Run ID you just created by materializing the assets to access the Run details page. From here, you can monitor the execution of your job run.
-
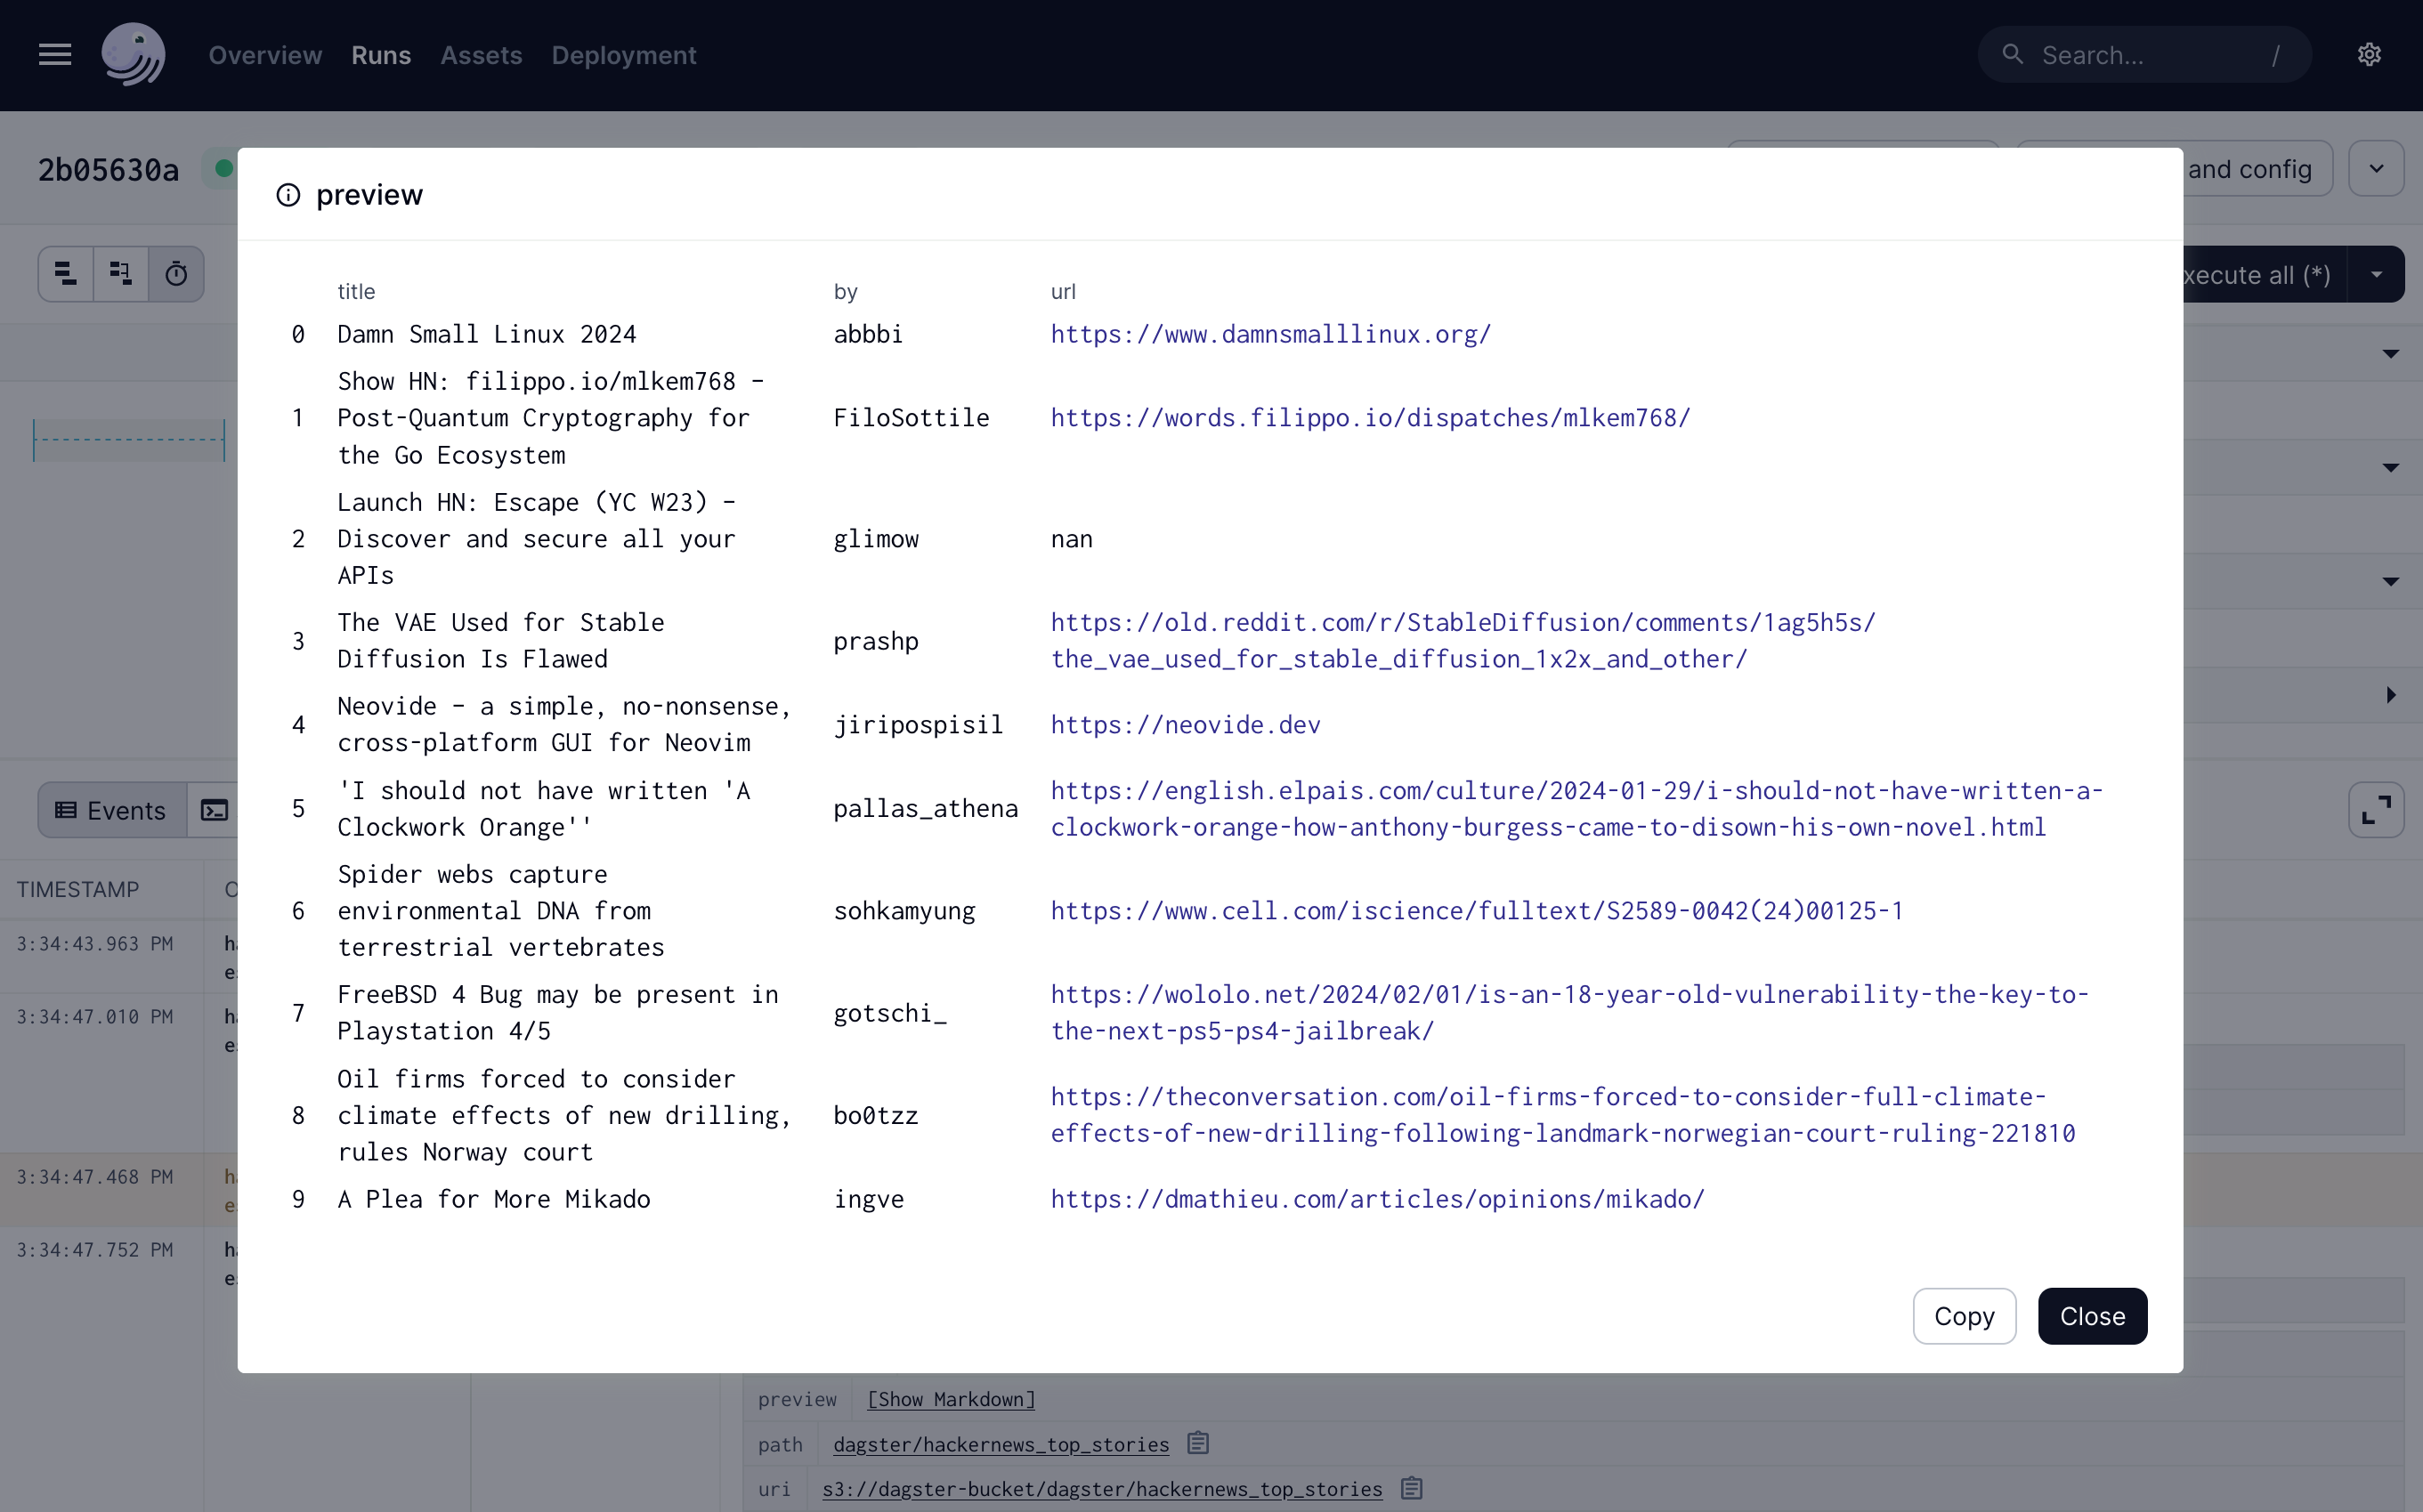
Once the job run is done, click Show Markdown in the INFO column to display a preview of the title, author, and URL of the top Hacker News articles.
The binary file containing the DataFrame created is stored in the Object Storage bucket. Each new run will overwrite the existing DataFrame contained in the bucket.
The Serverless Database ensures communication between the different Dagster elements, especially to notify the UI that the scheduler has completed the execution of a job. It also stores the different events occurring during the execution.
Going further
-
The source code is available in the dagster-scaleway repository.
-
Refer to the official Dagster documentation for more information.
-
You can automate your Dagster deployment using Terraform/OpenTofu. Refer to our Terraform/OpenTofu Quickstart and to the Scaleway Provider registry for more information.
-
You can replace the Serverless Database with a Managed Database for postgreSQL to keep the Dagster UI running and reduce your database costs. Refer to the Dagster documentation to connect a database using Postgres credentials.
Troubleshooting
-
Make sure that you have exported the environment variables, as they are cleared at the end of a terminal session.
-
Make sure the
assets.pyand__init__.pyfile contain the corresponding code. -
Make sure the
dagster.yamlfile is in the root folder of your Dagster project.
Visit our Help Center and find the answers to your most frequent questions.
Visit Help Center