GitLab Kubernetes integration - build, test, deploy at scale
GitLab provides a built-in Kubernetes integration that allows you to build, test, deploy, and run your app at scale.
In this tutorial, you will learn how to use the gitlab Kubernetes integration using a Scaleway Instance. The Instance will be deployed using the Scaleway gitlab InstantApp.
Before you start
To complete the actions presented below, you must have:
- A Scaleway account logged into the console
- Owner status or IAM permissions allowing you to perform actions in the intended Organization
- An Instance running the
gitlabInstantApp - Created a Kapsule cluster.
- Downloaded the corresponding kubeconfig file and ensured kubectl is working
- Installed Helm client
Configuring GitLab runner using Helm charts
Installing helm
In this tutorial, we use helm to deploy a gitlab runner on a Kapsule cluster.
Ensure you're using the latest version of Helm, which is Helm 3.16.2.
Installation Steps:
- Download Helm
curl -fsSL -o get_helm.sh https://raw.githubusercontent.com/helm/helm/main/scripts/get-helm-3
chmod 700 get_helm.sh
./get_helm.sh- Verify the installation:
helm versionEnsure the output shows version 3.16.2.
The helm charts are provided through repositories. By default helm 3 does not have any repository configured.
We will add the gitlab repository, as it provides the necessary chart to install the runner.
helm repo add gitlab https://charts.gitlab.io
"gitlab" has been added to your repositories
helm repo update
Hang tight while we grab the latest from your chart repositories...
...Successfully got an update from the "gitlab" chart repository
Update Complete. ⎈ Happy Helming!⎈
Installing GitLab runners using Helm
A helm chart is always shipped with a value.yaml file. It can be edited to customize the deployment of the application.
In this part of the tutorial we customize the value.yaml to fit our needs and deploy the runner on kapsule.
-
Fetch the latest
values.yamlfile:wget https://gitlab.com/gitlab-org/charts/gitlab-runner/-/raw/main/values.yamlEach
gitlabrunner needs a registration token to register on thegitlabserver. Retrieve the registration token from the GitLab web interface ("Admin Area" > "Runners"):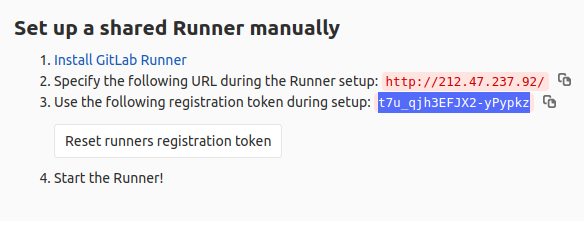
-
Open the file in a text editor and update the following fields in
values.yaml:gitlabUrl: http://<your-gitlab-instance>/ runnerRegistrationToken: "<your-registration-token>" rbac: create: true serviceAccountName: defaultEnsure you replace
<your-gitlab-instance>and<your-registration-token>with your actual GitLab Instance URL and registration token. -
To install the
gitlabrunner, create it on yourKapsulecluster. We will use a dedicated namespace.kubectl create ns gitlab-runnerThe following output displays
namespace/gitlab-runner created.The default service account should use a new Kubernetes role, and rolebinding.
-
Use the following example to create a role and role binding and associate it to the default service account in the
gitlab-runnernamespace:cat <<EOF | kubectl create -f - apiVersion: rbac.authorization.k8s.io/v1 kind: Role metadata: name: gitlab-runner namespace: gitlab-runner rules: - apiGroups: [""] resources: ["pods"] verbs: ["list", "get", "watch", "create", "delete"] - apiGroups: [""] resources: ["pods/exec"] verbs: ["create"] - apiGroups: [""] resources: ["pods/log"] verbs: ["get"] EOF kubectl create rolebinding --namespace=gitlab-runner gitlab-runner-binding --role=gitlab-runner --serviceaccount=gitlab-runner:default -
Use the
helmcommand to install the runner (note that you specify in this command line thevalues.yamlfile):helm install --namespace gitlab-runner gitlab-runner -f ./values.yaml gitlab/gitlab-runner --version 0.68.1 NAME: gitlab-runner LAST DEPLOYED: Wed May 6 15:48:20 2020 NAMESPACE: gitlab-runner STATUS: deployed REVISION: 1 TEST SUITE: None NOTES: Your GitLab Runner should now be registered against the GitLab instance reachable at: "http://212.47.xxx.yyy/"The command above installs the GitLab Runner Helm chart version 0.68.1 in the
gitlab-runnernamespace. You can check the runner is working in thegitlabconsole ("admin area" > runners):
Running a pipeline in the runner using a test app
To demonstrate that the runner is working, we create a repository with a "hello world" piece of code written in Python.
- Create the files using a text editor of your choice (e.g.
nanoorvim). In this tutorial, we usenano.nano helloworld.py - Create the content of the file as follows, save and exit:
print("Hello, World!") - Create an associated gitlab-ci file to check it is running in the runner we just deployed:
nano .gitlab-ci.yaml - Create the content of the file as follows, save and exit:
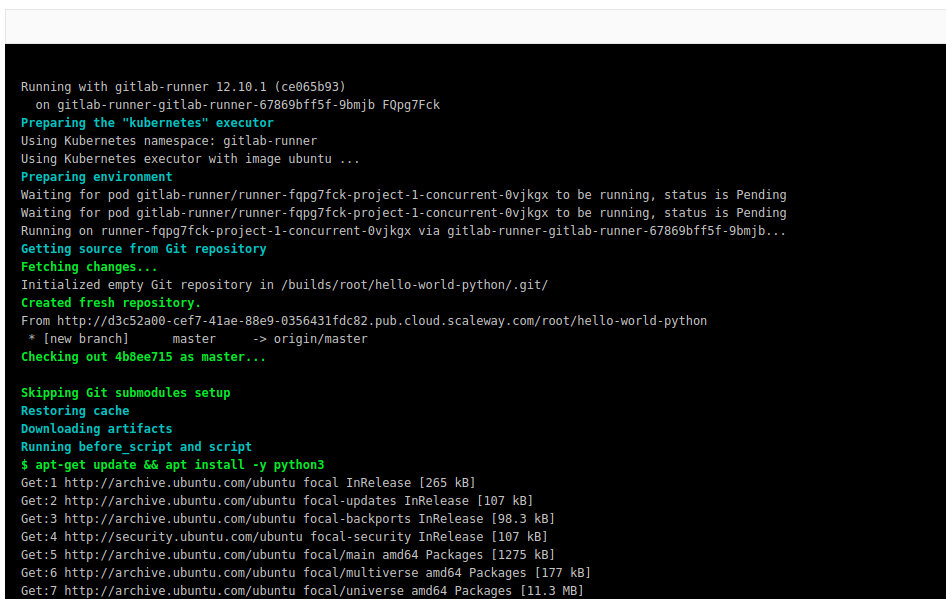
image: ubuntu hello-test: script: - apt-get update && apt-get install python3 - python3 helloworld.py - Push the repository and an Ubuntu container is launched. At first
aptis updated, andpython3is installed, and then the “hello, world” script is launched in the terminal.
If you want to learn more about running a gitlab runner on Kubernetes you can also check the gitlab-ci official documentation.
Visit our Help Center and find the answers to your most frequent questions.
Visit Help Center