Deploying NextCloud with Scaleway Object Storage
NextCloud is an open-source, self-hosted file share and communication platform.
Combining NextCloud with Scaleway Object Storage gives you infinite storage space for your personal cloud.
Before you start
To complete the actions presented below, you must have:
- A Scaleway account logged into the console
- Owner status or IAM permissions allowing you to perform actions in the intended Organization
- An SSH key
- An Instance running on Ubuntu 24.04 or later
- Installed and configured MariaDB on your Instance
sudoprivileges or access to the root user
Installing NextCloud
-
Log in to your Instance via SSH.
ssh root@<your_instance_public_ip> -
Update the apt-sources and the already installed software on the server:
apt update && apt upgrade -y -
Install the required software from the apt repositories:
apt update && apt upgrade -y && apt install apache2 mariadb-server libapache2-mod-php php-gd php-json php-mysql php-curl php-mbstring php-intl php-imagick php-xml php-zip -y -
Download the latest version of NextCloud:
wget https://download.nextcloud.com/server/releases/latest.tar.bz2 -O nextcloud.tar.bz2 -
Download
bzip2to extract the archive.apt install bzip2 -
Extract the archive.
tar -xvjf nextcloud.tar.bz2 -
Move the extracted folder to the Apache web directory:
mv nextcloud /var/www/ -
Set the correct file permissions:
chown -R www-data:www-data /var/www/nextcloud/
Configuring Apache
-
Create an Apache configuration file for NextCloud:
nano /etc/apache2/sites-available/nextcloud.conf -
Insert the following content:
Alias /nextcloud "/var/www/nextcloud/" <Directory /var/www/nextcloud/> Options +FollowSymlinks AllowOverride All <IfModule mod_dav.c> Dav off </IfModule> SetEnv HOME /var/www/nextcloud SetEnv HTTP_HOME /var/www/nextcloud </Directory> -
Enable the configuration and reload Apache to activate the site:
a2ensite nextcloud.conf systemctl reload apache2 -
Enable SSL. Apache provides a self-signed certificate to encrypt the connection to your server. You can activate it with the following commands:
a2enmod ssl a2ensite default-ssl systemctl reload apache2 -
Set the file permissions to the Apache user:
chown -R www-data:www-data /var/www/nextcloud/
Configuring MariaDB
- Connect to the MariaDB server:
mysql -u root -p - Create an empty database for NextCloud:
CREATE DATABASE nextcloud;
CREATE USER 'nextclouduser'@'localhost' IDENTIFIED BY 'your_secure_password';
GRANT ALL PRIVILEGES ON nextcloud.* TO 'nextclouduser'@'localhost';
FLUSH PRIVILEGES;
EXIT;
Completing the setup wizard
- Run the installation wizard by opening your web browser and accessing NextCloud at
https://YOUR_SERVER_IP/nextcloudRemember to replaceYOUR_SERVER_IPwith the IP address of your server. - Fill out the setup form with the credentials for the admin user and the database settings that you have configured in the previous step.
Configuring Object Storage as primary storage in NextCloud
NextCloud can use Object Storage as primary storage. This gives you the possibility to store infinite data in your personal cloud.
-
Retrieve your
ACCESS-KEYandSECRET-KEYfrom the Scaleway console. -
Open the NextCloud configuration file in a text editor (i.e.
nano):nano /var/www/nextcloud/config/config.php -
Add a configuration block for Amazon S3-compatible storage, as follows:
'objectstore' => array(
      'class' => '\\OC\\Files\\ObjectStore\\S3',
      'arguments' => array(
              'bucket' => 'my-nextcloud-storage-bucket',
              'autocreate' => true,
              'key'    => 'ACCESS-KEY',
              'secret' => 'SECRET-KEY',
              'hostname' => 's3.fr-par.scw.cloud',
              // The hostname depends on the geographical location of your bucket: It can be either s3.fr-par.scw.cloud, s3.nl-ams.scw.cloud or s3.pl-waw.scw.cloud
              'port' => 443,
              'use_ssl' => true,
              'region' => 'fr-par',
              // Region can be either fr-par, nl-ams, or pl-waw
      ),
),
The configuration file should look like the following example after modification:
<?php $CONFIG = array ( 'instanceid' => 'instanceid', 'passwordsalt' => 'hashedpassword', 'secret' => 'secret', 'trusted_domains' => array ( 0 => 'YOUR-NEXTCLOUD-HOSTNAME', ), 'objectstore' => array( 'class' => '\\OC\\Files\\ObjectStore\\S3', 'arguments' => array( 'bucket' => 'my-nextcloud-storage-bucket', 'autocreate' => true, 'key' => 'ACCESS-KEY', 'secret' => 'SECRET-KEY', 'hostname' => 's3.fr-par.scw.cloud', 'port' => 443, 'use_ssl' => true, 'region' => 'fr-par', ), ), 'dbtype' => 'mysql', 'version' => '16.0.3.0', 'overwrite.cli.url' => 'https://YOUR_NEXTCLOUD_HOSTNAME/nextcloud', 'dbname' => 'nextcloud', 'dbhost' => 'localhost', 'dbport' => '', 'dbtableprefix' => 'oc_', 'dbuser' => 'nextcloud', 'dbpassword' => 'databasepassword', 'installed' => true, ); -
Save the configuration file, close the text editor, and open the NextCloud web interface in a browser. NextCloud uses Object Storage for storing files now:
Configuring Object Storage as external storage in NextCloud
You can use NextCloud as a client for Object Storage while using Local Storage as primary storage. This can be useful for the migration of an existing NextCloud Instance to Object Storage.
-
Log into your NextCloud to configure the Object Storage bucket.
-
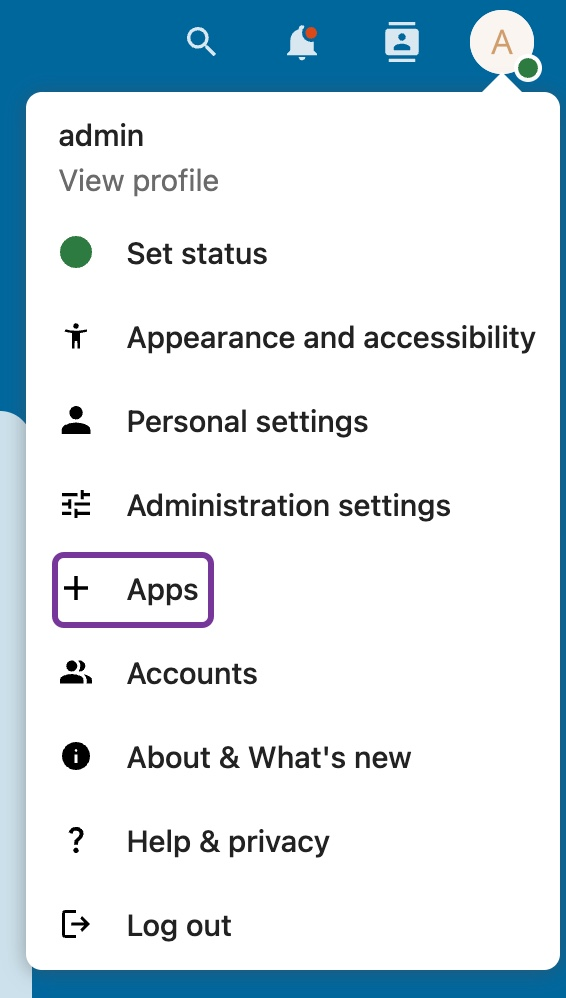
From the NextCloud interface, click Apps in the drop-down menu to access the list of available apps:
-
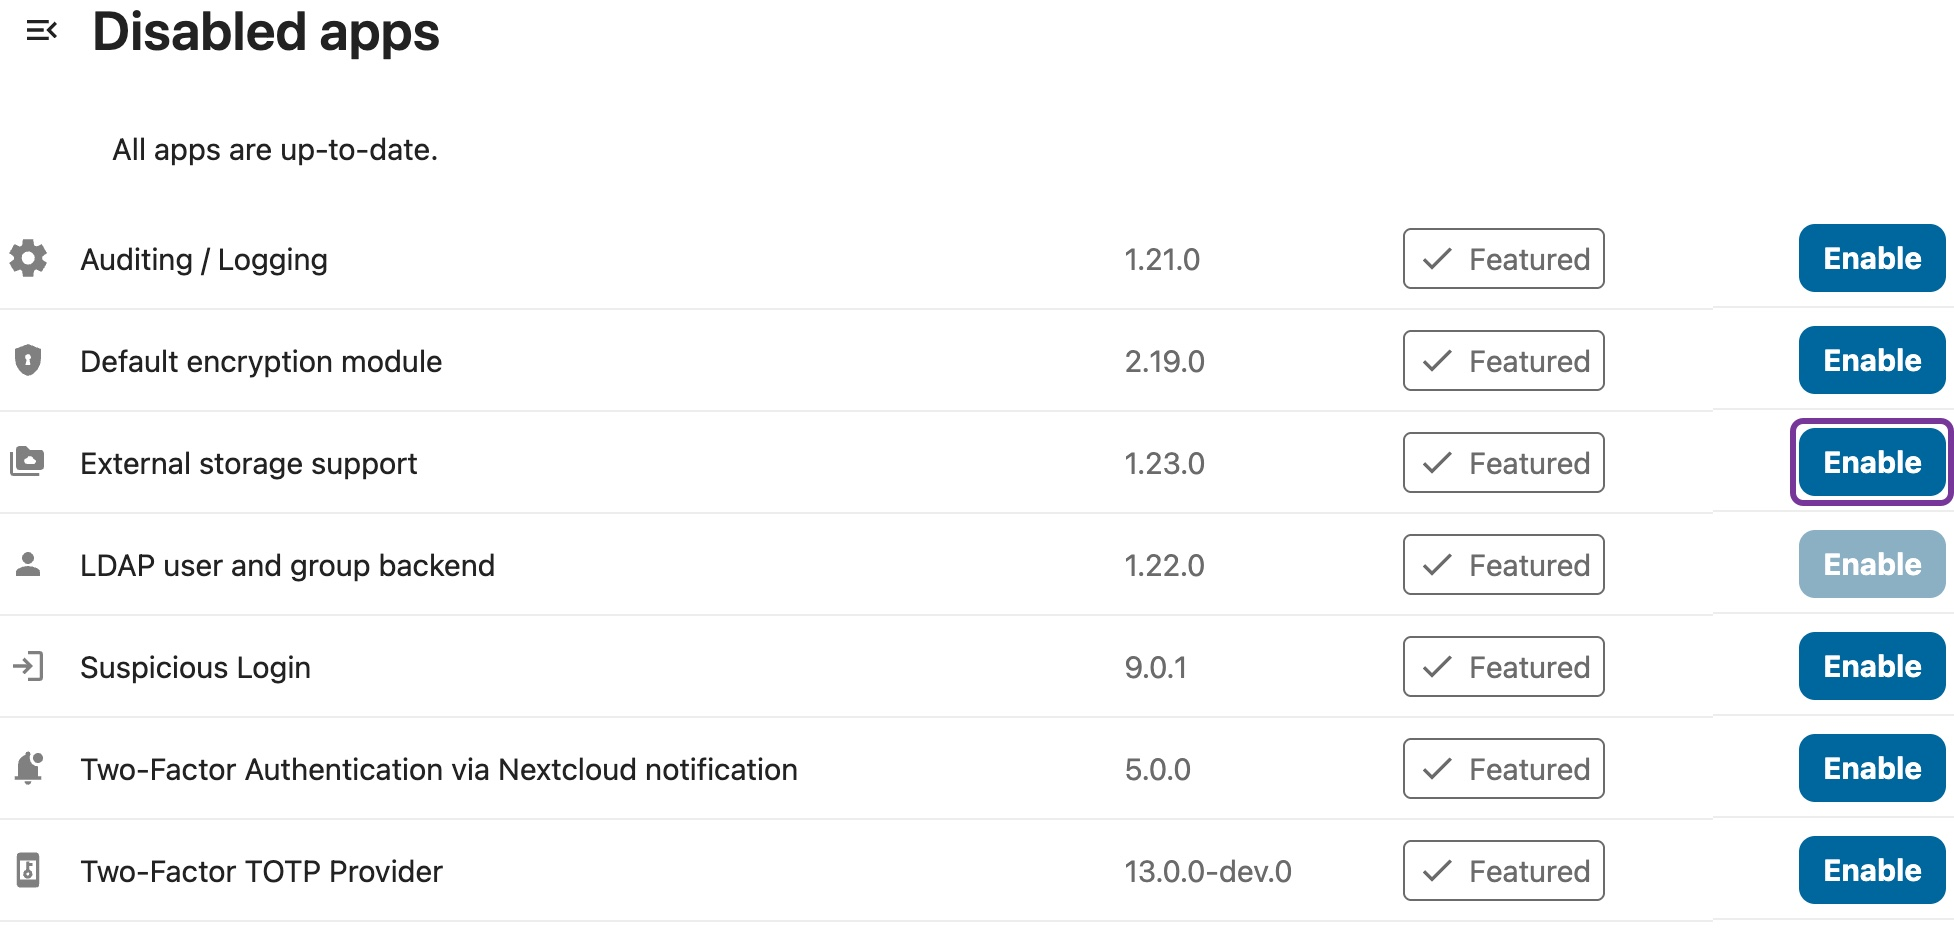
Click Disabled apps in the left navigation menu.
-
Click Enable to enable the External Storage Support app:
-
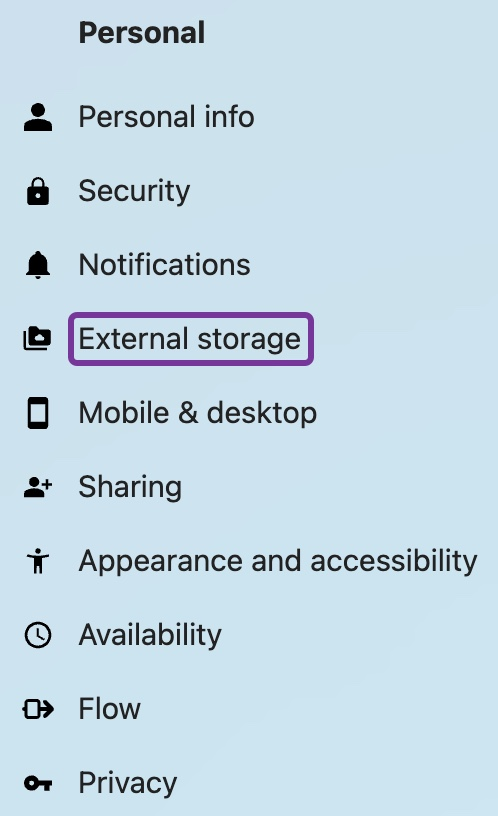
Click Administration Settings in the drop-down menu, then on External Storage in the Administration section of the page:
-
Configure the credentials for your bucket:
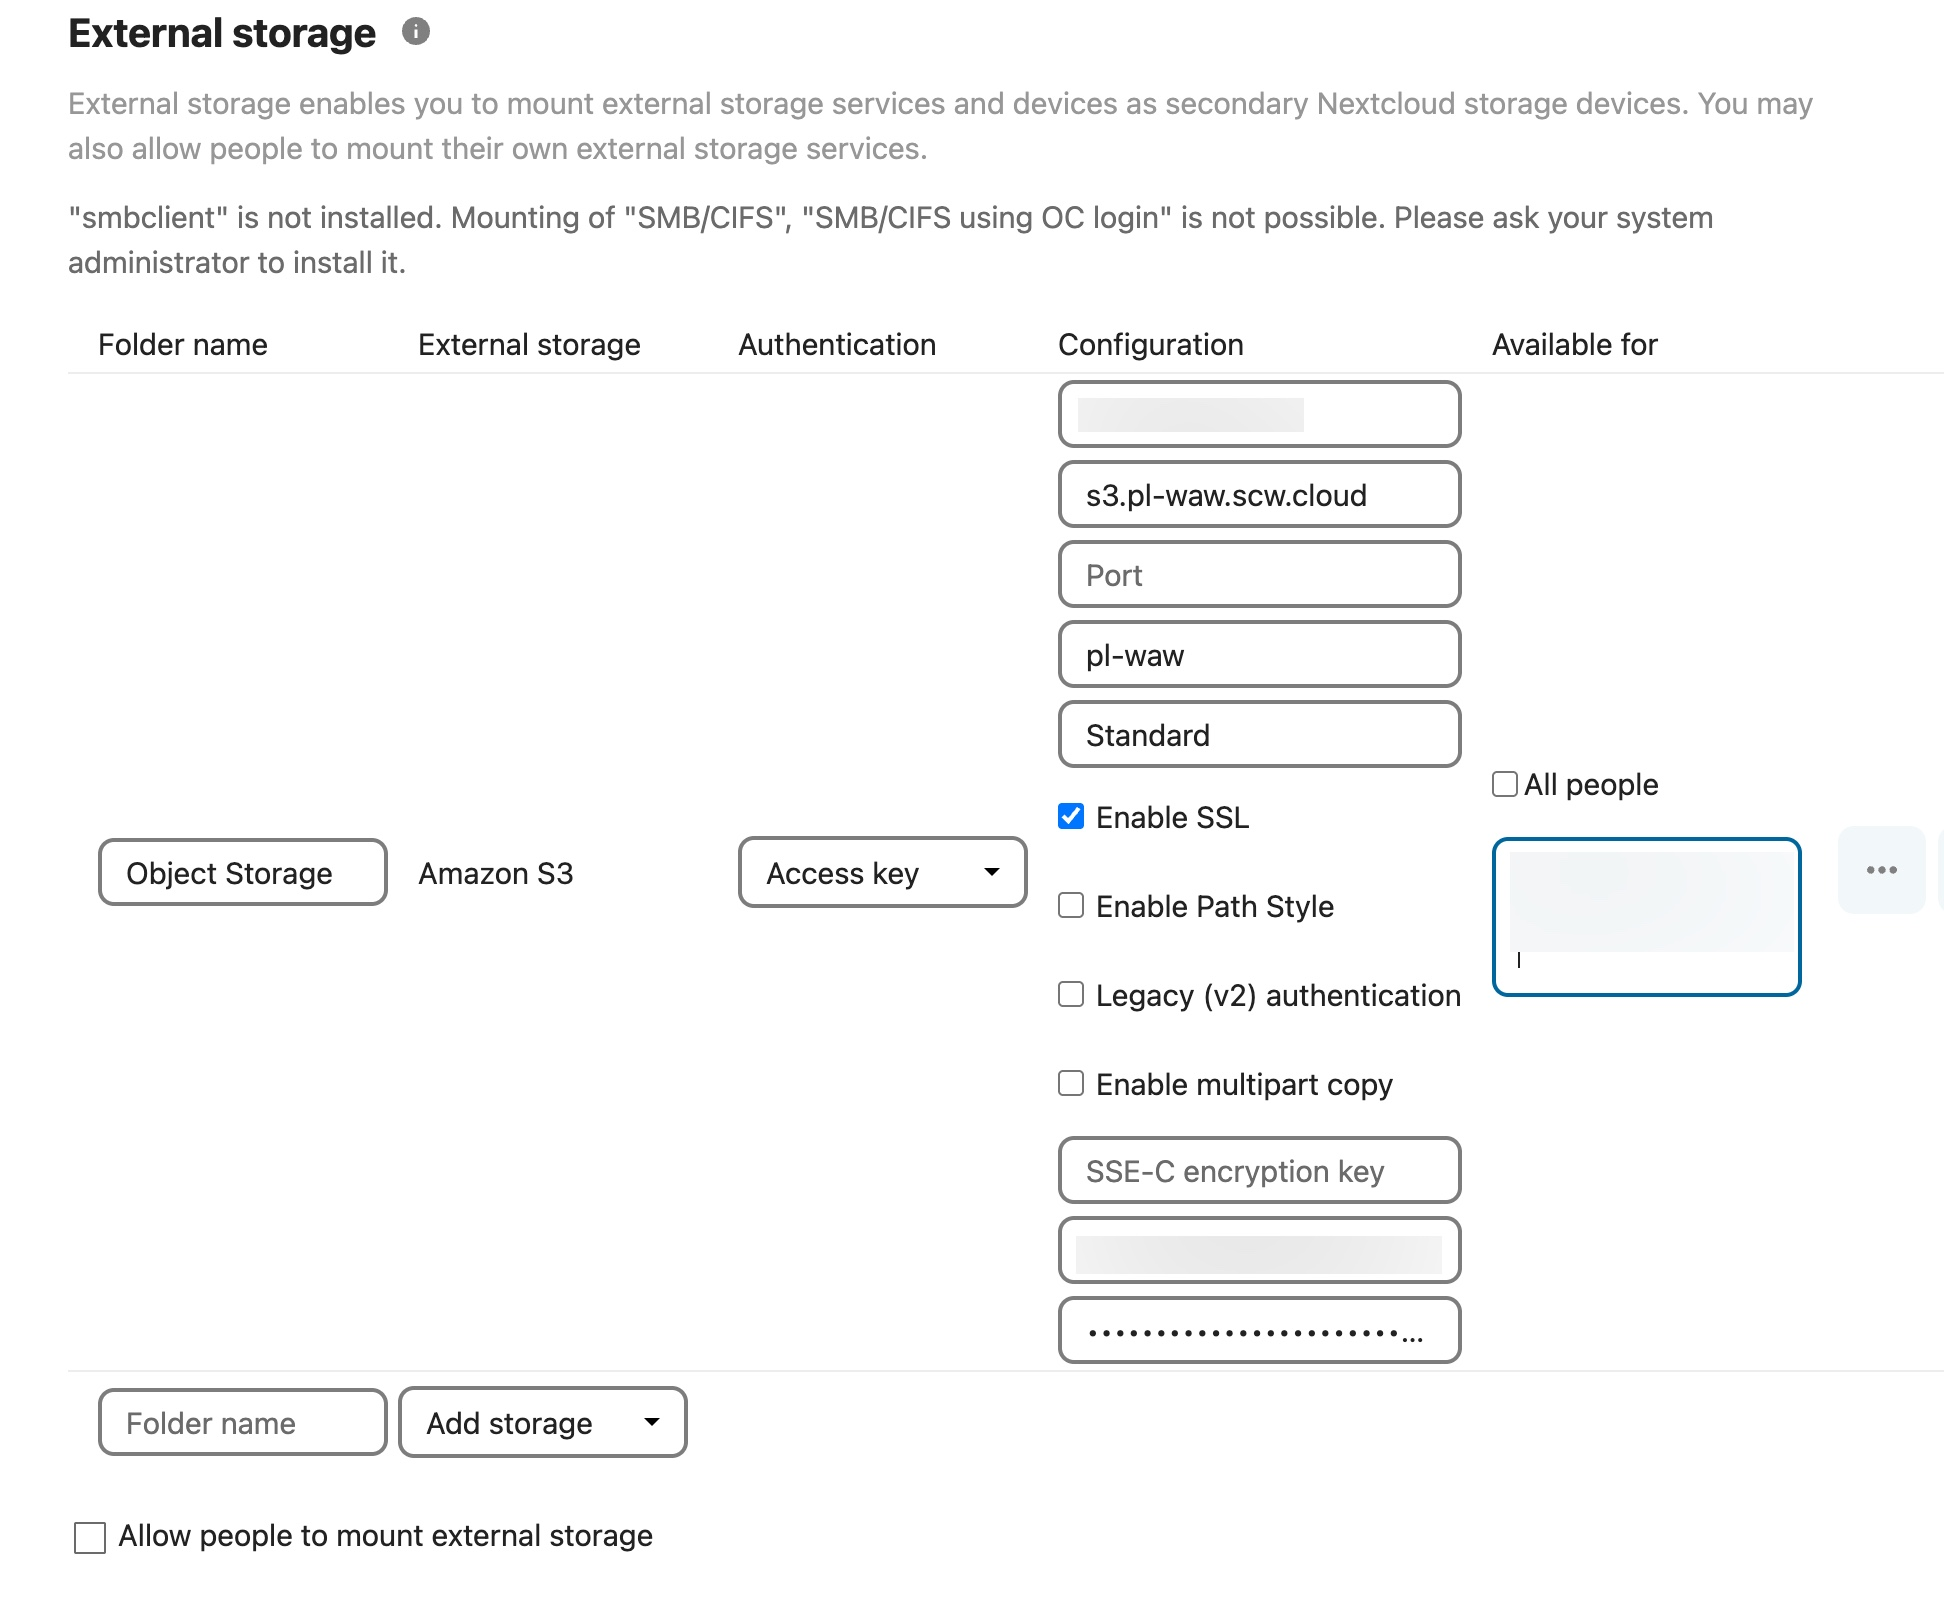
- Bucket - The Name of your bucket
- Hostname - The hostname of the bucket (For Scaleway Object Storage in Amsterdam:
s3.nl-ams.scw.cloud, for Scaleway Object Storage in Paris:s3.fr-par.scw.cloud, for Warsaw:s3.pl-waw.scw.cloud) - Port - The port for your bucket, leave this empty
- Region - The geographical region of your bucket (Either:
nl-amsfor Amsterdam, The Netherlands,pl-wawfor Warsaw, Poland, orfr-parfor Paris, France) - Storage Class - The AWS storage class. You can leave this empty.
- Enable SSL - Activate this checkbox to encrypt the connection between your NextCloud and the Bucket
- Access key - Your access key
- Secret key - Your secret key
Once you have entered all the details, click the checkmark to validate your configuration. If everything works well, a green dot will appear on the left.
-
Click the file icon, then on External Storage to access your bucket:
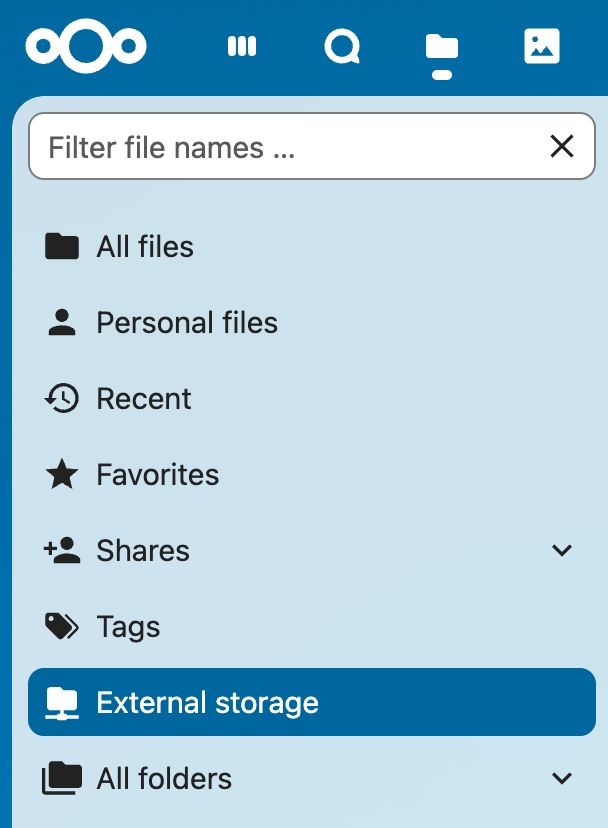
You can now upload and manage the files in your bucket directly from NextCloud.
Visit our Help Center and find the answers to your most frequent questions.
Visit Help Center