Storing WordPress Media on Object Storage with Media Cloud
Media Cloud is a WordPress plugin that allows you to automatically import the media gallery of your blog to Object Storage and upload new media files via the WordPress Media Manager directly into an Object Storage Bucket.
Before you start
To complete the actions presented below, you must have:
- A Scaleway account logged into the console
- Owner status or IAM permissions allowing you to perform actions in the intended Organization
- A WordPress blog running on an Instance
- An Object Storage bucket
Installing Media Cloud
Media Cloud can be installed directly from the admin interface of your WordPress blog.
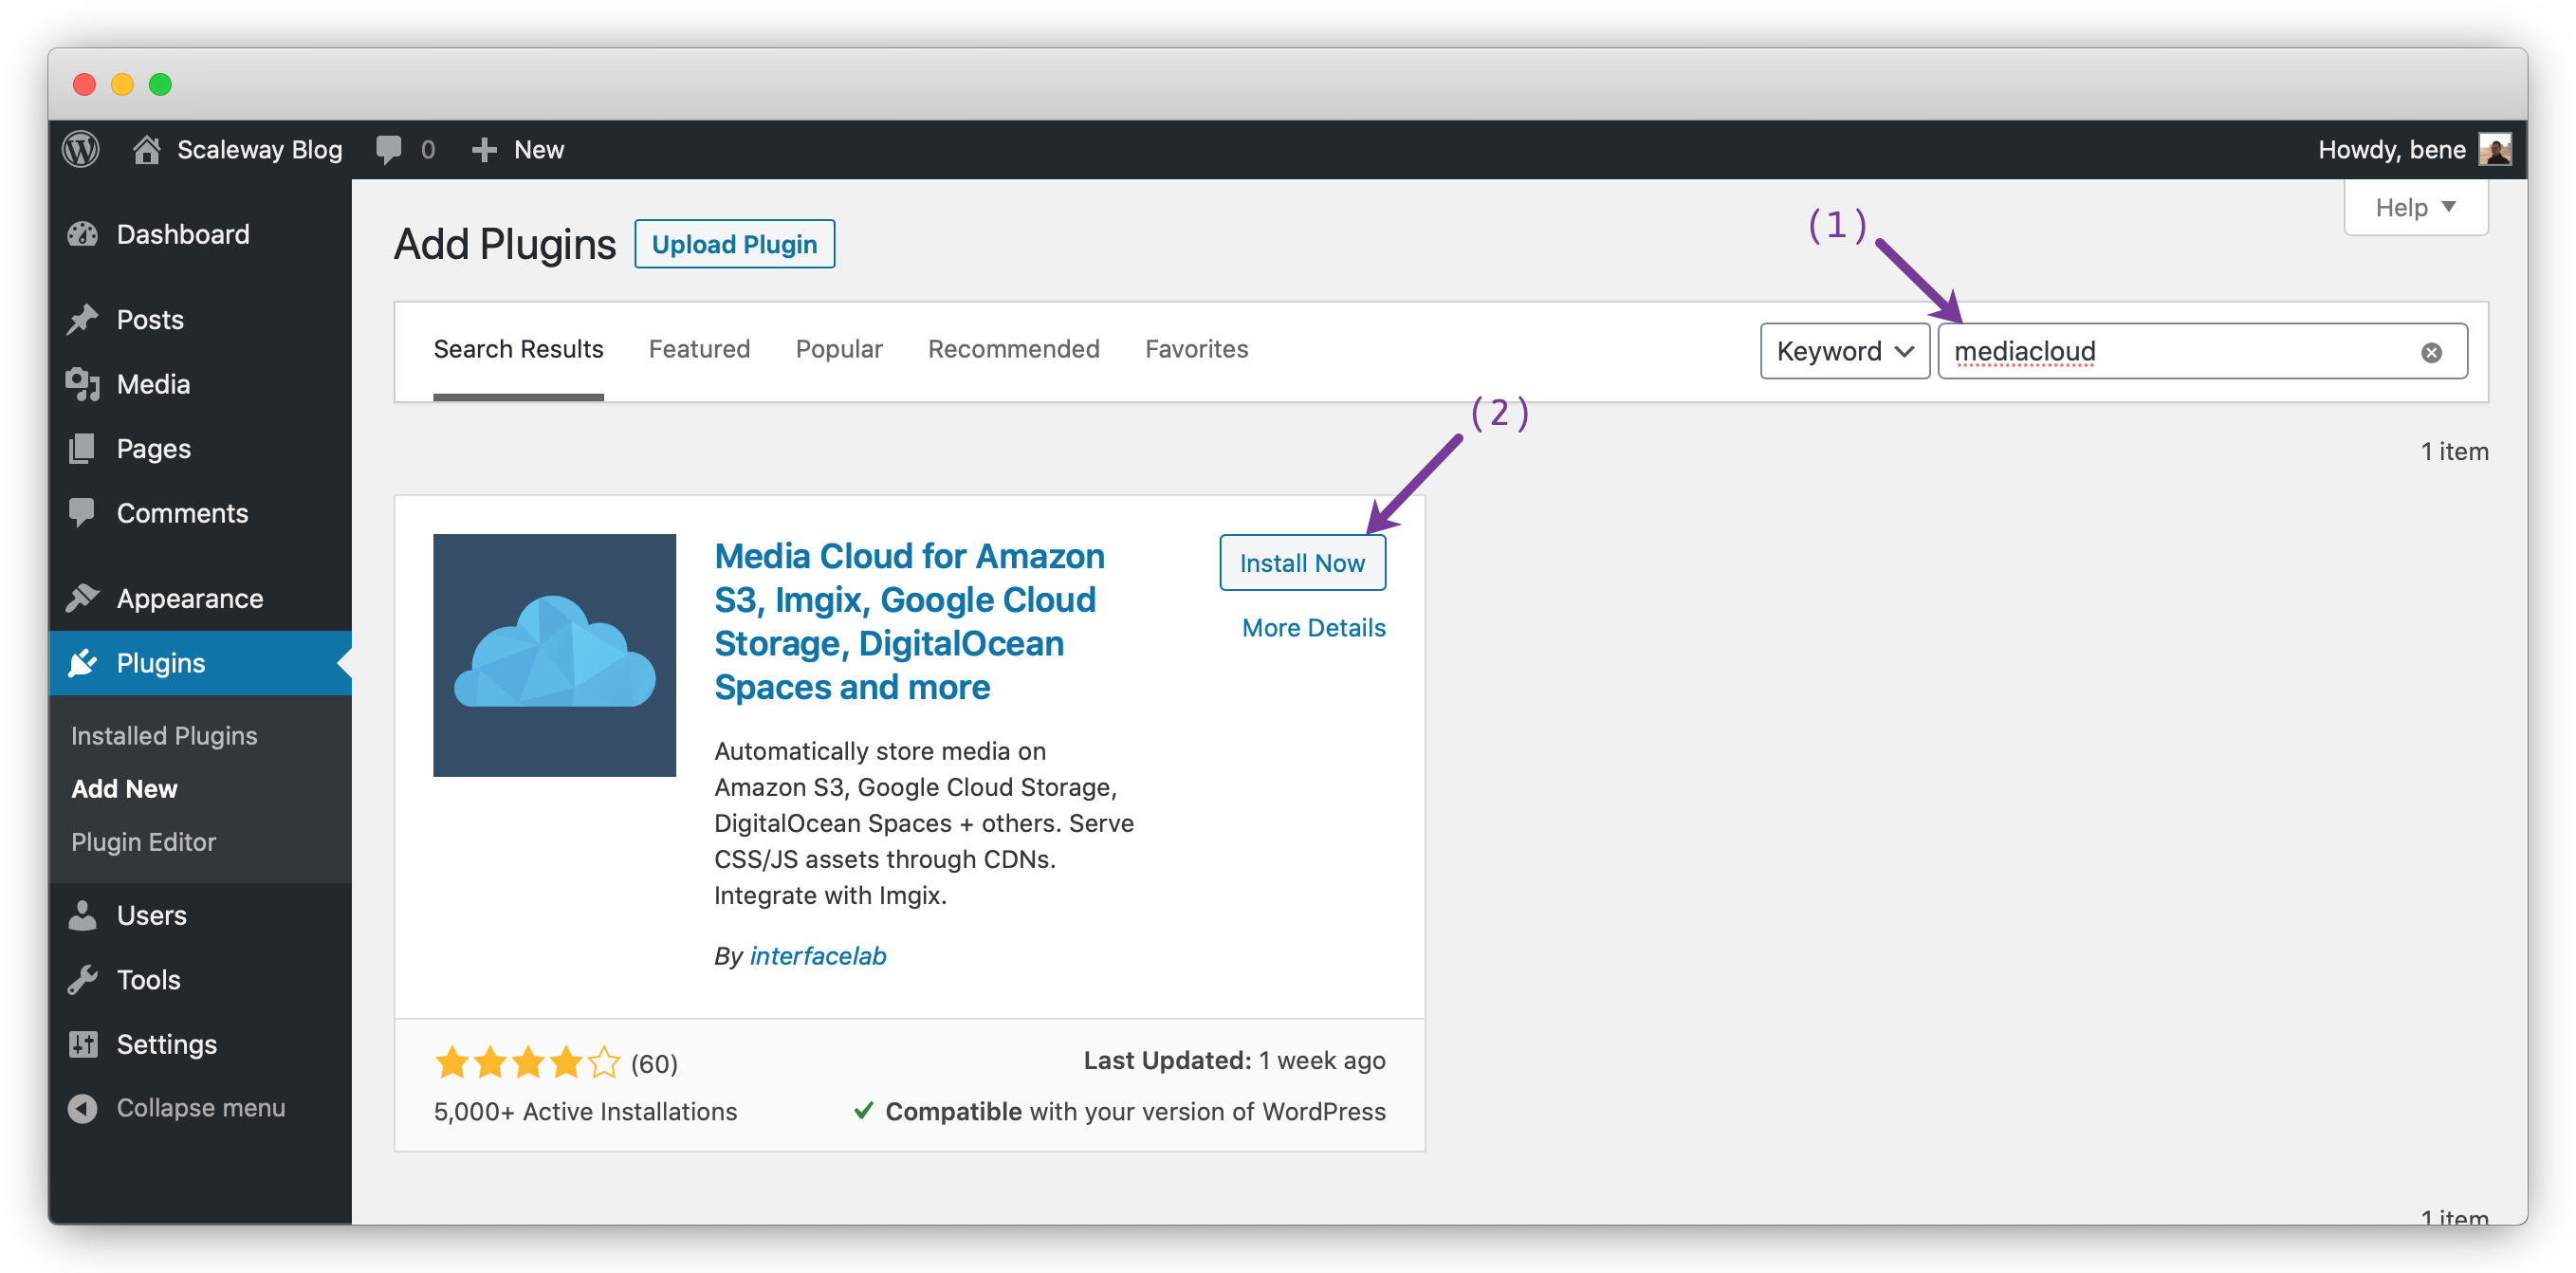
- Enter the Plugins section in the admin interface of WordPress, then click New Plugin and search for Media Cloud (The exact plugin name is: Media Cloud for Bunny CDN, Amazon S3, Cloudflare R2, Google Cloud Storage, DigitalOcean and more).
- Click Install Now to install the plugin into WordPress:
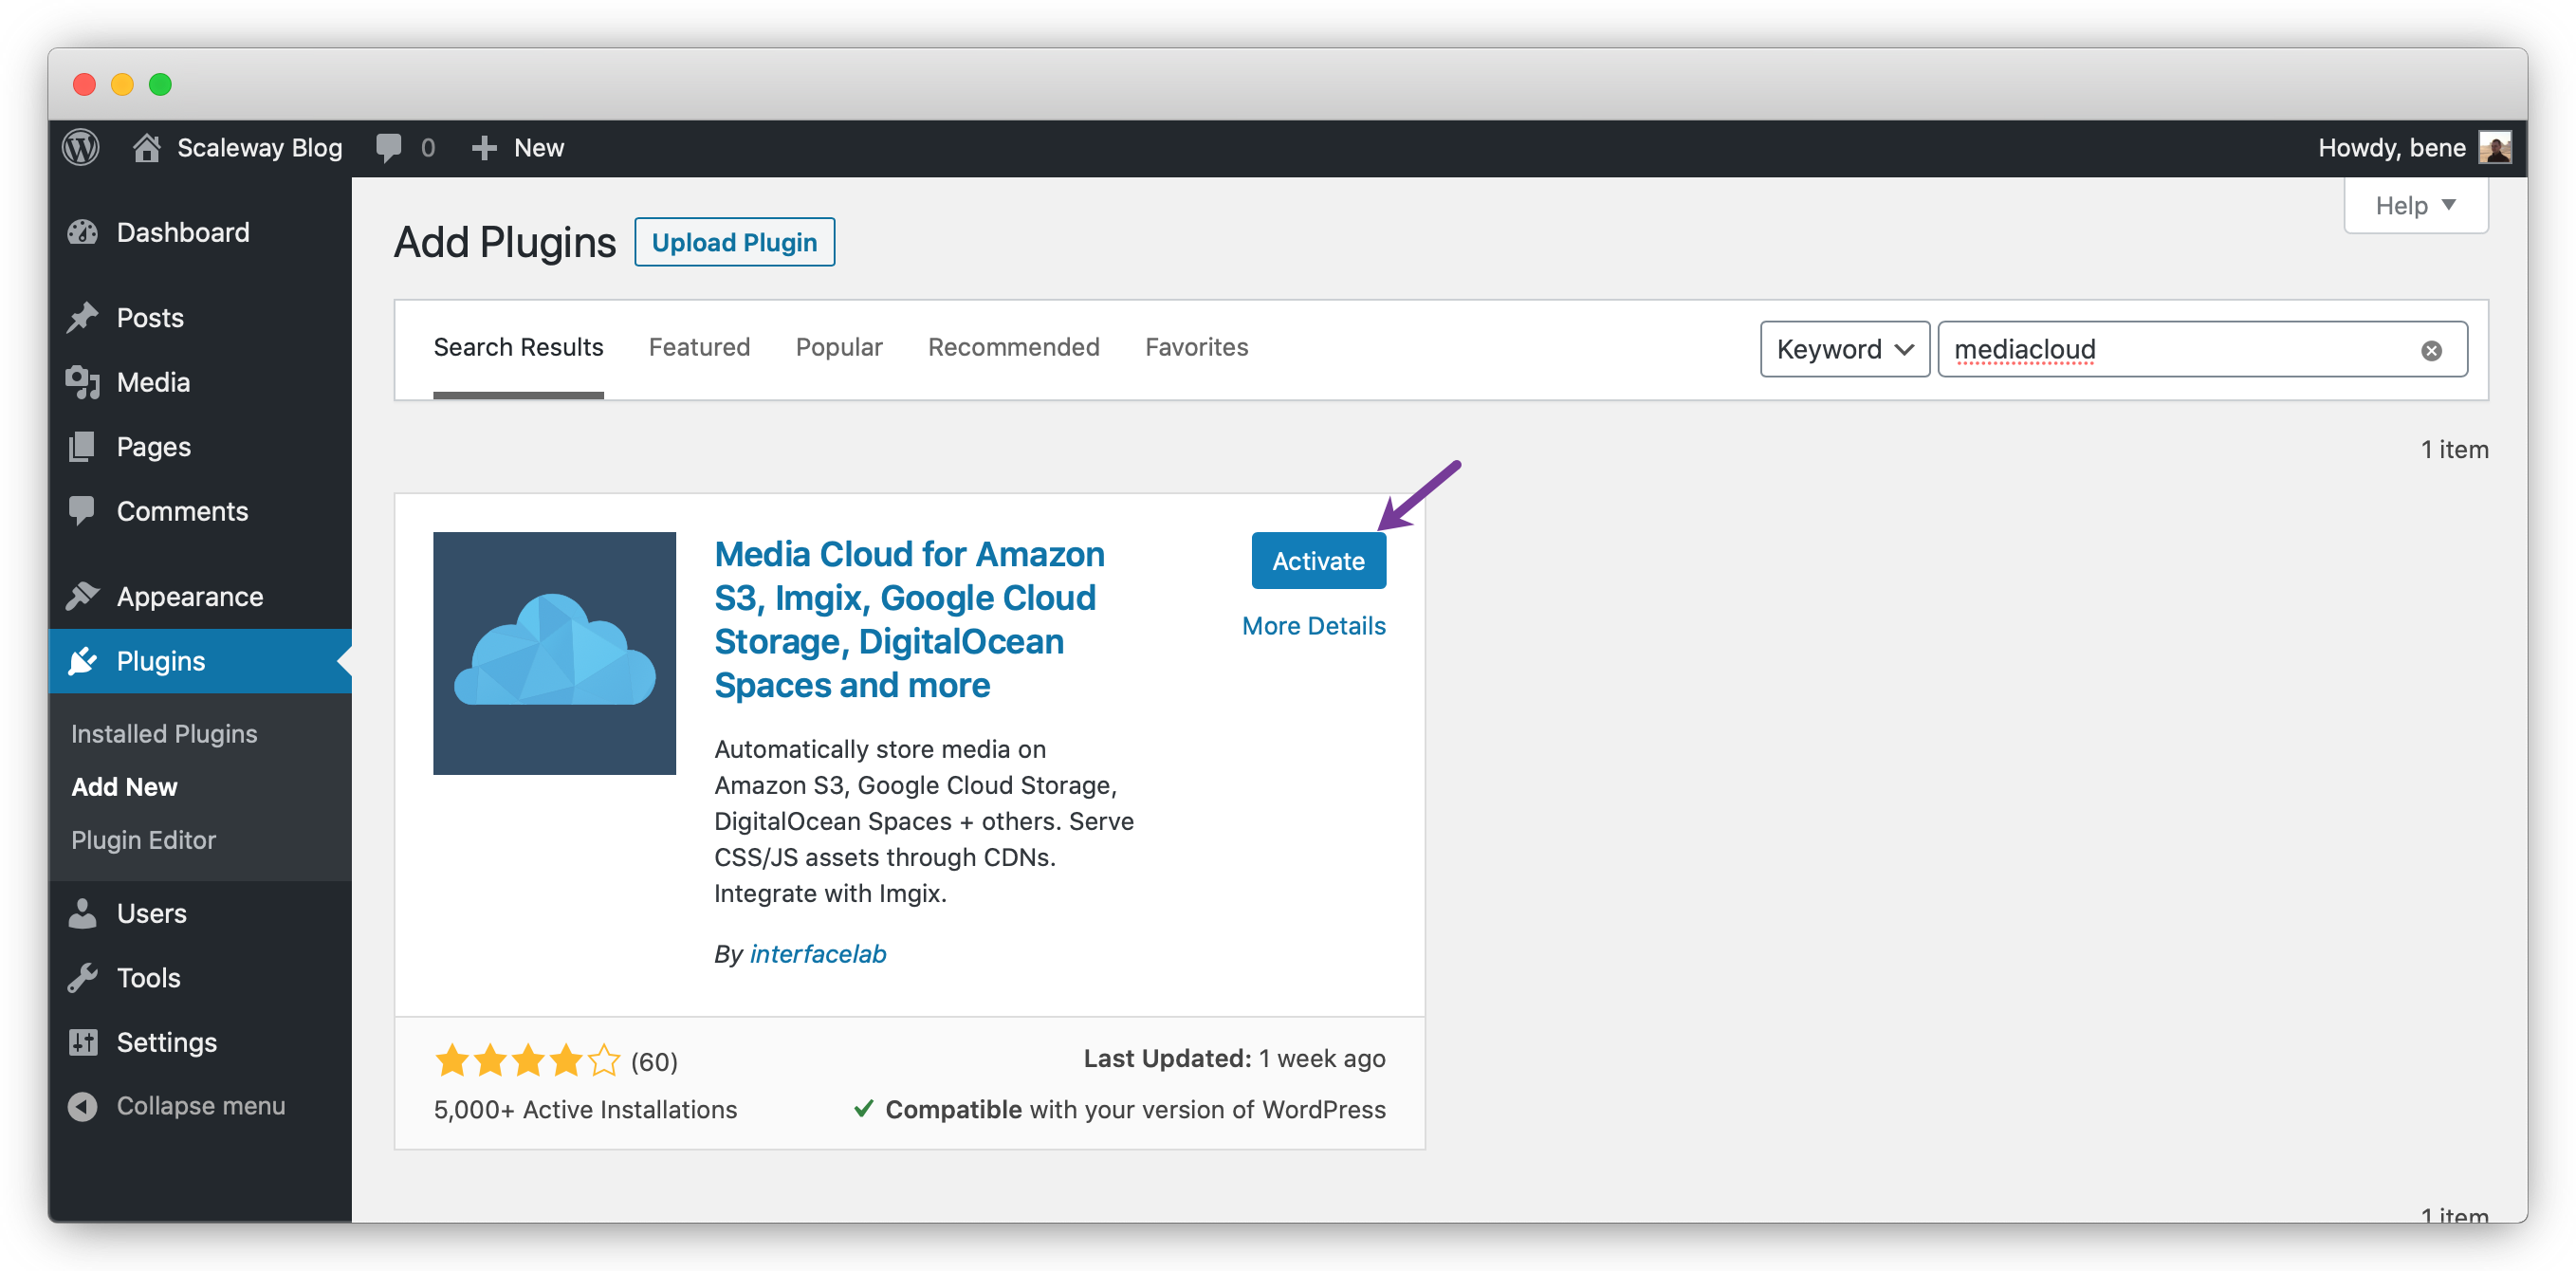
- Once installed, activate the plugin by clicking on Activate:
Configuring Media Cloud
-
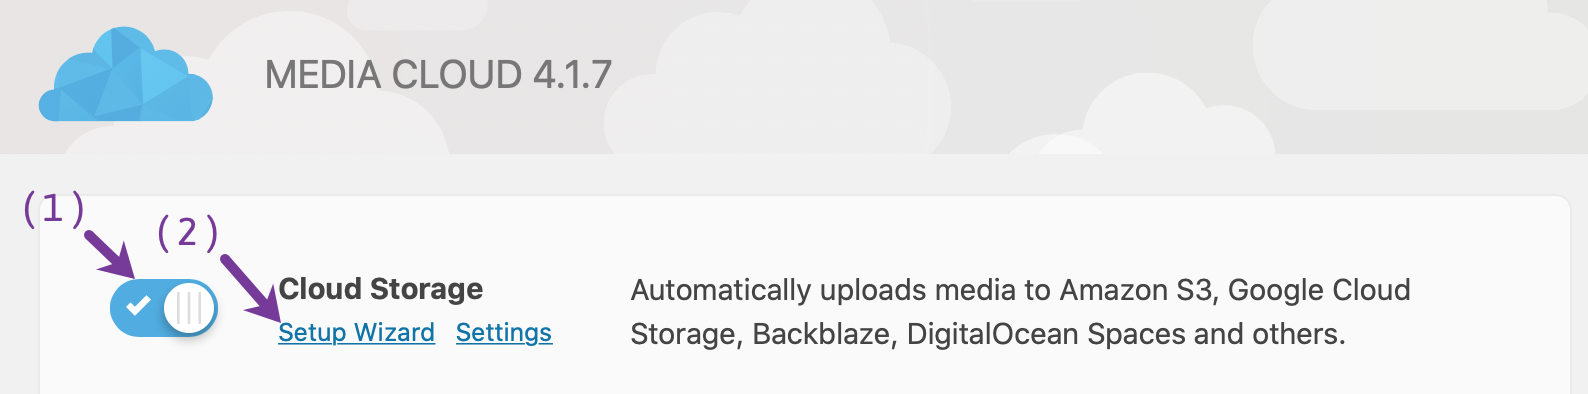
From the plugin overview page, make sure that the Cloud Storage switch is toggled on (1) and click Setup Wizard (2) to launch the Media Cloud configuration:
-
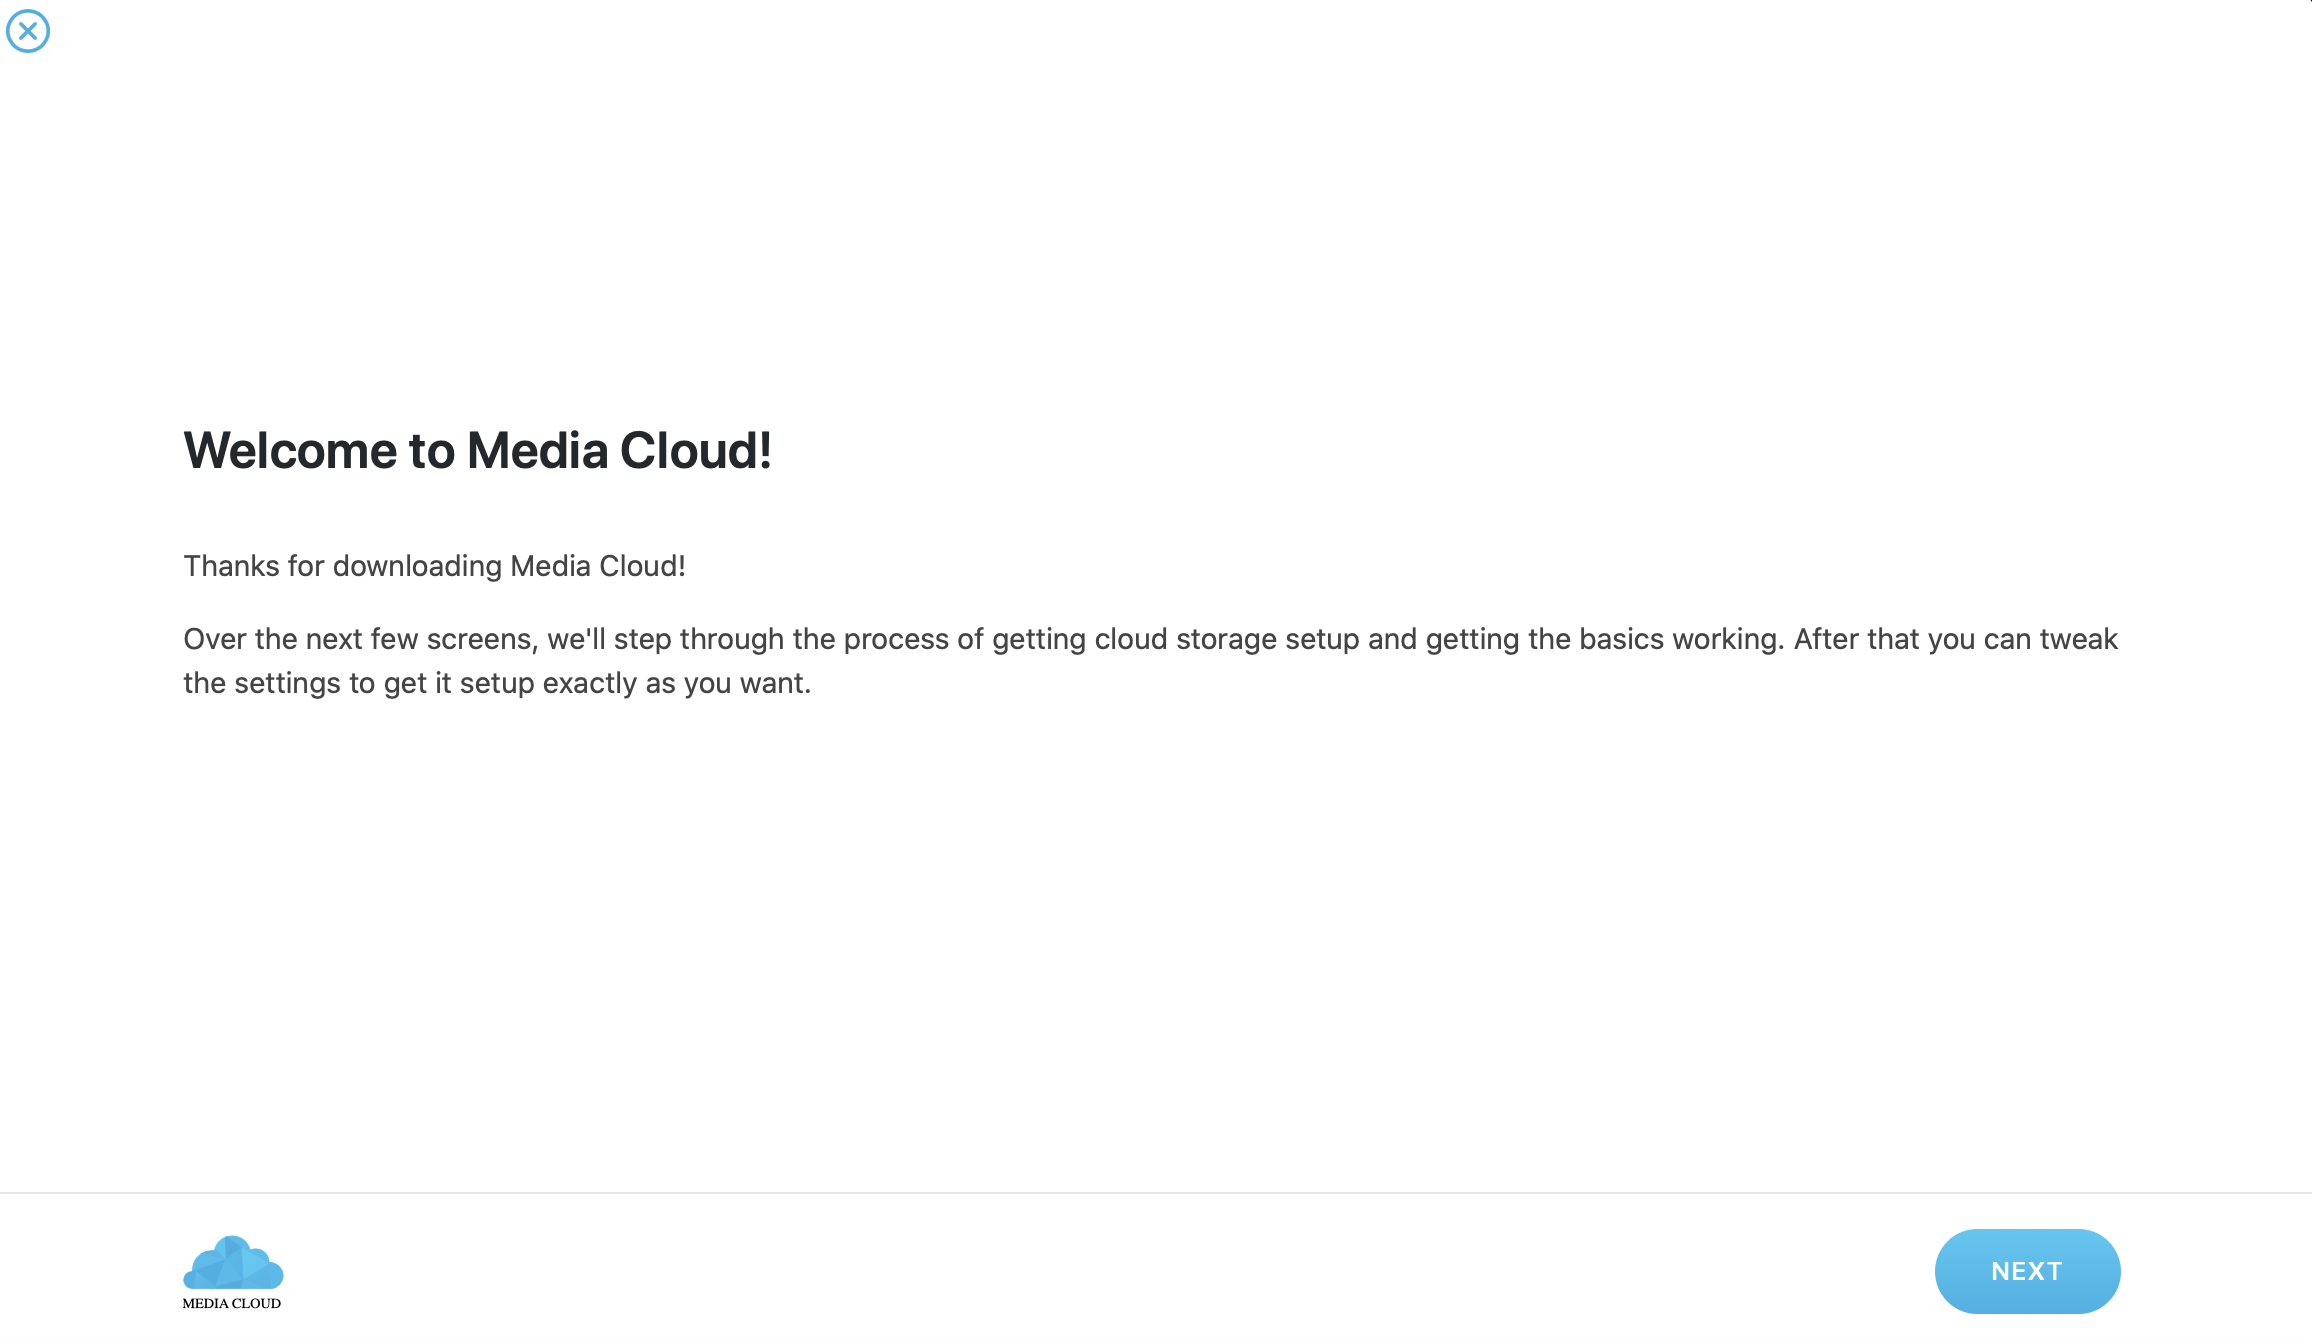
The setup wizard displays. Click Next to continue:
-
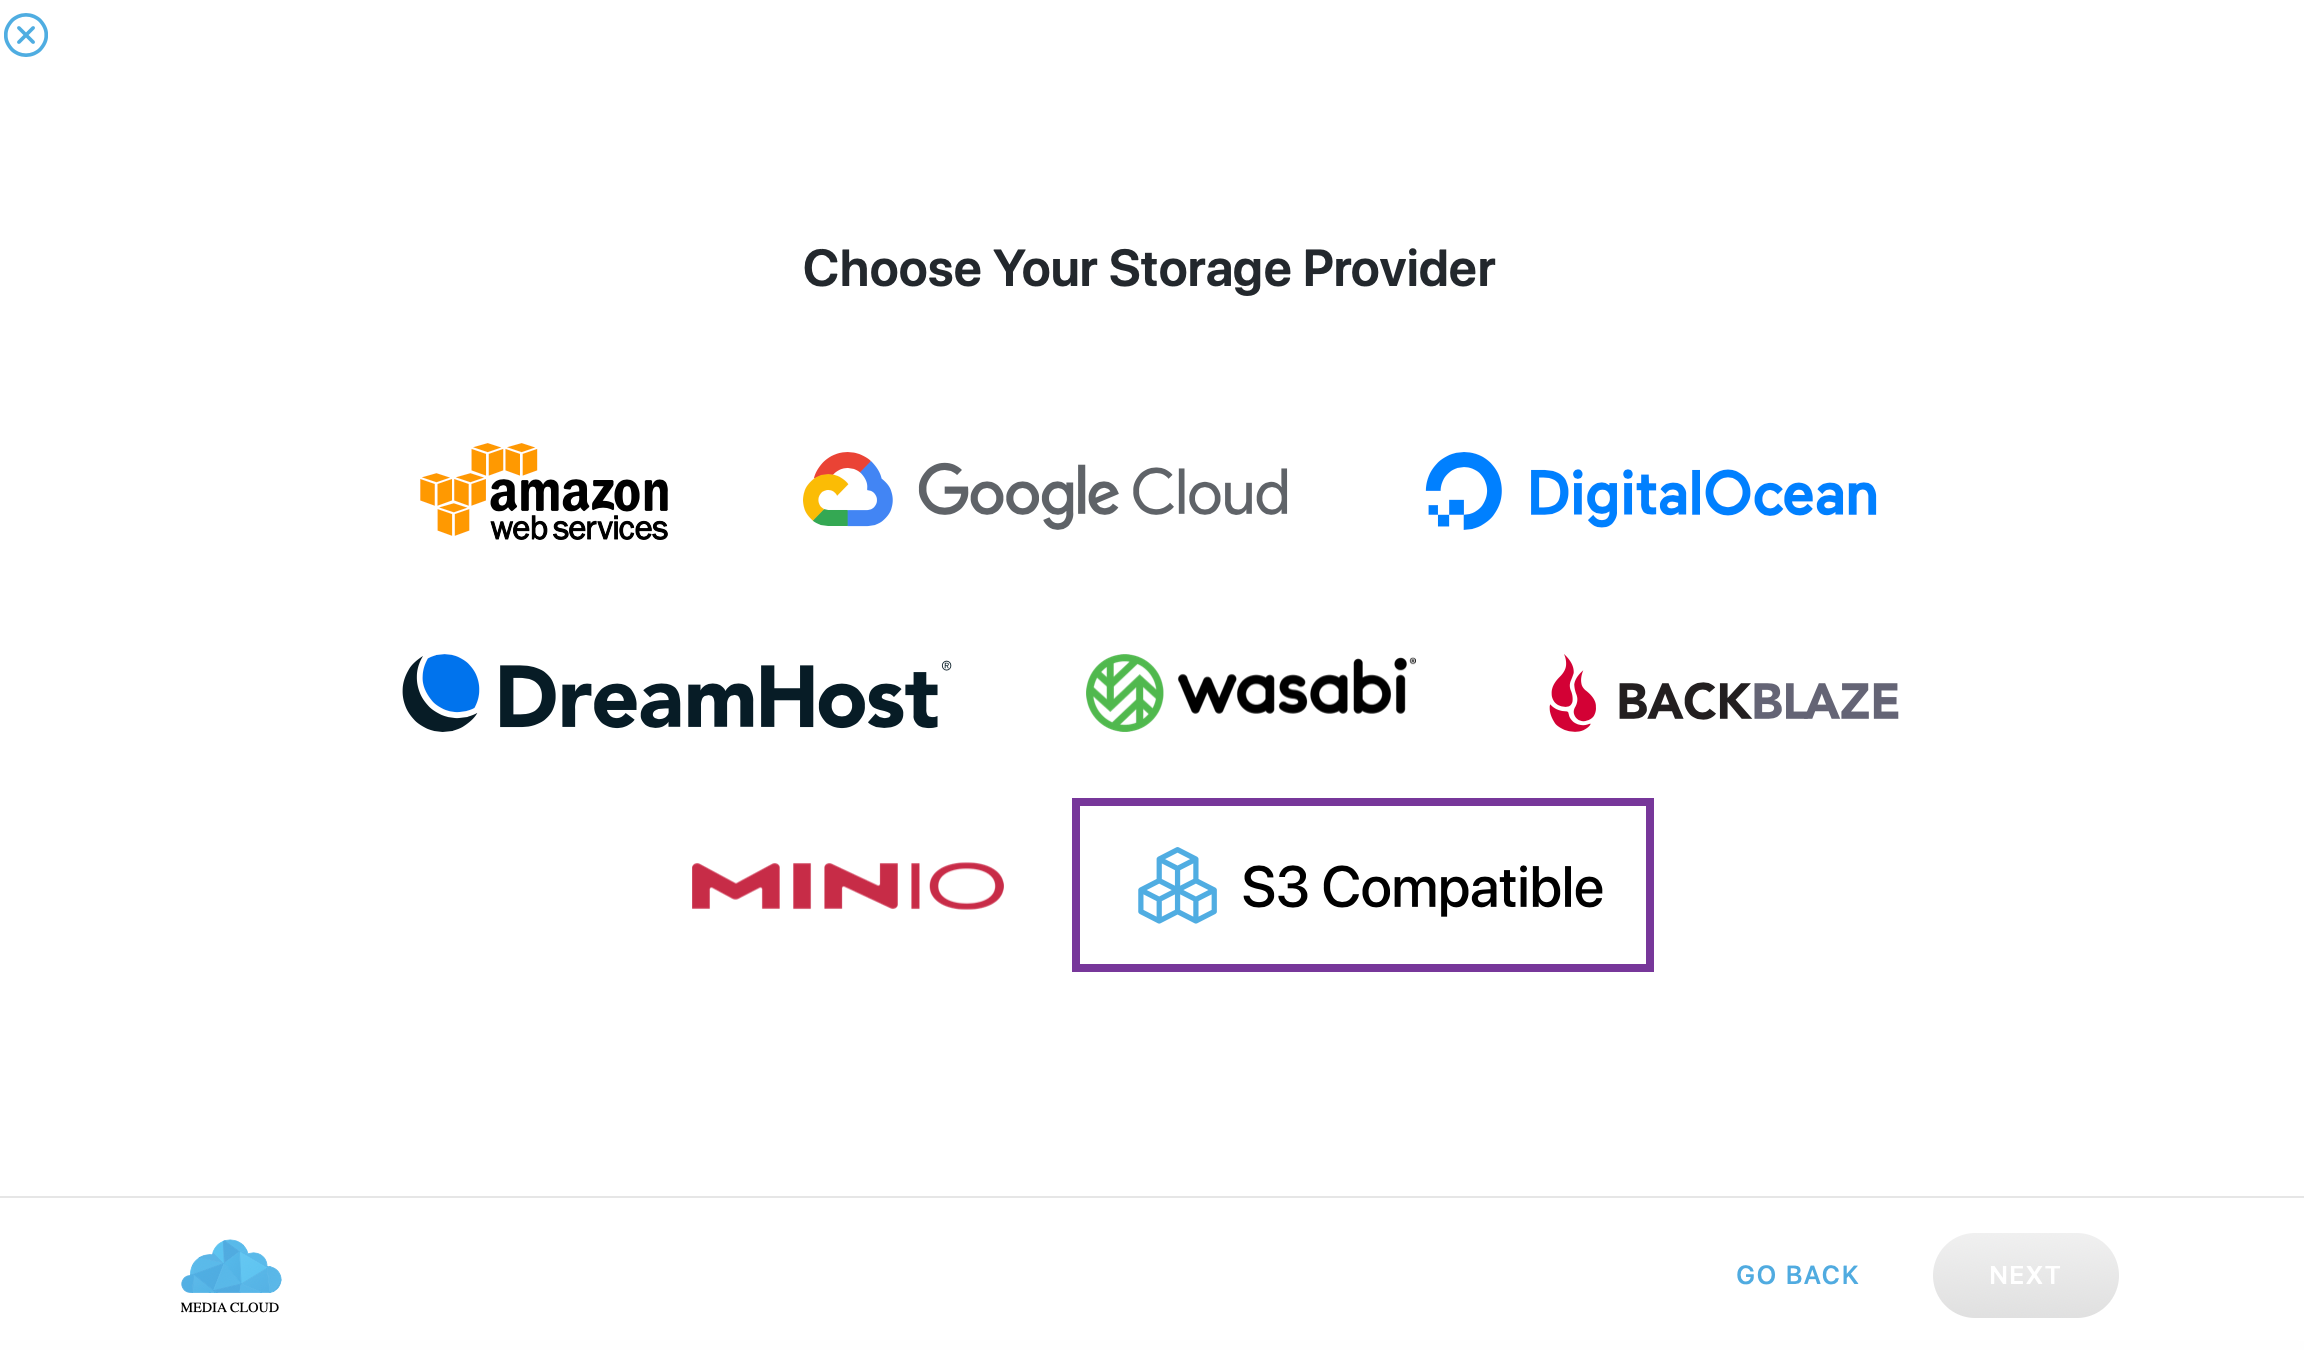
Choose the S3 Compatible storage option to continue:
-
Click Next to proceed with the configuration:

-
Enter the connection credentials of your Object Storage bucket:
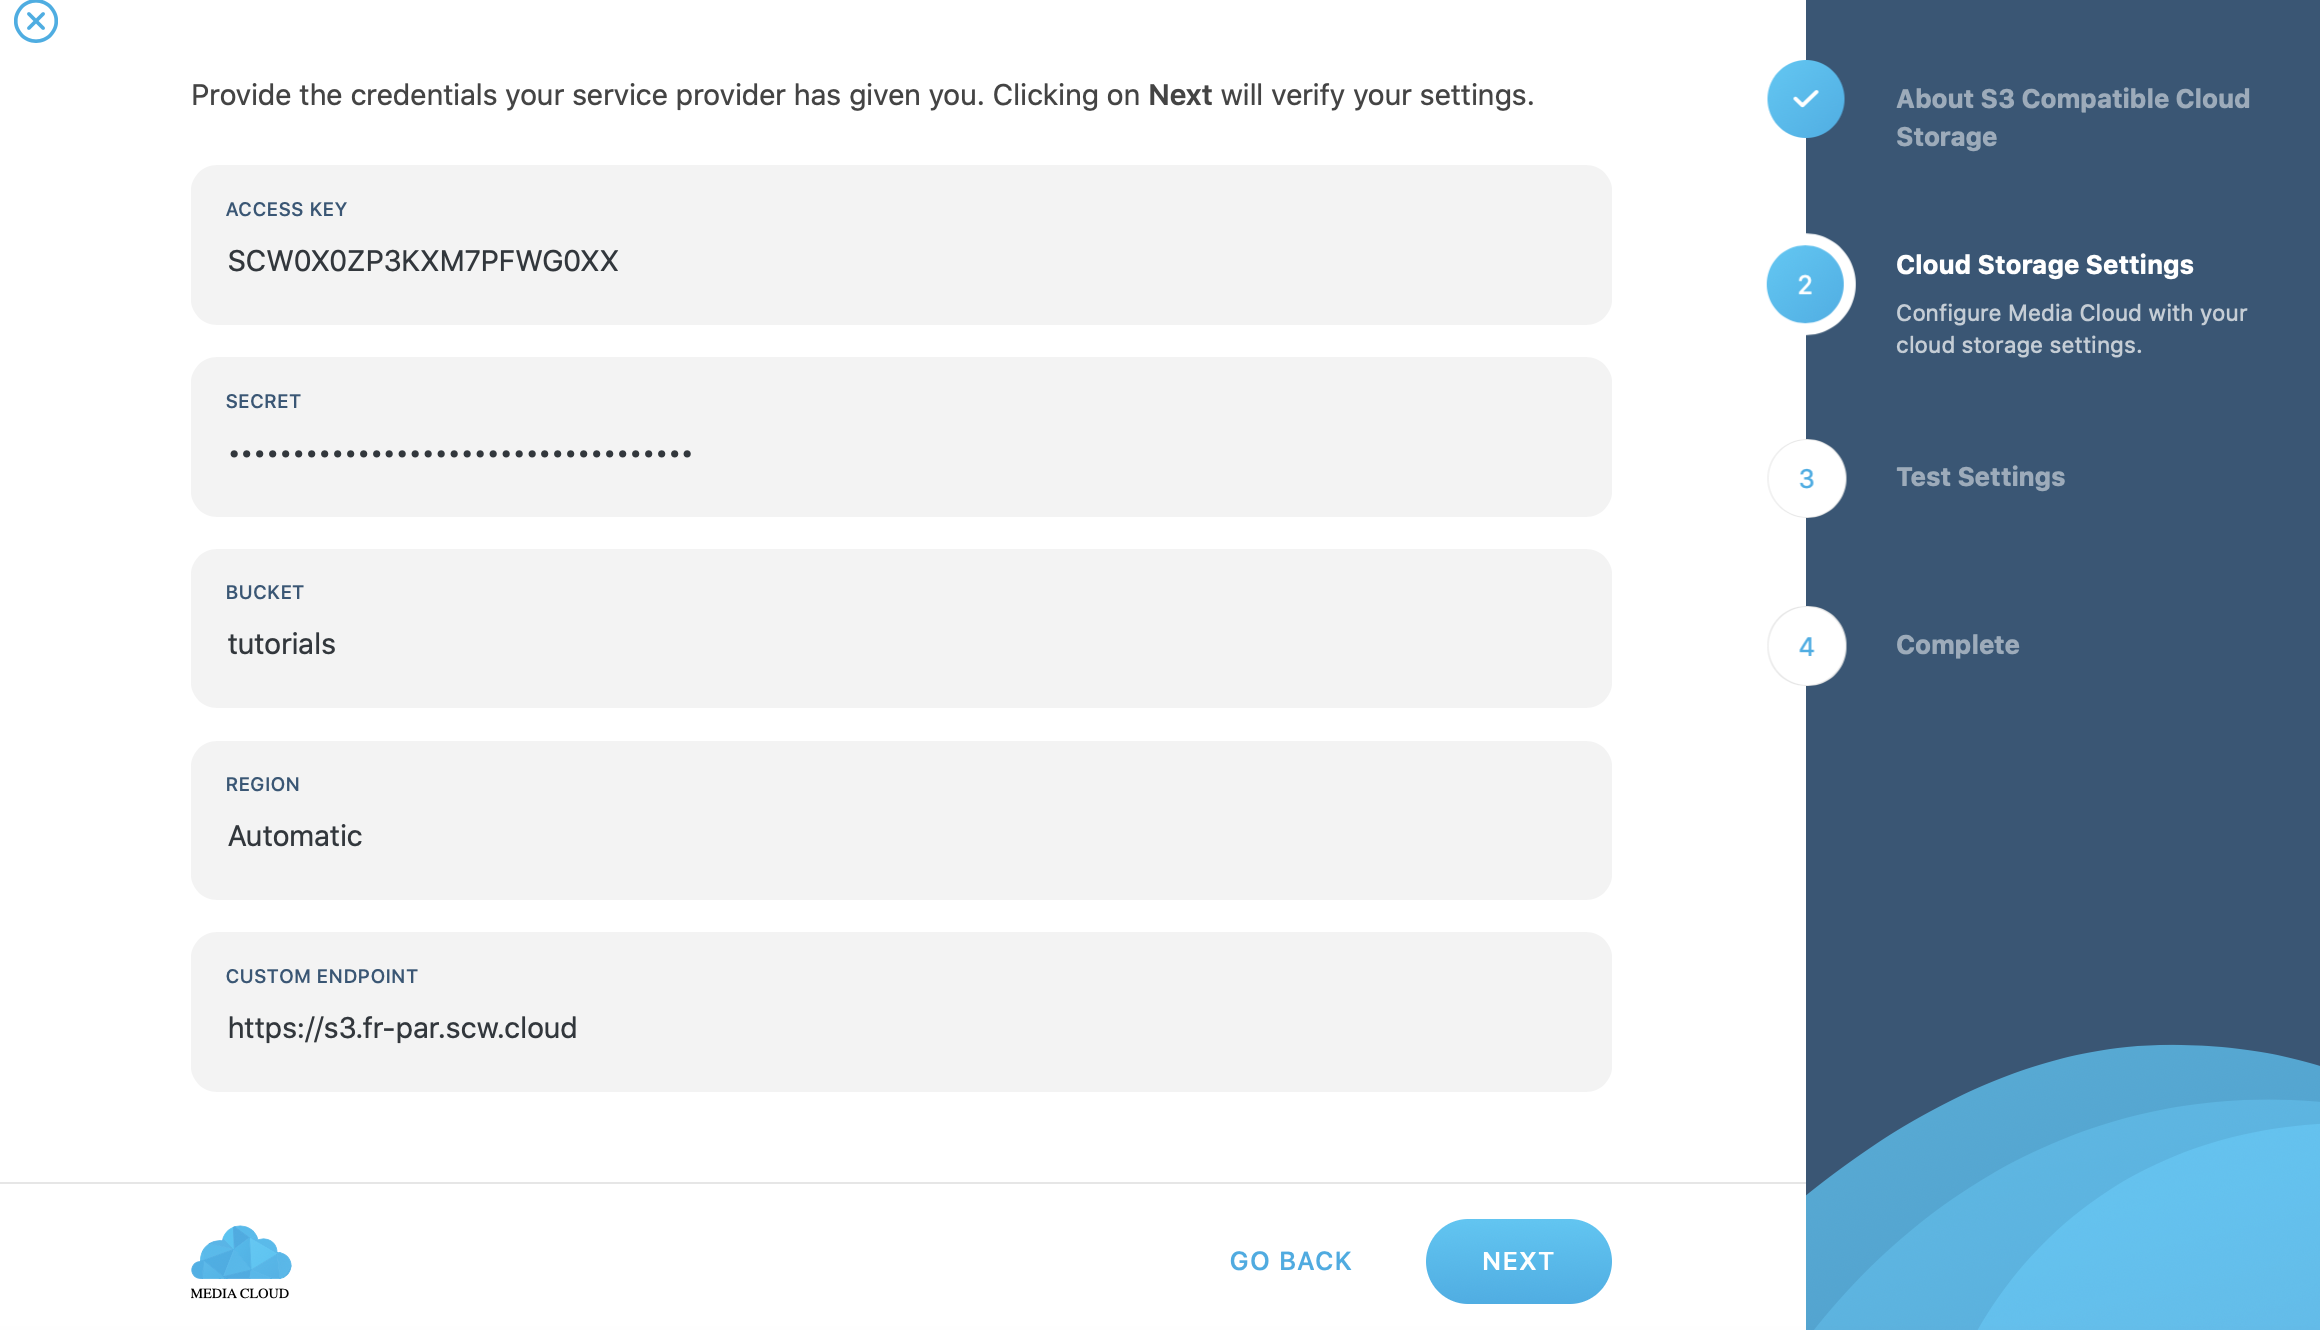
- Access key: Your Scaleway access key
- Secret key: Your Scaleway secret key
- Bucket: The name of your Object Storage Bucket
- Region: Automatic
- Custom Endpoint: The endpoint of your bucket, can either be:
https://s3.fr-par.scw.cloudfor Paris (France)https://s3.nl-ams.scw.cloudfor Amsterdam (The Netherlands)https://s3.pl-waw.scw.cloudfor Warsaw (Poland) Click Next to continue with the configuration.
-
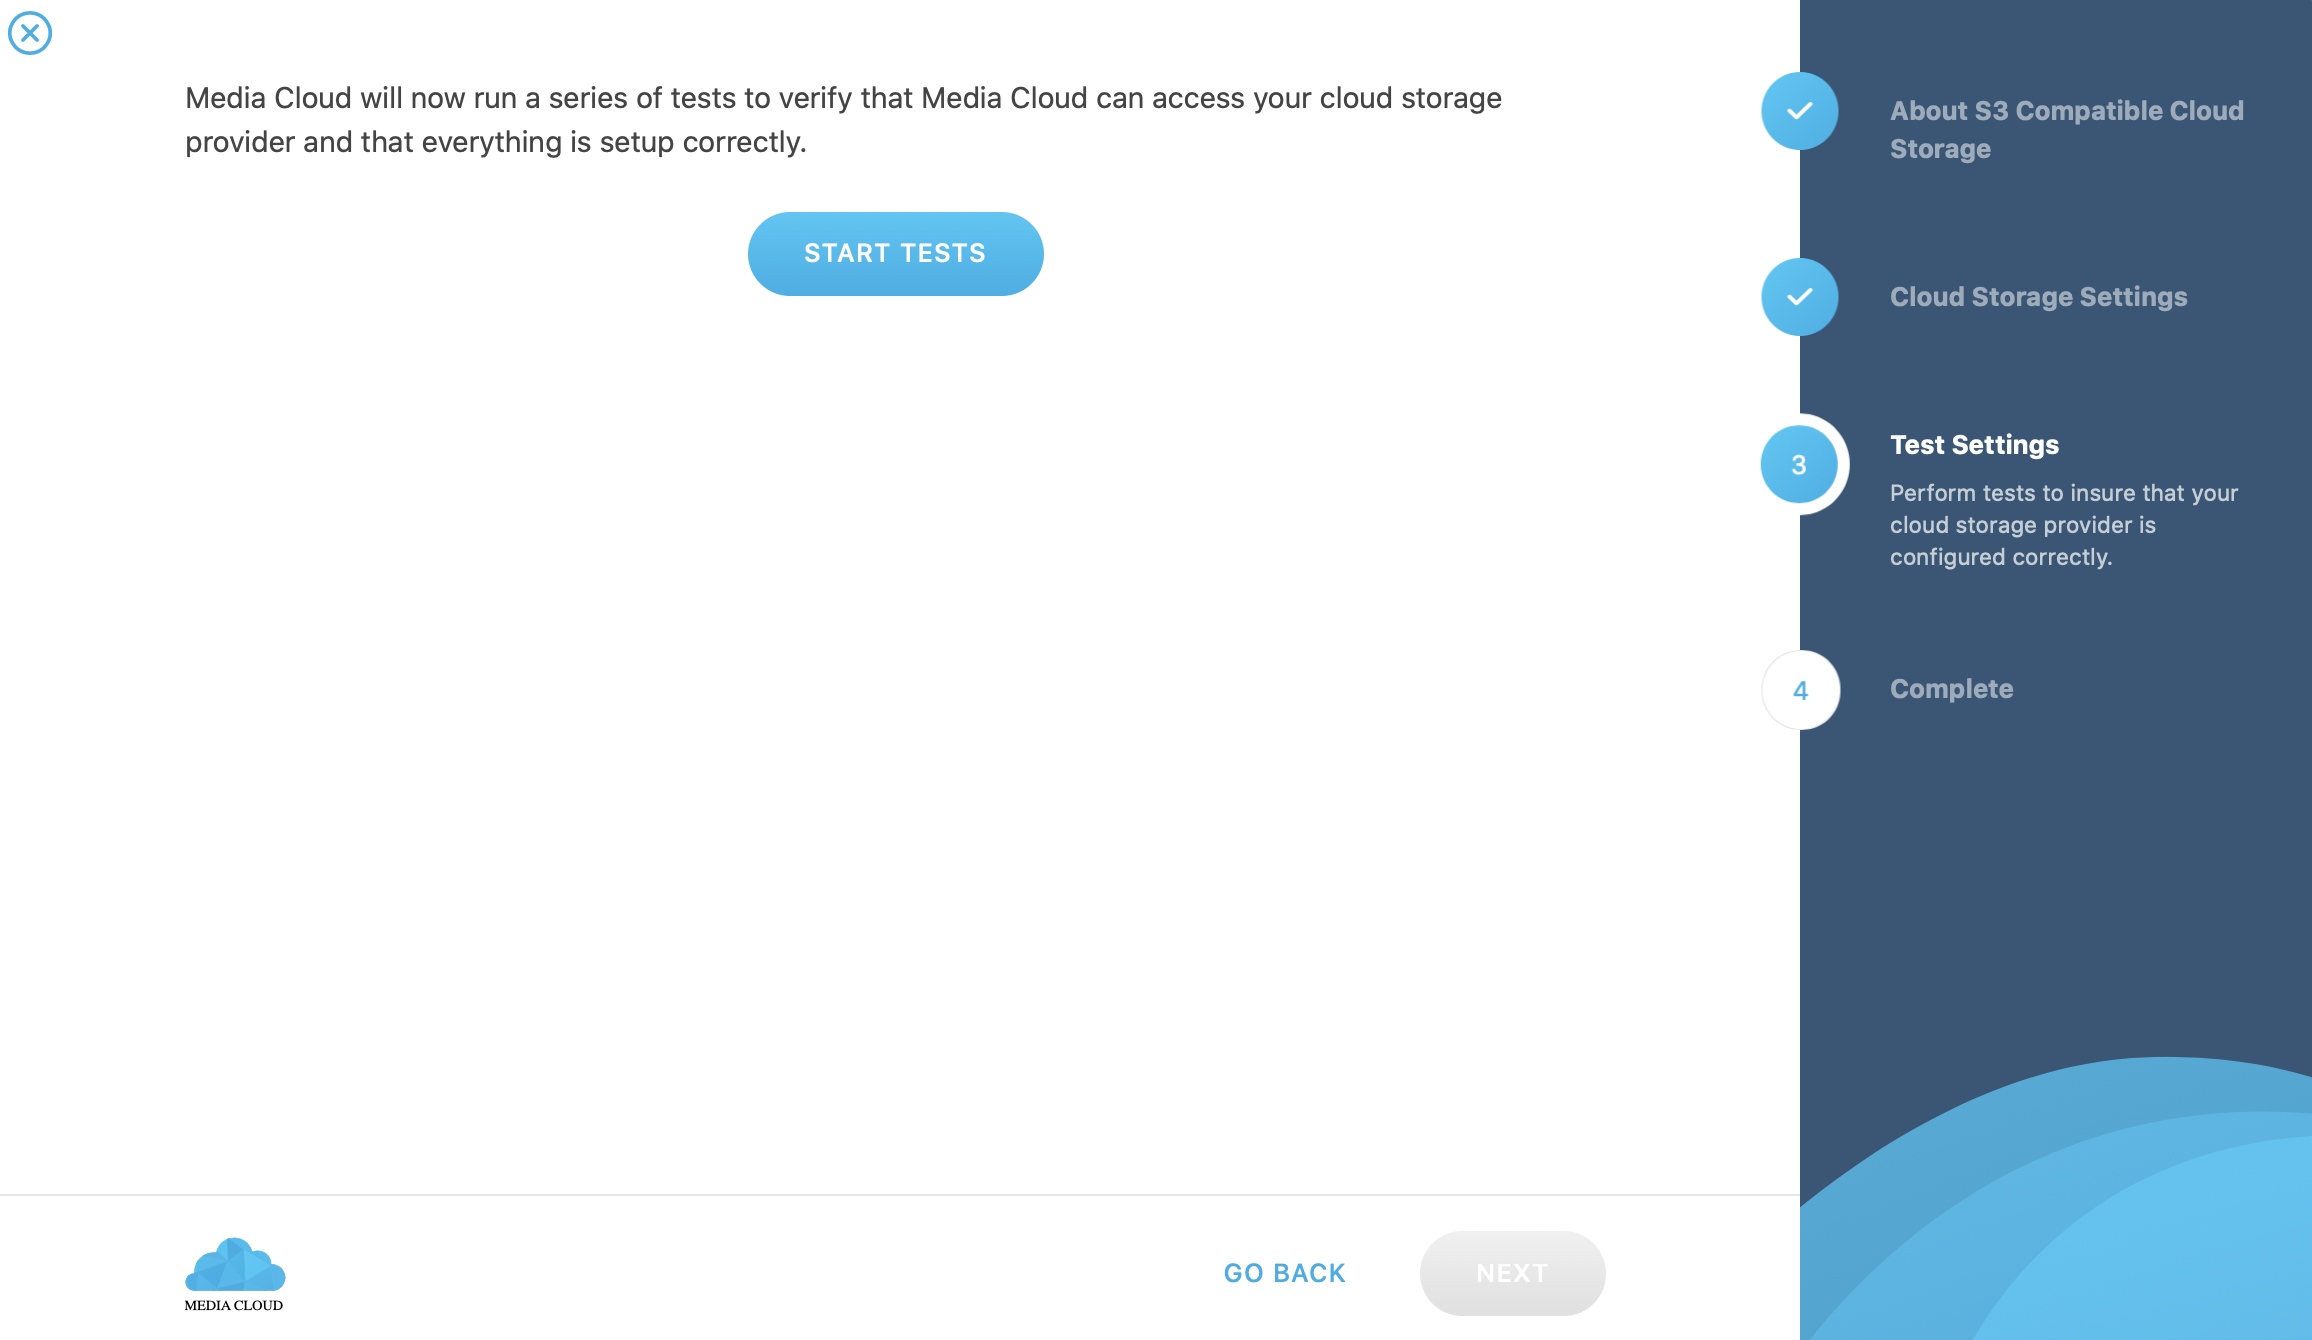
The setup wizard will check your configuration. Click Start tests to launch the validation of your credentials:
-
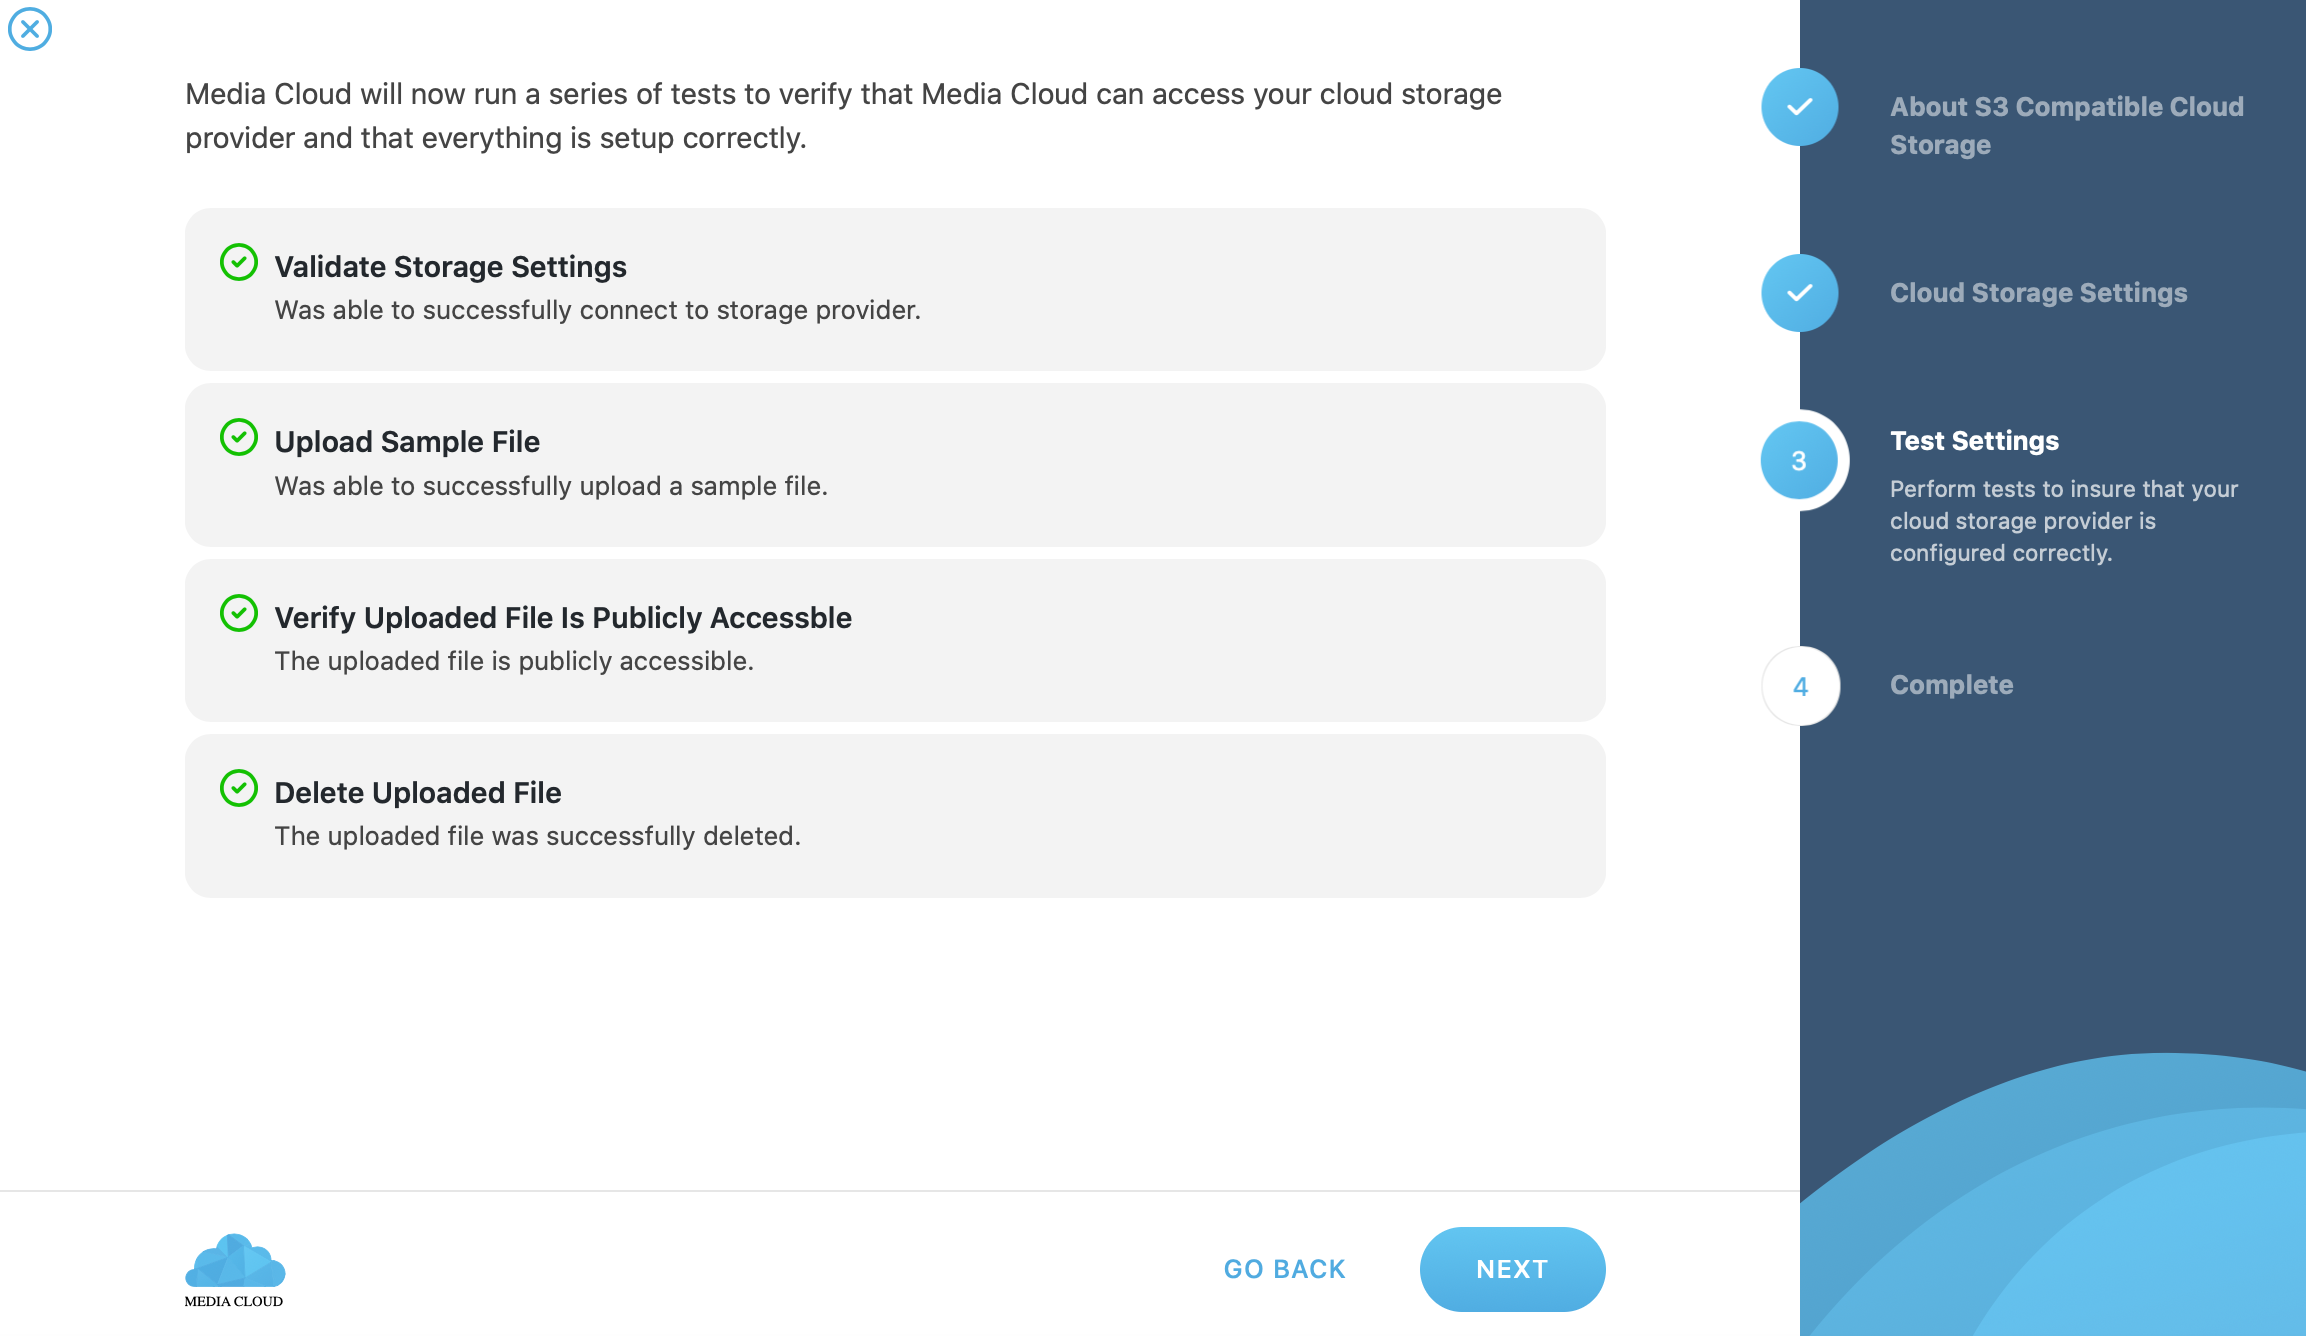
Several tests are done to validate that everything is working well. If everything succeeds, click Next to continue:
-
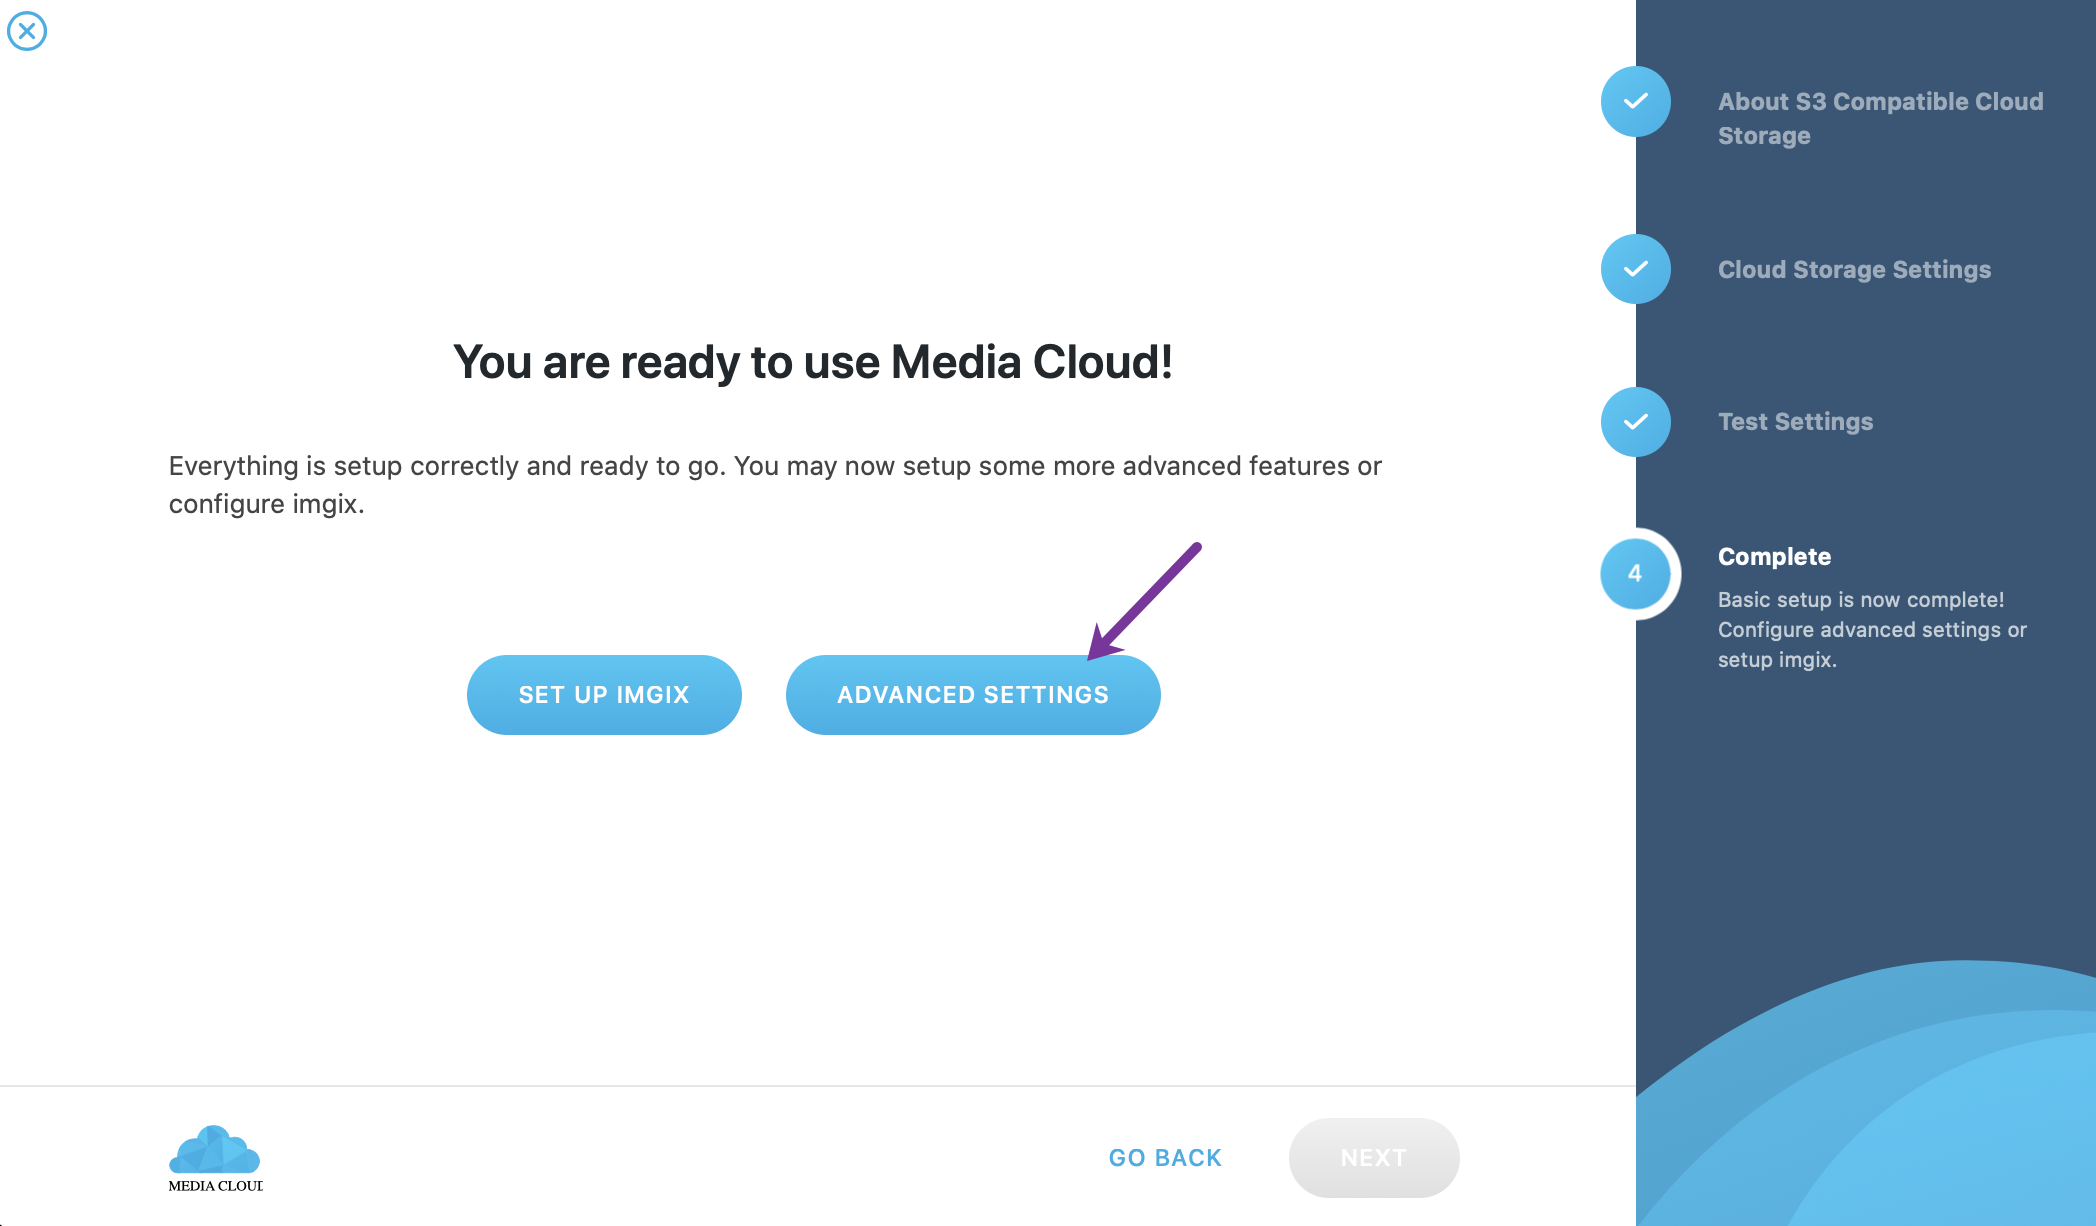
The setup is complete now. Click Advanced Settings to exit the wizard and display the advanced settings. Normally nothing needs to be configured there, and you can go to your media gallery from there:
-
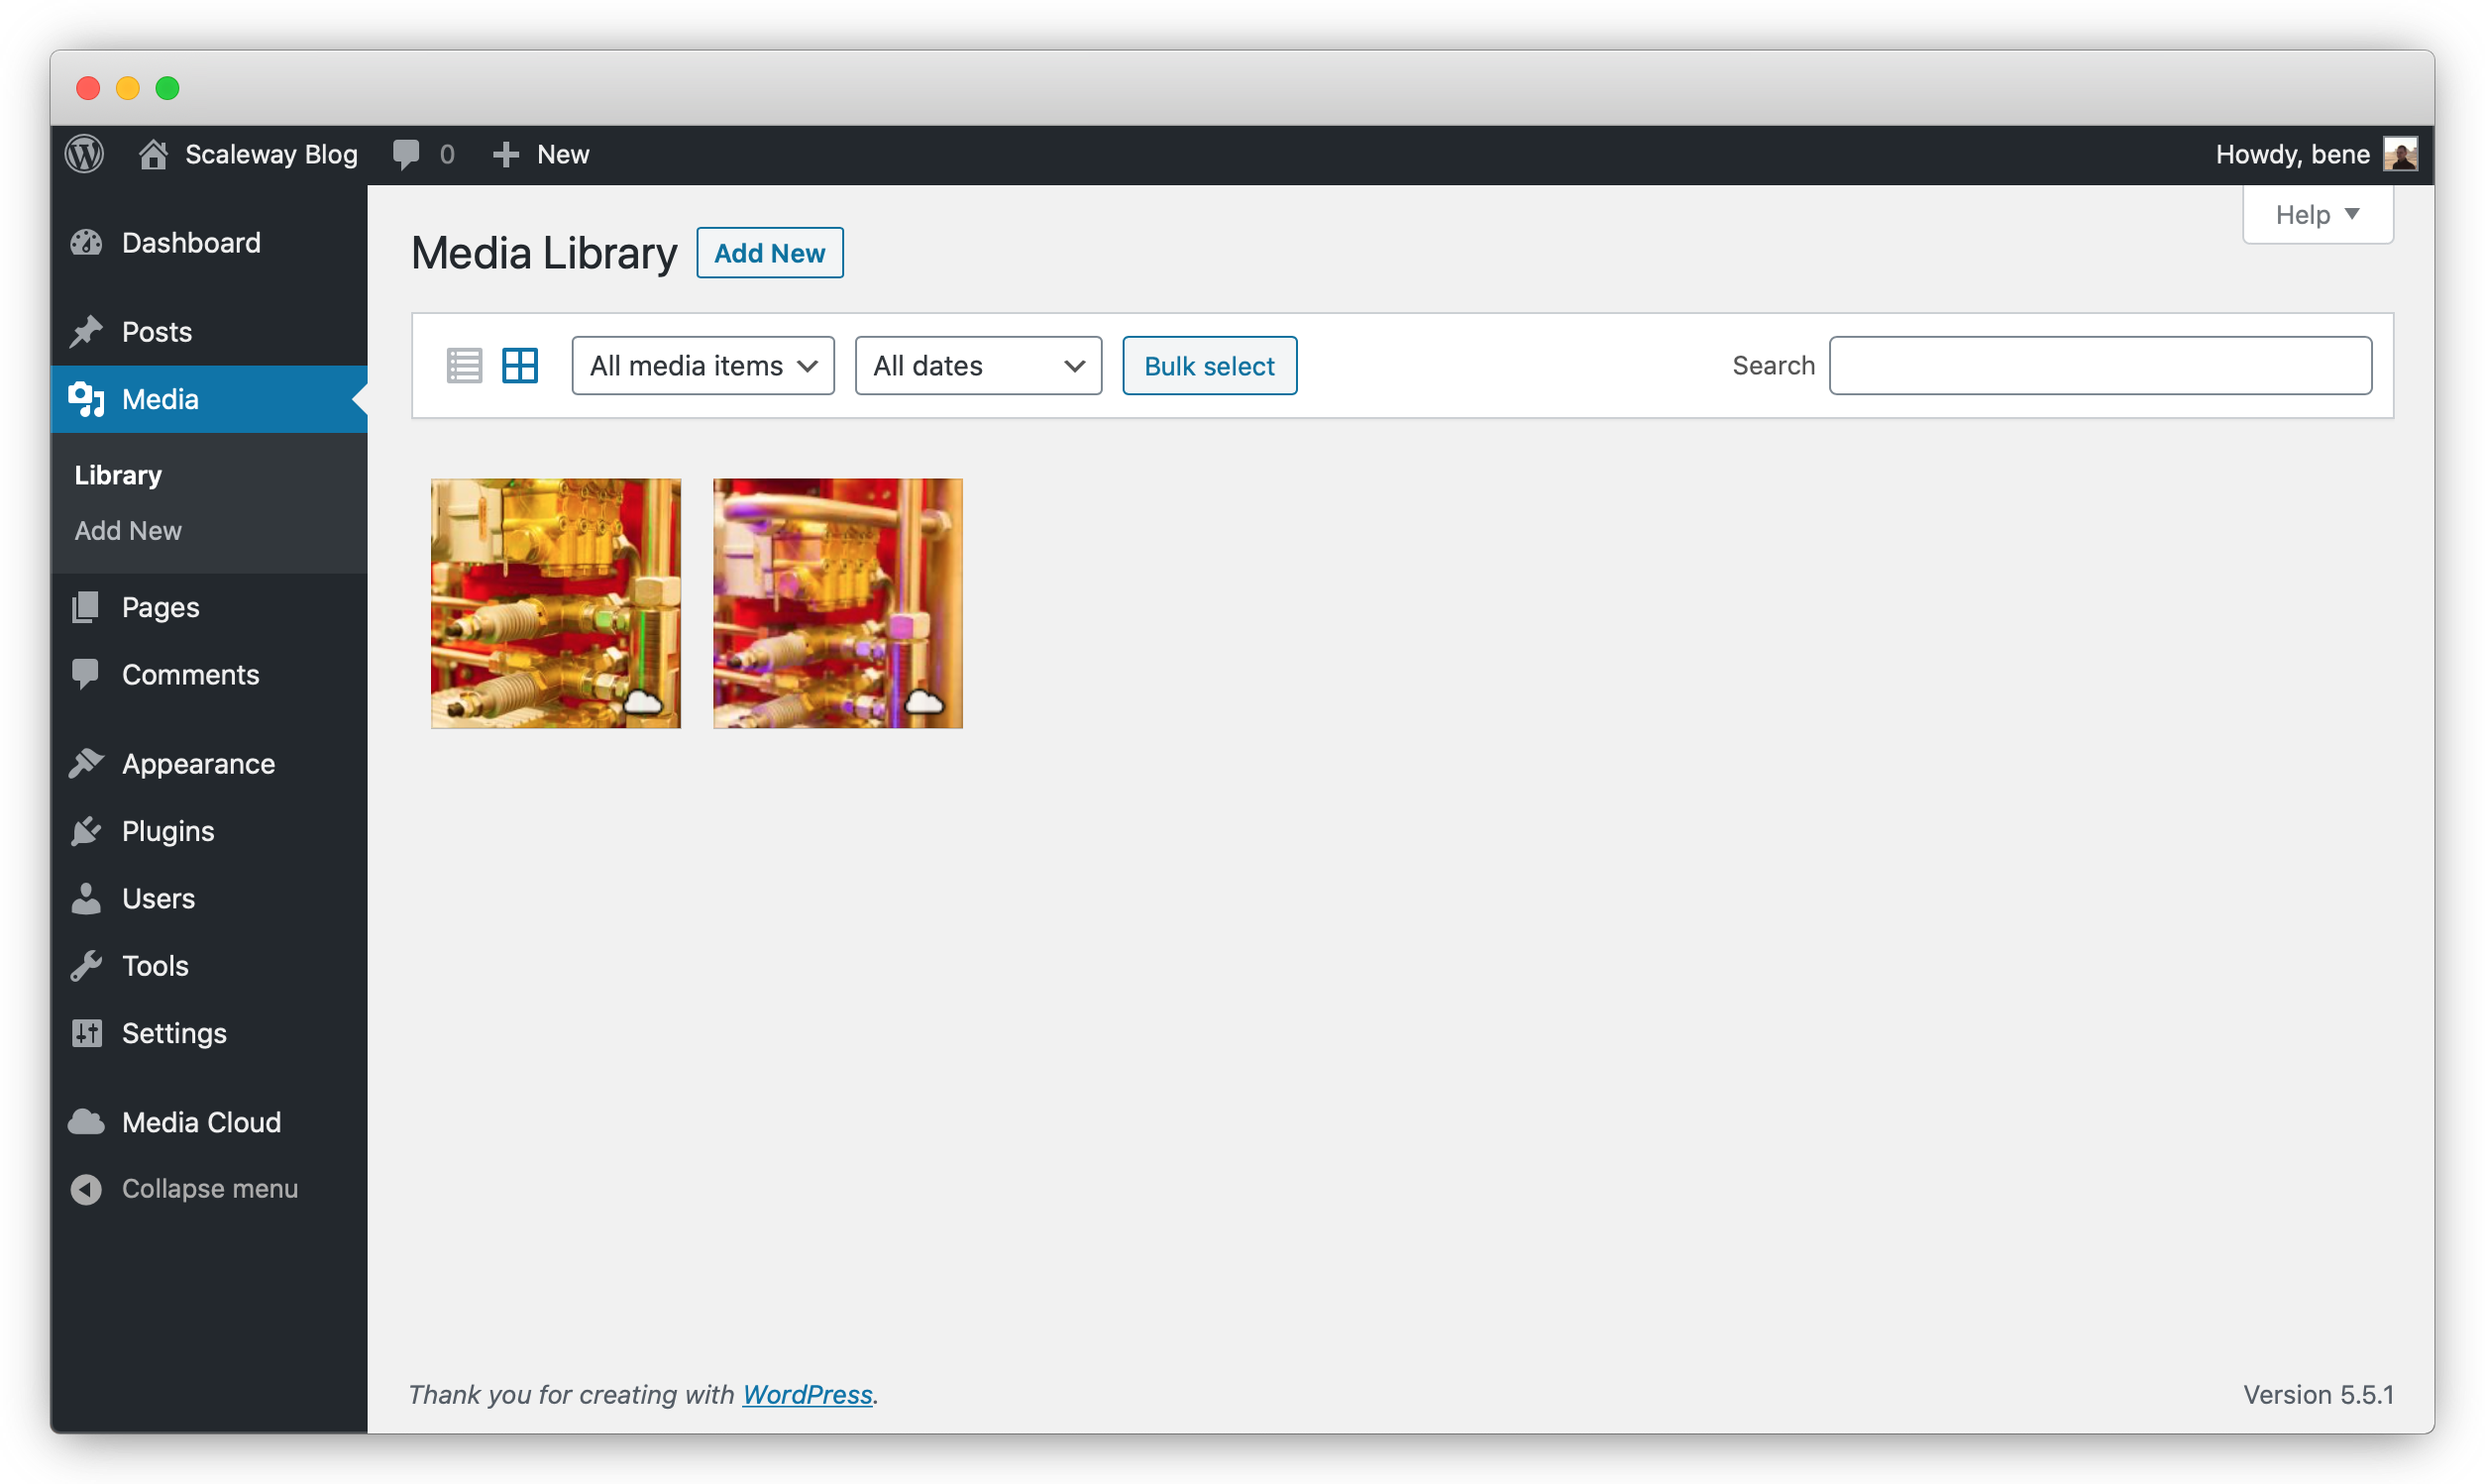
Upload your media files using the WordPress upload feature. They will be uploaded automatically into your Object Storage bucket.
-
Once uploaded, you will notice a small cloud icon next to each media file, indicating that it is stored in the Object Storage bucket:
-
To see details of each file, click it. WordPress displays details about the file, such as the bucket name, the media dimensions, and the complete storage URL:
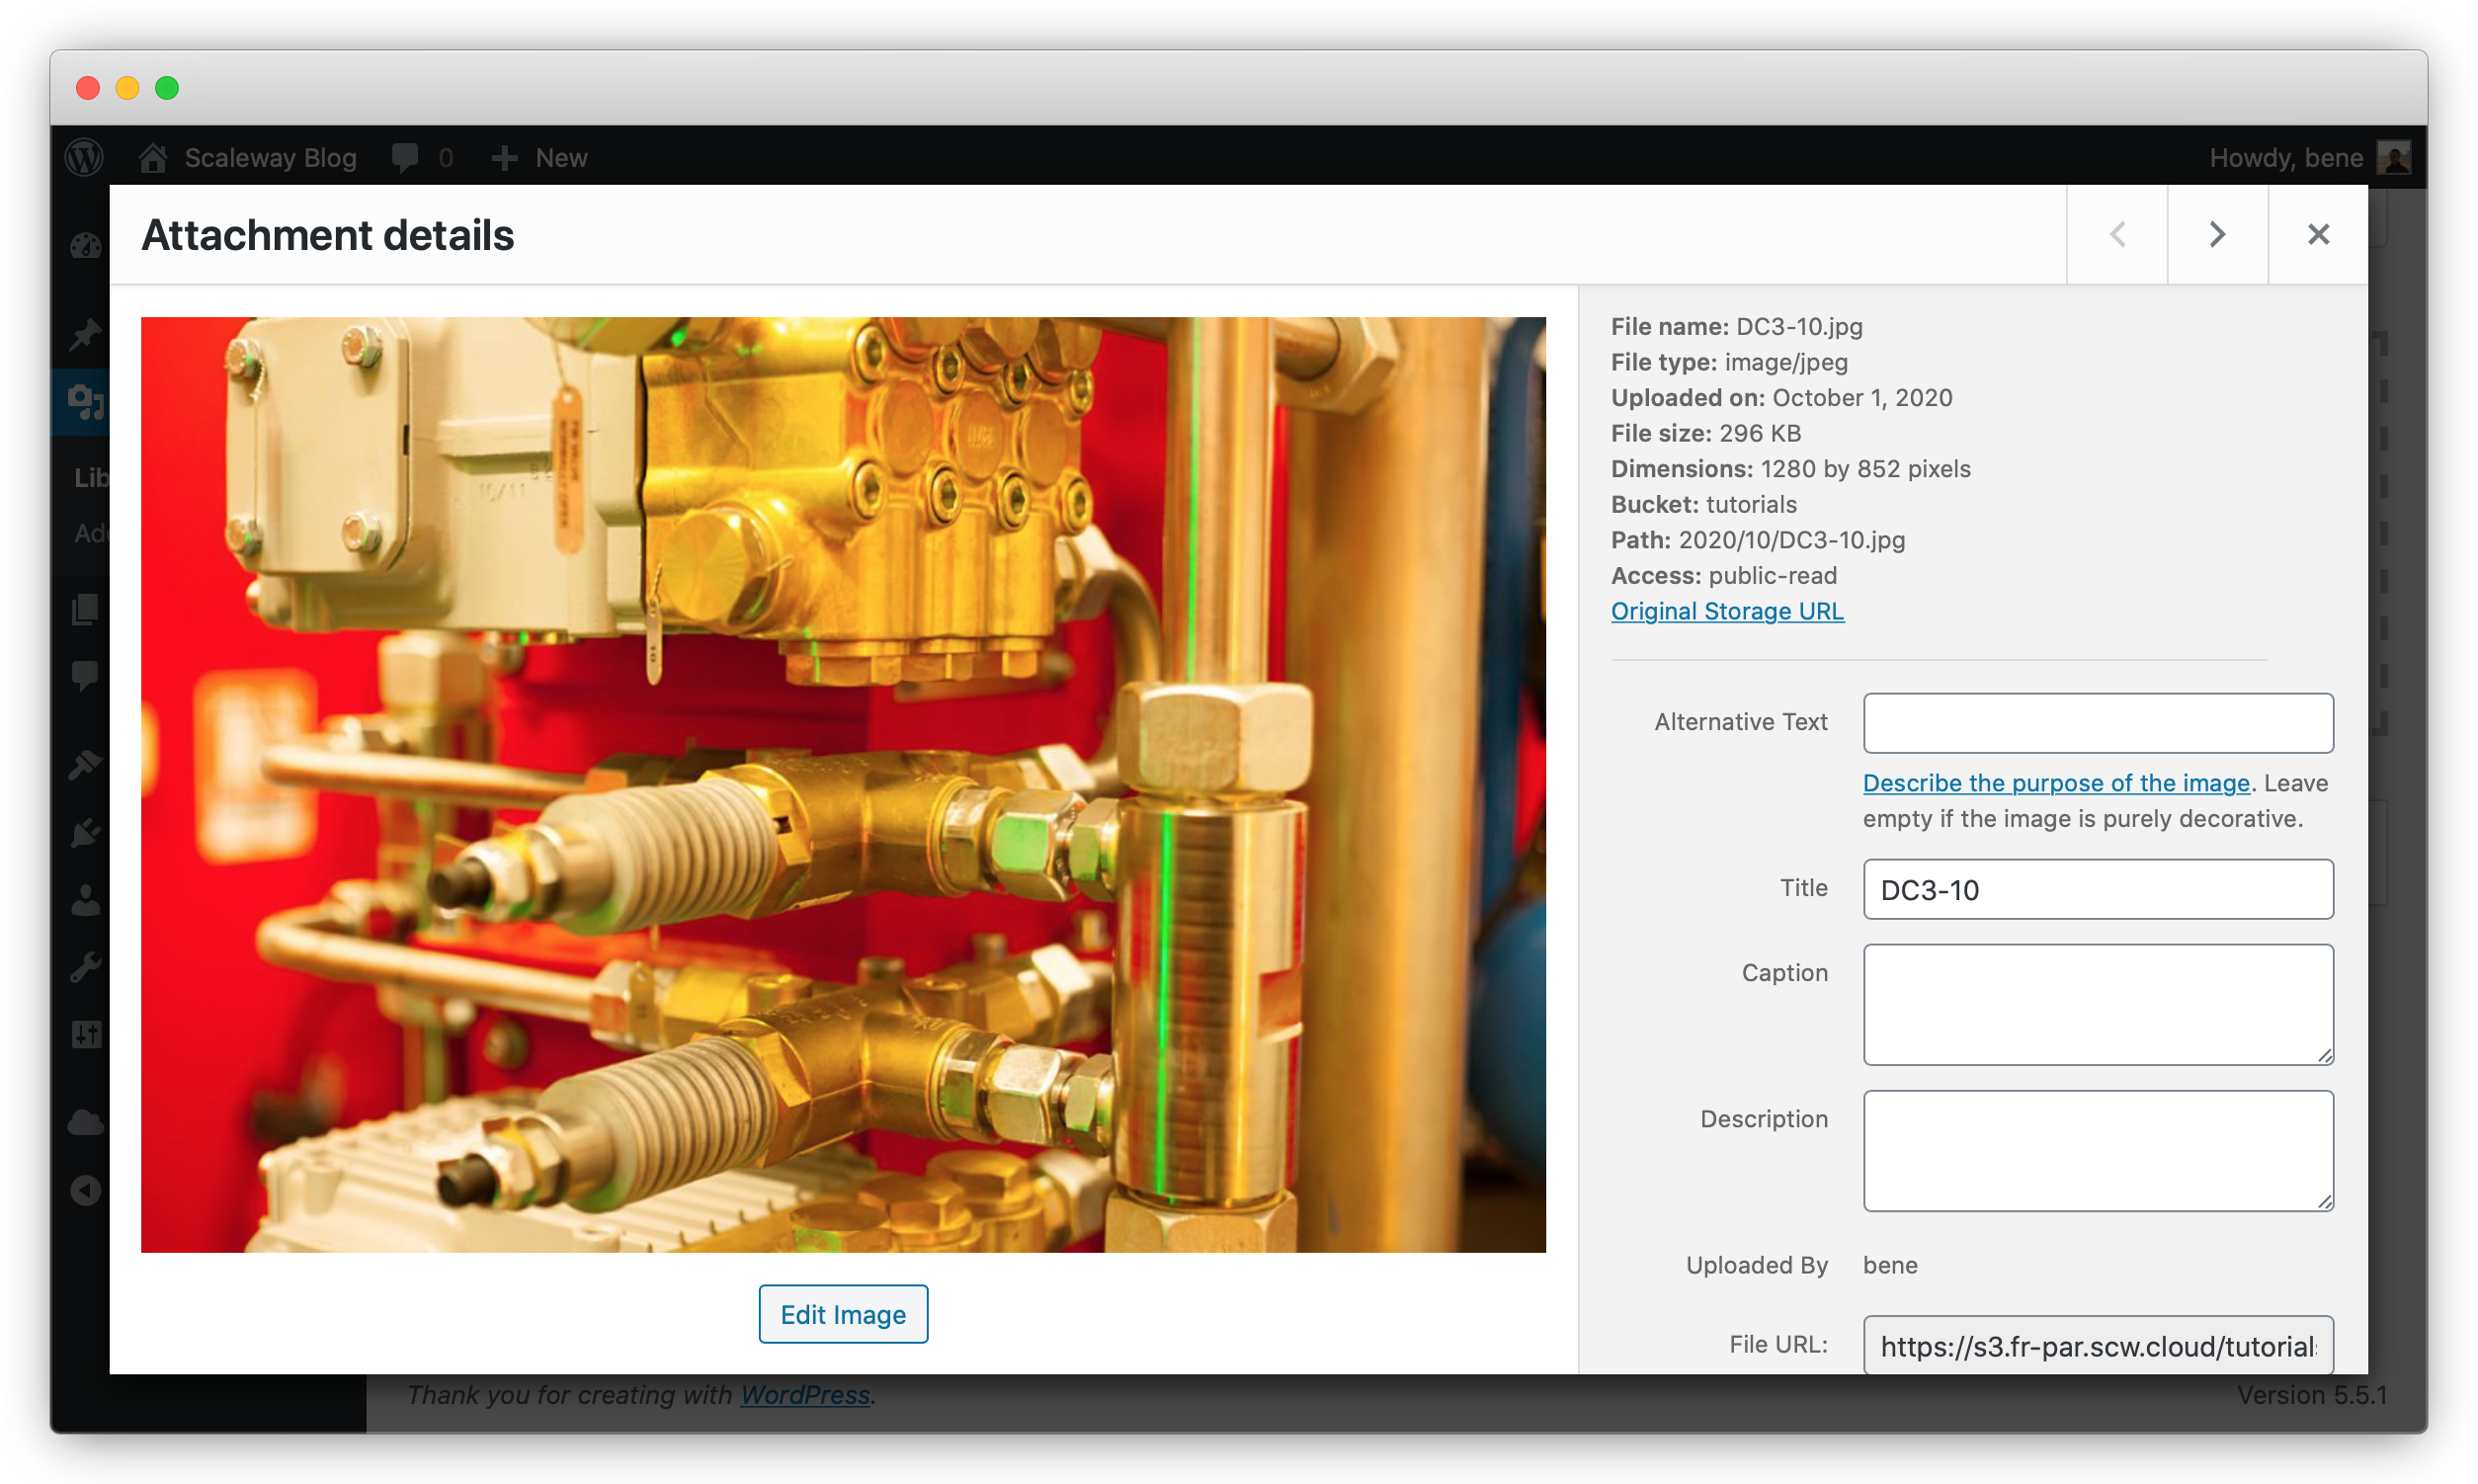
All newly uploaded files are automatically stored in the Object Storage bucket, and they can be used from the Media Library like any other media when writing a blog post.
If you do not have a WordPress blog yet, get started with a few clicks, using our WordPress blog. For more information about the Media Cloud plugin, refer to the official Media Cloud documentation.
Visit our Help Center and find the answers to your most frequent questions.
Visit Help Center