Configuring a GitHub Actions Runner on a Mac mini for enhanced CI/CD
GitHub Actions is a powerful CI/CD platform that allows users to automate their software development workflows, connected to a GitHub organization or repository. While GitHub offers online runners with a pay-as-you-go model, self-hosted runners provide increased control and customization for your CI/CD setup. This tutorial guides you through setting up, configuring, and connecting a self-hosted runner on a Mac mini to execute macOS pipelines.
Before you start
To complete the actions presented below, you must have:
- A Scaleway account logged into the console
- Owner status or IAM permissions allowing you to perform actions in the intended Organization
- A Mac mini
- A GitHub repository with administrator rights
- Installed a package manager, preferably Homebrew
Preparing for installation
Before starting the installation process, create a dedicated user account named gh-runner on your Mac mini and add it to the admin group. Execute the following terminal commands:
# Create the 'gh-runner' user account
sudo dscl . -create /Users/gh-runner
sudo dscl . -create /Users/gh-runner UserShell /bin/bash
sudo dscl . -create /Users/gh-runner RealName "GitHub runner"
sudo dscl . -create /Users/gh-runner UniqueID "1001"
sudo dscl . -create /Users/gh-runner PrimaryGroupID 20
sudo dscl . -create /Users/gh-runner NFSHomeDirectory /Users/gh-runner
# Set the password of the user. Replace 'password' with the actual password you want to configure for the user.
sudo dscl . -passwd /Users/gh-runner password
# Add 'gh-runner' to the 'admin' group
sudo dscl . -append /Groups/admin GroupMembership gh-runner
Use su to switch to the newly created gh-runner account for configuring the self-hosted runner.
su gh-runnerInstalling Git and Rosetta 2
Ensure Git and Rosetta 2 are installed on your Mac mini:
git --version
# Assuming you have Homebrew installed. If not, follow the guides on https://brew.sh/ to install it.
brew install git

# Install Rosetta 2 if not already installed
softwareupdate --install-rosettaInstalling and configuring the runner
-
Navigate to your GitHub repository and go to Settings.
-
Click Actions under Code and automation, then select Runners. A list of your configured runners displays.
-
Click New self-hosted runner to be redirected to the configuration page.
-
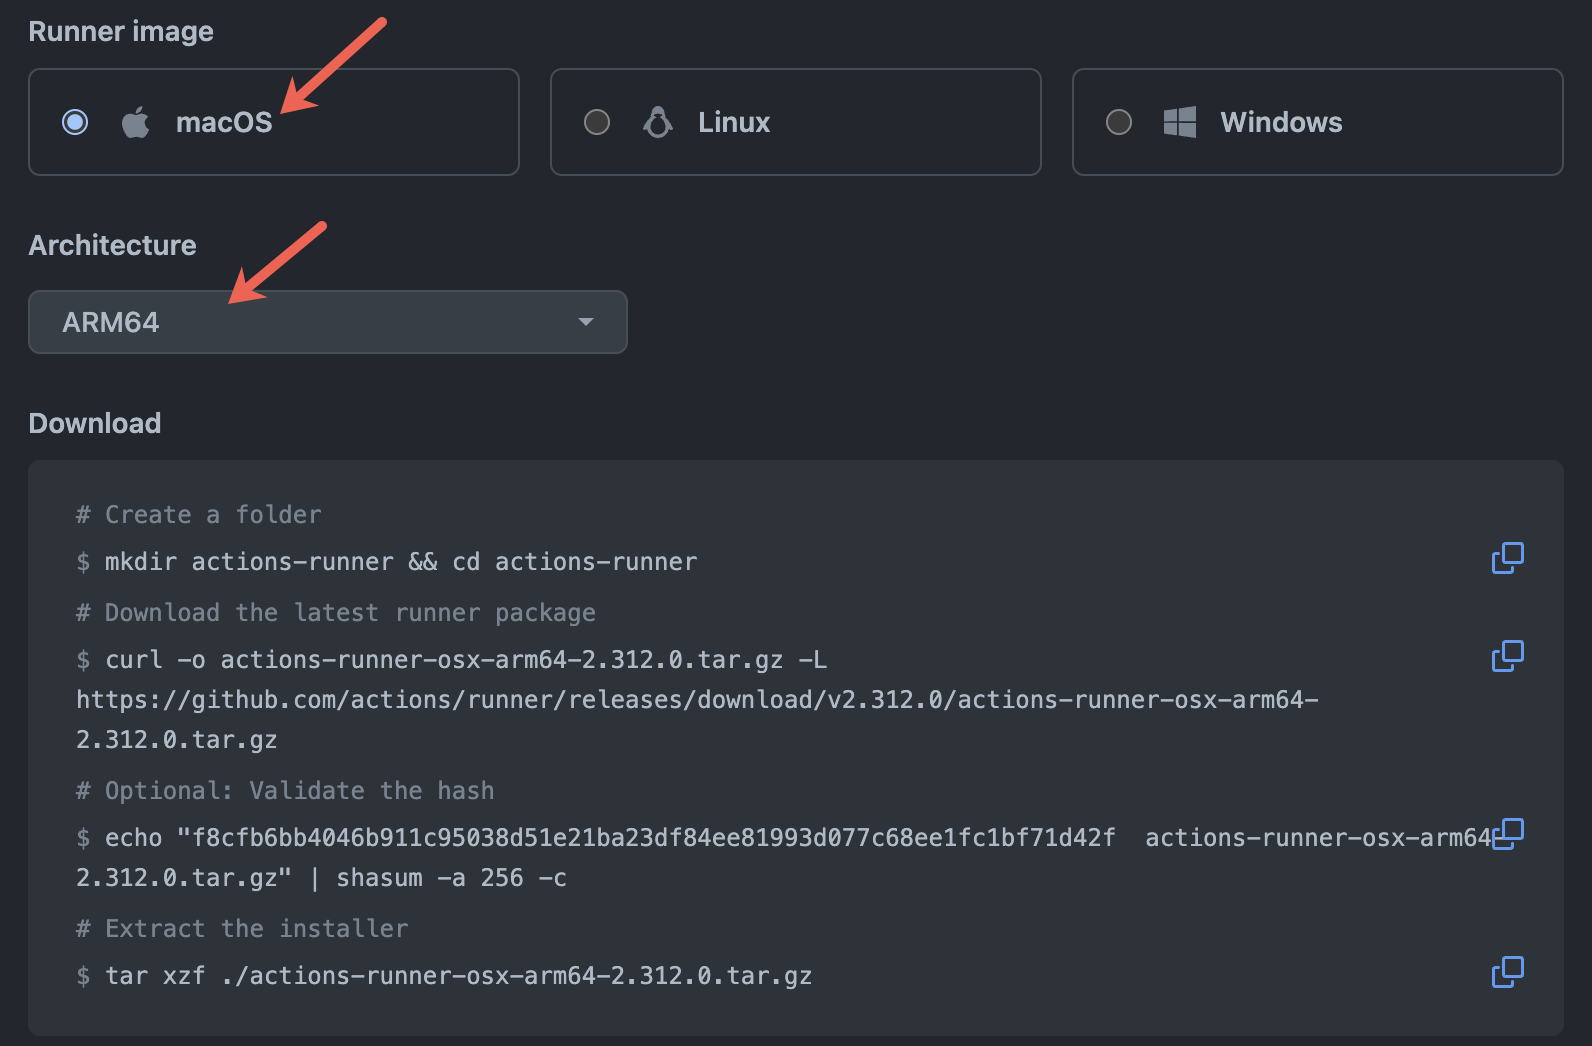
Choose macOS as the runner image and ARM64 as the architecture.
-
Follow the prompted shell commands to authenticate your machine, download the necessary runtime, and set up the runner. Do not start your runner yet.
-
Create a
.envfile in the runner_workfolder for essential environment variables:# _work/.env file ImageOS=macos13 XCODE_15_DEVELOPER_DIR=/Applications/Xcode.app/Contents/DeveloperAdd any additional environment variables required by your actions.
-
Execute the
run.shscript in your runner directory to complete the setup. -
Verify that the runner is up and listening for jobs in the terminal and check the GitHub repository settings for the runner's association and
Idlestatus.
Using the runner in a workflow
The runner is authenticated to your repository and labeled with self-hosted, macOS, and ARM64. Use it in your workflows by specifying these labels in the runs-on field:
name: Sample workflow

on:
  workflow_dispatch:

jobs:
  build:
    runs-on: [self-hosted, macOS, ARM64]

    steps:
      - name: Install NodeJS
        run: brew install node
Sudoers configuration (optional)
If actions require root privileges, configure the sudoers file using sudo visudo. For private repositories, add:
gh-runner ALL=(ALL) NOPASSWD: ALLConclusion
This tutorial guided you through setting up a self-hosted runner on an Apple silicon-based Mac mini for macOS pipelines. Your runner is now ready to be integrated into your workflows. For additional information, refer to the managing self-hosted runners documentation on GitHub.
Visit our Help Center and find the answers to your most frequent questions.
Visit Help Center