Hometutorials
install apache ansible
Jump toUpdate content

Installing Apache on Ansible

Reviewed on 07 March 2023 • Published on 02 August 2018
  • Ansible
  • getting-started
  • Apache
  • Playbook

Apache is one of the most used open-source web servers in the world.

Security & Identity (IAM):

You may need certain IAM permissions to carry out some actions described on this page. This means:

  • you are the Owner of the Scaleway Organization in which the actions will be carried out, or
  • you are an IAM user of the Organization, with a policy granting you the necessary permission sets
Note:

This tutorial is recommended for users who are familiar with Ansible.

Configuring Ansible for Apache

Once Ansible is installed, we need to specify Ansible which hosts to talk to. We could use the default host file located in /etc/ansible/hosts however, that is applied globally across your system and often requires admin permissions. To make things easier we will use a local hosts file.

Ansible always looks for an ansible.cfg file in the local directory that it is being run from, and if found will override the global configuration with local values.

  1. Create a new directory that we will use through the example

    mkdir ansible-apache
  2. Move to this newly created directory

    cd ~/ansible-apache/
  3. Create a new file ansible.cfg

    nano ansible.cfg
  4. Add in the hostfile configuration option with the value of hosts, within the [defaults] group. Copy the following into the ansible.cfg file.

    [defaults]
    hostfile = hosts
  5. Create a hosts file and open it for editing

    nano hosts
  6. Copy the following into the hosts file. Make sure you replace the secondary_server_ip with the secondary server’s hostname or IP address.

    Note:

    The ansible_ssh_user=username component is optional if you are running Ansible as the same user as the target host.

    [apache]
    secondary_server_ip ansible_ssh_user=username
    secondary_server_ip | SUCCESS => {
    "changed": false,
    "ping": "pong"
    }

You can also use echo, a Unix command that echoes a string to the terminal

ansible apache -m command -a "/bin/echo hello world"
secondary_server_ip | success | rc=0 >>
hello world

Creating a Playbook

Playbooks are Ansible’s configuration, deployment, and orchestration language. They can describe a policy you want your remote systems to enforce. In short, playbooks are designed to be human-readable and they are used to manage configurations of and deployments to remote machines.

  1. Create a file called apache.yml.
    nano apache.yml
  2. Copy the following text into the file:
    - hosts: apache
    tasks:
    - name: run echo command
    command: /bin/echo hello world
  3. Run the playbook we just created.
    ansible-playbook apache.yml
    PLAY [apache] *******************************************************************
    TASK [Gathering Facts] **********************************************************
    Enter passphrase for key '/root/.ssh/id_rsa':
    ok: [secondary_server_ip]
    TASK [run echo command] *********************************************************
    changed: [secondary_server_ip]
    PLAY RECAP **********************************************************************
    secondary_server_ip : ok=2 changed=1 unreachable=0 failed=0

Playbooks do not return the production of the module, so unlike the direct command we used above, we cannot see if hello world was indeed printed out.

Installing Apache

  1. Update the apache.yml playbook with the apt module instead of the command module.
    nano apache.yml
  2. If there is existing content in the apache.yml file, delete the content and replace it with the following.
    ---
    - hosts: apache
    sudo: yes
    tasks:
    - name: install apache2
    apt: name=apache2 update_cache=yes state=latest
  3. Run the Playbook. The --ask-sudo-pass flag prompts the sudo password on the secondary Ansible server.
    ansible-playbook apache.yml --ask-sudo-pass
    PLAY [apache] ******************************************************************
    TASK [Gathering Facts] *********************************************************
    ok: [secondary_server_ip]
    TASK [install apache2] *********************************************************
    changed: [secondary_server_ip]
    PLAY RECAP *********************************************************************
    secondary_server_ip : ok=2 changed=1 unreachable=0 failed=0

If you visit your secondary server’s hostname or IP address in your browser, an Apache2 Ubuntu default page should display as follows

Configuring Apache Modules

Now that Apache is installed, we need to enable modules to be used by Apache.

Let us make sure that the mod_rewrite module is enabled for Apache using the apache2_module module and a task handler to restart apache2.

The apache2_module module takes two actions:

  • name: The name of the module to enable, such as write.
  • attribute: Either present or away, being on if the module needs to be enabled or not.
  1. Open apache.yml for editing

    nano apache.yml
  2. Paste the following content. As we need to restart apache2 after the module is enabled we need to use a task handler.

    ---
    - hosts: apache
    sudo: yes
    tasks:
    - name: install apache2
    apt: name=apache2 update_cache=yes state=latest
    - name: enabled mod_rewrite
    apache2_module: name=rewrite state=present
    notify:
    - restart apache2
    handlers:
    - name: restart apache2
    service: name=apache2 state=restarted

    The way handlers work is that a task can be told to notify a handler when it has changed, and the handler only runs when the task has been changed. To do this we need to add the notify option into the apache2_module task, and then we can use the service module to restart apache2 in a handler.

  3. Run the Playbook

    ansible-playbook apache.yml --ask-sudo-pass
    PLAY [apache] ******************************************************************
    TASK [Gathering Facts] *********************************************************
    Enter passphrase for key '/root/.ssh/id_rsa':
    ok: [secondary_server_ip]
    TASK [install apache2] *********************************************************
    ok: [secondary_server_ip]
    TASK [enabled mod_rewrite] *****************************************************
    changed: [secondary_server_ip]
    RUNNING HANDLER [restart apache2] **********************************************
    changed: [secondary_server_ip]
    PLAY RECAP *********************************************************************
    secondary_server_ip : ok=4 changed=2 unreachable=0 failed=0

If you run the command again, the restart task is not listed anymore.

Configuring Apache Options

Now that we have a working Apache installation, with our demanded modules turned on, we need to configure Apache. By default Apache listens on port 80 for all HTTP traffic.

For the sake of the tutorial, let us assume that we want Apache to listen on port 8081 instead. We will use the lineinfile module to tune the configuration options.

If you want to know more about the lineinfile module refer to the Ansible Documentation

  1. Open the apache.yml file for editing
    nano apache.yml
  2. Amend the additional lines so that the file looks like this:
    ---
    - hosts: apache
    sudo: yes
    tasks:
    - name: install apache2
    apt: name=apache2 update_cache=yes state=latest
    - name: enabled mod_rewrite
    apache2_module: name=rewrite state=present
    notify:
    - restart apache2
    - name: apache2 listen on port 8081
    lineinfile: dest=/etc/apache2/ports.conf regexp="^Listen 80" line="Listen 8081" state=present
    notify:
    - restart apache2
    - name: apache2 virtualhost on port 8081
    lineinfile: dest=/etc/apache2/sites-available/000-default.conf regexp="^<VirtualHost \*:80>" line="<VirtualHost *:8081>" state=present
    notify:
    - restart apache2
    handlers:
    - name: restart apache2
    service: name=apache2 state=restarted
  3. Run the Playbook
    ansible-playbook apache.yml --ask-sudo-pass

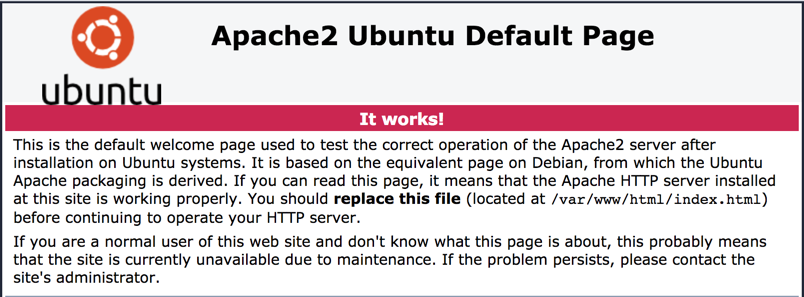
Once Ansible is fully set up, you can visit your web browser on port 8081 (rather than port 80). In most web browsers, this can be easily achieved by adding :port onto the end of the URL: http://public_ip_adress:8081/