Setting up and configuring Jupyter Notebook on a Scaleway GPU Instance
Jupyter Notebook is a dynamic client-server application tailored for editing and executing notebook documents right from your web browser.
This versatile platform empowers you to seamlessly blend code, annotations, multimedia elements, and visualizations into a cohesive interactive document — aptly named a notebook — all within the confines of your web browser.
Originally designed to cater to the needs of data science, the name Jupyter is a clever amalgamation of the initial languages it supported: JUlia, PYThon, and R. However, its utility has transcended those origins. Today, Jupyter serves as the go-to environment for an array of applications. It's not only indispensable for research endeavors involving data visualization or complex formulas but also finds extensive use in documenting processes with code and facilitating code sharing or interactive visualization experiences.
This evolutionary journey has seen Jupyter expand its horizons to provide support for over 40 programming languages. As an open-source project, it builds upon the foundation laid by the IPython Notebook project, fostering a vibrant ecosystem of innovation and collaboration.
Before you start
To complete the actions presented below, you must have:
- A Scaleway account logged into the console
- Owner status or IAM permissions allowing you to perform actions in the intended Organization
- An SSH key
sudoprivileges or access to the root user
Setting up a remote Jupyter Notebook on a GPU Instance
- Deploy a new GPU Instance with the Ubuntu ML image from the Scaleway console.
- Log in to the Instance using SSH.
- Update the apt repositories list and upgrade the packages already installed on the Instance:
apt update && apt upgrade -y - Reboot the Instance once the software has been upgraded:
reboot - Wait a few minutes and reconnect to the Instance:
ssh root@gpu-instance-ip - Start the Jupyter Notebook application by running the following command:
jupyter notebook --no-browser --port=8888 --allow-root
- The flag
--no-browserprevents opening the notebook in a browser after startup. - The flag
port=8888specifies the port on which the notebook listens. It is possible to change this value to another port number if required.
Connecting to the remote Jupyter Notebook
From a Linux/macOS client
To connect to the Jupyter Notebook from a remote client, an SSH tunnel is required. SSH is available natively on Linux or macOS computers.
- Open a local terminal and run the following command on a client running on Linux or macOS:
ssh -N -L localhost:7777:localhost:8888 root@gpu-instance-ip
The command above configures the port forwarding of the local port 7777 to the port 8888 on the GPU Instance. This allows access to the Jupyter Notebook with a web browser from the local computer.
- Open a web browser and go to
http://localhost:7777. The Jupyter web interface should display: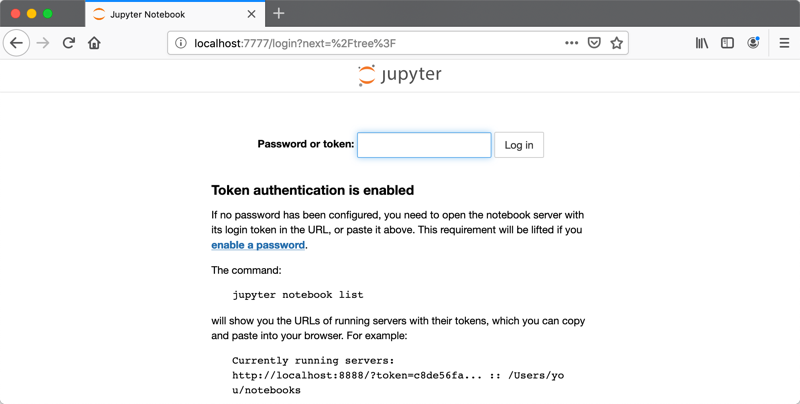
From a Windows client
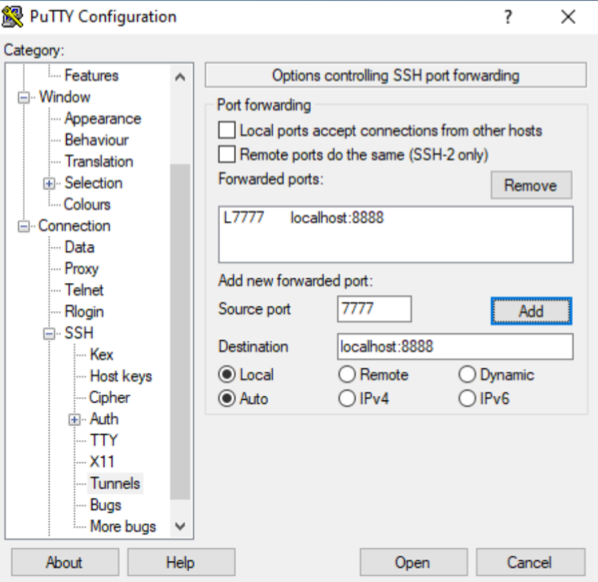
To establish an SSH tunnel on a Windows computer, you need to have PuTTY installed on the machine.
-
Open the PuTTY application.
-
In the menu bar on the left, click Connection > SSH > Tunnels. Then add a new forwarded port:
- Fill in the Source port:
7777 - Fill in the Destination:
localhost:8888 - Click Add to add the configuration. Once done the forwarded port appears in the Forwarded ports list.
- Fill in the Source port:
-
Go back to the main window of PuTTY and enter the connection details of the Instance, then click Open to log into it.
-
Keep the PuTTY window open in the background and launch a web browser. Go to
http://localhost:7777to connect to the Jupyter Notebook: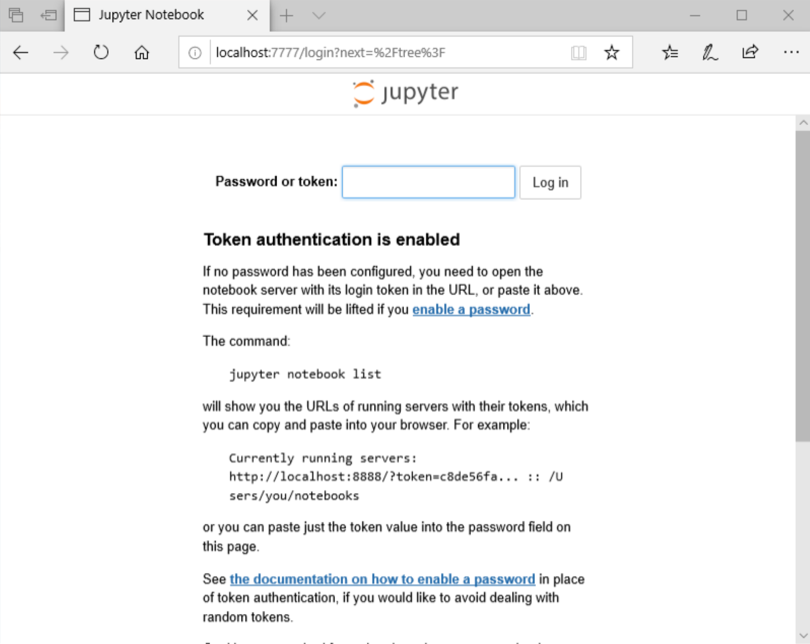
Setting a password for Jupyter Notebook
- To access the Jupyter Notebook, an access token is required. It is displayed in the startup messages of the application:

- Copy the access token and open the URL
http://localhost:7777in a web browser: - Scroll down to the password section of the page and paste the token into the corresponding form. Then enter a safe password and click Log in and set new password to take the changes into effect:

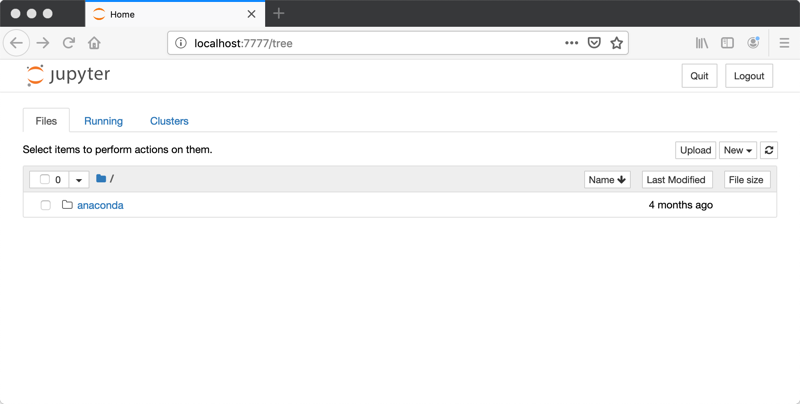
- You are now logged into Jupyter Notebook. The Dashboard displays:
Using Jupyter Notebook
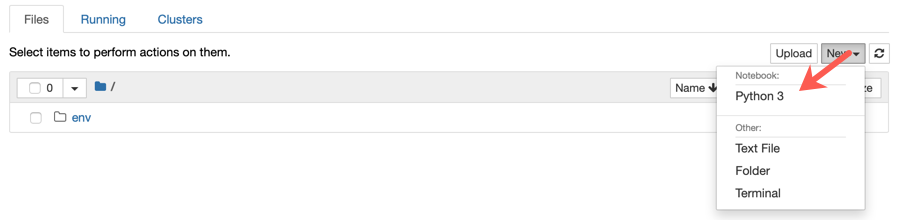
- You can now create a new or import an existing Jupyter Notebook by clicking on Upload or New:

- Create a new Python 3 notebook by clicking on the corresponding line in the menu:
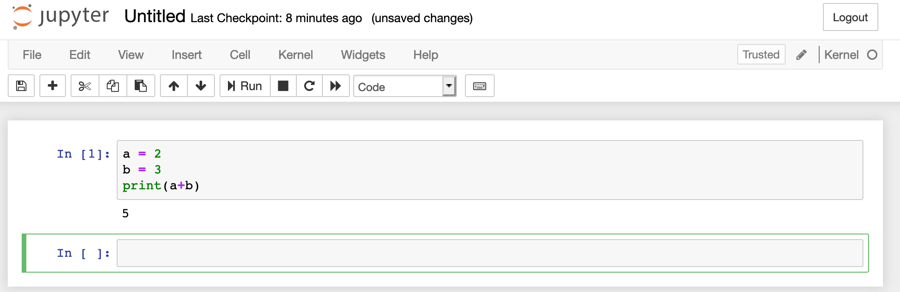
- The Jupyter Editor displays. The first cell is already in place and uses the kernel (Python3) that was chosen when starting the notebook. Write your Python 3 code in the cell. To run the content of a cell click Play:
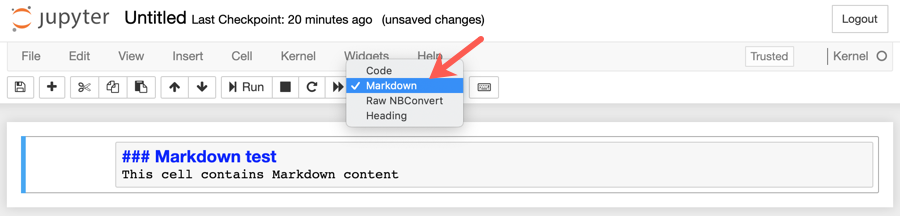
- It is also possible to edit Markdown content in a Cell. To do so, change the status of a cell to Markdown by choosing it from the drop-down menu:
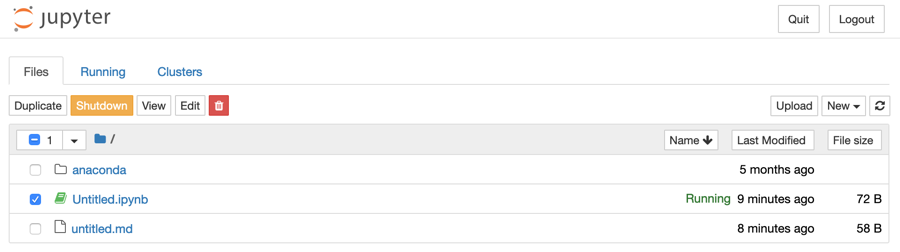
- A running notebook is marked with a green icon. To suspend its execution, tick the corresponding box and click Shutdown:
For more information and advanced configuration of Jupyter Notebook, refer to the official documentation.
Visit our Help Center and find the answers to your most frequent questions.
Visit Help Center