Use Scaleway Managed Redis™ for MySQL caching with Entity Framework
This tutorial demonstrates the integration of a Scaleway Redis™ Instance as a record cache (commonly referred to as a second-level cache) for an application using a Scaleway MySQL Instance through Entity Framework.
Before you start
To complete the actions presented below, you must have:
- A Scaleway account logged into the console
- Owner status or IAM permissions allowing you to perform actions in the intended Organization
- A Redis™ Database Instance
- A MySQL Database Instance
- Installed the .NET 7 SDK
Scaffold a project with Entity Framework
Entity Framework acts as an object-relational mapper for databases, also providing the capability to cache data retrieved from the underlying data store and effectively reducing database-access costs.
The framework includes an integrated first-level cache that stores data for the scope of a single database session. Additionally, this tutorial explores a second-level cache, which functions as a globally shared record cache throughout the application to store recently accessed data.
To initiate a new .NET project, follow these steps using the dotnet CLI:
-
Create an empty project:
dotnet new web -n ScalewayTutorial -
Navigate to your newly created project folder and install dependencies for the data stores:
Pomelo.EntityFrameworkCore.MySqlis the database driver for MySQL in Entity Framework.EFCoreSecondLevelCacheInterceptoris the second-level cache extension for Entity Framework.EasyCaching.Redisis a Redis™ driver for .NET.EasyCaching.Serialization.MessagePack: provides serialization support for EasyCaching.
dotnet add package Pomelo.EntityFrameworkCore.MySql
dotnet add package EFCoreSecondLevelCacheInterceptor
dotnet add package EasyCaching.Redis
dotnet add package EasyCaching.Serialization.MessagePack
Create a database schema
Begin by creating a database schema. For this tutorial, you can use the default Program.cs file to define your configuration.
Create a new class to represent a table:
public class ProductModel
{
    public int Id { get; set; }
    public string Name { get; set; }
    public decimal Price { get; set; }
}
Set up the database context
To establish a connection between Entity Framework and your table model, create the following class representing the database context:
public class ProductDatabase : DbContext
{
    public ProductDatabase(DbContextOptions<ProductDatabase> options)
        : base(options)
    { }
    public DbSet<ProductModel> Products => Set<ProductModel>();
}
These components define both the structure of your database schema and how Entity Framework interacts with it through the specified ProductModel class.
Configure the MySQL database
Follow these steps to configure your MySQL database with Entity Framework:
-
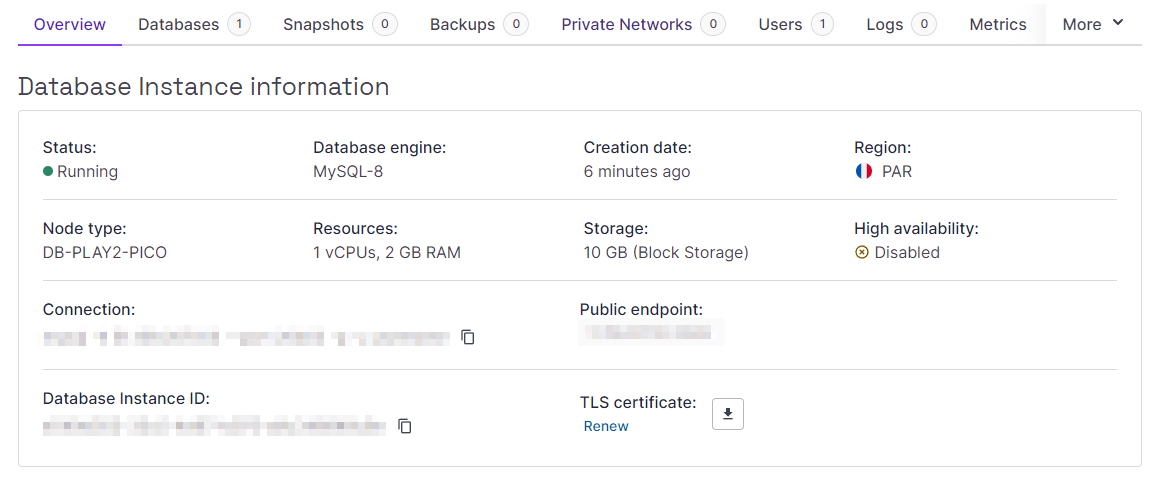
Get the public IP and port of your Database Instance. You can locate this information on the Database Instance Information page of your Instance in the Scaleway console, under Public endpoint.
-
Create a new user for your database, granting administrative rights from the Users page. Alternatively, use the default user.

-
Generate a connection string for your database using the provided information:
server=<IP address>;port=<Port>;user id=<Username>;password=<Password>;database=products -
During the application startup, establish the connection between Entity Framework and your Scaleway MySQL Instance. Begin by clearing the content of
Program.cs, then insert the following snippet:var builder = WebApplication.CreateBuilder(args); builder.Services.AddDbContext<ProductDatabase>( (sp, options) => var connectionString = "<your connection string>"; { options.UseMySql(connectionString, ServerVersion.AutoDetect(connectionString)) .AddInterceptors(sp.GetRequiredService<SecondLevelCacheInterceptor>()); } );
Configure the Redis™ cache
Follow these steps to configure your Redis™ cache with Entity Framework:
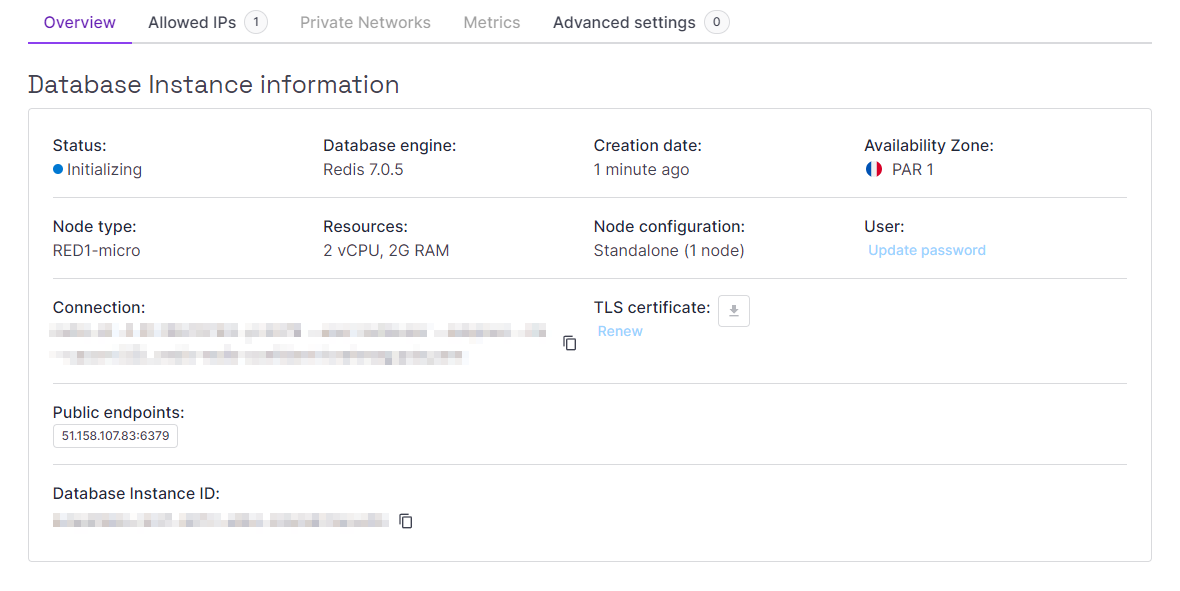
- Get the public IP, port, and username for your Redis™ Instance. Locate this information on the Database Instance Information page of your Instance in the Scaleway console, under Public endpoints.
-
Download the TLS certificate using the toggle icon button and store it in your project folder.
-
Generate a connection string using the provided information:
<IP address>:<Port>,user=<Username>,password=<Password>,ssl=True -
During application startup, configure the EasyCaching library to connect to your Redis™ Database Instance, and configure it as the second-level cache for Entity Framework. Insert this snippet at the end of
Program.cs:builder.Services.AddEasyCaching(options => { options.WithMessagePack("redis-messagepack"); options.UseRedis(config => { config.SerializerName = "redis-messagepack"; config.DBConfig.ConfigurationOptions = ConfigurationOptions.Parse("<your connection string>"); var scalewayCert = new X509Certificate2("<your TLS certificate filename>", ""); config.DBConfig.ConfigurationOptions.CertificateValidation += (_, _, chain, _) => chain.ChainElements.Any(x => x.Certificate.Thumbprint == scalewayCert.Thumbprint); }, "scaleway-redis"); }); builder.Services.AddEFSecondLevelCache(options => options.UseEasyCachingCoreProvider("scaleway-redis"));
Create the app
Your application is now fully configured to use the Redis™ Database Instance as a second-level cache for the Scaleway MySQL Instance. To test the setup, create a couple of API endpoints.
-
Define endpoints to interact with your Product database model for listing, retrieving, and adding
ProductModels. Add the following snippet at the end of Program.cs:var app = builder.Build(); app.MapGet("/product", (ProductDatabase db) => db.Products.Cacheable().ToList()); app.MapPost("/product", (ProductModel p, ProductDatabase db) => { db.Products.Add(p); db.SaveChanges(); }); app.MapGet("/product/{id}", (int id, ProductDatabase db) => { return db.Products.Cacheable().FirstOrDefault(p => p.Id == id); }); -
Scaffold the database at launch. Insert the following snippet at the end of
Program.cs:using (var serviceScope = app.Services.CreateScope()) { var context = serviceScope.ServiceProvider.GetRequiredService<ProductDatabase>(); context.Database.Migrate(); } app.Run(); -
Start the application. In your project folder, execute the following commands:
dotnet build
dotnet run
The last command will display the local URL to access the web application and test your API endpoints.
Visit our Help Center and find the answers to your most frequent questions.
Visit Help Center