Installing and configuring Foreman on Ubuntu Jammy Jellyfish (22.04 LTS)
Foreman is a tool that helps system administrators manage servers throughout their lifecycle, from provisioning and configuration to orchestration and monitoring. In short, it is a complete lifecycle management tool for physical and virtual servers. Foreman, available as open source software, becomes even more powerful when integrated with other open source projects such as Puppet, Chef, Salt, and Ansible.
Foreman helps to automatize the OS installation. After that, through its integration with Puppet, the new system will be configured to the desired state. Finally, Puppet will send facts about the system to Foreman which helps to monitor the whole system over its complete lifecycle. With a discovery plugin, Foreman can also discover new machines in the network based on their MAC address.
This tutorial assumes that Foreman is being installed on a fresh Instance, which will also act as the Puppet primary server.
Before you start
To complete the actions presented below, you must have:
-
A Scaleway account logged into the console
-
Owner status or IAM permissions allowing you to perform actions in the intended Organization
-
An SSH key
-
An Instance running on Ubuntu Jammy Jellyfish (22.04 LTS) or later
-
Root access to all the servers you want to manage
-
A reachable port 8140 on the Puppet primary Instance
-
A working Puppet installation to perform the configuration management of hosts
Creating your Foreman server
The installation tool is a collection of Puppet modules that install everything required for a full working Foreman setup.
The Foreman installer uses Puppet (> 3.x required) to install the software.
- Connect to the Instance using SSH:
ssh root@SERVER_IP
To retrieve the Instance's IP, list your existing servers using scw ps (Scaleway CLI). For more information on the Scaleway CLI, refer to the tutorial on the Scaleway Command Line Interface.
The Instance's IP can also be retrieved from the Scaleway console. Once logged in, check the IP addresses in the CPU & GPU Instances tab of the left menu. 2. Check your Instance's full hostname to ensure the hostname is set to a valid FQDN.
hostnameYou should see the complete hostname of your Instance (e.g. foreman.example.com). If this is the case, skip the remaining steps and jump directly to the next section.
3. (Optional) In case a short name is returned (e.g. foreman), configure the complete hostname. To do so, edit the hosts file in a text editor:
sudo nano /etc/hosts- (Optional) Add the FQDN before the short hostname.
foreman.example.com foreman - Save and exit nano.
- Edit the hostname file:
sudo nano /etc/hostname - Change the entry in the file to the Instances FQDN, e.g.
foreman.example.com. Then save and exit the editor. - Run the following command to reconfigure the Instance's hostname according to the changes made in the previous steps:
sudo hostname --file /etc/hostname
Installing Foreman on Ubuntu Focal
The fastest way to install Foreman is by using the installer, which installs and configures automatically all the required components to run Foreman, these include:
- Foreman
- Puppet primary/agent
- The Apache Web Server with SSL and Passenger modules
-
Install Puppet 6.x from the Puppetlabs repository as follows:
apt-get -y install ca-certificates wget https://apt.puppetlabs.com/puppet8-release-focal.deb sudo dpkg -i puppet8-release-focal.deb apt-get update apt-get -y install puppet-agent -
Add the Foreman repository to the APT package manager sources list:
echo "deb http://deb.theforeman.org/ focal 3.12" | sudo tee /etc/apt/sources.list.d/foreman.list echo "deb http://deb.theforeman.org/ plugins 3.12" | sudo tee -a /etc/apt/sources.list.d/foreman.list wget -q https://deb.theforeman.org/pubkey.gpg -O- | sudo apt-key add - -
Download the installer via APT:
sudo apt-get update && sudo apt-get -y install foreman-installer -
Run the Foreman Installer by typing the following command:
foreman-installerUpon completion, you will see:
Success!
* Foreman is running at https://<your_foreman_url>
  Initial credentials: admin / <random_password>
* Puppet server is running at port 8140
Managing Puppet
During installation, the installation wizard sets up a puppet primary on the host, which is fully integrated with Foreman. Run the Puppet agent on the Instance to send the first Puppet report to Foreman, This creates the host automatically in Foreman's database.
-
Install
puppet-agentwith the following command:apt-get install puppet-agent -
Add the host to Foreman's database by running the puppet agent command:
sudo puppet agent --testThis adds the local Foreman host as the first Puppet agent node, managed by Foreman.
The Foreman web interface
The web interface of Foreman can be accessed on the public IP address of your Instance. By default, Foreman uses Puppets self-signed certificates, which are probably not trusted by your browser. Accept the notification about the certificate and proceed.
You can log in to Foreman using the credentials that were returned once it was installed.
- Username: admin
- Password: random

Foreman dashboard
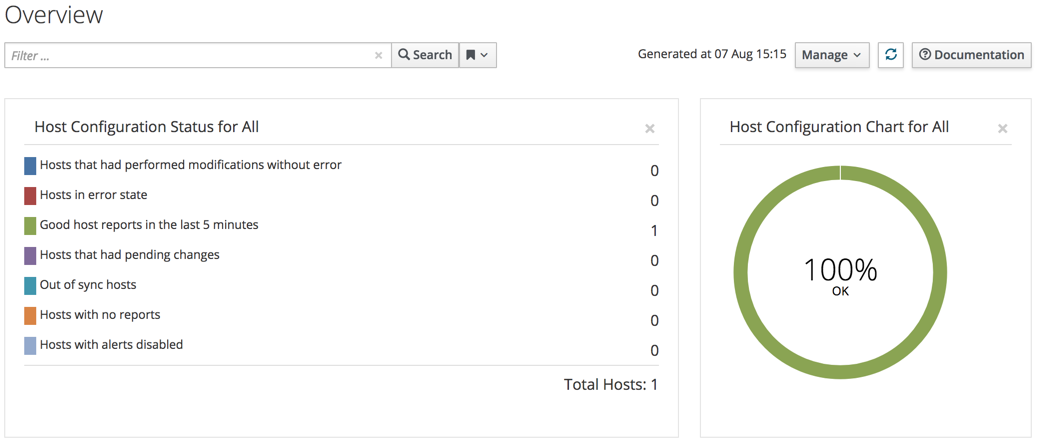
After login, the Foreman dashboard displays an overview of your Puppet environment.
A summary of "Host Configuration Status" displays the amount of Puppet agent nodes and their statuses. Upon first connection, one single Instance should be visible in the "good host" section.
Changing the admin password
Before doing anything else, change the admin user password for security reasons.
- Go to Admin User and select My Account.
- In the User section, fill in the current password and set a new password in the password and verify tabs.
- Click Submit.
Adding NTP module to Foreman
Puppet requires accurate time-keeping, therefore the NTP service runs on the Foreman host (which acts also as Puppet primary).
-
Install NTP and Stdlib on the Puppet primary:
puppet module install -i /etc/puppet/environments/production/modules puppetlabs/ntpThe command returns
Notice: Created target directory /etc/puppet/environments/production/modules
Notice: Downloading from https://forgeapi.puppet.com ...
Notice: Installing -- do not interrupt ...
/etc/puppet/environments/production/modules
└─┬ puppetlabs-ntp (v7.2.0)
  └── puppetlabs-stdlib (v4.25.1)
The module requires to be added to Foreman before being usable.
-
When connected to the Foreman web UI, click Configure> Puppet> Classes:
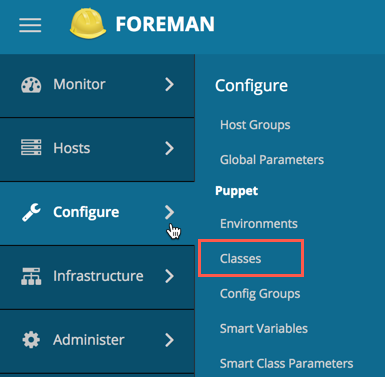
-
Click the
Import environments from foreman.example.combutton.
This imports the environment and displays the Changed environments panel.
-
Tick the NTP checkbox next to the item and click Update to import the NTP module.

Overriding default NTP pool
Update the settings and configure the NTP module to use the French NTP pool by default.
- In the Puppet Classes screen, click ntp class to edit it.
- Click the Smart Class Parameter tab.
- Scroll down to find the servers item in the left sidebar, and select it.
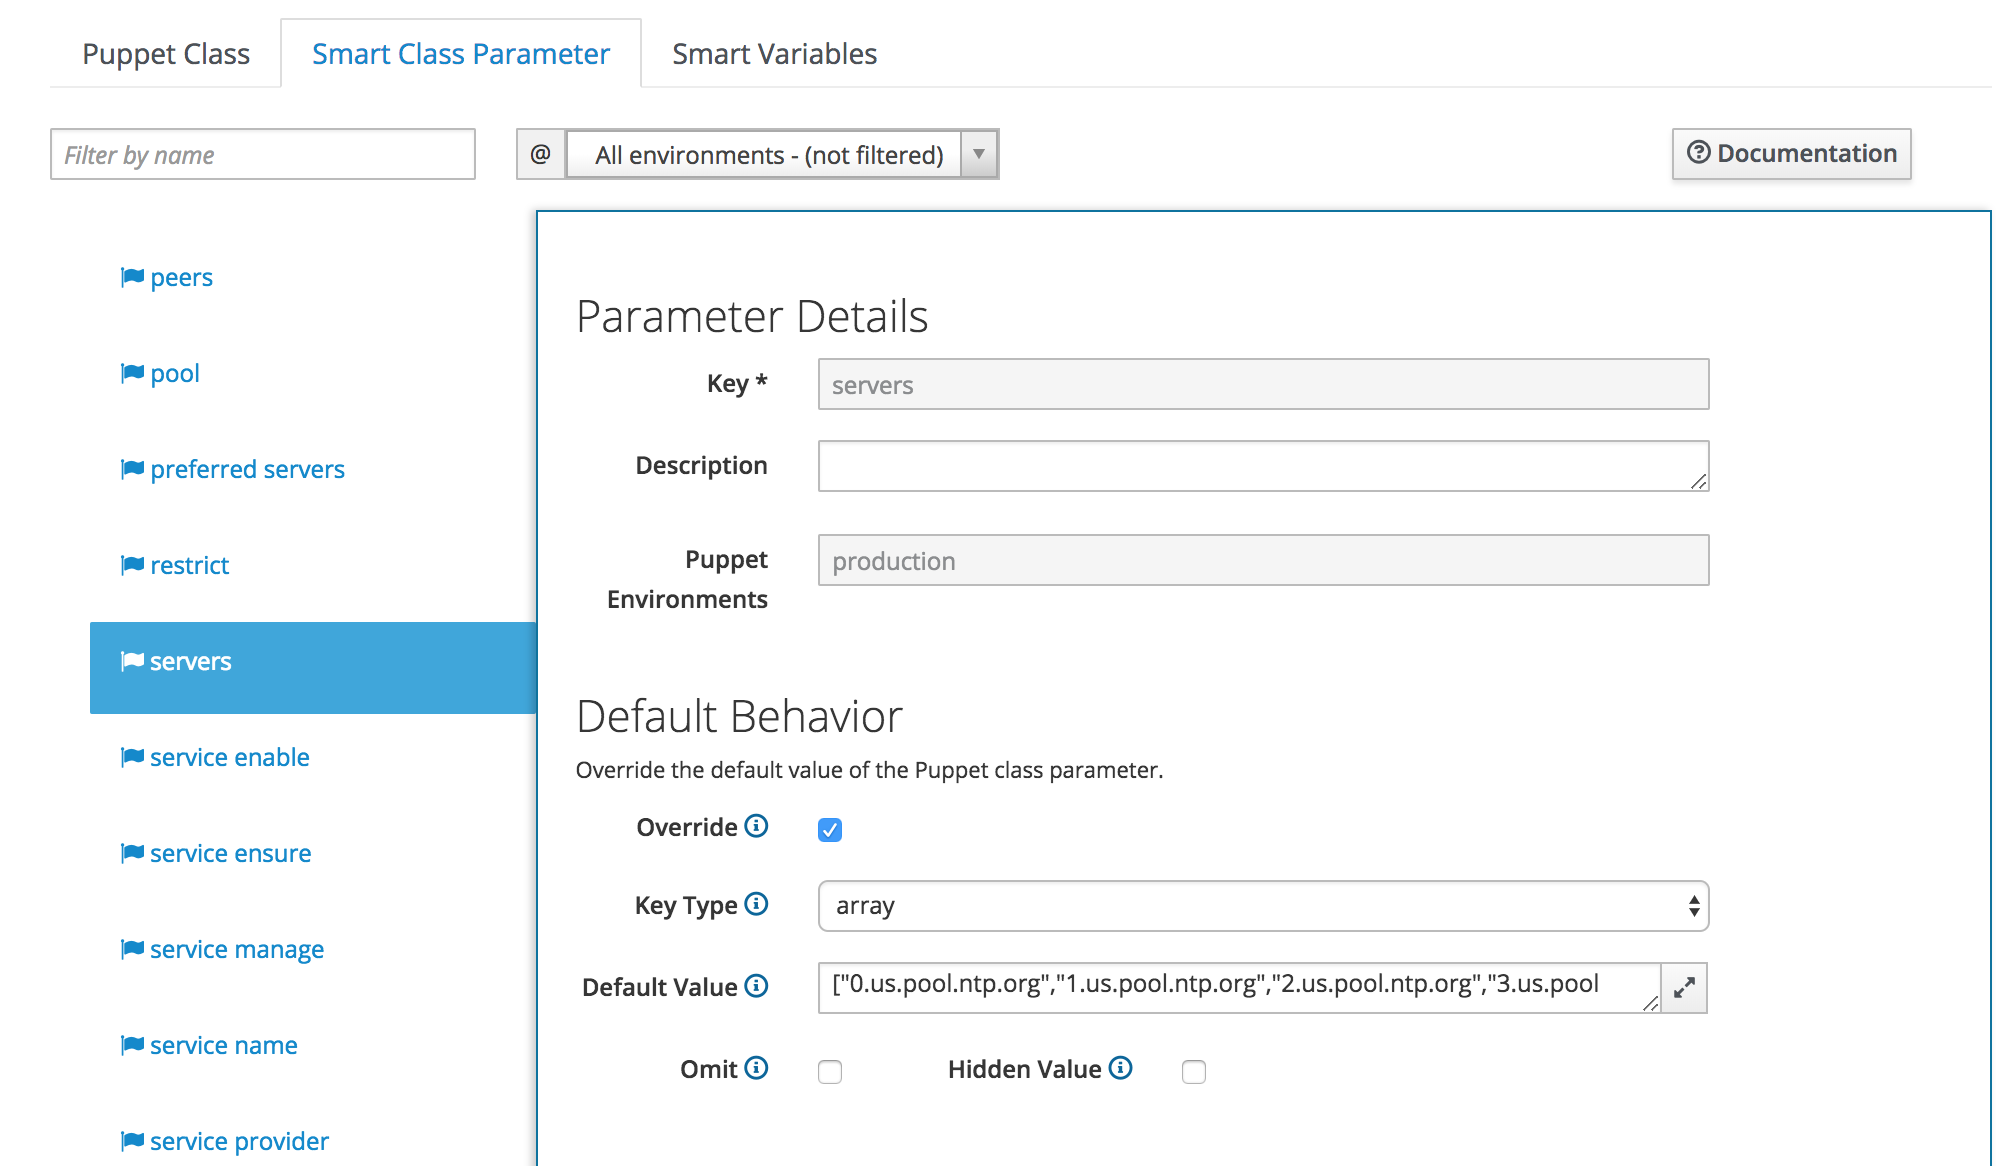
- Tick the Override checkbox. In the Parameter type menu, choose array and change the Default value from the default NTP pool to the desired one:
["0.fr.pool.ntp.org","1.fr.pool.ntp.org","2.fr.pool.ntp.org","3.fr.pool.ntp.org"] - Click Submit to update the configuration and to use the French NTP pool as default.
Configuring Foreman host to use NTP module
Configure the NTP module to manage NTP on the Foreman host.
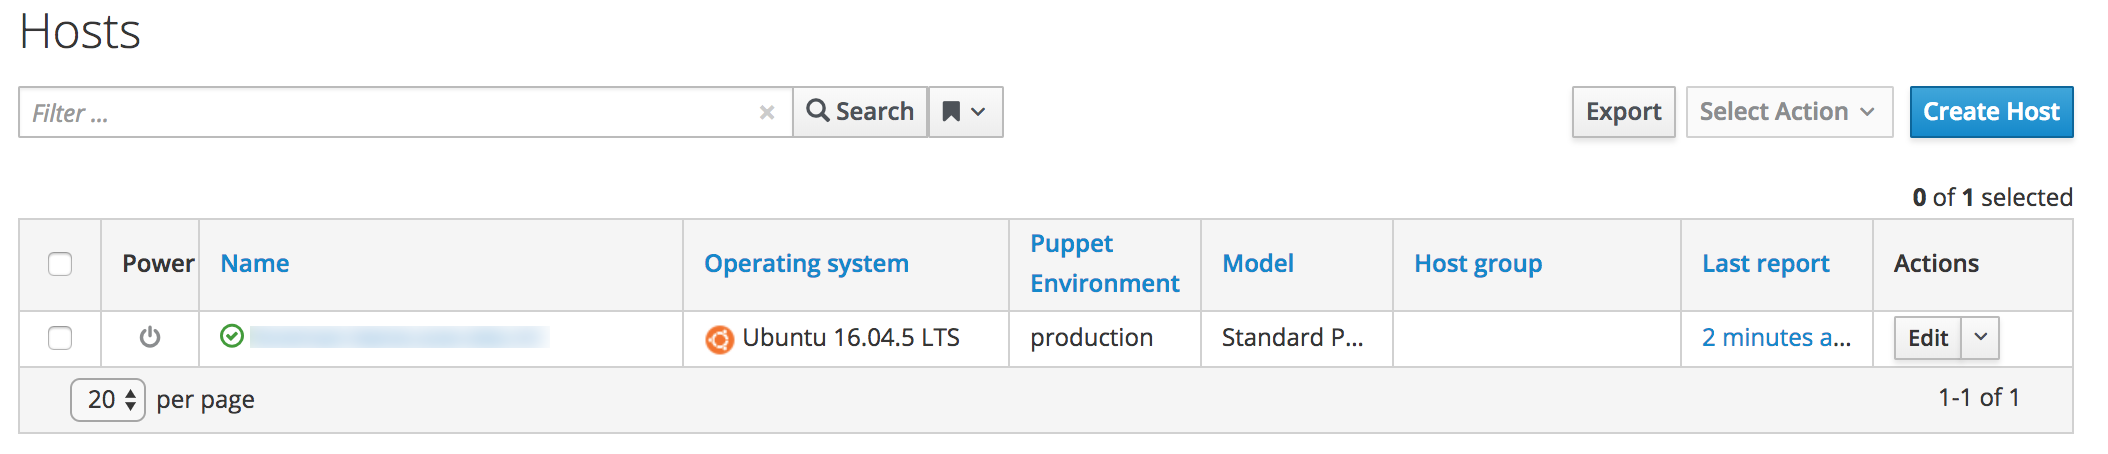
-
Click Hosts on the side menu and select All hosts.
-
Click Edit on the far right of your Foreman host.
-
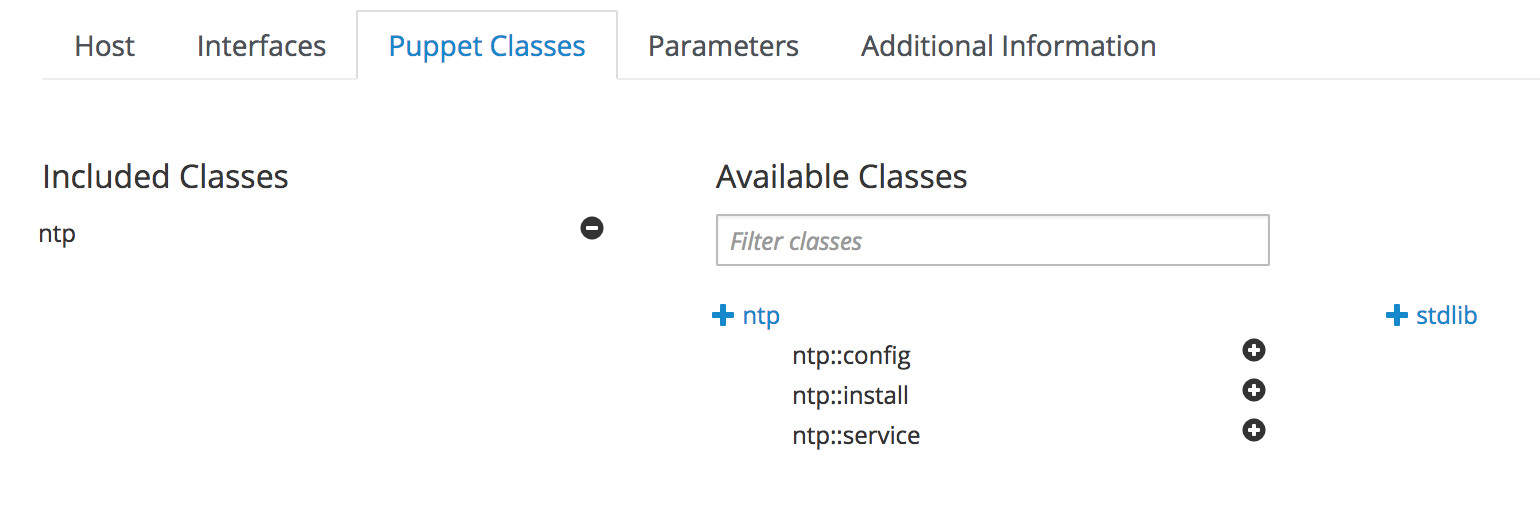
Click the Puppet Classes tab. Within the Available Classes section, click the ntp class, then click the plus sign next to "ntp":
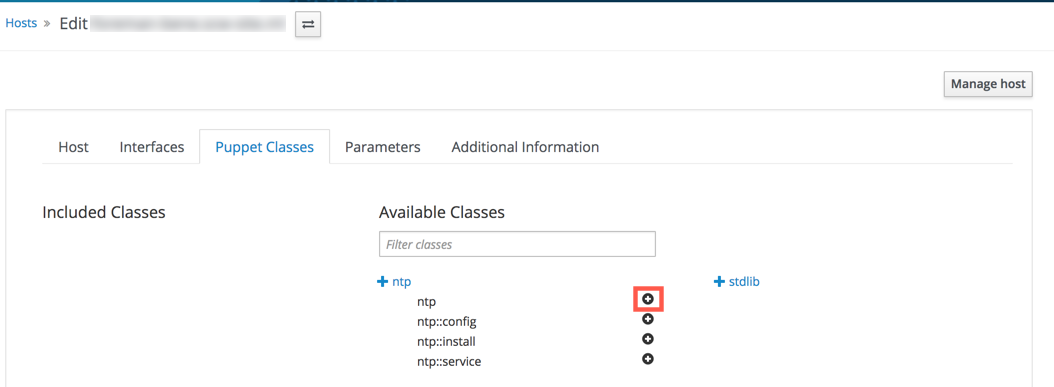
The NTP class is being moved to the Included Classes section. The next time the Puppet agent checks in, it will have this module applied to it.
-
Click Submit to activate the configuration.
Viewing Puppet configuration
After editing Foreman host's configuration, a redirection to Foreman host's summary page applies.
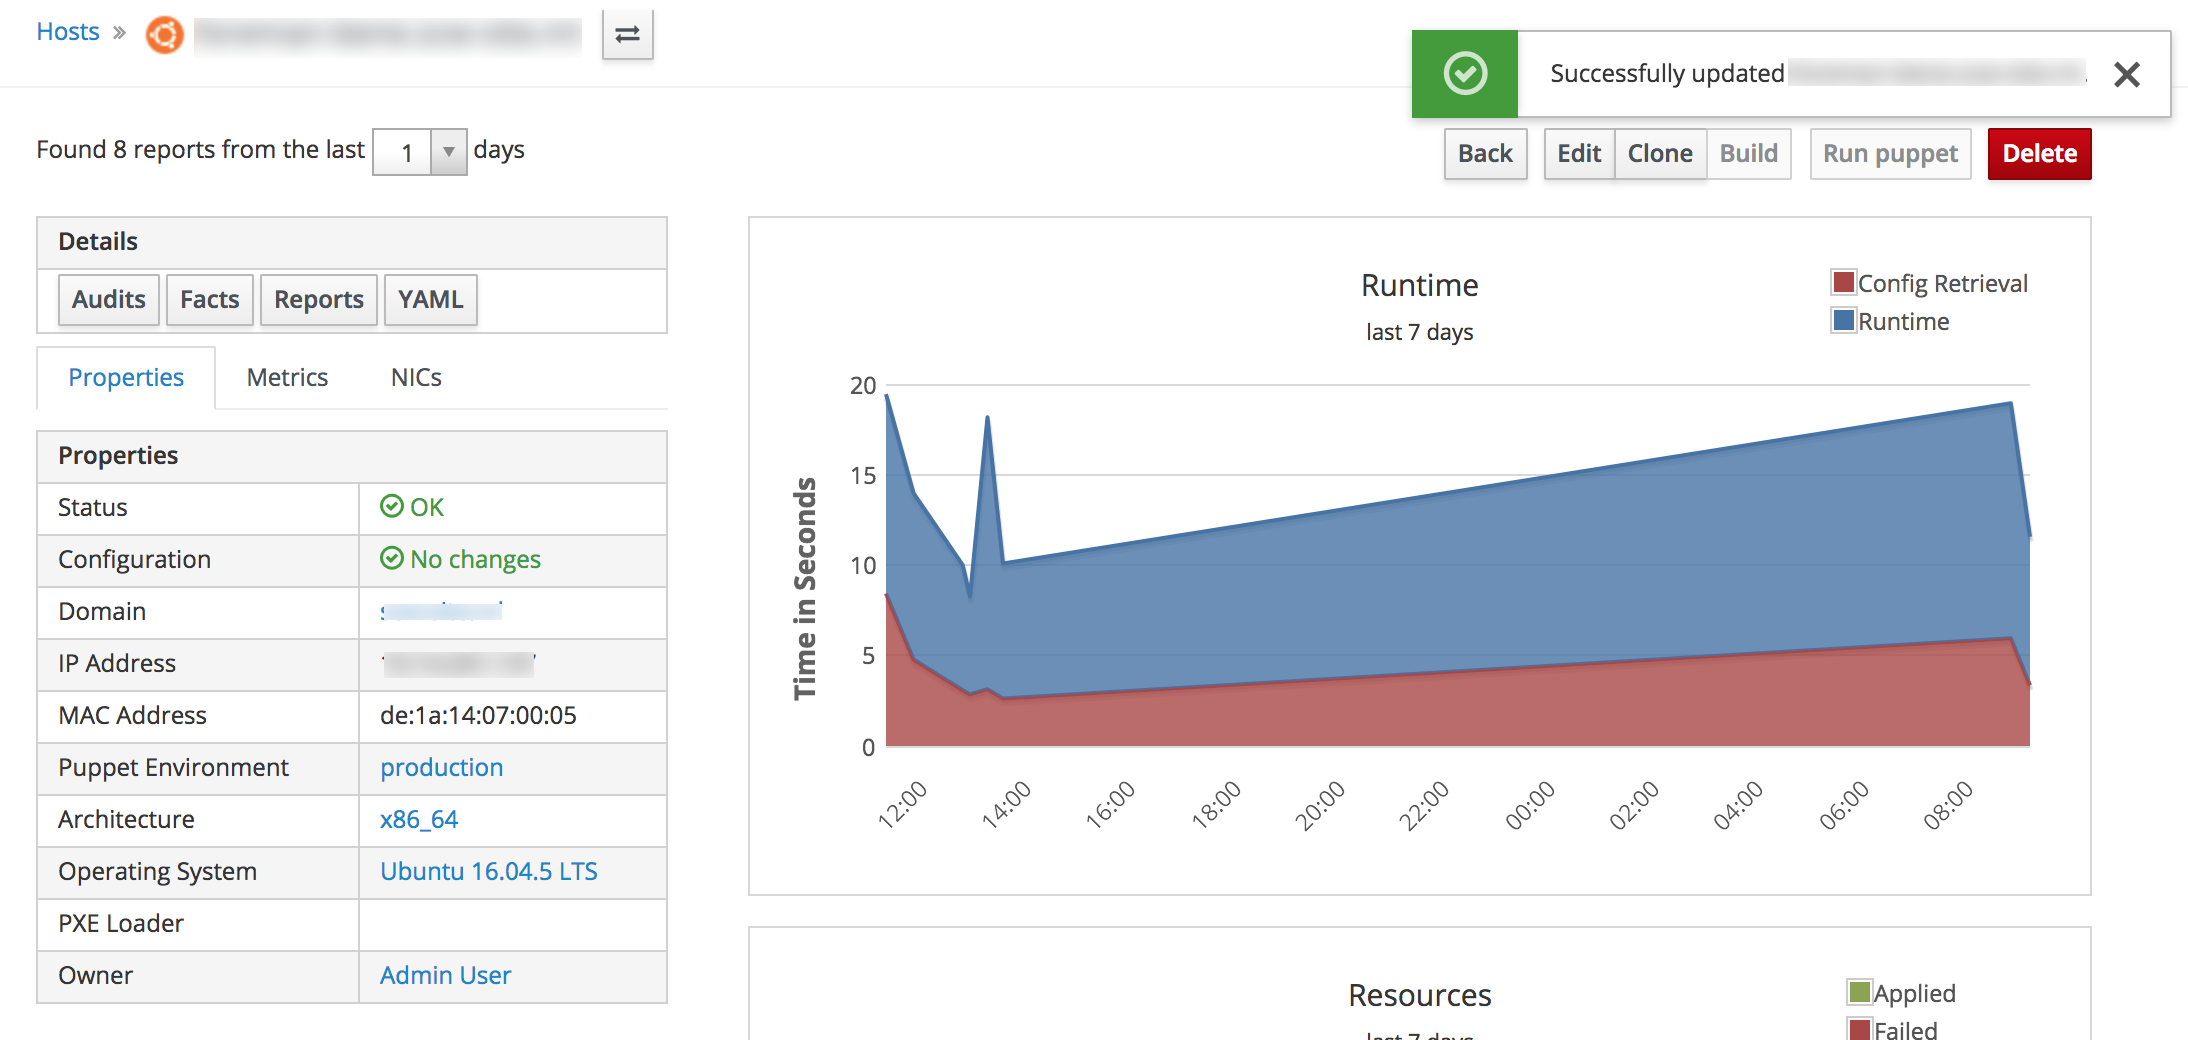
Click the YAML button, to see the information provided to Puppet when an agent node checks in.
Running the Puppet agent
Run the Puppet agent on the Foreman Instance to apply all the changes that were made above.
sudo puppet agent --testThe command returns the following output:
root@foreman:~# puppet agent --test
Info: Using configured environment 'production'
Info: Retrieving pluginfacts
Info: Retrieving plugin
Info: Retrieving locales
Notice: /File[/opt/puppetlabs/puppet/cache/locales/ja/puppetlabs-ntp.po]/ensure: defined content as '{md5}7265ff57e178feb7a65835f7cf271e2c'
Info: Loading facts
Info: Caching catalog for foreman.example.com
Info: Applying configuration version '1533720851'
Notice: Applied catalog in 0.42 seconds
In the web UI, go back to the Foreman host and click the Reports button.
A new report entry indicates that some changes were applied, and a service was restarted. Click the report. Several notices indicate that the NTP service was installed, configured, and restarted.
Visit our Help Center and find the answers to your most frequent questions.
Visit Help Center