Deploying the Zammad ticketing solution
Zammad is an open-source helpdesk system that allows you to oversee customer interactions across various communication channels, encompassing telephone, Facebook, Twitter, chat, and emails. Notably, the software is entirely open-source and distributed under the GNU AFFERO General Public License version 3 (GNU AGPLv3).
This tutorial will guide you through the process of installing Zammad on a Scaleway Instance operating on Ubuntu 20.04 LTS (Focal Fossa). Furthermore, you will receive a brief orientation of the application.
Before you start
To complete the actions presented below, you must have:
- A Scaleway account logged into the console
- Owner status or IAM permissions allowing you to perform actions in the intended Organization
- An SSH key
- An Instance, running on Ubuntu Focal Fossa (20.04 LTS), with at least 4 GB of RAM
- A domain name pointed to your Instance
Installing Elasticsearch
Zammad requires an Elasticsearch database to increase search performance and to support advanced features like reports or searching by email attachment contents. Start by installing the Elasticsearch engine on your Instance.
- Connect to your Instance using SSH.
- Install the Elastic GPG Key to validate the packages.
wget -qO - https://artifacts.elastic.co/GPG-KEY-elasticsearch | gpg --dearmor -o /usr/share/keyrings/elasticsearch-keyring.gpg - Install HTTPS transport to download the packages over a secure connection.
apt install curl apt-transport-https gnupg - Add the Elastic repository to the APT configuration.
echo "deb [signed-by=/usr/share/keyrings/elasticsearch-keyring.gpg] https://artifacts.elastic.co/packages/8.x/apt stable main" | tee /etc/apt/sources.list.d/elastic-8.x.list - Update the
aptpackage manager and install Elasticsearch.apt update && apt install -y elasticsearch - Start
elasticsearchand enable the service:systemctl start elasticsearch.service systemctl enable elasticsearch.service
Installing Zammad
-
Make sure that your system is using a
UTF-8locale, otherwise the PostgreSQL database engine installation may fail. In this tutorial we use the localeen_US.UTF-8:locale-gen en_US.UTF-8 echo "LANG=en_US.UTF-8" > /etc/default/locale -
Install the Zammad GPG key on your system:
curl -fsSL https://dl.packager.io/srv/zammad/zammad/key | \ gpg --dearmor | sudo tee /etc/apt/keyrings/pkgr-zammad.gpg> /dev/null -
Add the Zammad repository to the
aptpackage manager:echo "deb [signed-by=/etc/apt/keyrings/pkgr-zammad.gpg] https://dl.packager.io/srv/deb/zammad/zammad/stable/ubuntu 24.04 main"| \ sudo tee /etc/apt/sources.list.d/zammad.list > /dev/null -
Update the
aptpackage manager to activate the new repository and install Zammad:apt update && apt install zammad -y -
Configure Zammad with Elasticsearch by running the following two commands:
zammad run rails r "Setting.set('es_user', 'elastic')"
zammad run rails r "Setting.set('es_password', '<elastic_password>')"
zammad run rails r "Setting.set('es_url', 'https://localhost:9200')"
zammad run rake searchindex:rebuild
Configuring Nginx
Zammad uses the Nginx web server to serve the application. In the following step, you configure the web server application and request a TLS certificate, issued by the Let's Encrypt certificate authority, to secure the connection between your users and agents using HTTPS. A domain name pointing to the IP address of your Virtual Cloud Instance is required for this step (A-Record).
-
Open the Nginx configuration file, generated by Zammad, in a text editor. In this tutorial, we use
nanoto edit the file:nano /etc/nginx/sites-enabled/zammad.conf -
Look out for the
server {block and replace the server's hostnamelocalhostwith your domain name. In this tutorial, we usezammad.example.com:[...] server { listen 80; # replace 'localhost' with your fqdn if you want to use zammad from remote server_name localhost; [...]Once edited, save the file by pressing
CTRL+O, then leave the editor by pressingCTRL+X. -
Reload the Nginx configuration files to activate the new configuration:
service nginx reload -
Install
certbot, a tool requesting the TLS certificate for the Let's Encrypt CA and doing all the required Nginx configuration for you:apt install certbot python3-certbot-nginx -y -
Run
certbot:certbot --nginxFollow the prompts and provide the requested information to certbot. Certbot will automatically request the certificate and reconfigure Nginx for HTTPS connections. For more information refer to our dedicated documentation.
Setting up Zammad
- Open a web browser and point it to your Zammad installation (in our tutorial:
https://zammad.example.com). - The interactive setup wizard displays. Click Setup new system to start the configuration of the tool.
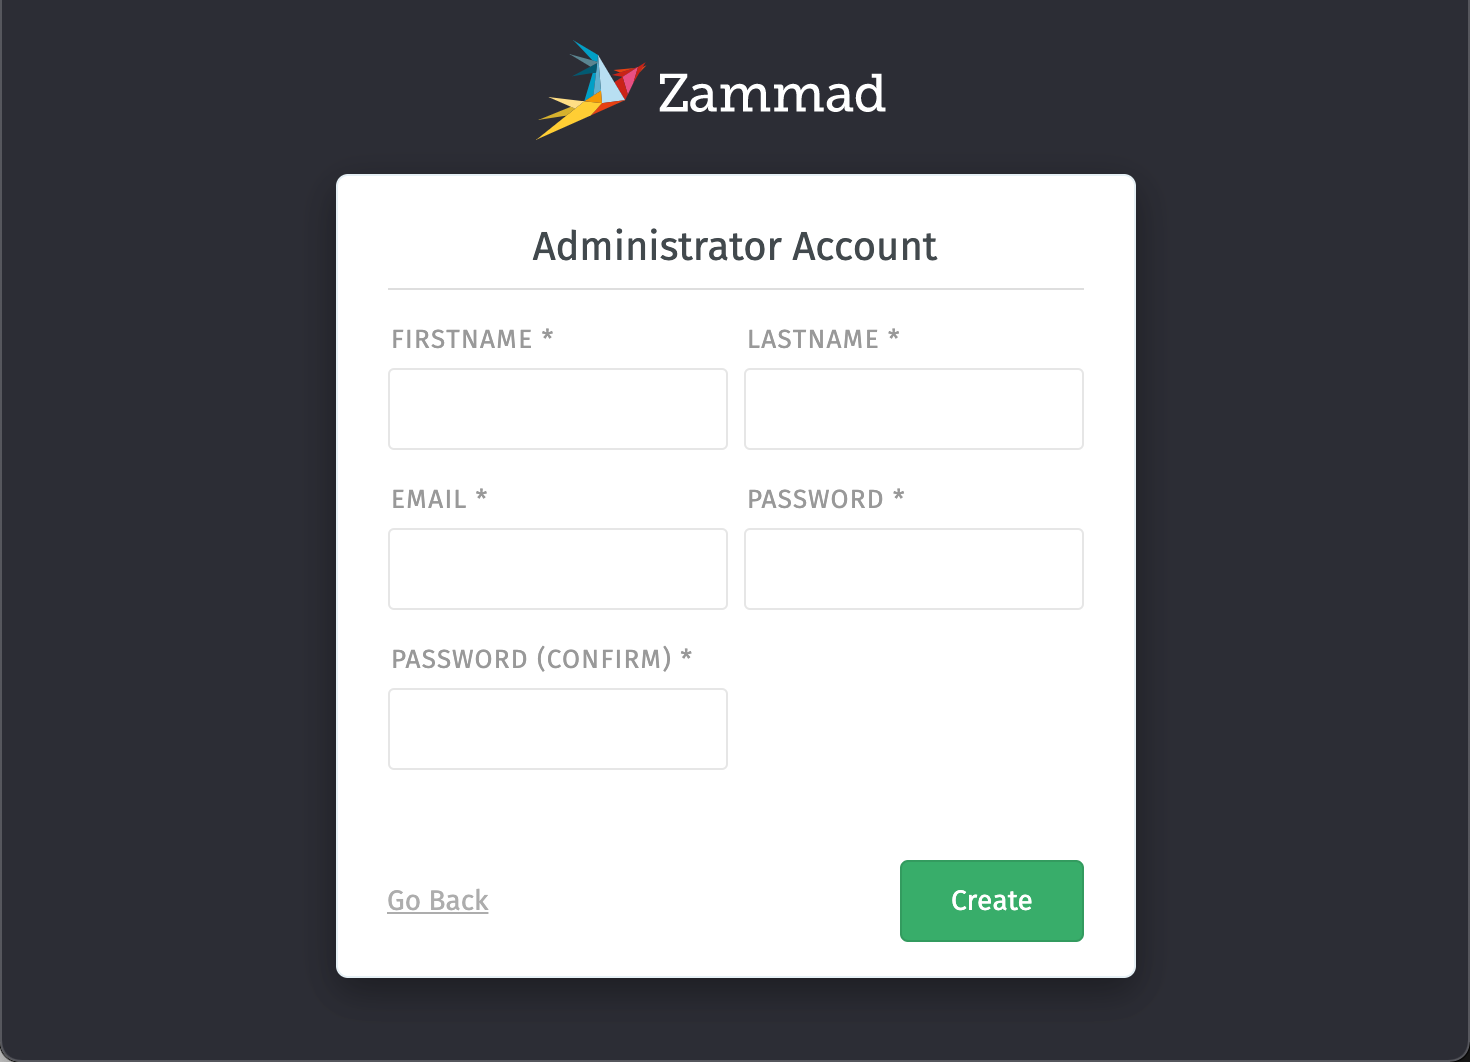
- Enter the required information for the administrator account and validate the form by clicking Create:
- Enter the required information about your organization. You can upload your company logo to customize the installation. Make sure the System URL corresponds with your domain name (
zammad.example.comin our example):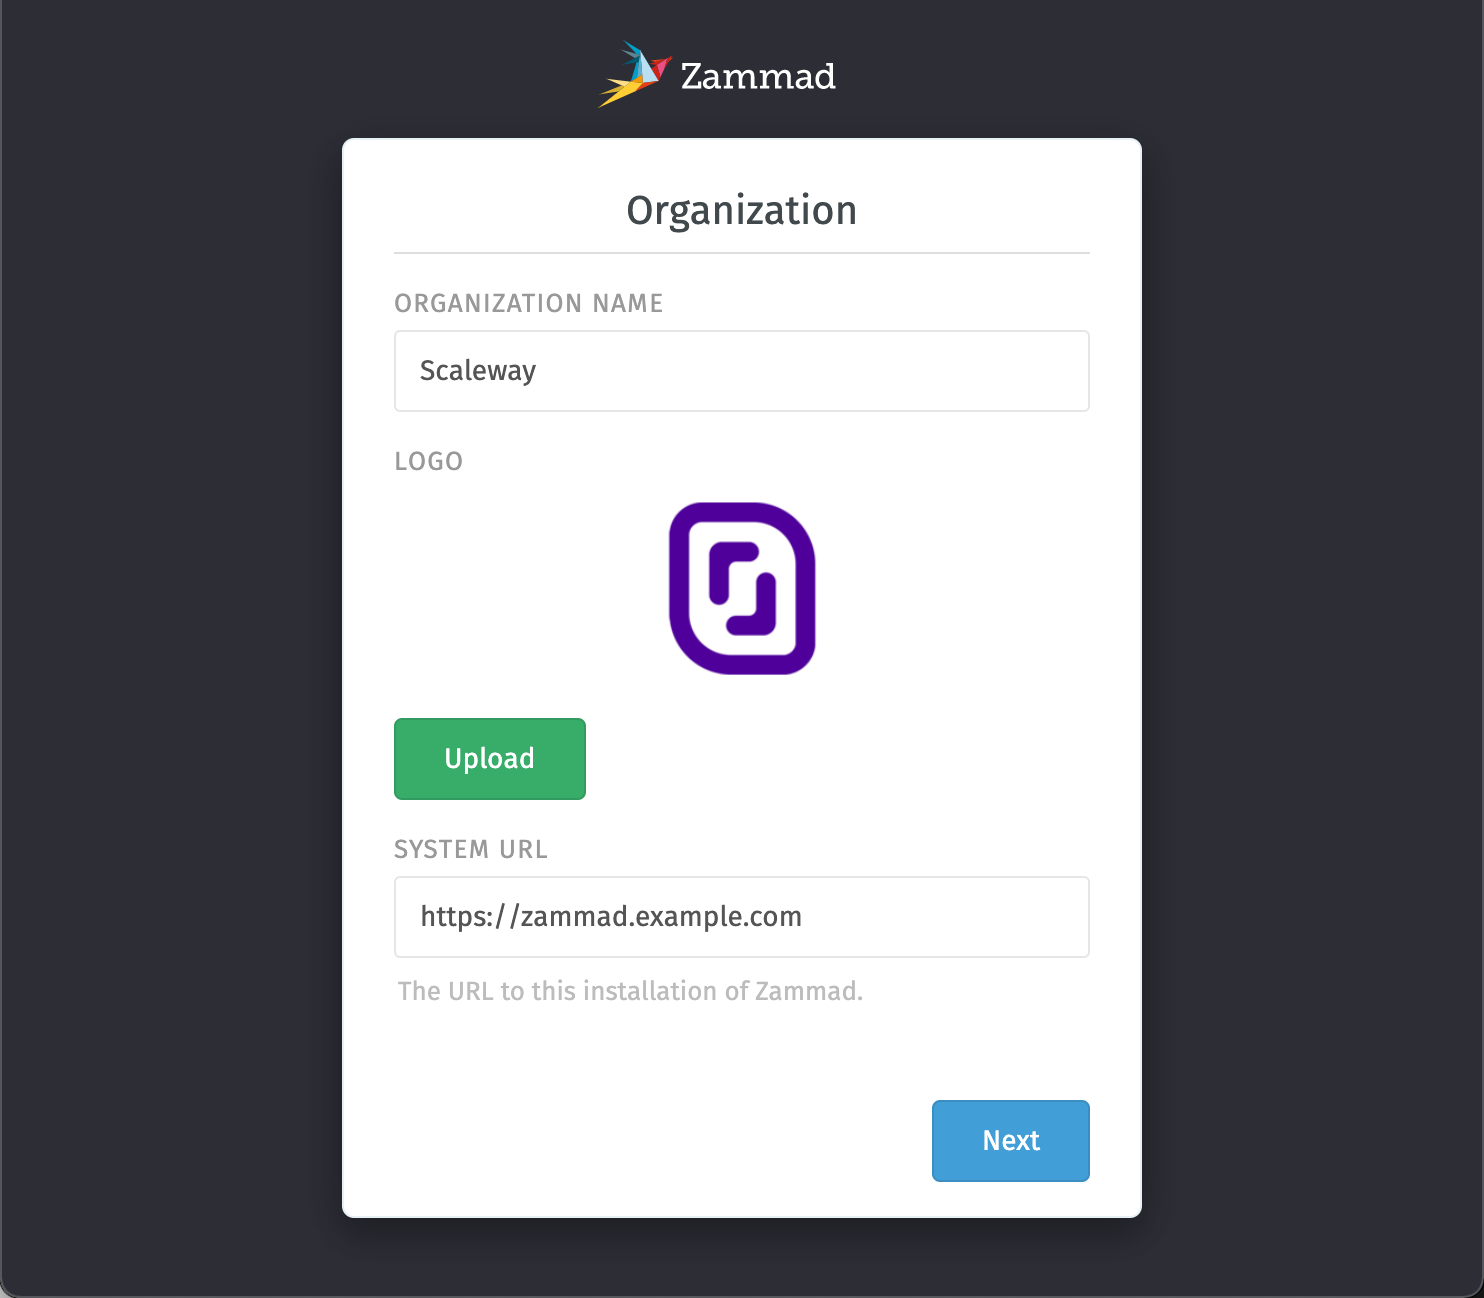
- Choose how you want to deliver your emails. You can either use a local mail server, installed on your Instance or use an external mailing service by using SMTP:
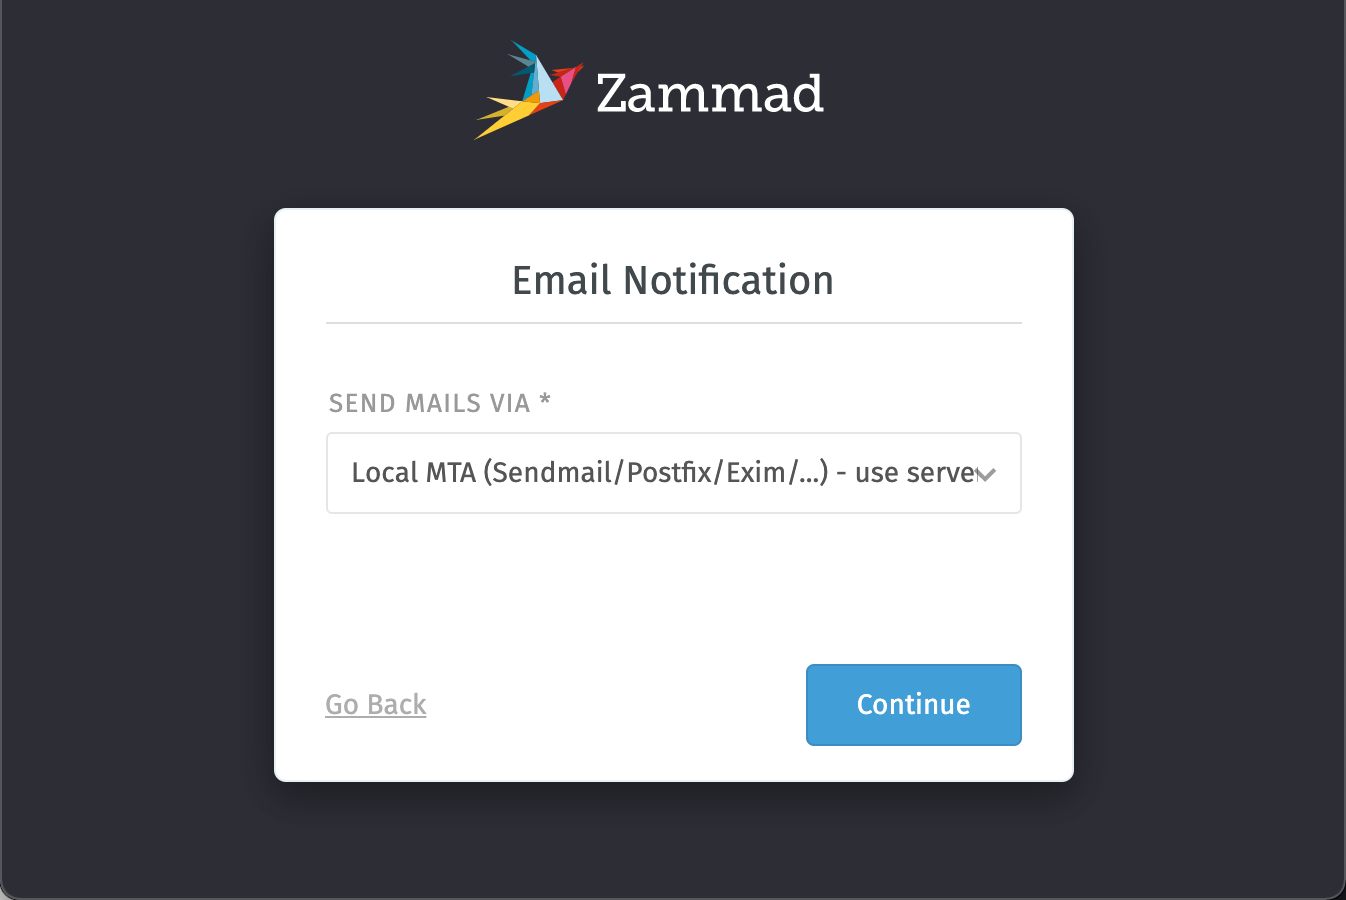
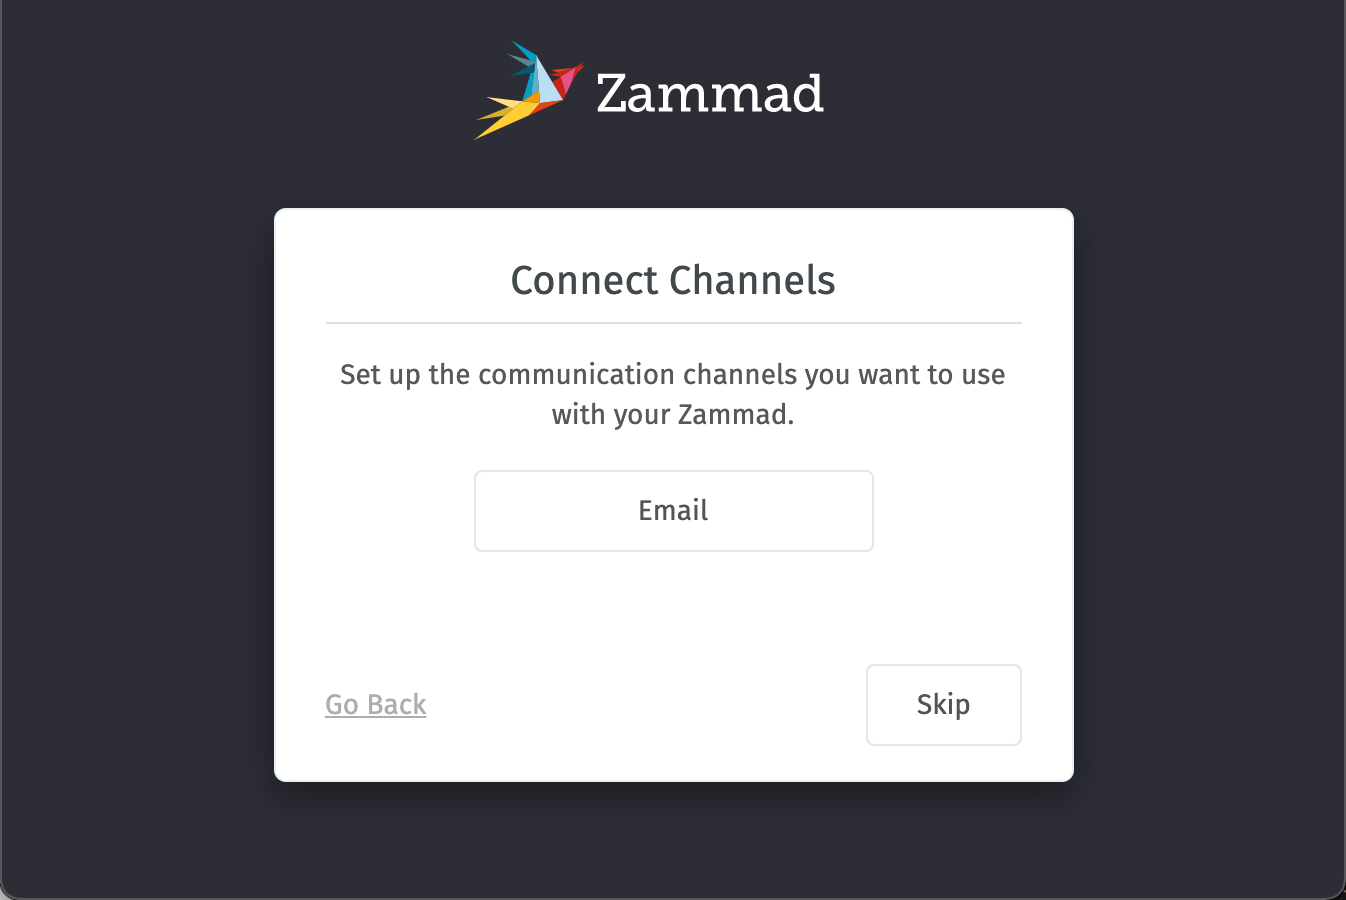
Enter the SMTP details of either the local MTA or the information you received from your messaging service. 6. To configure the email channel, click the Email button and enter the account POP3/IMAP information for your incoming emails.
-
You have completed the basic installation of Zammad. The agent dashboard displays:
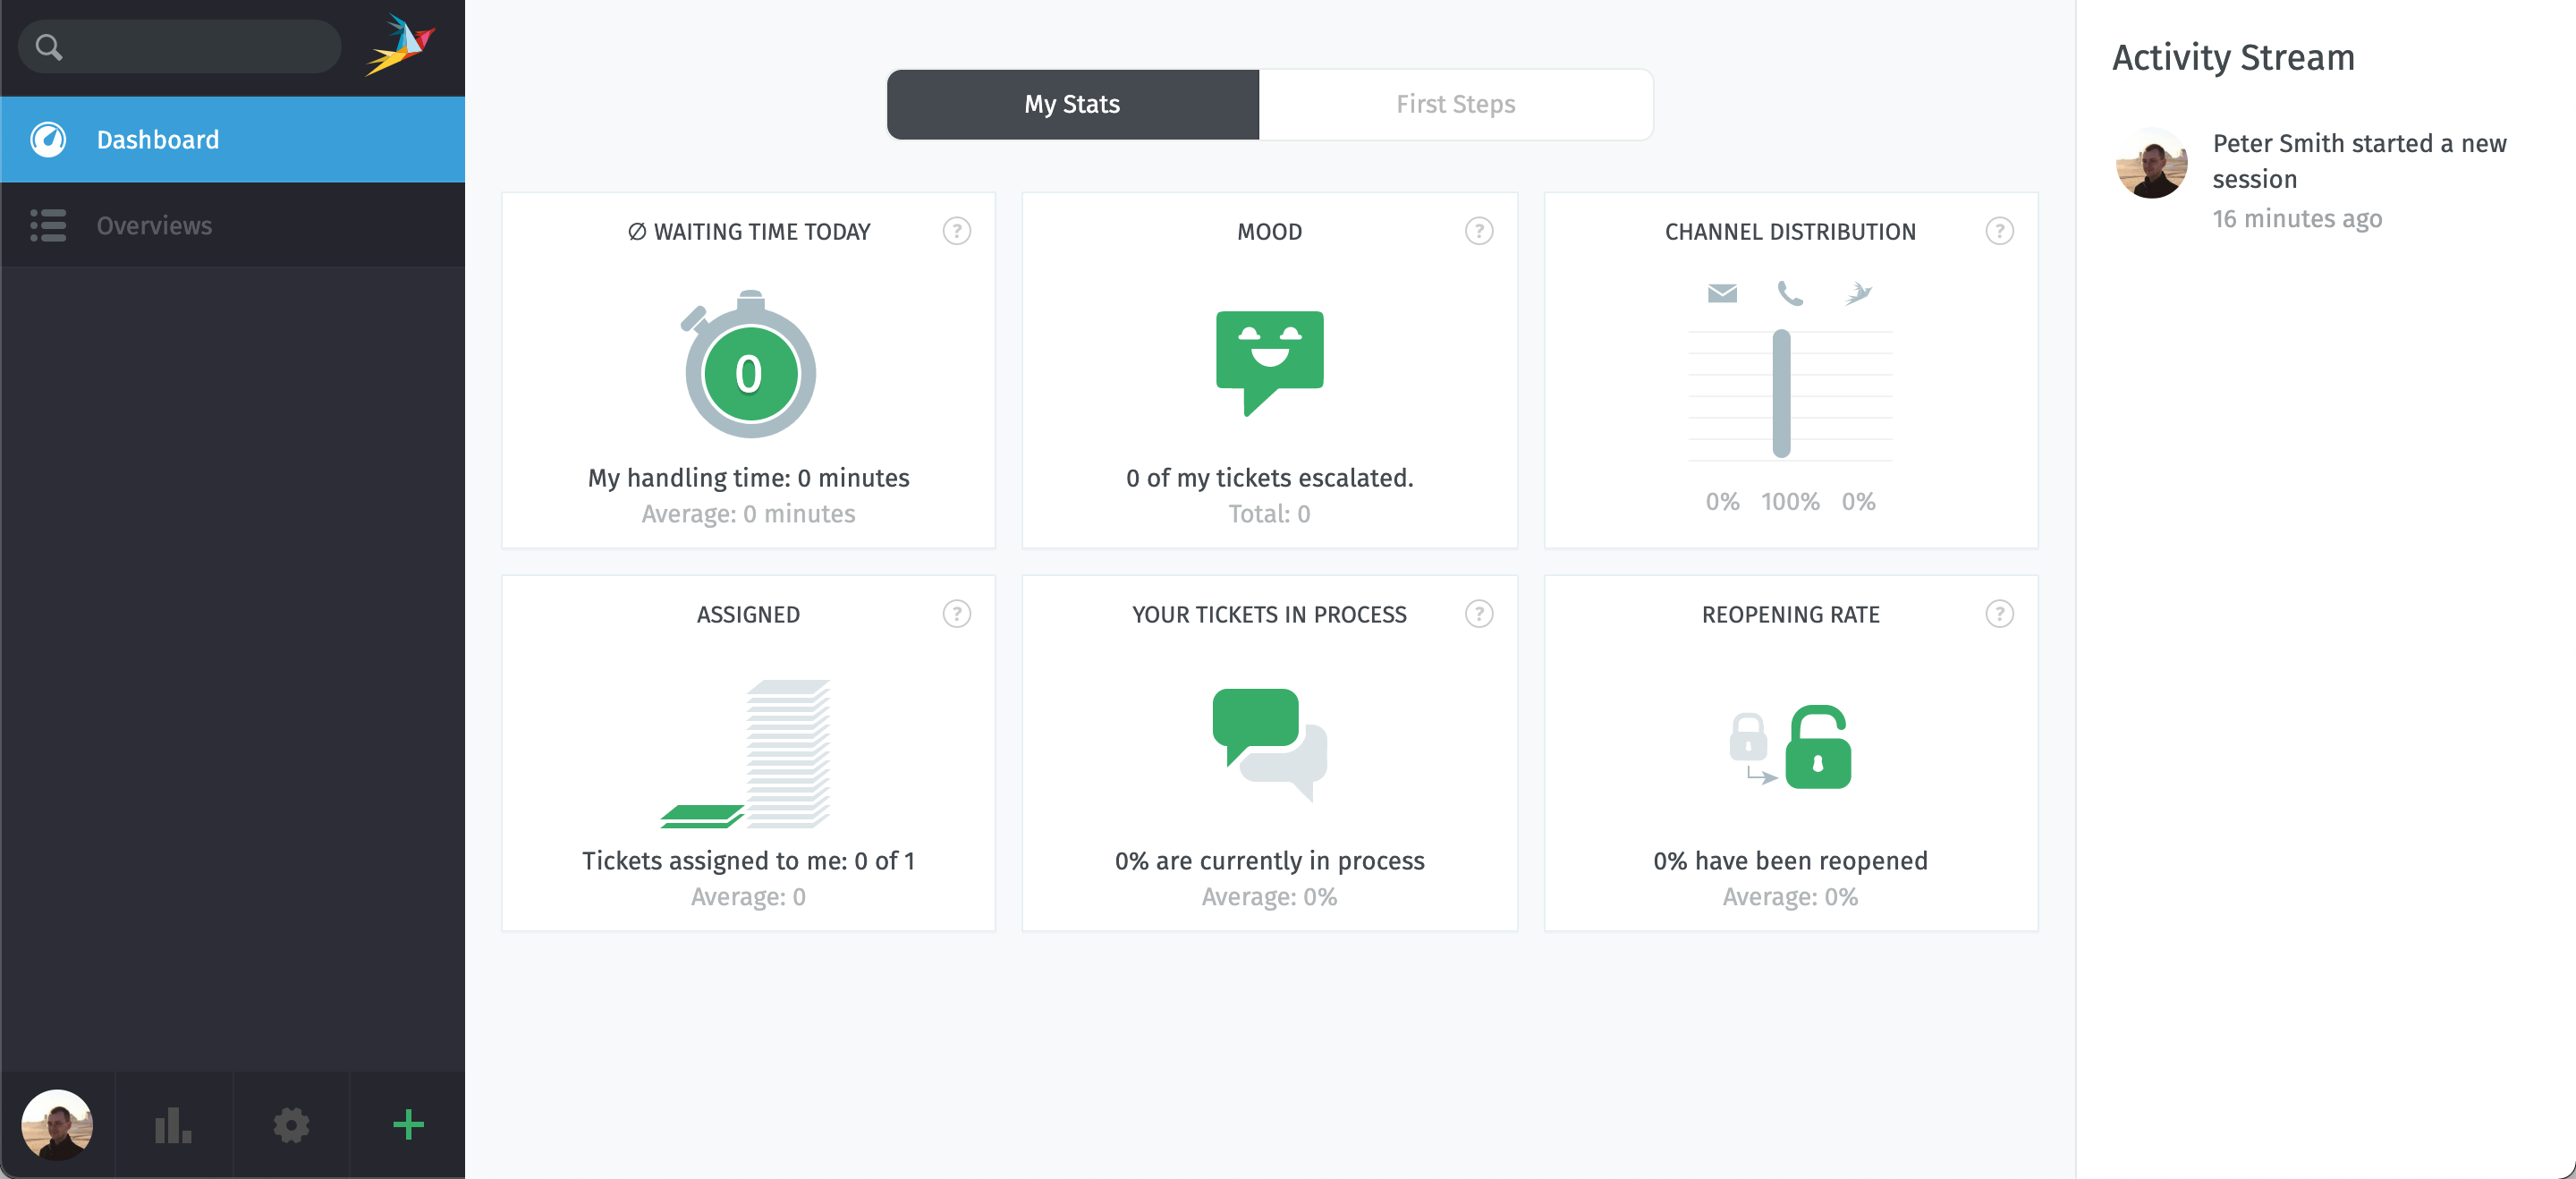
Your users and agents can now communicate efficiently by email and by logging into their helpdesk interface.
Creating additional users
Currently, your Zammad application has only the admin user. In the following step, we create additional accounts for users and agents.
Zammad proposes three default roles for user accounts:
- Customer: Users who create tickets and ask for help.
- Agent: Your agents who deal with the requests made by your customers.
- Admin: Admin accounts have full control over the Zammad Instance and can manage the system.
If required, you can create more detailed roles by adding more and allowing or disallowing features on a more finely granulated level.
- From the Zammad dashboard click the cogwheel icon (1) to enter the management section of the system.
- In the users section (2) of the management panel, click New user (3) to create a new account.
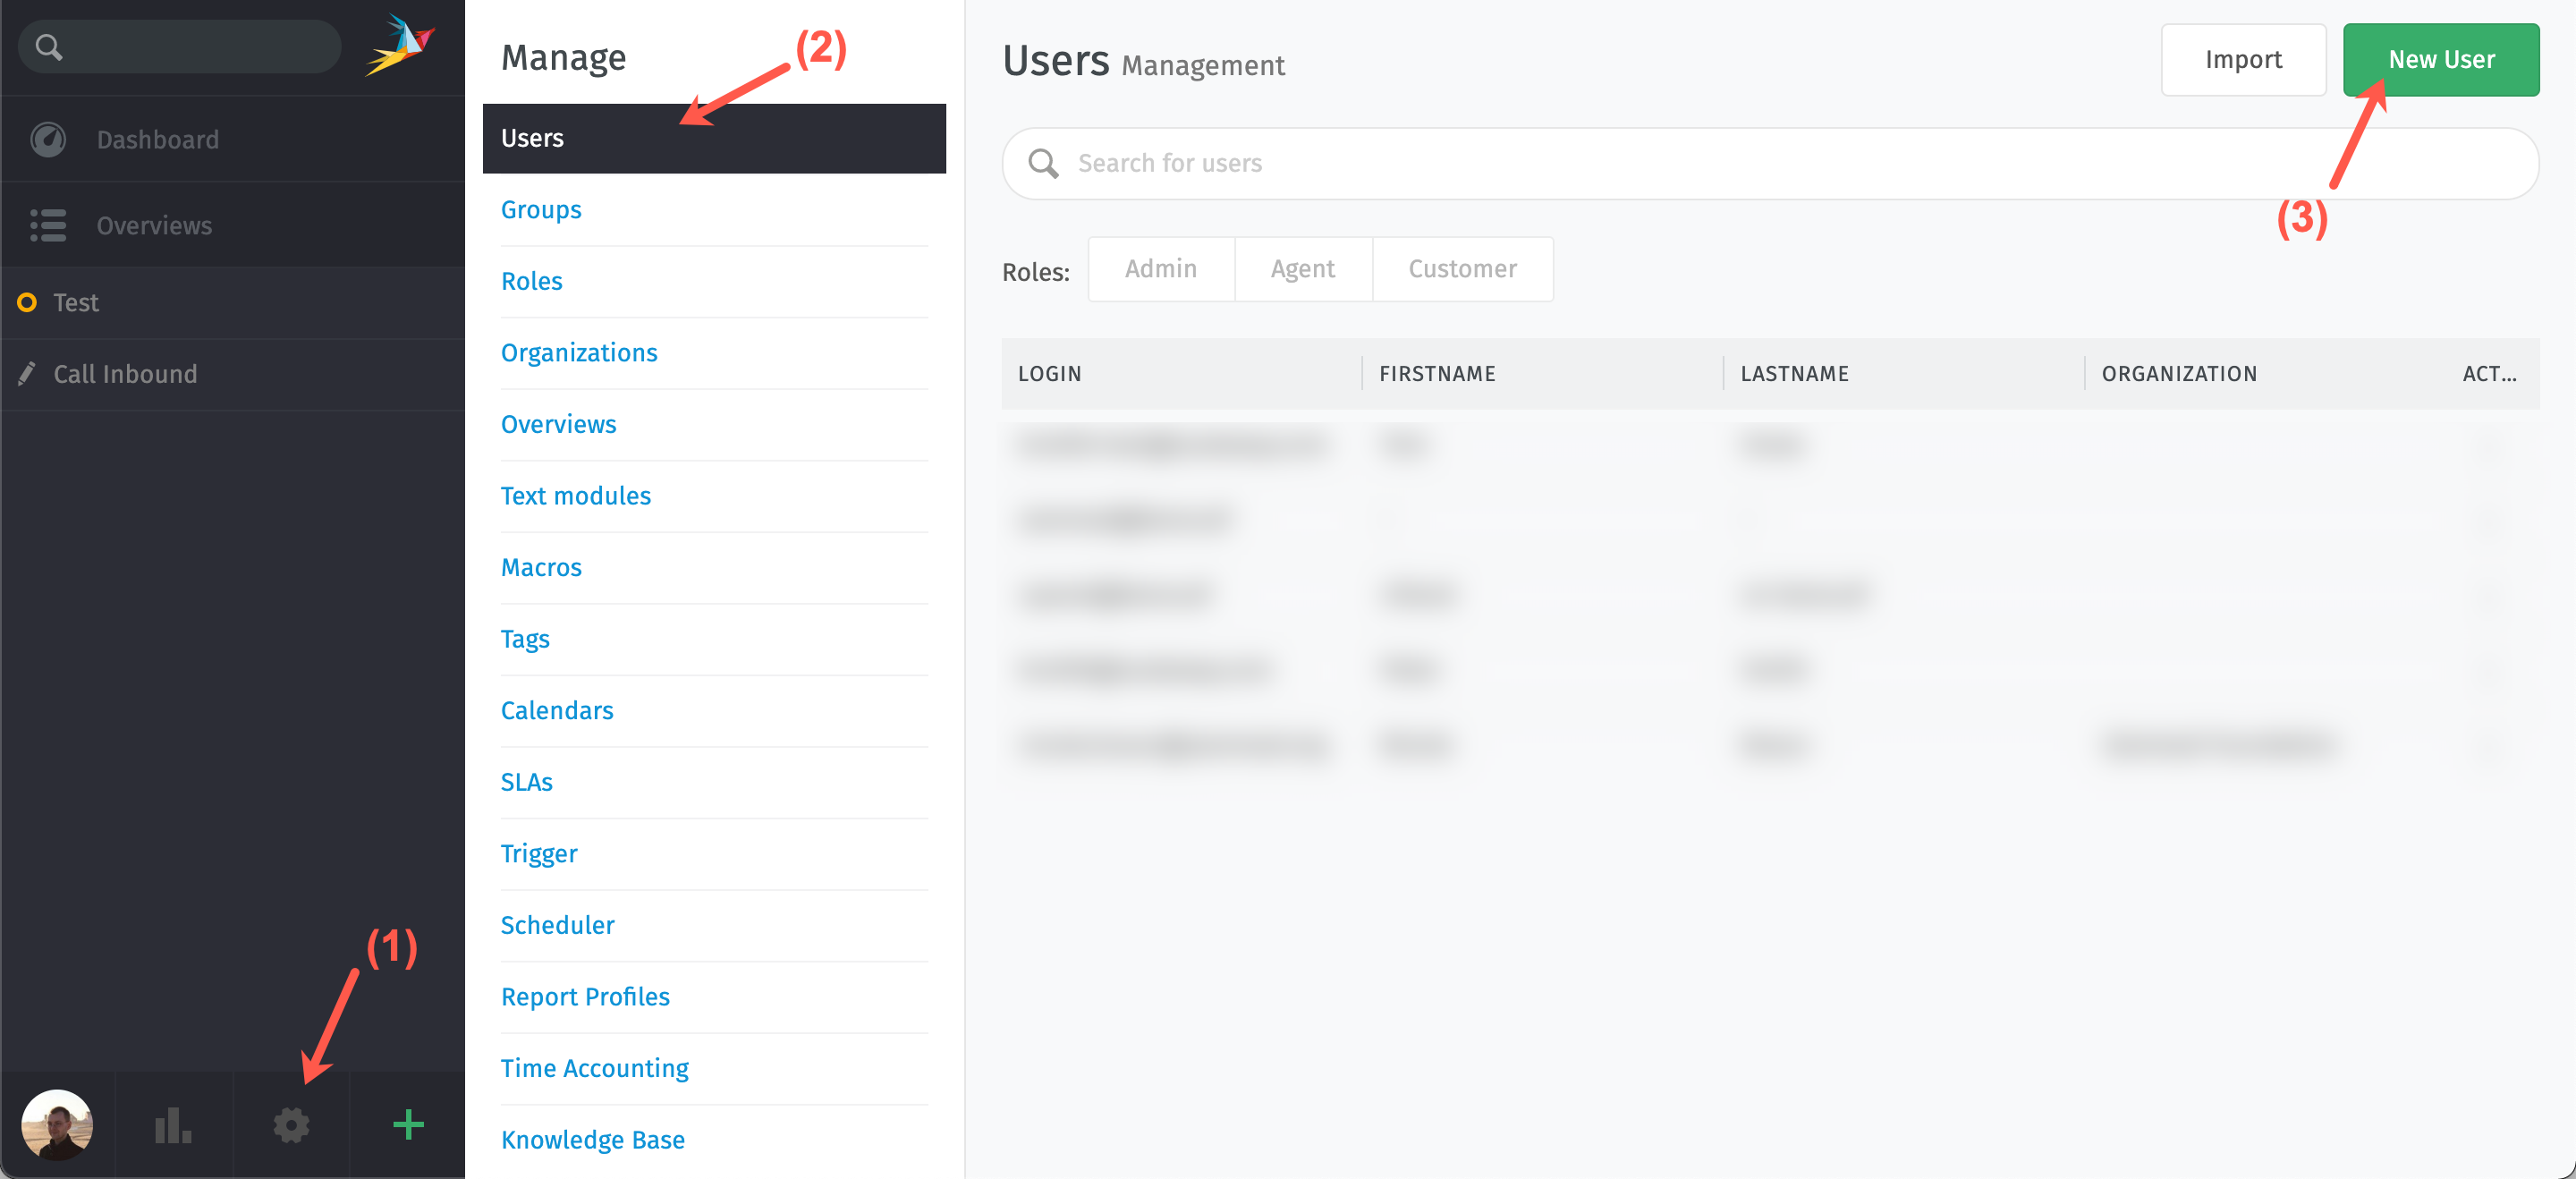
- Enter the account information of the new user and tick the checkbox corresponding to its role on the application. Once all information is provided, click Submit to create the new user account.
Creating additional channels
For now, your Zammad Instance allows you to communicate with your users by e-mail, but the application provides a wide range of connectors to interact with your customers. You can configure modules for:
- Telegram
- Chat
- SMS (via Twilio) And much more.
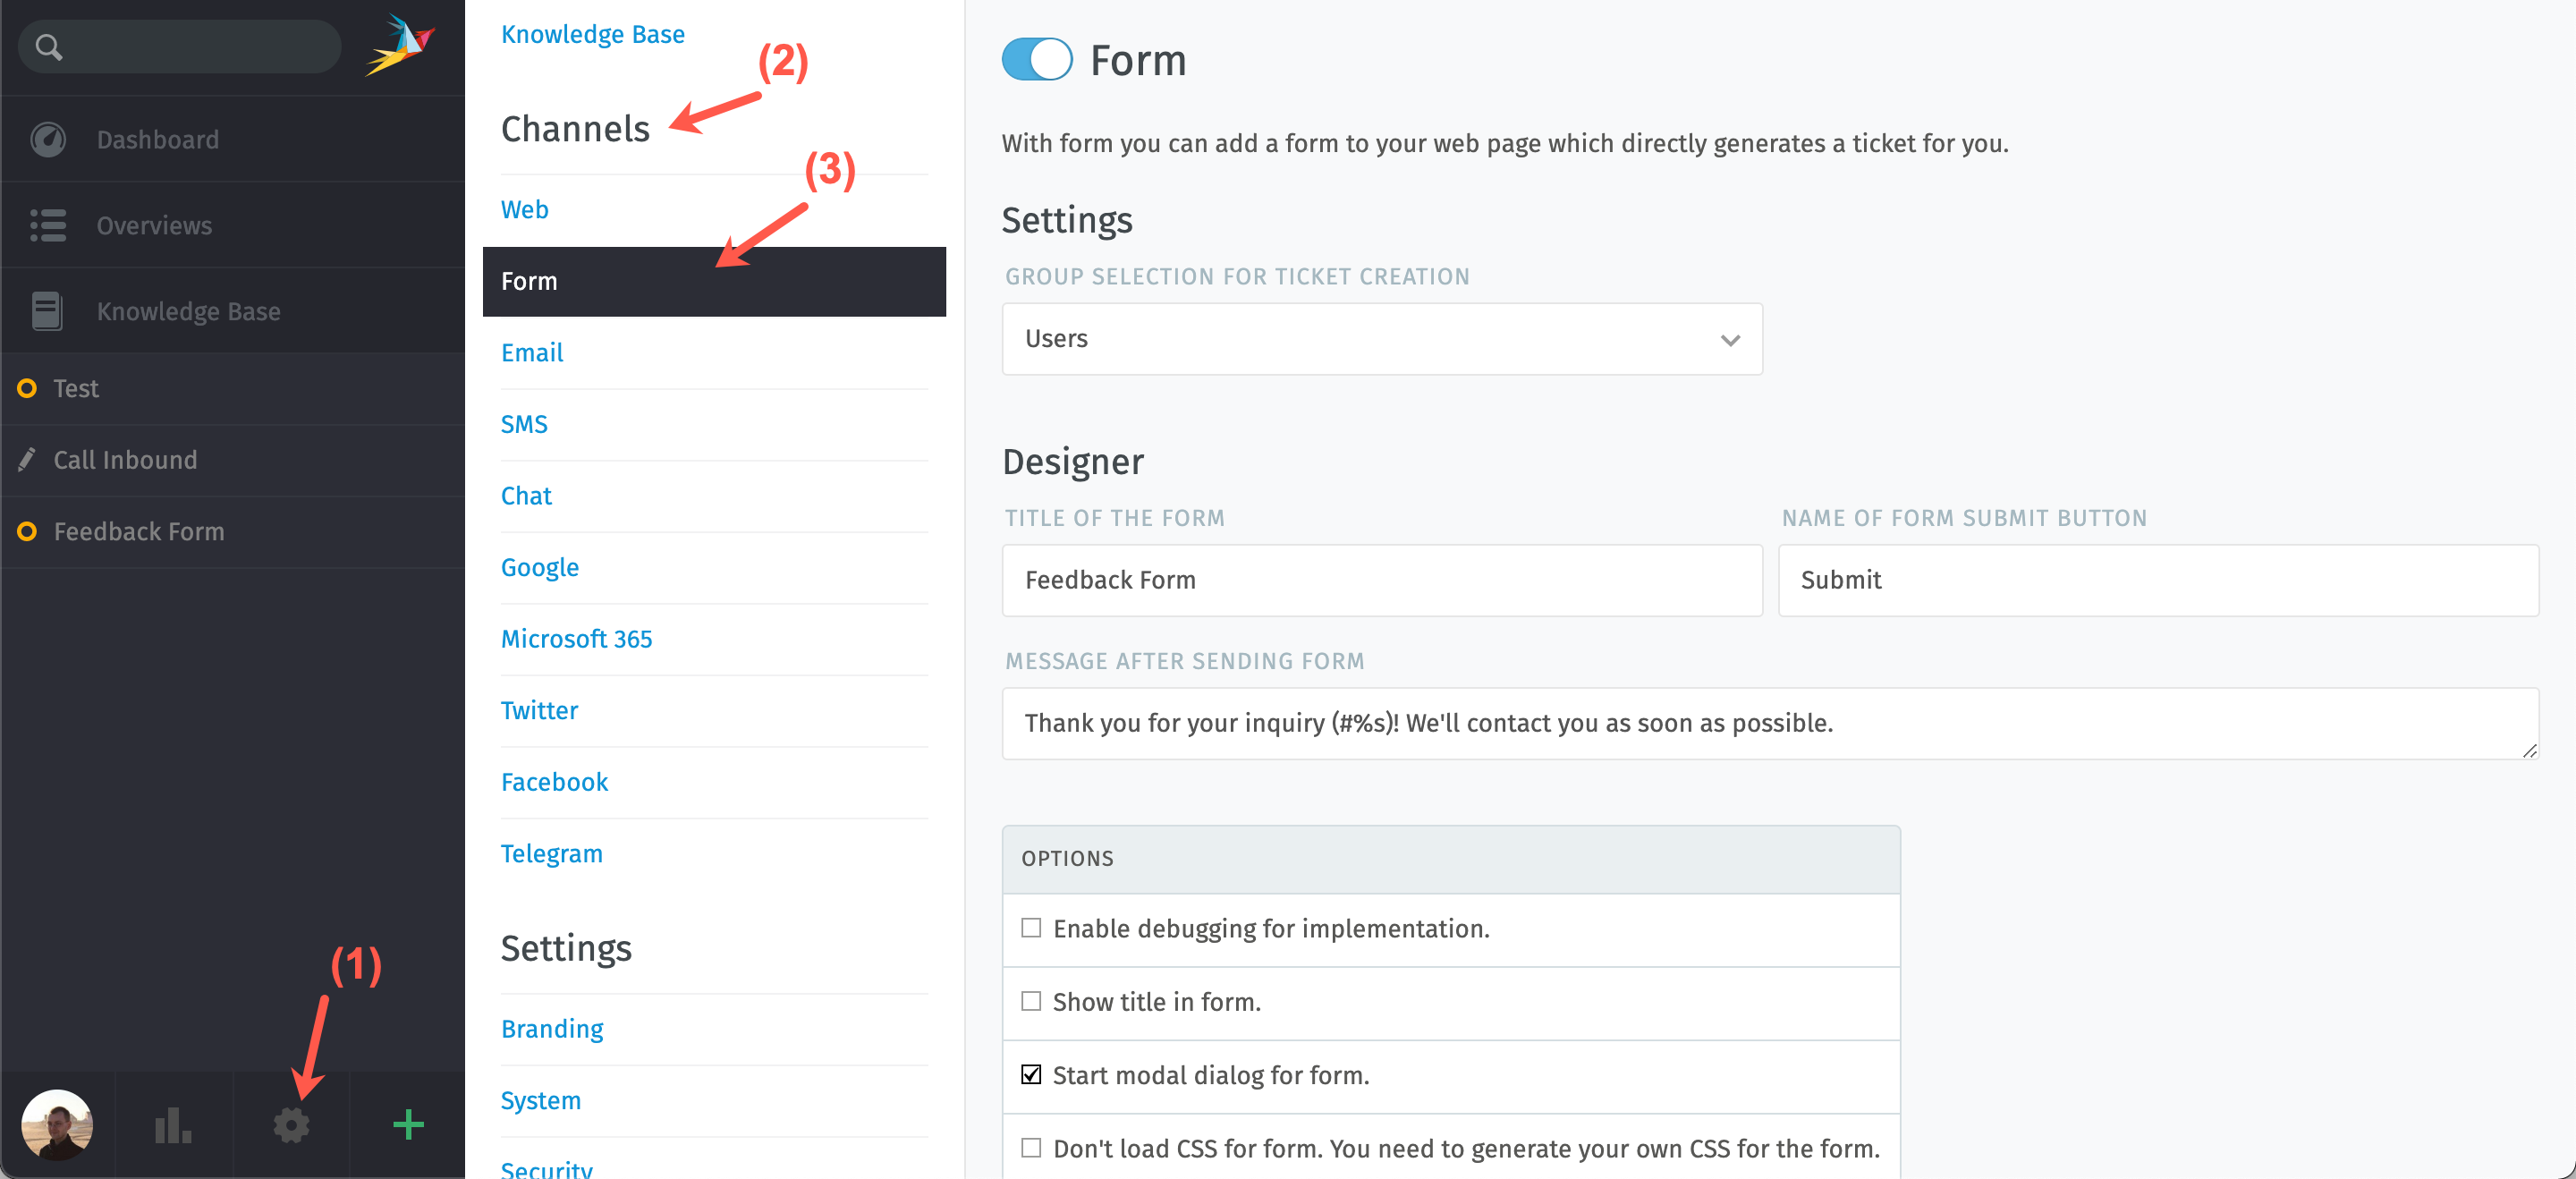
- Click the cogwheel icon (1) to enter the management section of Zammad.
- Scroll down to the Channels section (2) and choose the communication channel you want to configure (3).
- The configuration options vary depending on the channel you want to configure.
Conclusion
You have configured a Virtual Cloud Instance with the Zammad ticketing solution, linked it to an Elasticserarch database, and configured a secure connection to the Instance using HTTPS. You also did a short walkthrough of some features of Zammad. For more information on all features of the solution, refer to the official documentation.
Visit our Help Center and find the answers to your most frequent questions.
Visit Help Center