Create an IAM policy
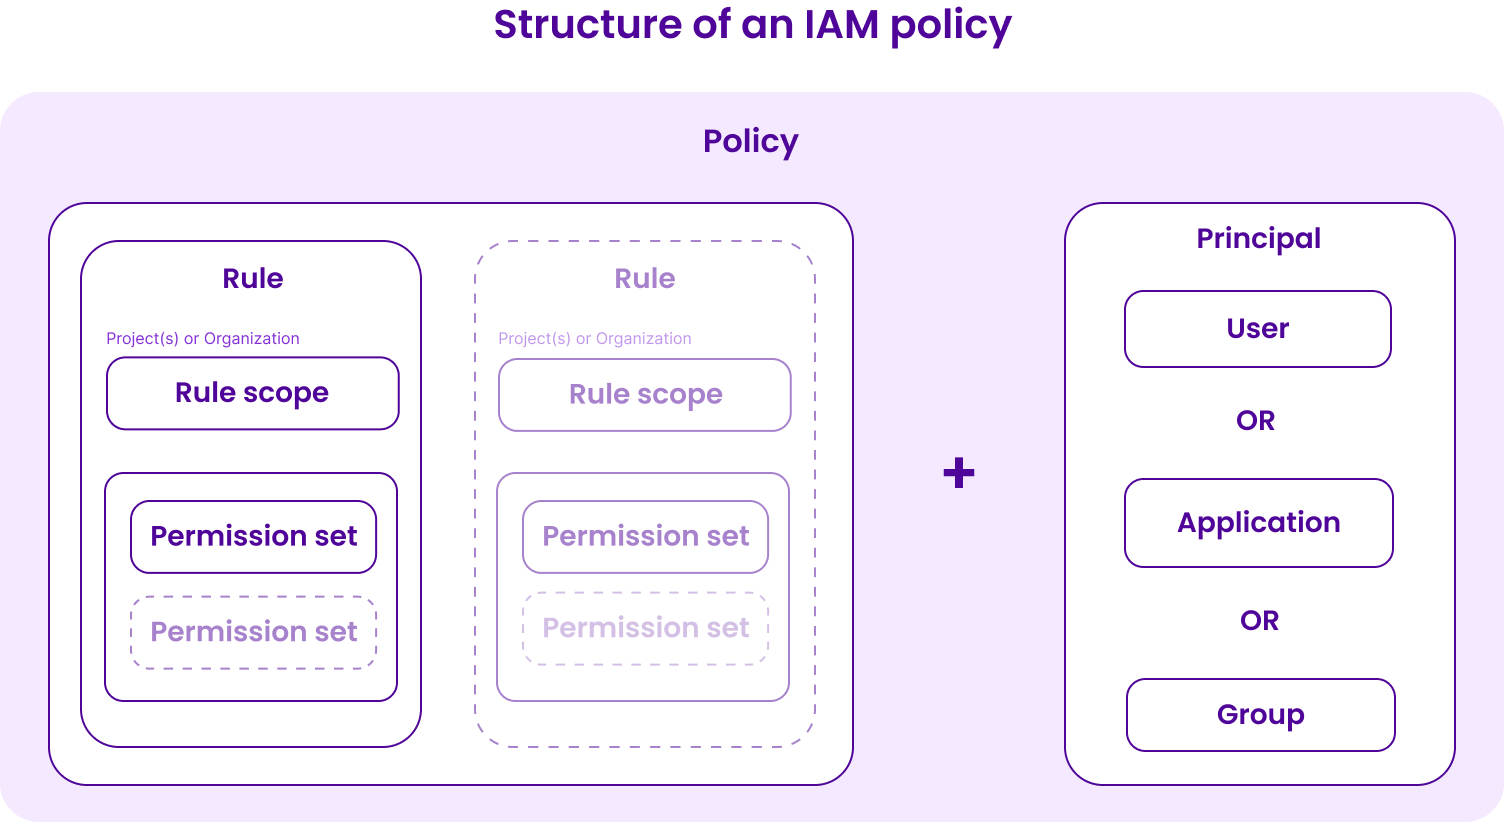
An IAM policy defines the permissions granted to users, groups, and applications within a given Organization. Each policy consists of:
- a principal: the user, group, or application to which the policy applies
- one or more IAM rules: the rules that specify the permission sets granted to the principal and the scope to which they apply
Before you start
To complete the actions presented below, you must have:
- A Scaleway account logged into the console
- Owner status or IAM permissions allowing you to perform actions in the intended Organization
-
In the side menu, click IAM. The Users tab of the Identity and Access Management dashboard opens.
-
In the Policies tab, click Create policy. The creation wizard opens.
-
Enter a name and a description for the policy.
-
Add a tag. Tags are key/value pairs that help you organize your policies.
- You can assign up to 10 tags per user.
- Tag values must be between 1 and 70 characters long, including
keyandvalue. - The same tag cannot be used twice.
-
Select a principal for your policy. The principal is the user, application, or group you want to grant permissions to.
-
Create rules for the policy.
Rules define what actions the attached principal can carry out within the Organization. When creating a rule, you first select the permission sets to apply, then set the scope within which they apply. You can also optionally add conditions to the rule. For more information, see Understanding IAM policies. -
Select the permission sets for the rule and click Next.
You can select as many permission sets as you want. The principal will have the rights defined in these permission sets within the scope you select in the next step. See Permission sets for more information.- To give the principal permissions to view, create, edit, and/or delete resources, select permission sets in Resource management.
- To give the principal permissions to Organization-level features such as IAM, billing, support & abuse tickets, as well as project management, select permission sets in Organization management.
-
Select a scope for the rule and click Next.
- Select All projects to grant the selected permissions on all projects.
- Select Specific projects to grant the permissions on the specified projects only.
-
(Optional) Add one or more conditions to the rule. Refer to Understanding policy conditions for details about how to write condition expressions, as well as examples of conditions.
- Resource-level conditions let you scope the rule to specific resources, based on attributes such as the resource's name, ID, or locality. For more information, see Resource-level conditions.
- Request-level conditions let you give access to specific user agents or IP addresses, and allow actions to be performed only at certain dates and times. For more information, see Request-level conditions.
-
Click Confirm rule. The rule, with its permission sets, scope, and any conditions, is added to the list of the policy's rules.
You can edit edit icon the rule by clicking the relevant button in the top right corner of the rule's summary.
You can delete delete icon the rule only if you have defined more than one rule. -
Click Add new rule and repeat steps 7 to 10 as many times as required to add multiple rules to your policy.
-
Click Create policy.
You are taken to the overview page of the newly-created policy.