How to manage IAM groups
You can manage IAM groups in an Organization if you are the Owner of that Organization, or if you have sufficient permissions (via policies) to do so. Management actions include adding and removing members to groups, attaching and detaching policies to/from groups and deleting groups from the Organization.
Before you start
To complete the actions presented below, you must have:
- A Scaleway account logged into the console
- Owner status or IAM permissions allowing you to perform actions in the intended Organization
How to access the group overview
- Click IAM & API keys on the top-right drop-down menu of the Scaleway console. The Users tab of the Identity and Access Management dashboard displays.

- Click the Groups tab. A list of the Organization's IAM groups displays.
- Click the name of the group you want to manage. Alternatively, click more icon next to the application, and select Overview. Either way, you are taken to the group's Overview page. Follow the steps below depending on the management action you wish to take.
How to edit a group's description
- From the groups' Overview page, in the Group Information panel, click on the text underneath Description.
- Edit the description as required and click validate icon to finish.
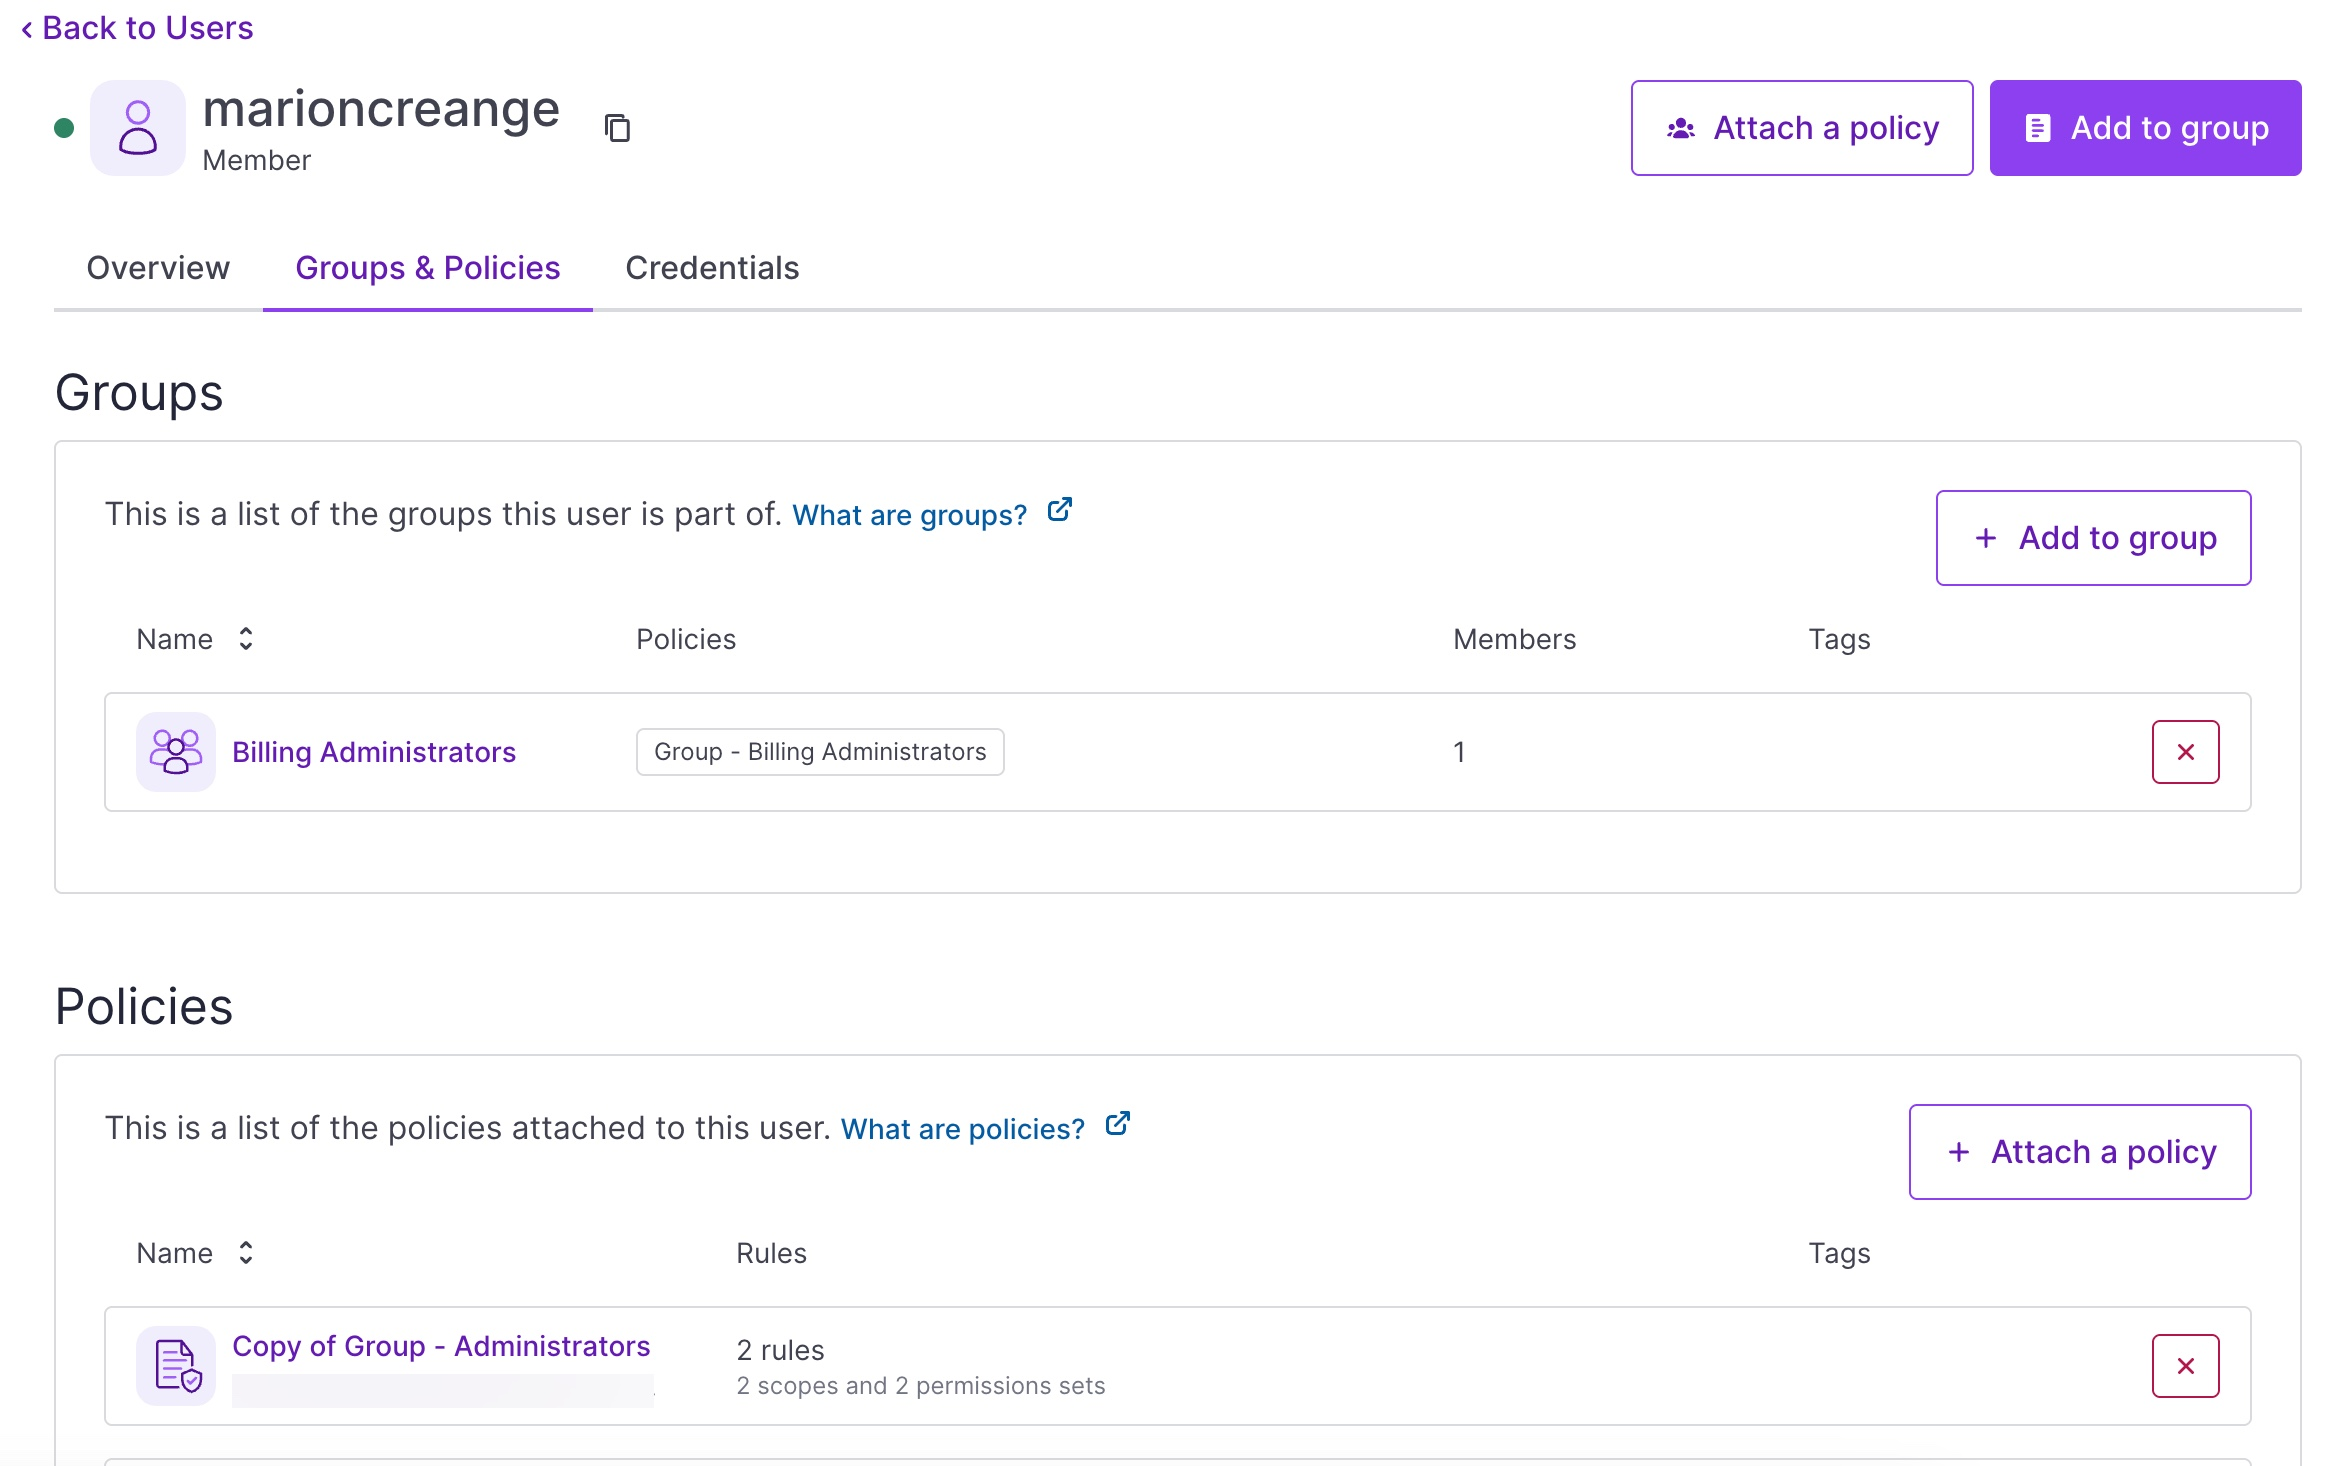
How to manage a group's users
From the groups's Overview page, scroll down to the Users panel. A list of all users in the group displays.
Add users to a group
- In the Users panel, click Add users. A pop-up displays:
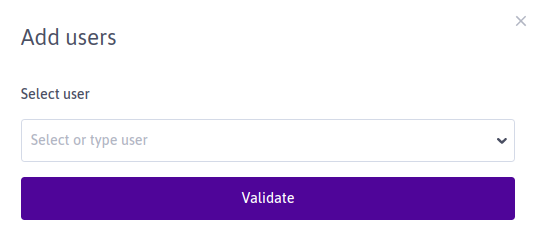
- Select the user you want to add from the drop-down menu, or type the name of the user.
- Click Validate. You are returned to the group's overview page, where the newly-added user now appears.
Remove users from a group
- In the Users panel, click the X button next to the user you want to remove from the group. A pop-up displays asking you to confirm the action.
- Click Remove from group to confirm.
How to manage a group's applications
From the group's Overview page, scroll to the Applications panel. A list of all applications in the group displays.
Add applications to a group
- In the Applications panel, click Add applications. A pop-up displays, prompting you to select the application to add.
- Select the application you want to add from the drop-down menu, or type the name of the application.
- Click Validate. You are returned to the group's overview page, where the newly-added application now appears.
Remove applications from a group
- In the Applications panel, click the X button next to the application you want to remove from the group. A pop-up displays asking you to confirm the action.
- Click Remove from group to confirm.
How to manage a group's policies
From the groups' Overview page, scroll to the Policies panel. A list of all policies attached to the group displays.
Detach a policy from a group
- In the Policies panel, click the X button next to the policy you want to detach from the group. A pop-up displays asking you to confirm the action.
- Click Detach policy to confirm.
Attach a policy to a group
A group may be attached to multiple policies.
- In the Policies panel, click Attach a policy to attach a policy to the application. A pop-up displays, prompting you to select a policy.
- Select the policy you want to attach to the application from the drop-down list, or type the name of the policy.
- Click Validate to finish. The selected policy is attached to the group, and you are returned to the group's overview page.
How to delete a group
- From the groups's Overview tab, scroll down to the Delete group panel.
- Click Delete group. A warning displays, asking you to confirm your action:
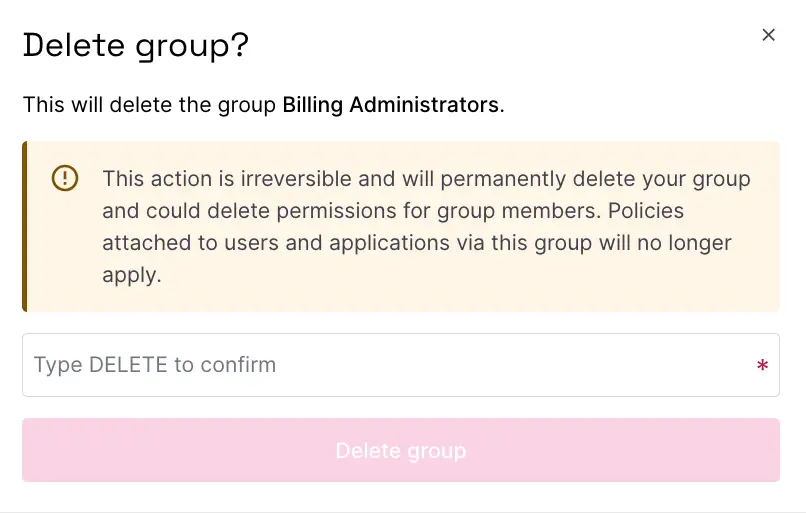
- Type DELETE to confirm, and click Delete group to validate.
See Also
Still need help?Create a support ticket