How to manage your email filters on Web Hosting Classic
Email filters allow you to sort your emails based on the sender, subject, and more. If an email meets one or more criteria, you can define different actions, such as deleting or moving it into a folder. Email filters only work on email accounts.
Before you start
To complete the actions presented below, you must have:
- A Dedibox account logged into the console
- Created a Webhosting Classic
How to configure your email filters?
-
Log into your Scaleway webmail account.
-
Click Settings in the upper right corner of your screen, then click Filters. You can create filter groups, and activate or deactivate your filters by groups to easily manage your emails.
How to add new filter groups?
- Log into your Scaleway webmail account.
- Click Settings in the upper right corner of your screen, then click Filters.
- Click + under the Filter sets column.
- Enter the name of your filter group in Filters set name.
- You can either import filters from a file or from another filter group.
How to add a filter?
- Log into your Scaleway webmail account.
- Click Settings in the upper right corner of your screen, then click Filters.
- Click + under the Filters column.
- Enter the name of your filter in Filter name.
- Two input fields display. For incoming mail defines the requirements so that the mails undergo the action selected in the execute the following actions field.
- Once you have added your filter, click Save.
How to configure an automatic response?
- Log into your Scaleway webmail account.
- Add a new filter and name it Auto Reply. It should appear at the bottom of your filter list, under antispam and antivirus.
- Select all messages in the For incoming mail input field.
- Select Reply with message in the execute the following actions input field.
- Write your message in Message body.
- Type in [Auto reply] in Message subject.
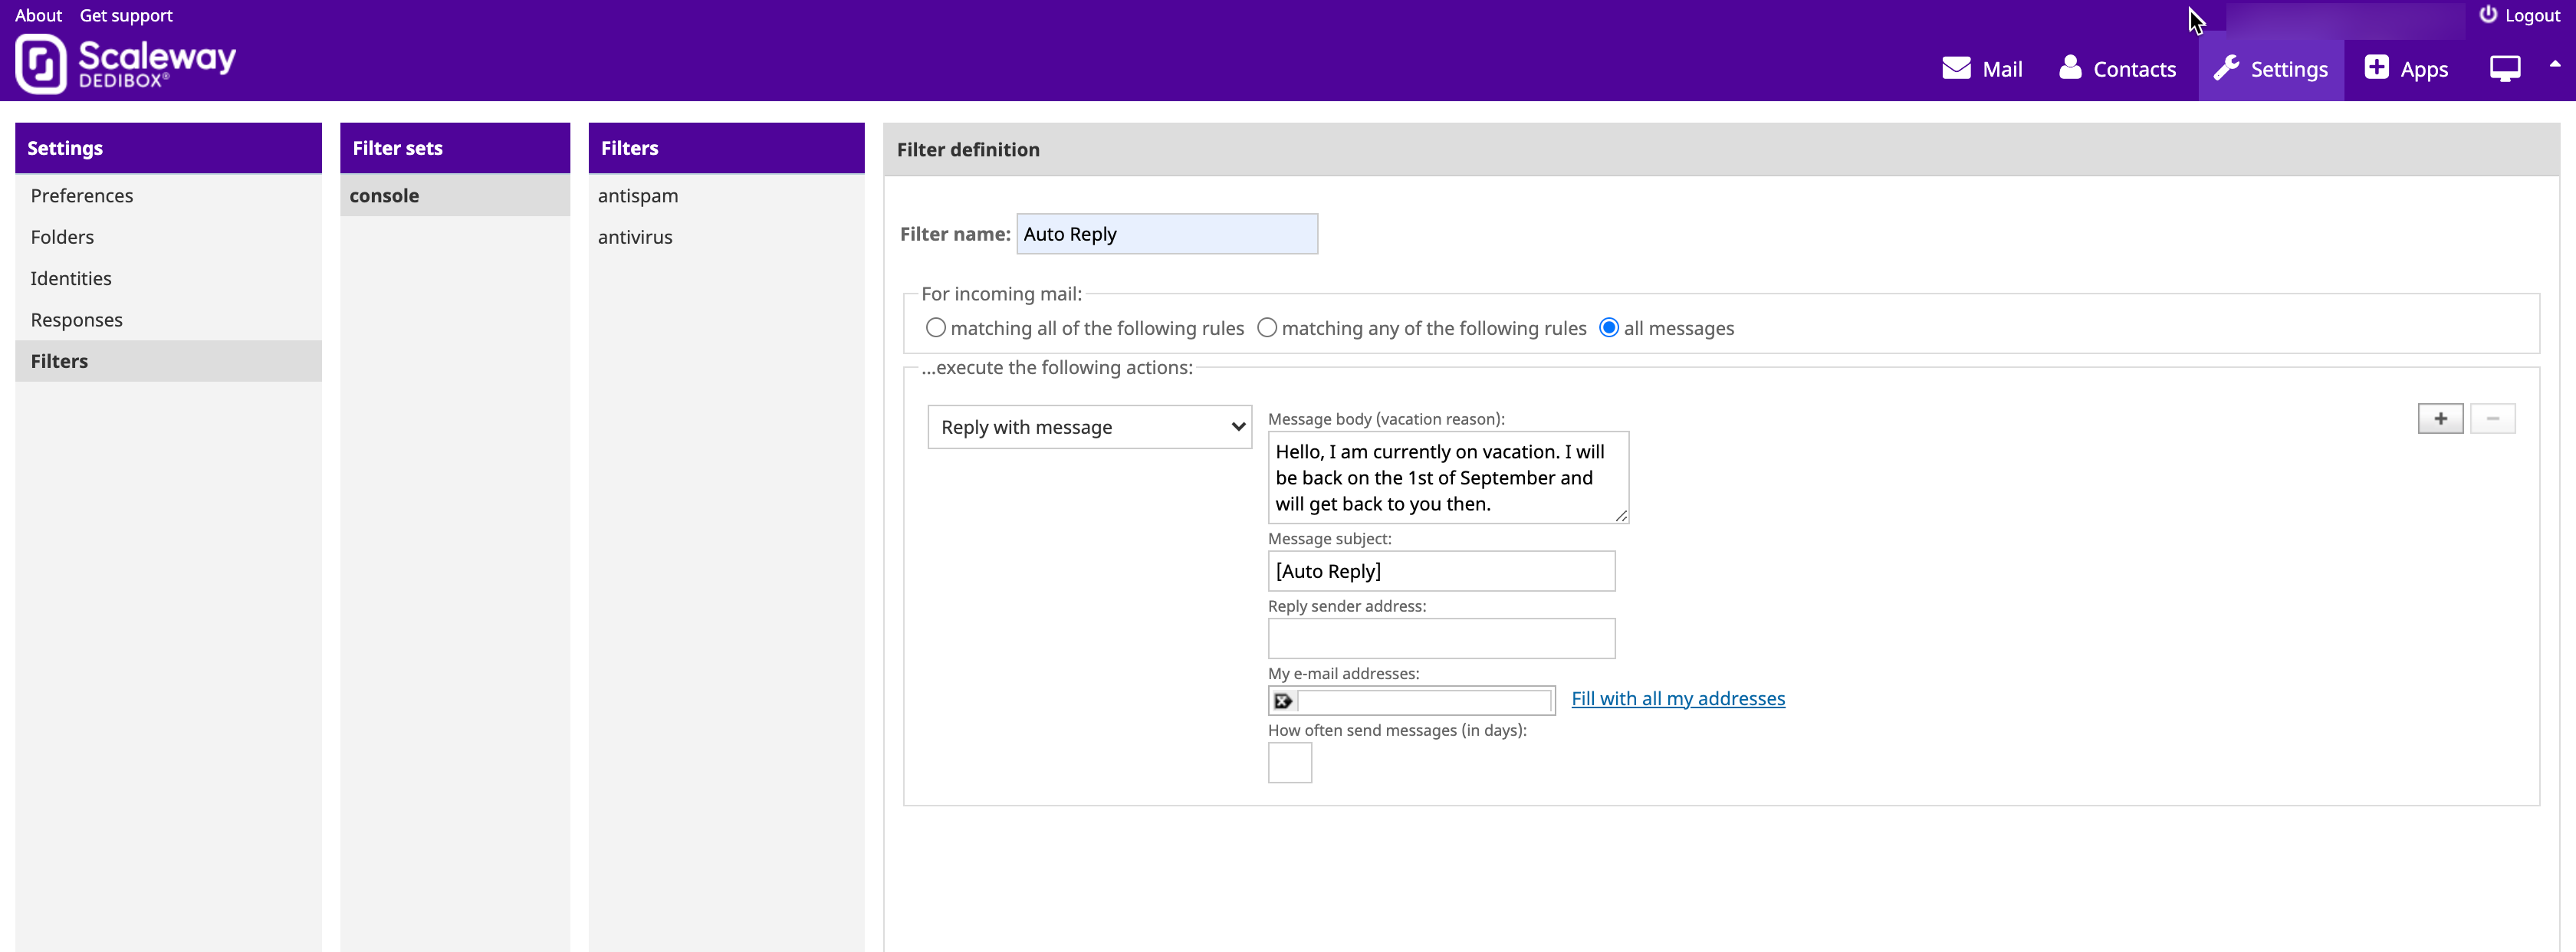
- Click Save.
See Also
Still need help?Create a support ticket