VPC Peering - Quickstart
Scaleway VPC Peering is a networking service that enables two Scaleway VPCs to establish a private peering connection. You can then securely route traffic between them, away from the public internet.
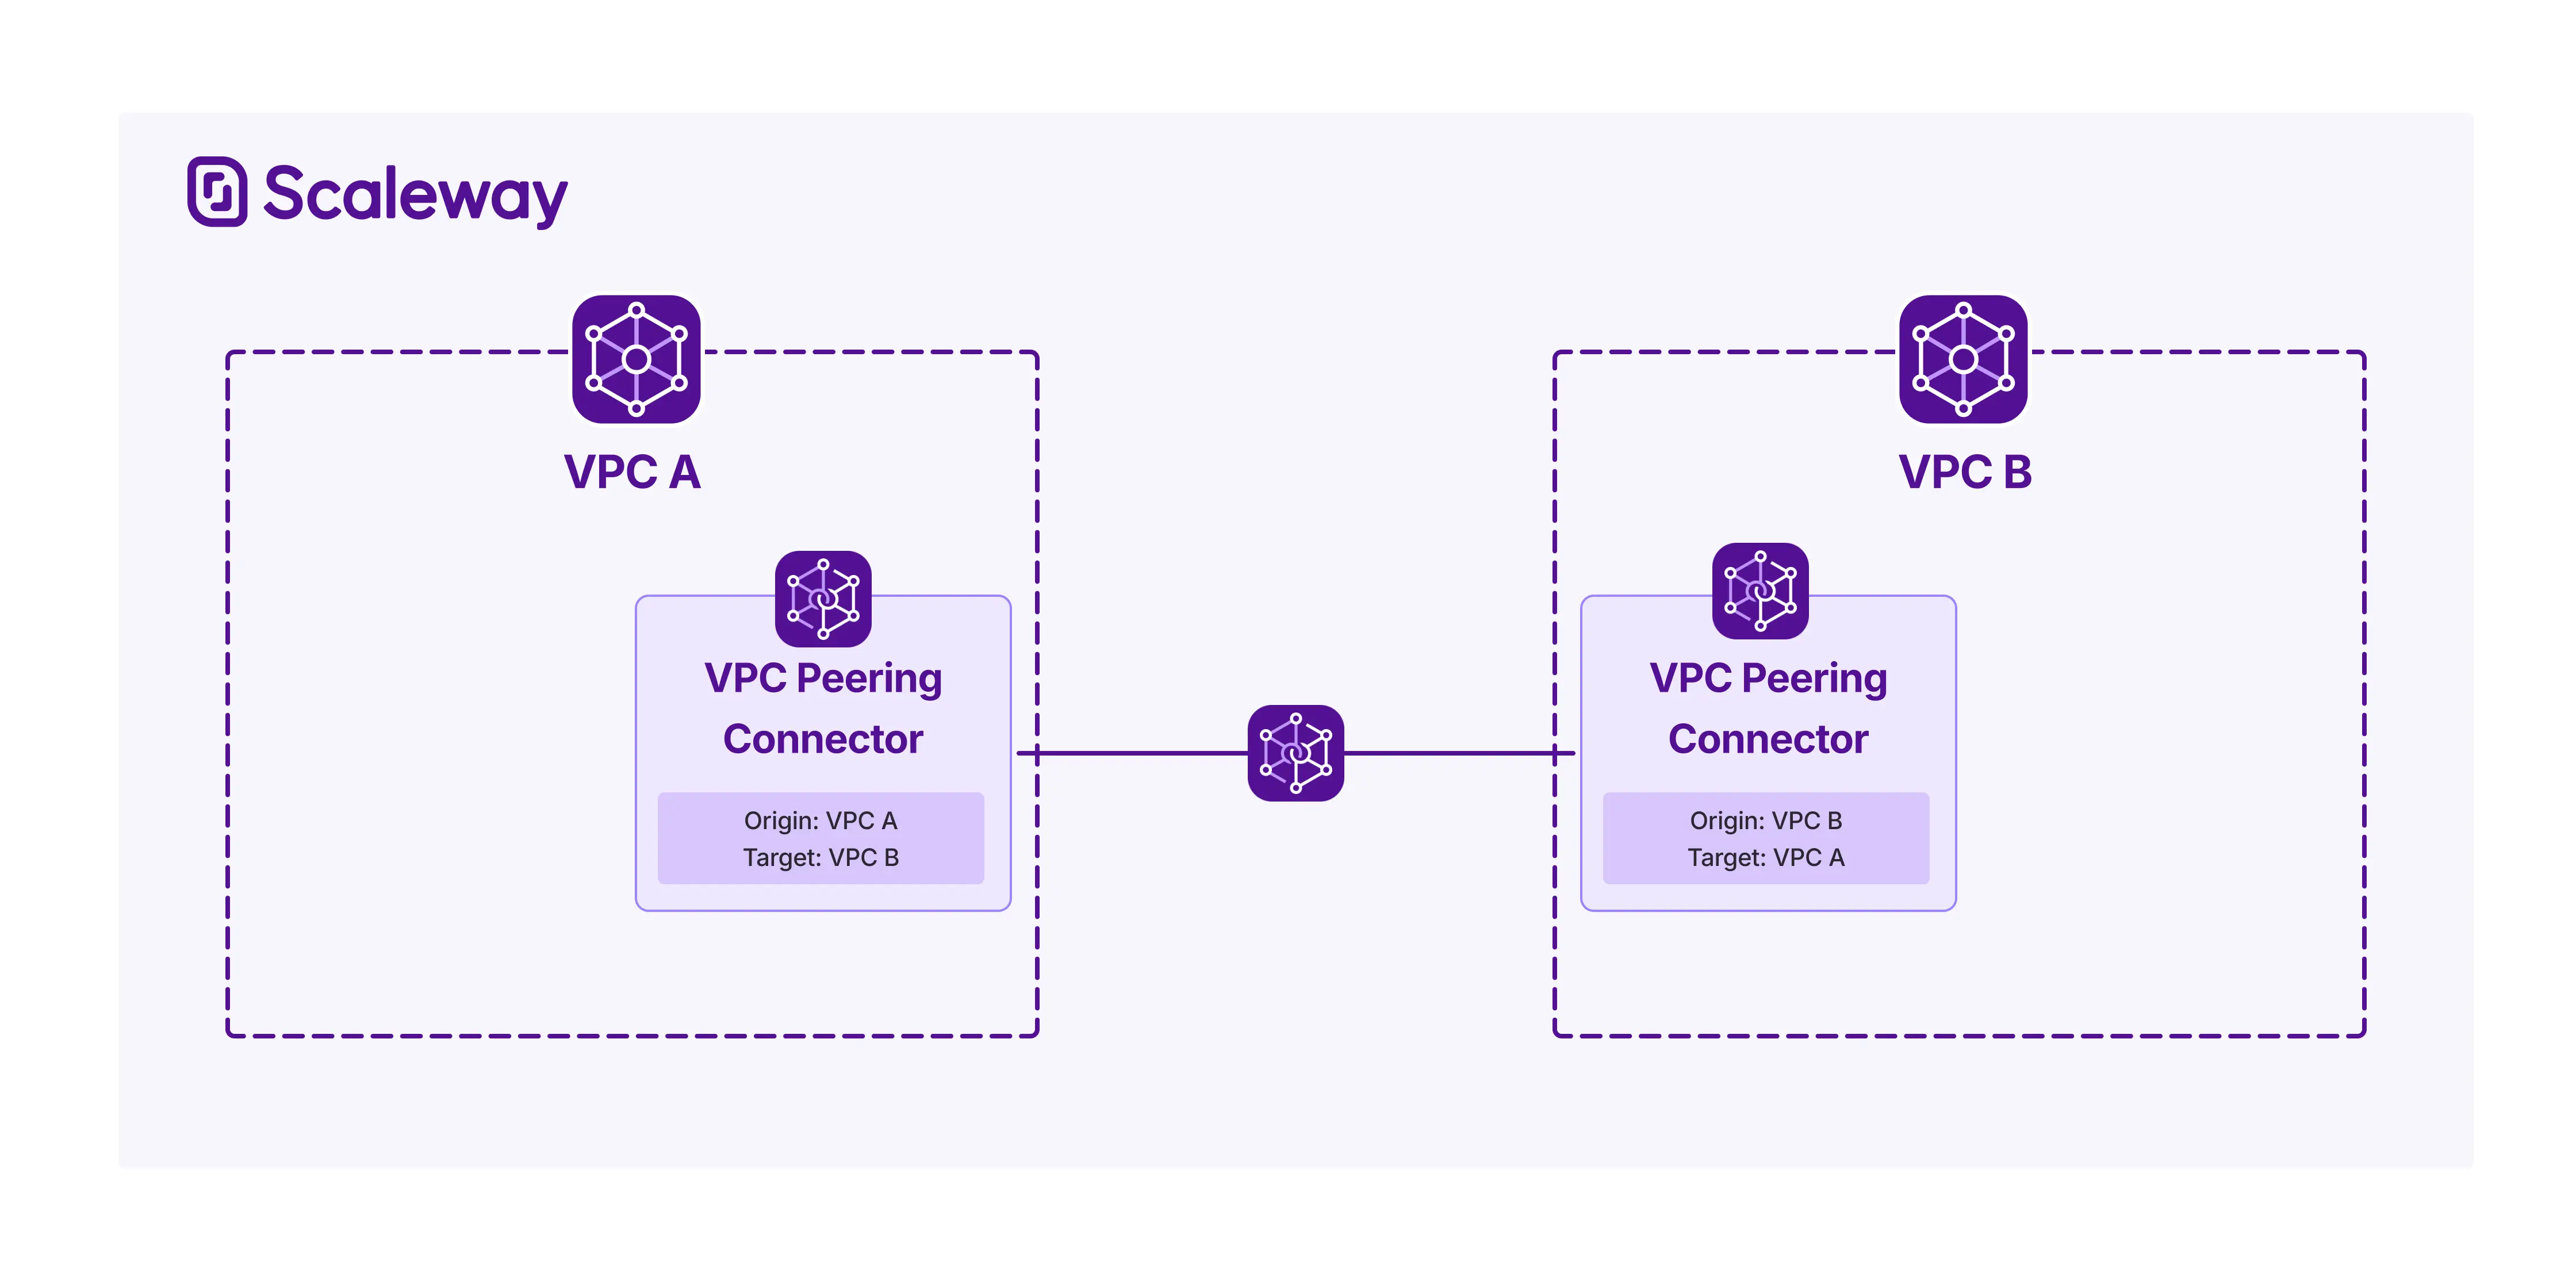
For full details about VPC Peering, refer to Understanding VPC Peering.
Before you start
To complete the actions presented below, you must have:
- A Scaleway account logged into the console
- Owner status or IAM permissions allowing you to perform actions in the intended Organization
- Created a VPC
- The unique VPC ID of the VPC you want to peer with
- Activated routing on both VPC peers
How to create a peering connector
-
Click VPC Peering in the Network section of the Scaleway console side menu.
-
Click + Create a peering connector. The peering connector creation wizard displays.
-
Choose a region in which to create your peering connector.
-
Select an origin VPC from the current Scaleway Project using the drop-down menu.
-
Enter the ID of the target VPC you want to peer with. The target VPC can be in a different Project/Organization.
-
Enter a name for your connector, or use the automatically-generated one. Optionally, you can also add tags to help organize your resources. Each tag should be separated by a space.
-
Click Create a peering connector to finish.
The peering connector will be in
Orphanstatus, until the next step is carried out. -
An owner or manager of the target VPC must create a matching peering connector on their end, defining their VPC as origin and your VPC as target.
-
Scaleway detects that two matching peering connectors have been created, and automatically carries out a compatibility check to ensure the Private Networks of the two VPCs do not contain any overlapping CIDR blocks.
- If the two VPCs are compatible, both connectors go into
Peeredstatus, and the peering connection is created. - If the two VPCs have overlapping CIDR blocks, both connectors go into
Conflictstatus. They cannot be peered until you resolve the conflict.
- If the two VPCs are compatible, both connectors go into
How to create custom routes
Once both connectors are in a Peered status, you must add custom routes to the route table of each peered VPC to establish rules for routing traffic for the IP ranges you specify, across the peering connection.
-
Click VPC in the Network section of the Scaleway console side menu. A list of your VPCs displays.
-
Use the region selector at the top of the page to filter for the region of the VPC where you want to define a custom route, then click the VPC. A list of Private Networks in this VPC displays.
-
Click the Routing tab.
-
Click Create route. The custom route creation wizard displays.
-
Enter a description for your route, e.g. "Route to peered VPC".
-
Enter a destination for the route. The VPC will apply the route to all traffic with a matching destination IP. You must enter an IPv4 or IPv6 CIDR range with a subnet mask, e.g.
192.168.1.0/24. -
Choose Peering connector as the next hop for the route, then select the desired peering connector from the drop-down list. The VPC will route traffic for the destination IP to the selected entry.
-
Click Create route to finish.
Your new route now displays in the Routing tab of your VPC. A matching custom route must be added to the target VPC for traffic to flow between the peered VPCs. The destination of that return route must be a subnet that contains the IP address(es) of the resources in the origin VPC that need to reach the peered side.
How to delete a peering connector
-
Click VPC Peering in the Network section of the Scaleway console side menu. A listing of your peering connectors displays.
-
Use the region selector at the top of the page to filter for the region of the peering connector you want to delete.
-
Click more icon next to the peering connector you want to delete, and select Delete from the drop-down menu.
-
Type DELETE in the box to confirm, then click Confirm.