Configuring NGINX with Let's Encrypt
Let's Encrypt, a renowned Certificate Authority (CA), offers a valuable service by providing free TLS/SSL certificates. These certificates are a key element in enabling secure HTTPS connections on web servers. Let's Encrypt simplifies the process through its user-friendly software client, Certbot, which automates the majority of the steps involved in obtaining and configuring certificates, particularly within the Nginx web server environment.
Before you start
To complete the actions presented below, you must have:
- A Scaleway account logged into the console
- Owner status or IAM permissions allowing you to perform actions in the intended Organization
- An SSH key
- An Instance running Ubuntu Focal Fossa (20.04) or later
- A registered domain name pointed to your web server
Installing the NGINX web server
- Connect to your server as
rootvia SSH. - Update the APT package cache and the software already installed on the Instance:
apt update && apt upgrade -y - Install the Nginx web server via APT:
apt install nginx -y
Configuring an NGINX server block
The default installation of Nginx on Ubuntu Focal Fossa (20.04 LTS) comes with one pre-defined server block that listens on port 80. While it is possible to host a single site by putting the content into the directory /var/www/html, it would not be possible to host multiple sites on the same Instance. To avoid this problem, server blocks can be configured. These specify a directory for the content that will be served when requesting a specific site. The content of /var/www/html will be served as the default directory if a request does not match any other site configured.
-
Create the directory for your domain name. Using the
-pflag will create any required parent directory in case they do not exist:mkdir -p /var/www/example.com/html -
Create a placeholder page that will be displayed when accessing your domain:
nano /var/www/example.com/html/index.html -
Put some content like the following into the file which will be displayed to a user when requesting your site. Save and quit nano once you have edited the file:
<html> <head> <title>Welcome to example.com</title> </head> <body> <h1>Hello World!</h1> <p>You have accessed the example.com website.</p> </body> </html> -
To serve the site, a server block is required. Create the block in the directory /etc/nginx/sites-available/:
nano /etc/nginx/sites-available/example.comAnd put the following content into it:
server { listen 80; listen [::]:80; root /var/www/example.com/html; index index.html index.htm; server_name example.com www.example.com; location / { try_files $uri $uri/ =404; } } -
Enable the file by linking it to the sites-enabled directory, to enable the server block during Nginx startup:
ln -s /etc/nginx/sites-available/example.com /etc/nginx/sites-enabled/ -
Verify if there are no errors in the configuration file before restarting Nginx:
nginx -t -
Restart the Nginx web server:
systemctl restart nginx.service -
When typing http://example.com in your browser, you should see your newly created placeholder page:
Installing Certbot and obtaining a certificate
-
Install Certbot for Nginx:
apt install python3-certbot-nginx -y -
Launch the certificate generation:
certbot --nginx -d example.com -d www.example.comWhen running Certbot for the first time, you will be asked to enter your email address. Confirm it by pressing Enter on your keyboard.
-
Once confirmed Certbot will run a challenge and request the certificate. When asked to redirect all traffic to HTTPS, press 2, then Enter on your keyboard:
Please choose whether or not to redirect HTTP traffic to HTTPS, removing HTTP access.
  - - - - - - - - - - - - - - - - - - - - - - - - - - - - - - - - - - - - - - - -
  1: No redirect - Make no further changes to the webserver configuration.
  2: Redirect - Make all requests redirect to secure HTTPS access. Choose this for
  new sites, or if you're confident your site works on HTTPS. You can undo this
  change by editing your web server's configuration.
  - - - - - - - - - - - - - - - - - - - - - - - - - - - - - - - - - - - - - - - -
  Select the appropriate number [1-2] then [enter] (press 'c' to cancel):
Certbot will now reconfigure Nginx and once you see the following message your certificate is successfully installed:
IMPORTANT NOTES:
  - Congratulations! Your certificate and chain have been saved at:
    /etc/letsencrypt/live/example.com/fullchain.pem
    Your key file has been saved at:
    /etc/letsencrypt/live/example.com/privkey.pem
    Your cert will expire on 2019-04-15. To obtain a new or tweaked
    version of this certificate in the future, simply run certbot again
    with the "certonly" option. To non-interactively renew *all* of
    your certificates, run "certbot renew"
  - Your account credentials have been saved in your Certbot
    configuration directory at /etc/letsencrypt. You should make a
    secure backup of this folder now. This configuration directory will
    also contain certificates and private keys obtained by Certbot so
    making regular backups of this folder is ideal.
  - If you like Certbot, please consider supporting our work by:

    Donating to ISRG / Let's Encrypt:   https://letsencrypt.org/donate
    Donating to EFF:                    https://eff.org/donate-le
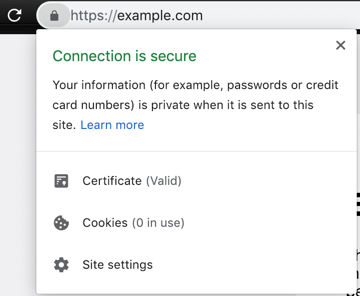
You can now open your web browser and type https://example.com to verify that your connection is secure:
Visit our Help Center and find the answers to your most frequent questions.
Visit Help Center