Managing Computing Infrastructures with GLPI and a Database for MySQL
Gestionnaire Libre de Parc Informatique (GLPI), or Open Source IT Equipment Manager in English, is a web-based asset and IT management open-source software, written in PHP and released under the GNU General Public License. A graphic interface, accessible via web-browser, allows users to easily operate IT operations, that can include hardware from peripherals to entire server racks.
The application disposes of several features to assist companies in managing their information systems. Among them:
- Asset management and automatic inventory
- Item lifecycle management
- Data Center Infrastructure Management
- Issue tracking system
- Helpdesk
- Administrative and financial management of IT assets
- Statistics and reports
- Knowledge base
Before you start
To complete the actions presented below, you must have:
- A Scaleway account logged into the console
- Owner status or IAM permissions allowing you to perform actions in the intended Organization
- An SSH key
- An Instance running on Ubuntu Focal Fossa (20.04 LTS)
- A domain or subdomain pointed to your Instance
Installing the stack
In this tutorial, we will install and configure a LEMP-Stack using Nginx, a Database for MySQL and PHP.
- Update the systems'
aptrepository information and upgrade it to make sure that the system is up-to-date and that the latest bug fixes are installed.apt update && apt -y upgrade - Use Ubuntu's APT package manager to install Nginx. Then, restart and enable Nginx.
apt install nginx systemctl restart nginx.service systemctl enable nginx.service - Install PHP.
apt install php7.4-fpm php7.4-common php7.4-mysql php7.4-gmp php7.4-curl php7.4-intl php7.4-mbstring php7.4-soap php7.4-xmlrpc php7.4-gd php7.4-xml php7.4-cli php7.4-zip
Creating a Database for MySQL
In this tutorial, we use a Scaleway Database for MySQL. To create the database, follow this how-to.
Downloading GLPI
-
Change the directory from root to the folder where you want to download the GLPI repository.
In this tutorial, we use
/tmpcd /tmpCheck the most recent version of GLPI here and replace it in the commands accordingly. In this tutorial, we are using version
10.0.9wget https://github.com/glpi-project/glpi/releases/download/10.0.18/glpi-10.0.18.tgz tar -xvf glpi-10.0.18.tgz -
Move
glpito the/var/www/glpidirectory.mv glpi /var/www/glpi -
Give Nginx ownership of the directory.
chown -R www-data:www-data /var/www/glpi/
Configuring Nginx
- Use a text editor to create a new server block VirtualHost file named
glpiunder the/etc/nginx/sites-availabledirectory to include the client request settings of your web server. In this tutorial, we usenanoas a text editor.nano /etc/nginx/sites-available/glpi - Copy and paste the configuration below into the file. Replace
example.comwith your domain name and save.server { listen 80; listen [::]:80; server_name example.com www.example.com; root /var/www/glpi; index index.php index.html index.htm; access_log /var/log/nginx/example.com.access.log; error_log /var/log/nginx/example.com.error.log; client_max_body_size 100M; autoindex off; location / { try_files $uri $uri/ =404; } location /dataroot/ { internal; alias /var/www/glpi/; } location ~ [^/].php(/|$) { include snippets/fastcgi-php.conf; fastcgi_pass unix:/run/php/php7.4-fpm.sock; fastcgi_param SCRIPT_FILENAME $document_root$fastcgi_script_name; include fastcgi_params; } } - Create a symbolic link to enable the server block and restart Nginx.
ln -s /etc/nginx/sites-available/glpi /etc/nginx/sites-enabled/ systemctl restart nginx.service - Enter your server's domain name or IP address in a browser to check if GLPI can be accessed via the internet.
Installing an SSL/TLS certificate
To protect user credentials and other confidential information that are stored in GLPI, you can generate an SSL/TLS certificate issued by Let's Encrypt for free.
In this tutorial, we use certbot.
-
Prepare the system:
apt-get update apt-get install software-properties-common add-apt-repository ppa:certbot/certbot apt-get update -
Install
certbotusingsnap.apt-get install python3-certbot-nginx -
Run
certbot:certbot --nginx -
Answer the questions when prompted by the certbot Wizard. A) Enter your e-mail address.
Enter email address (used for urgent renewal and security notices) (Enter 'c' to cancel):Please read the Terms of Service at https://letsencrypt.org/documents/LE-SA-v1.2-November-15-2017.pdf. You must agree in order to register with the ACME server at https://acme-v02.api.letsencrypt.org/directory - - - - - - - - - - - - - - - - - - - - - - - - - - - - - - - - - - - - - - - - (A)gree/(C)ancel: AB) Type
Ato agree.Would you be willing to share your email address with the Electronic Frontier Foundation, a founding partner of the Let's Encrypt project and the non-profit organization that develops Certbot? We'd like to send you email about our work encrypting the web, EFF news, campaigns, and ways to support digital freedom. - - - - - - - - - - - - - - - - - - - - - - - - - - - - - - - - - - - - - - - - (Y)es/(N)o:C) Choose
Yes orNo and input accordingly. The Wizard then asks which names you would like to activate HTTPS for.D) Input the corresponding number(s) and enter.
Which names would you like to activate HTTPS for?
- - - - - - - - - - - - - - - - - - - - - - - - - - - - - - - - - - - - - - - -
1: example.com
- - - - - - - - - - - - - - - - - - - - - - - - - - - - - - - - - - - - - - - -
Select the appropriate numbers separated by commas and/or spaces, or leave input
blank to select all options shown (Enter 'c' to cancel): 1
E) Answer the following prompt with
2and press enter If you want to redirect HTTP traffic to HTTPS.Please choose whether or not to redirect HTTP traffic to HTTPS, removing HTTP access. - - - - - - - - - - - - - - - - - - - - - - - - - - - - - - - - - - - - - - - - 1: No redirect - Make no further changes to the webserver configuration. 2: Redirect - Make all requests redirect to secure HTTPS access. Choose this for new sites, or if you're confident your site works on HTTPS. You can undo this change by editing your web server's configuration. - - - - - - - - - - - - - - - - - - - - - - - - - - - - - - - - - - - - - - - - Select the appropriate number [1-2] then [enter] (press 'c' to cancel): 2Your certificate is generated.
Obtaining a new certificate Performing the following challenges: http-01 challenge for openproject-scw.ga Using the webroot path /opt/openproject/public for all unmatched domains. Waiting for verification... Cleaning up challenges IMPORTANT NOTES: - Congratulations! Your certificate and chain have been saved at: /etc/letsencrypt/live/yourdomain.name/fullchain.pem Your key file has been saved at: /etc/letsencrypt/live/yourdomain.name/privkey.pem Your cert will expire on 2020-10-20. To obtain a new or tweaked version of this certificate in the future, simply run certbot again. To non-interactively renew *all* of your certificates, run "certbot renew" - Your account credentials have been saved in your Certbot configuration directory at /etc/letsencrypt. You should make a secure backup of this folder now. This configuration directory will also contain certificates and private keys obtained by Certbot so making regular backups of this folder is ideal. -
Take note of the paths provided as they will be required in a later step.
-
Run the command below to program an automatic renewal of your certificate.
certbot renew --dry-run
Configuring GLPI
-
Access your GLPI interface via browser using your domain name or IP address. The GLPI setup wizard displays.
-
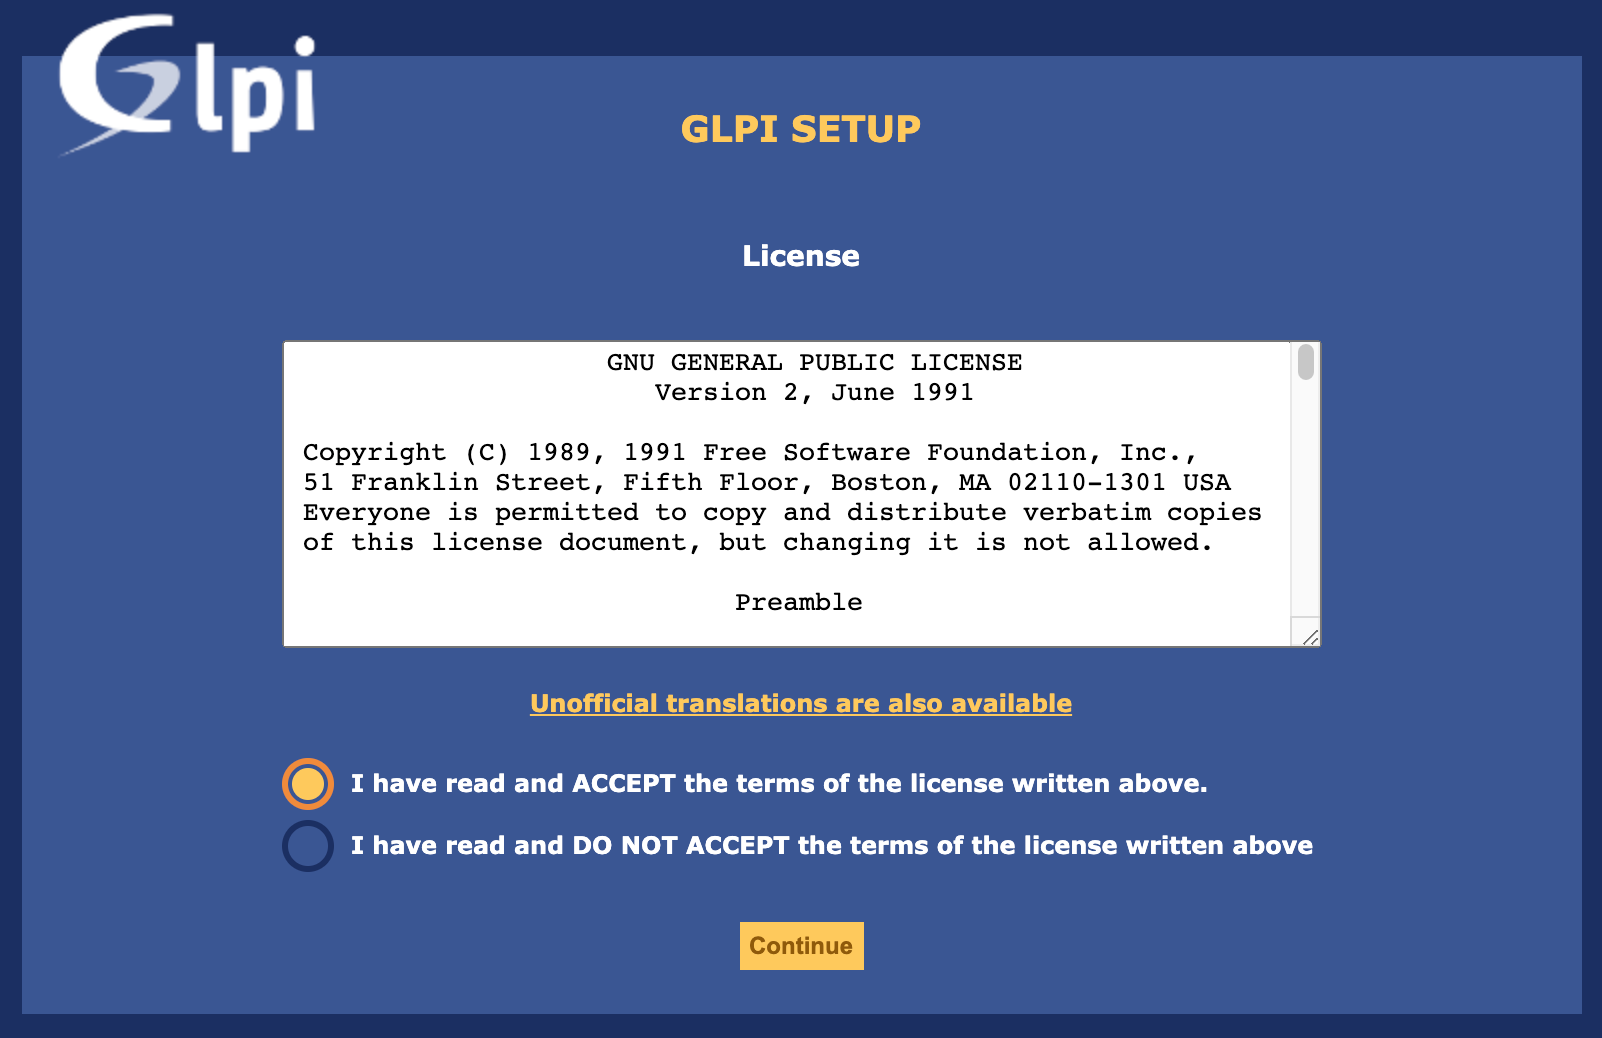
Select the language and click OK. The GLPI license terms display.
-
Read the license terms and check I have READ and ACCEPT the terms of the license written above to proceed.
-
Click Install to begin the installation,
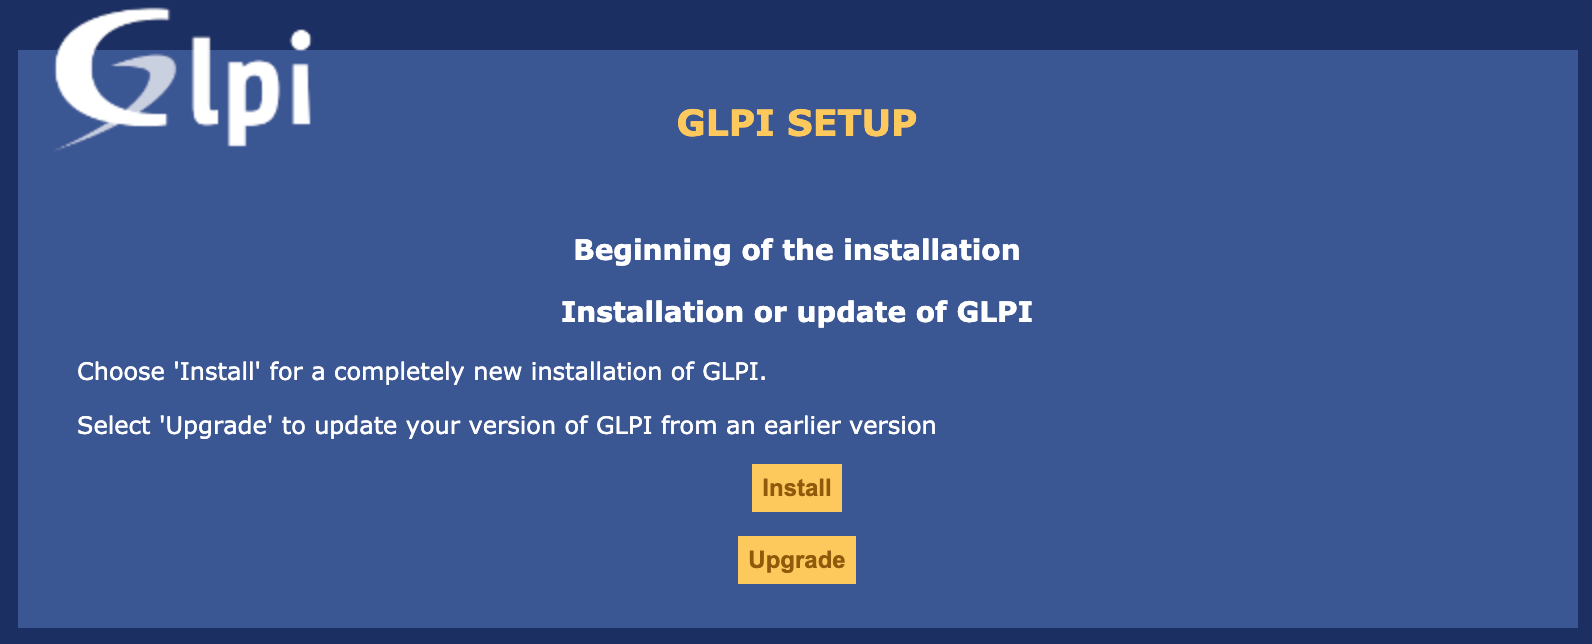
The wizard runs a compatibility check and a list of tests done on the environment displays.
-
Click Continue to proceed.
-
Fill out the boxes to set up your database connection. Enter the following information:
- SQL Server (MariaDB or MySQL):
XXX.XXX.XX.XX:PORT(The IP address of your Database Instance followed by the MySQL port) - SQL User:
db-username(The username previously created for your Database) - SQL Password:
db-password(The password previously created for your Database)
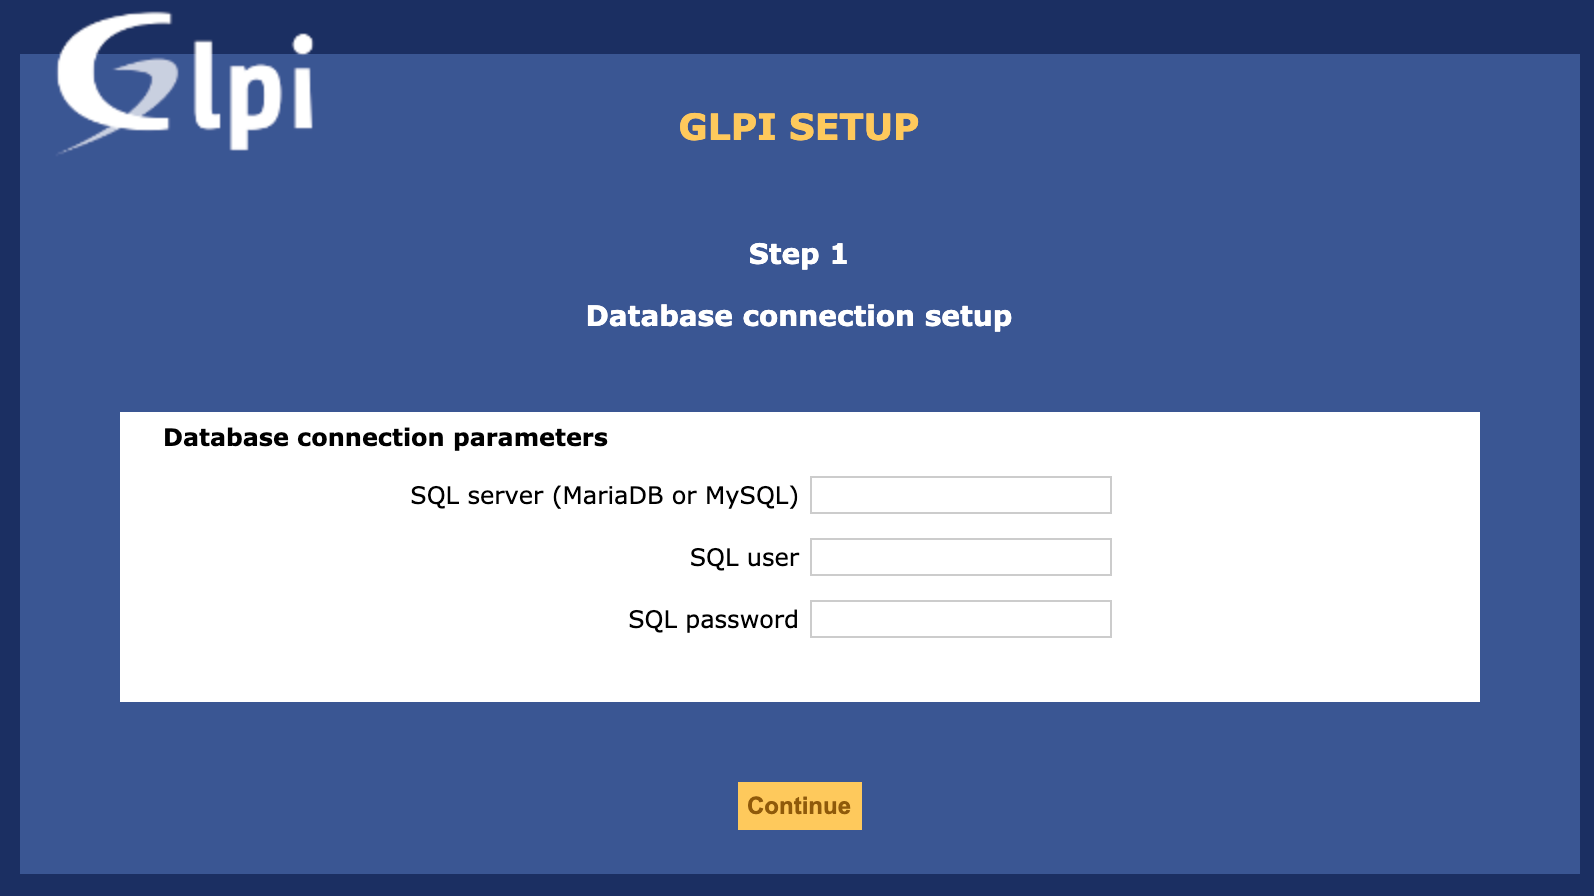
- SQL Server (MariaDB or MySQL):
-
Click Continue to proceed.
-
Select a database and click Continue:
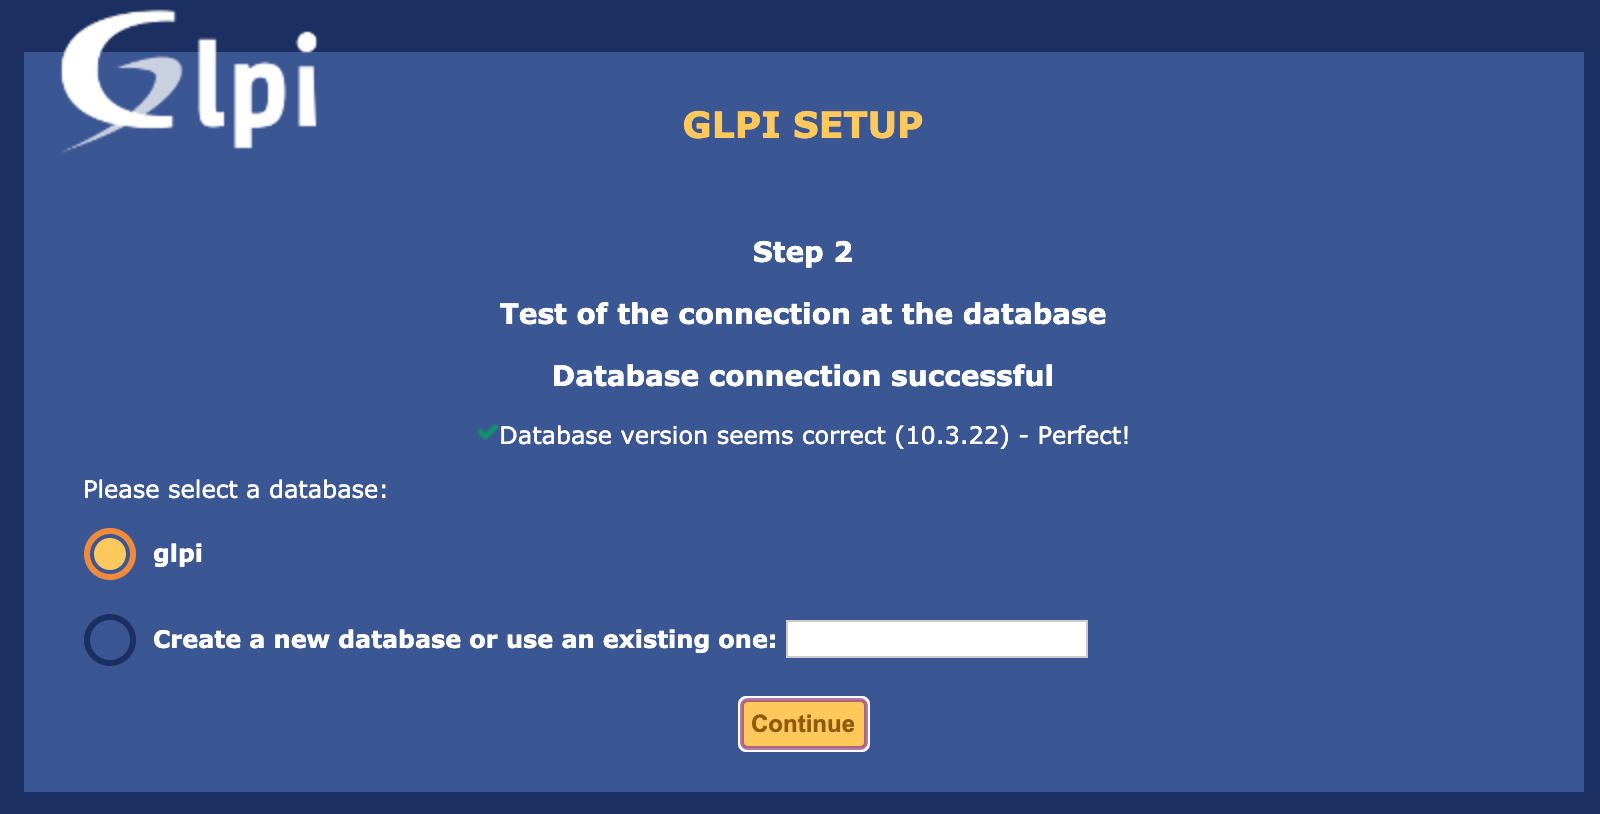
The initialization of the database might take a few minutes.
-
Click Continue again.
Once the installation completes, your default logins and passwords display.
-
Use the following identification to connect as the administrator:
- Login:
glpi - Password:
glpi
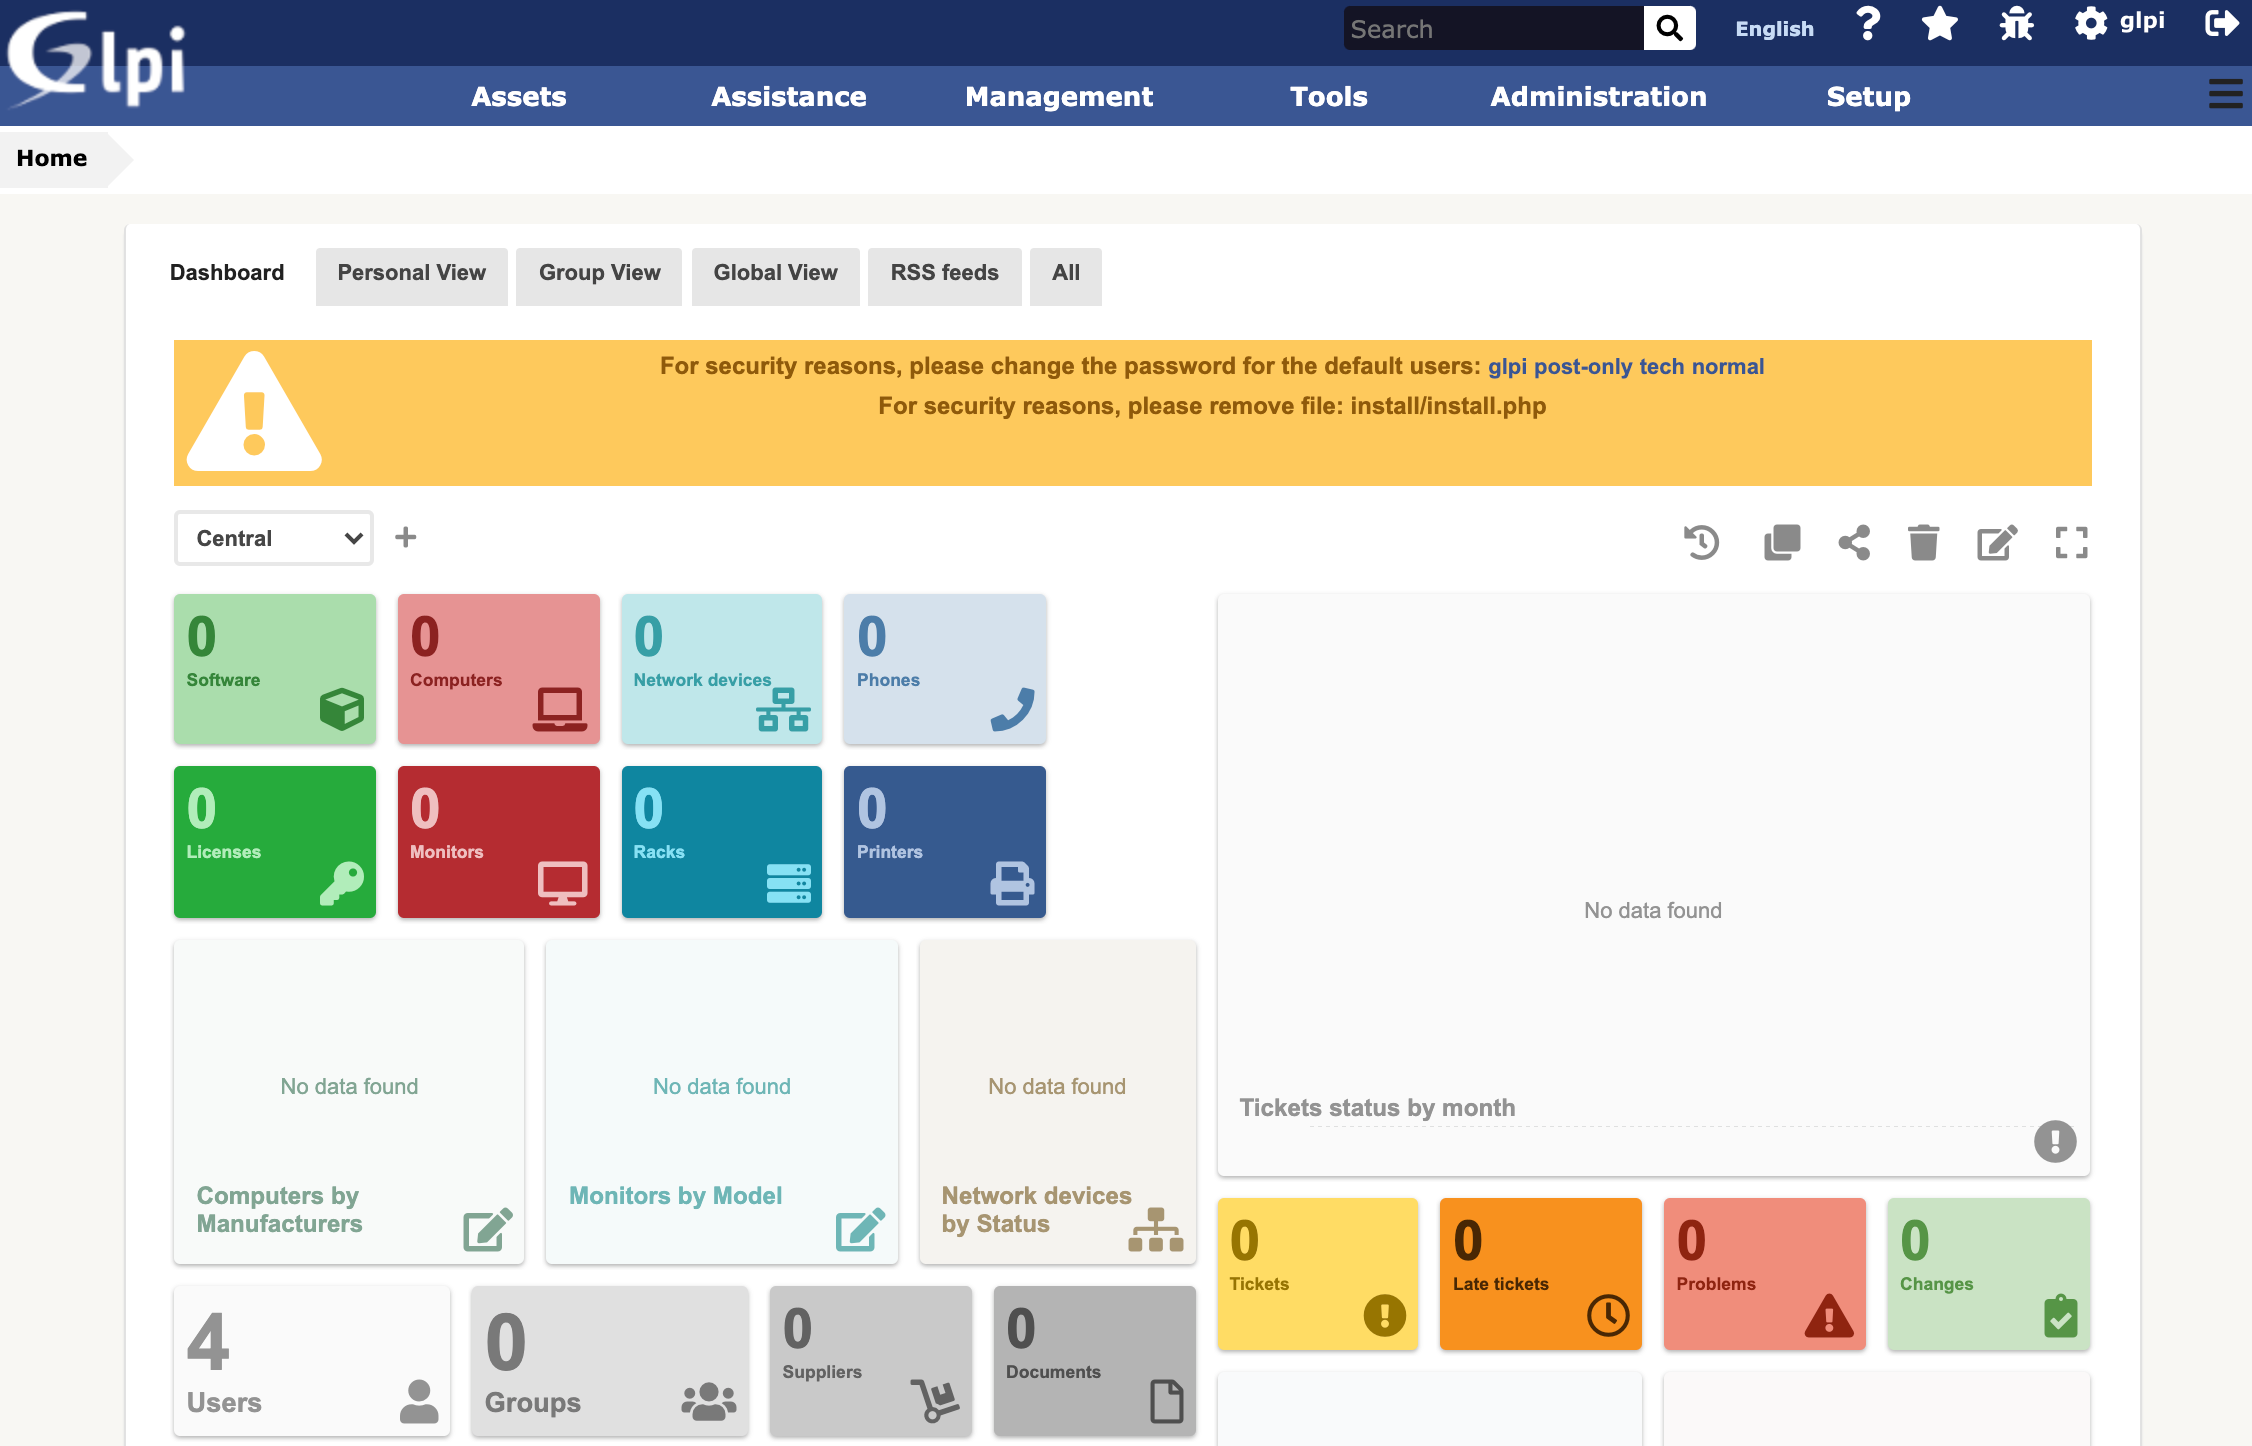
The GLPI dashboard displays.
- Login:
Your setup is complete. You can begin managing assets and resources. GLPI provides documentation to help you get started.
Visit our Help Center and find the answers to your most frequent questions.
Visit Help Center