Setting up a self-hosted git repository with Gitea
Gitea is a Git service that can be self-hosted to provide a lightweight code hosting solution. Written in Go and licensed under the MIT license, it is a community-managed fork of Gogs.
Git itself, is a distributed version control system used to track changes in files. Created by Linus Torvalds in 2005, it was initially designed to manage the development of the Linux kernel among a community of developers.
Unlike many other client-server systems, Git allows every Git directory on every computer to contain the entire repository with a complete history and version tracking, enabling it to be independent of network access or a central server.
While Git was initially developed for software development purposes, it can track changes in any file.
Before you start
To complete the actions presented below, you must have:
- A Scaleway account logged into the console
- Owner status or IAM permissions allowing you to perform actions in the intended Organization
- An SSH key
- An Instance running on Ubuntu Bionic Beaver (18.04) or later
Installing Gitea
- Log into your server via SSH.
- Update the APT package cache, upgrade the already installed software, and install Git:
apt update && apt upgrade -y && apt install git -y - Download the Gitea Binary and make it executable:
wget -O gitea https://dl.gitea.com/gitea/1.22.2/gitea-1.22.2-linux-amd64 chmod +x gitea - Add the user that will run the Gitea application:
adduser --system --shell /bin/bash --gecos 'Git Version Control' --group --disabled-password --home /home/git git - Create the folder structure that is used by Gitea to store data:
mkdir -p /var/lib/gitea/custom mkdir -p /var/lib/gitea/data mkdir -p /var/lib/gitea/log chown -R git:git /var/lib/gitea/ chmod -R 750 /var/lib/gitea/ mkdir /etc/gitea chown root:git /etc/gitea chmod 770 /etc/gitea - Set the working directory of Gitea:
export GITEA_WORK_DIR=/var/lib/gitea/ - Copy the Gitea binary file to
/usr/local/binto make it available system-wide:cp gitea /usr/local/bin/gitea
Running Gitea
- Create a systemd service for Gitea by opening the file
/etc/systemd/system/gitea.servicein a text editor likenano. - Copy the following content into the service file:
[Unit] Description=Gitea (Git with a cup of tea) After=syslog.target After=network.target #Requires=mysql.service #Requires=mariadb.service #Requires=postgresql.service #Requires=memcached.service #Requires=redis.service [Service] # Modify these two values and uncomment them if you have # repos with lots of files and get an HTTP error 500 because # of that ## #LimitMEMLOCK=infinity #LimitNOFILE=65535 RestartSec=2s Type=simple User=git Group=git WorkingDirectory=/var/lib/gitea/ ExecStart=/usr/local/bin/gitea web -c /etc/gitea/app.ini Restart=always Environment=USER=git HOME=/home/git GITEA_WORK_DIR=/var/lib/gitea # If you want to bind Gitea to a port below 1024 uncomment # the two values below ## #CapabilityBoundingSet=CAP_NET_BIND_SERVICE #AmbientCapabilities=CAP_NET_BIND_SERVICE [Install] WantedBy=multi-user.target - Enable the service and start Gitea at system boot:
systemctl enable gitea.service systemctl start gitea.service - Start Gitea for the first time from the command-line:
GITEA_WORK_DIR=/var/lib/gitea/ /usr/local/bin/gitea web -c /etc/gitea/app.ini - In a web browser go to
http://<your_instance_ip>:3000/to access the Gitea application:
- Click Register to start the database initialization. Gitea supports SQLite which makes the application very lightweight and ideal for a self-hosted development Environment. If you require more performance, it is also possible to use MySQL/MariaDB or PostgreSQL.
- Choose SQLite as database type. Leave the other pre-filled settings as they are, they are already set to the required values, and confirm the form.
- The installation is now ready, and it is time to create the first user. Open
http://<your_instance_ip>:3000/user/sign_upin a web browser and fill in the required parameters. - Once the form has been submitted, you are logged into your Gitea account:
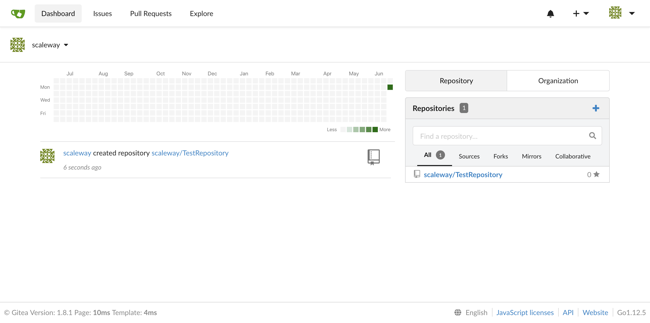
You can now configure your profile and begin to host code on your instance.
Setting up a Nginx SSL/TLS reverse proxy
For increased security, it is possible to configure NGINX reverse proxy with TSL/SSL in front of the Gitea instance. It handles all requests sent from a client to the web interface and adds a layer of increased security and performance.
- Install Nginx:
apt install nginx - Disable the default virtual host which has been configured during the installation of Nginx via the APT package manager:
unlink /etc/nginx/sites-enabled/default - Enter the directory
/etc/nginx/sites-availableand create a reverse proxy configuration file:cd /etc/nginx/sites-available nano reverse-proxy.conf - Paste the following Nginx configuration block in the text editor. The proxy server redirects all incoming connections to the web server listening on port 80, to the local Gitea application, listening on port 3000.
server { listen 80; listen [::]:80; server_name gitea.example.com; access_log /var/log/nginx/reverse-access.log; error_log /var/log/nginx/reverse-error.log; location / { proxy_pass http://127.0.0.1:3000; } } - Create a symbolic link from
/etc/nginx/sites-available/reverse-proxy.confto/etc/nginx/sites-enabled/reverse-proxy.confto activate the new configuration:ln -s /etc/nginx/sites-available/reverse-proxy.conf /etc/nginx/sites-enabled/reverse-proxy.conf - Restart Nginx:
service nginx restart - Certbot is a tool that can obtain and renew Let's Encrypt TLS certificates. Add it to the APT repository and install the Certbot application
apt install software-properties-common add-apt-repository ppa:certbot/certbot apt update && apt install python-certbot-nginx -y - Certbot can configure the Nginx automatically. Run the application and specify the flag
--nginxto configure the web server:certbot --nginx - When asked to do so, enter your email address and press Enter.
- Confirm the Terms of Service of Let's Encrypt by pressing on
Ato agree. - Certbot asks you if you want to share your email address with the Electronic Frontier Foundation (EFF). Confirm it by pressing
Yor refuse it by pressingN. - A list of domain names configured on the server is displayed. Press Enter to confirm:
Which names would you like to activate HTTPS for? - - - - - - - - - - - - - - - - - - - - - - - - - - - - - - - - - - - - - - - - 1: gitea.example.com - - - - - - - - - - - - - - - - - - - - - - - - - - - - - - - - - - - - - - - - Select the appropriate numbers separated by commas and/or spaces, or leave input blank to select all options shown (Enter 'c' to cancel): - Certbot requests the certificate for the domain name indicated in the previous step. Decide whether you want to force HTTPS on all connections by pressing
1or not, by pressing2, followed by Enter:Please choose whether or not to redirect HTTP traffic to HTTPS, removing HTTP access. - - - - - - - - - - - - - - - - - - - - - - - - - - - - - - - - - - - - - - - - 1: No redirect - Make no further changes to the webserver configuration. 2: Redirect - Make all requests redirect to secure HTTPS access. Choose this for new sites, or if you're confident your site works on HTTPS. You can undo this change by editing your web server's configuration. - - - - - - - - - - - - - - - - - - - - - - - - - - - - - - - - - - - - - - - - Select the appropriate number [1-2] then [enter] (press 'c' to cancel): - You can access Gitea via the Nginx Proxy now using an encrypted connection, by opening
https://gitea.example.comin your web browser.
Disabling Port 3000 in the Firewall
- For increased security it is possible to block the access to port 3000 from the exterior to avoid direct connections to the Gitea application without passing through Nginx. Start by installing UFW as a firewall on the instance:
apt install ufw - Block all traffic by default:
ufw default deny - Then allow outgoing connections:
ufw default allow outgoing - Enable connections on the ports
22(SSH),80(HTTP),443(HTTPS) via TCP and53(DNS) via TCP and UDP as both are required for DNS:ufw allow 22/tcp ufw allow 80/tcp ufw allow 443/tcp ufw allow 53 - Activate the new firewall configuration:
ufw enable - Connections to all other ports than the ones mentioned above are blocked now. Access to the Gitea Application is only possible by passing through the Nginx proxy.
Visit our Help Center and find the answers to your most frequent questions.
Visit Help Center