Publishing a website to a Windows Instance using Web Deploy
How to use Web Deploy to publish a website to Scaleway's Windows Server VMs
This guide explains how to publish a web application to a Scaleway Instance with Windows Server using the following tools:
- IIS, which is the default web server developed by Microsoft for hosting web applications on Windows.
- Web Deploy, a single-click remote deployment technology for IIS.
Throughout this guide, you will learn how to:
- Configure the Windows Server Instance with Web Deploy;
- Set up a website in IIS;
- Publish an application directly from Visual Studio.
Before you start
To complete the actions presented below, you must have:
- A Scaleway account logged into the console
- Owner status or IAM permissions allowing you to perform actions in the intended Organization
- An Instance running Windows Server or Windows Server Core
Configuring Windows Server to accept Web Deploy
In Windows Server, IIS and its remote management components are not installed by default and need to be added as features. Web Deploy, a tool for deploying web applications, is distributed separately by Microsoft. Here is how to set up your Windows Server to accept Web Deploy:
-
Connect to your Windows Server Instance and open a PowerShell prompt.
-
Install the necessary IIS features and management tools:
Install-WindowsFeature Web-Server, Web-WebServer, Web-Mgmt-Tools, Web-Mgmt-Service- Download and run the Web Deploy installer. An up-to-date, direct download link can be found at https://aka.ms/webdeploydownload:
Invoke-WebRequest -Uri "https://download.microsoft.com/download/b/d/8/bd882ec4-12e0-481a-9b32-0fae8e3c0b78/webdeploy_amd64_en-US.msi" -OutFile webdeploy.msi
Start-Process msiexec.exe -ArgumentList '/i webdeploy.msi'-
Follow the installation wizard launched by the previous command. When prompted, select the Complete installation.
-
Start the Web Management Service for IIS:
Start-Service WMSVCCreating the website configuration in IIS
The Instance is now ready to accept Web Deploy connections. You will create a configuration for a new website in IIS to use as a Web Deploy target. In this guide, the website is named MyApplication.
- Create a directory for the website:
mkdir "C:\inetpub\wwwroot\MyApplication"- Create a new website in IIS with the specified name and path:
New-Website -Name "MyApplication" -PhysicalPath "C:\inetpub\wwwroot\MyApplication"- Remove port bindings of the default website and create a new binding for the MyApplication website on port 80:
Remove-WebBinding "Default Web Site"
New-WebBinding -Name "MyApplication" -IPAddress "*" -Port 80 -HostHeader ""- Start the newly created website:
Start-Website -Name "MyApplication"Publishing from Visual Studio
- Open or create a web project in Visual Studio.
- Right-click the solution and select Publish.
- Choose Web Server (IIS) and click Next.
- Select Web Deploy and click Next.
- Set up the publish profile:
- Server:
<Your_Instance_IP>:8172 - Site name: MyApplication
- Destination URL:
<Your_Instance_IP> - User name: Administrator
- Password: (Use the password retrieved earlier)
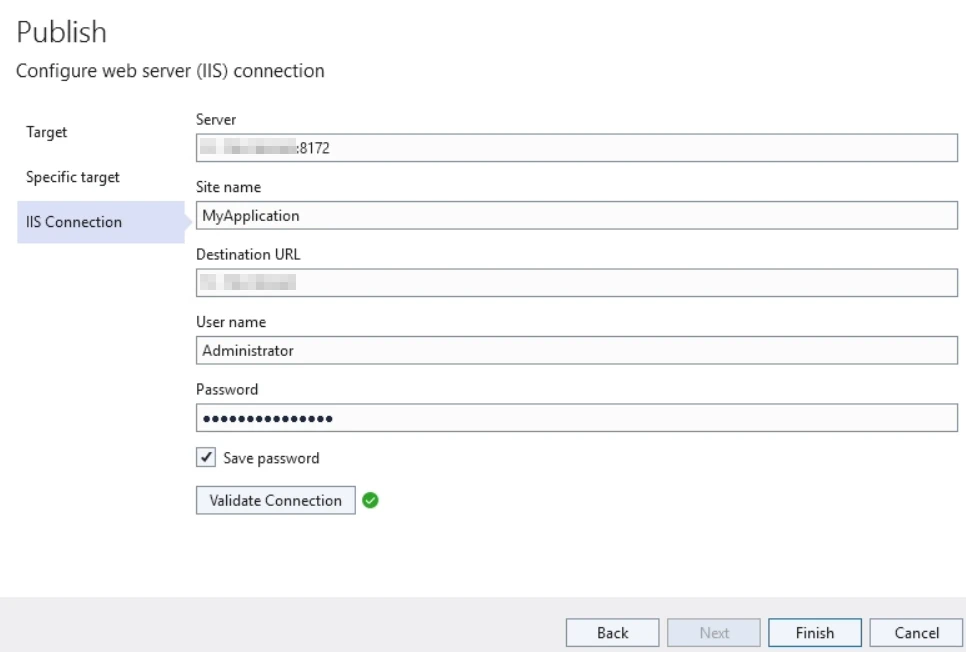
- Server:
- Click Finish to create the profile.
- Click Publish to deploy your website.
Accessing your website
Open a web browser and navigate to your server's IP address. Your website should now be live.
Visit our Help Center and find the answers to your most frequent questions.
Visit Help Center