Creating models in your Django application
Django is a web development framework for developing dynamic websites and applications. Django allows the use of less code and eases the creation of complex websites. It provides a very good structure and easy methods that help to do the heavy lifting when writing web applications.
To follow this tutorial, we assume that you completed the first tutorial on Django installation and configuration.
Before you start
To complete the actions presented below, you must have:
- A Scaleway account logged into the console
- Owner status or IAM permissions allowing you to perform actions in the intended Organization
- An SSH key
- An Instance running Ubuntu Focal Fossa (20.04 LTS) or later
sudoprivileges or access to the root user- Completed the Django installation and configuration tutorial
Creating models
Now that your environment (my-django) is set up, we can create a new application. The difference between an application and a project is that an app is a Web application that does something. A project is a collection of configurations and apps for a particular website. A project can contain multiple apps. An app can be in multiple projects.
-
To create your app, access the directory containing your
manage.pyfile using a terminal, then run the following command:python manage.py startapp pollsWe create two models: Question and Choice. A Question has a question and a publication date. A Choice has two fields: the text of the choice and a vote tally. Each Choice is associated with a Question.
-
Edit the
polls/models.pyfile so it looks like the following:from django.db import models # Create your models here. from django.db import models class Question(models.Model): question_text = models.CharField(max_length=200) pub_date = models.DateTimeField('date published') class Choice(models.Model): question = models.ForeignKey('Question', on_delete=models.CASCADE, ) choice_text = models.CharField(max_length=200) votes = models.IntegerField(default=0) -
To activate the app, edit the
myDjangoProject/settings.pyfile again:nano myDjangoProject/settings.py -
Change the
INSTALLED_APPSsetting to include the stringpolls:# application definition INSTALLED_APPS = [ 'django.contrib.admin', 'django.contrib.auth', 'django.contrib.contenttypes', 'django.contrib.sessions', 'django.contrib.messages', 'django.contrib.staticfiles', 'polls', ] -
Run
makemigrationsto indicate Django that you have made some changes to your models:python manage.py make migrations pollsThe following output displays:
Migrations for 'polls': polls/migrations/0001_initial.py - Create model Choice - Create model Question - Add field question to choice -
Run the migrations with the
migratecommand to manage your database schema automatically:python manage.py migrateThe following output displays:
Operations to perform:
  Apply all migrations: admin, auth, contenttypes, polls, sessions
Running migrations:
  Applying polls.0001_initial... OK
The
migratecommand takes all the migrations that have not been applied and runs them against your database, synchronizing the changes you made to your models with the schema in the database.
Playing with the API
-
Invoke the Python shell:
python manage.py shell -
Paste the following content to the shell:
>>> from polls.models import Question, Choice # Import the model classes we just wrote. # No questions are in the system yet. >>> Question.objects.all() [] # Create a new Question. # Support for time zones is enabled in the default settings file, so # Django expects a datetime with tzinfo for pub_date. Use timezone.now() # instead of datetime.datetime.now() and it will do the right thing. >>> from django.utils import timezone >>> q = Question(question_text="What's your name?", pub_date=timezone.now()) # Save the object into the database. You have to call save() explicitly. >>> q.save() # Now it has an ID. Note that this might say "1L" instead of "1", depending # on which database you're using. >>> q.id 1 # Access model field values via Python attributes. >>> q.question_text "What's your name?" >>> q.pub_date datetime.datetime(2018, 10, 31, 10, 54, 26, 985783, tzinfo=<UTC>) # Change values by changing the attributes, then calling save(). >>> q.question_text = "What's your name?" >>> q.save() # objects.all() displays all the questions in the database. >>> Question.objects.all() <QuerySet [<Question: Question object (1)>]> -
Press
Control+Dto exit the Python shell. -
Edit the
polls/models.pyto add a__str__()method to both Question and Choice.- Open the polls model file:
nano polls/models.py- Then, copy and paste the following:
from django.db import models # Create your models here. from django.db import models class Question(models.Model): question_text = models.CharField(max_length=200) pub_date = models.DateTimeField('date published') def __str__(self): return self.question_text class Choice(models.Model): question = models.ForeignKey('Question', on_delete=models.CASCADE, ) choice_text = models.CharField(max_length=200) votes = models.IntegerField(default=0) def __str__(self): return self.choice_text -
Save these changes and start a new Python interactive shell by running the following command:
python manage.py shellThen, paste the following to make sure our
__str__()addition worked.>>> from polls.models import Question, Choice >>> Question.objects.all() [<Question: What's your name?>] # Django provides a rich database lookup API that's entirely driven by # keyword arguments. >>> Question.objects.filter(id=1) [<Question: What's your name?>] >>> Question.objects.filter(question_text__startswith='What') [<Question:'What's your name', 'What's up?'>] # Get the question that was published this year. >>> from django.utils import timezone >>> current_year = timezone.now().year >>> Question.objects.get(pub_date__year=current_year) <Question: What's your name?> # Request an ID that doesn't exist, this will raise an exception. >>> Question.objects.get(id=3) Traceback (most recent call last): ... DoesNotExist: Question matching query does not exist. # Lookup by a primary key is the most common case, so Django provides a # shortcut for primary-key exact lookups. # The following is identical to Question.objects.get(id=1). >>> Question.objects.get(pk=1) <Question: What's your name?>
Making the application visible in the console
-
When you are logged in, the
pollapp is not displayed on the admin console. To make it appear, edit thepolls/admin.pyfile to match the following:from django.contrib import admin from .models import Question admin.site.register(Question) -
Reload the Admin Console and login.
python manage.py runserver your_server_ip:8000You now have several questions on your admin interface.

If you click
Question, the list of questions added to the configuration file displays.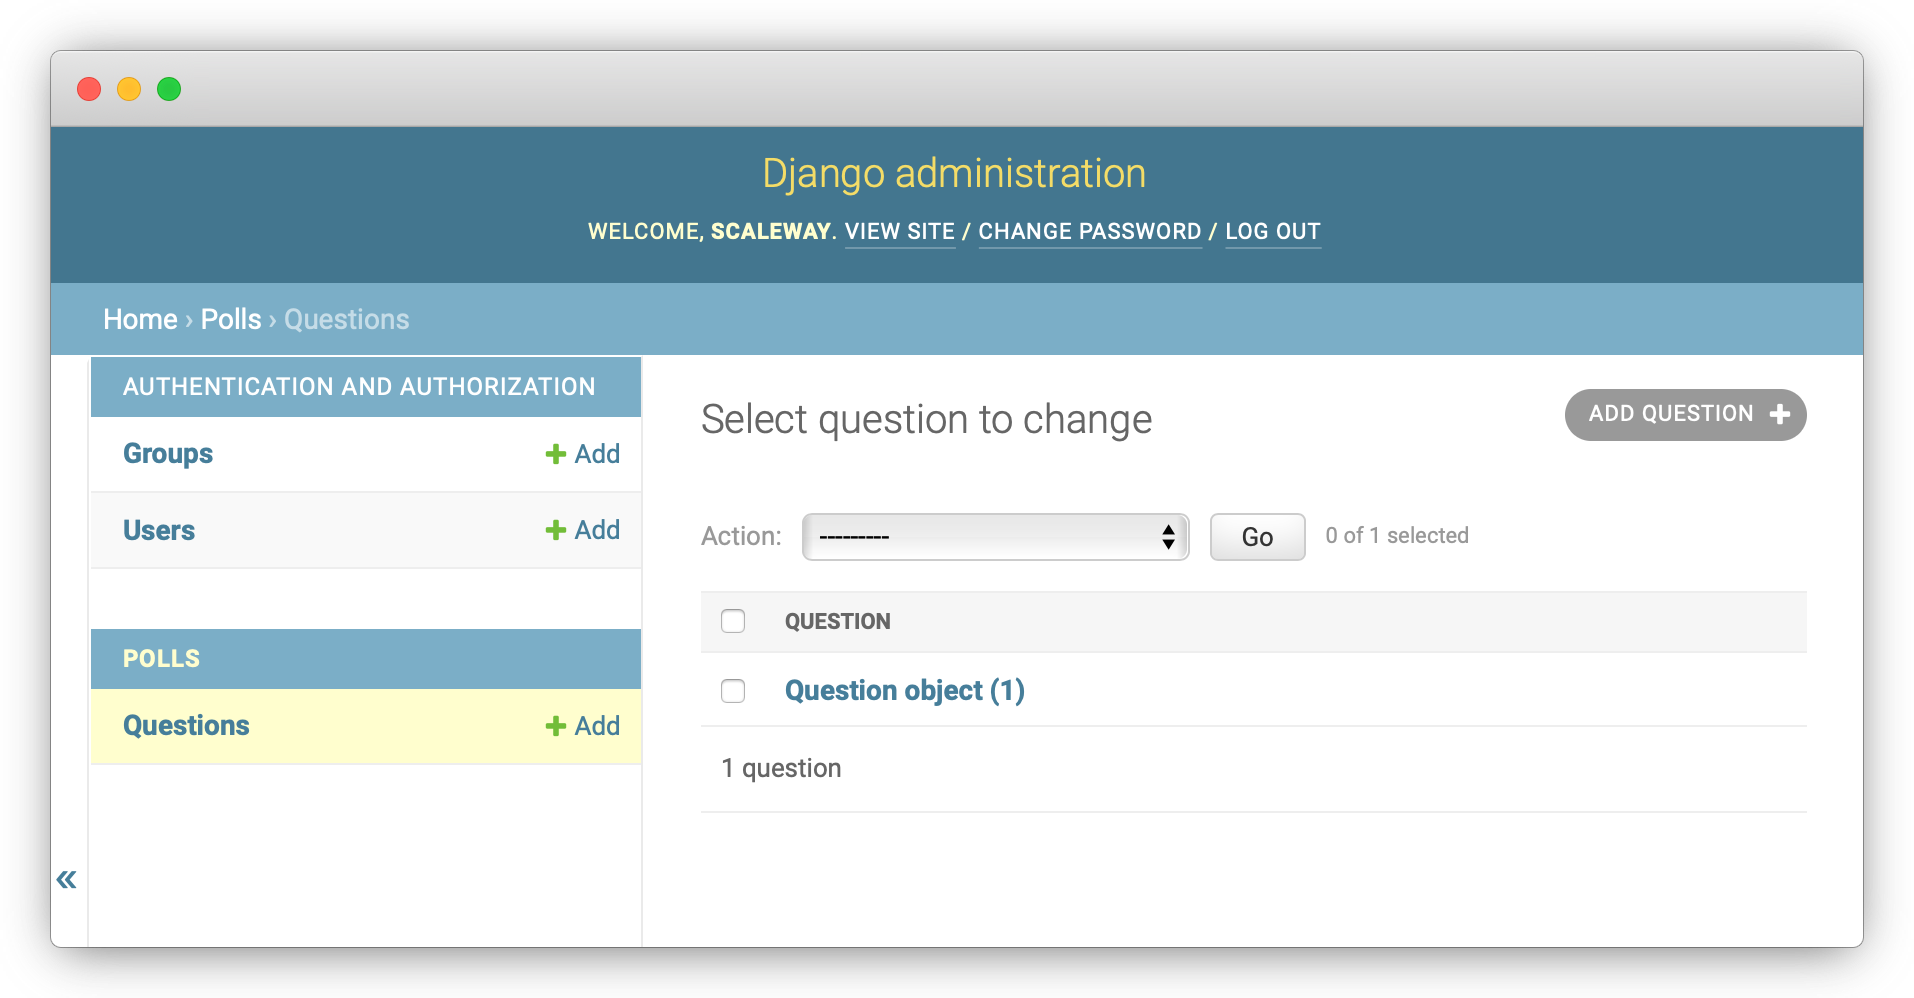
Click each question to either edit or delete it.
Adding Related Objects
Now that we have the questions on the admin page, we need to configure the multiple-choice responses.
-
Edit the
polls/admin.pyfile to add the following:from django.contrib import admin from .models import Choice, Question admin.site.register(Choice) -
Reload the Admin Console and log in.
python manage.py runserver your_server_ip:8000You now have
Choicedisplayed on your admin interface.
-
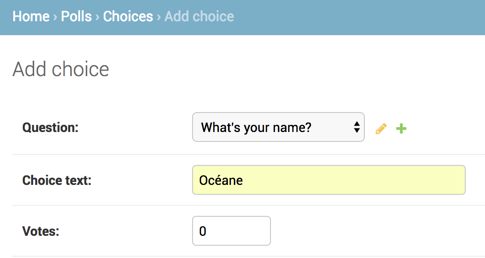
You can add as many choices as you wish. Click Choices to add a choice.
-
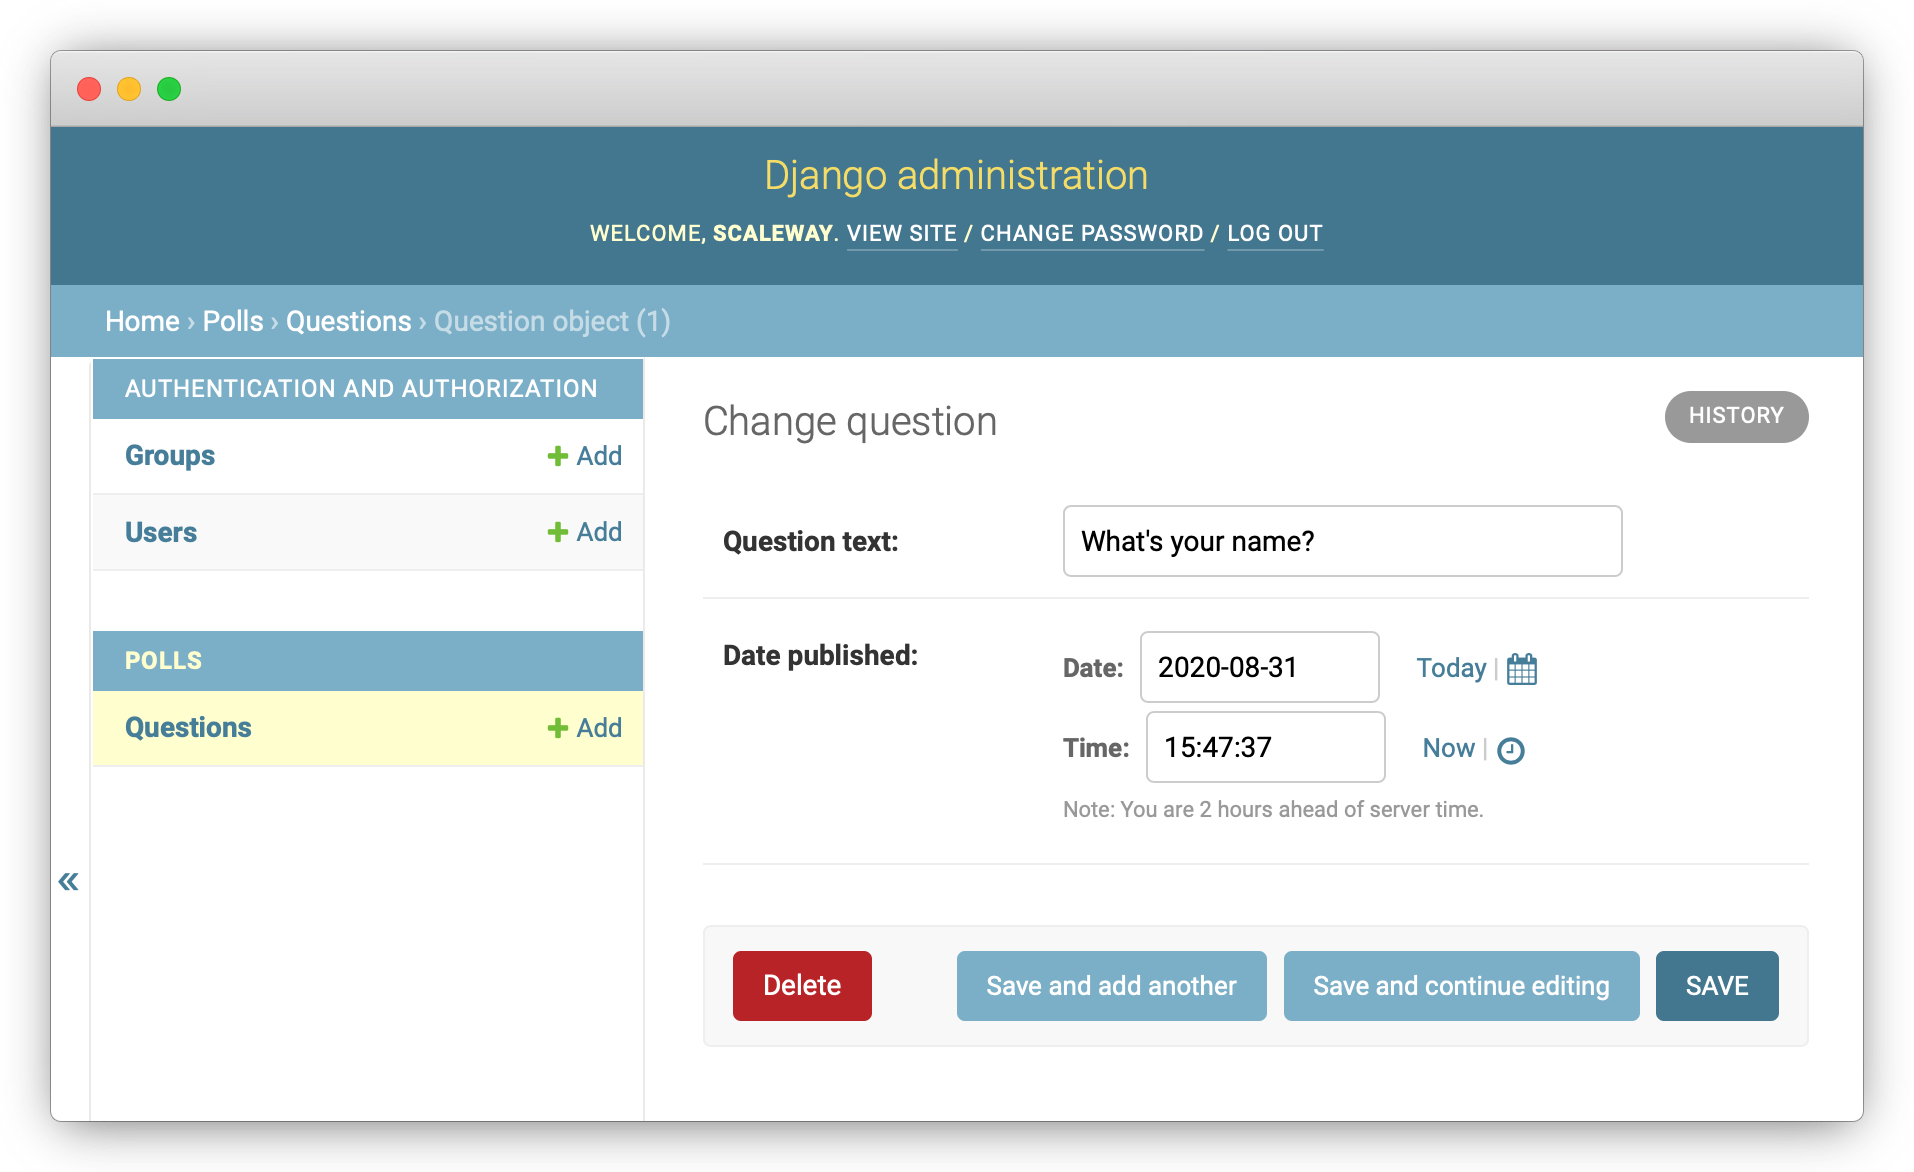
Select your question and type your answer.
You now have a poll with questions and answers. If you want to customize your interface, follow the official Django documentation.
Visit our Help Center and find the answers to your most frequent questions.
Visit Help Center