Deploying Strapi on a Scaleway Instance
Strapi is an open-source, Node.js-based, headless CMS to manage content and make it available through a fully customizable API. Unlike traditional CMSs such as WordPress, with Strapi the content is decoupled from the front end. Strapi simultaneously provides for content creators, who get an easy-to-use, database-driven interface to create, organize, and manage content, and developers, who get the convenience of an API that they can use to query, deliver, and integrate that content to diverse applications and front ends.
In this tutorial, you will learn how to deploy Strapi on a Scaleway Instance.
Before you start
To complete the actions presented below, you must have:
- A Scaleway account logged into the console
- Owner status or IAM permissions allowing you to perform actions in the intended Organization
- An SSH key
- An Instance running on Ubuntu Bionic Beaver (18.04)
Installing dependencies
-
Connect to your Instance using SSH.
-
Update the APT package cache and upgrade the software already installed on the Instance:
apt update && apt upgrade -y -
Download and import the Nodesource GPG key:
apt update apt install -y ca-certificates curl gnupg mkdir -p /etc/apt/keyrings curl -fsSL https://deb.nodesource.com/gpgkey/nodesource-repo.gpg.key | sudo gpg --dearmor -o /etc/apt/keyrings/nodesource.gpg -
Create the deb repository:
echo "deb [signed-by=/etc/apt/keyrings/nodesource.gpg] https://deb.nodesource.com/node_22.x nodistro main" | sudo tee /etc/apt/sources.list.d/nodesource.list -
Update the
aptpackage cache and install Node.js with the following command (npm and npx will also install):apt update apt install -y nodejs -
Check that Node.js and npm are installed:
node -v && npm -v && npx -vYou should see an output confirming the installed version number of each.
-
Strapi uses the yarn package manager. Install the repository for the required version of Yarn by running the following commands:
npm install --global yarn -
Check if
yarnhas been installed using the following command:yarn -vYou should see an output confirming the installed version number.
Installing Strapi and creating a project
-
Navigate to your home directory and create a new folder for your Strapi project:
cd /home/<user> mkdir strapi-projects -
Install Strapi in this directory and create a new project:
cd strapi-projects npx create-strapi-app@latest --quickstart strapi-projectsYou should see Strapi install and run (this may take a few minutes). There is some useful information at the end of this output that you may wish to read and take note of, particularly about the different commands like
yarn developandyarn startthat you can use to run your Strapi app in different modes. In any case, the output should finish with a message like:Create your first administrator 💻 by going to the administration panel at: ┌─────────────────────────────┐ │ http://localhost:1337/admin │ └─────────────────────────────┘ [2020-12-02T09:20:59.034Z] debug HEAD /admin (14 ms) 200 [2020-12-02T09:20:59.038Z] info ⏳ Opening the admin panel...We're now ready to start configuring our Strapi app.
Setting up Strapi and adding content
In this step, we will use the Strapi dashboard to configure Strapi for a very simple blog use case. First, we need to create a SuperAdmin user, then set up a database to hold our blog posts, then write a "Hello World" blog post and see how to access it.
-
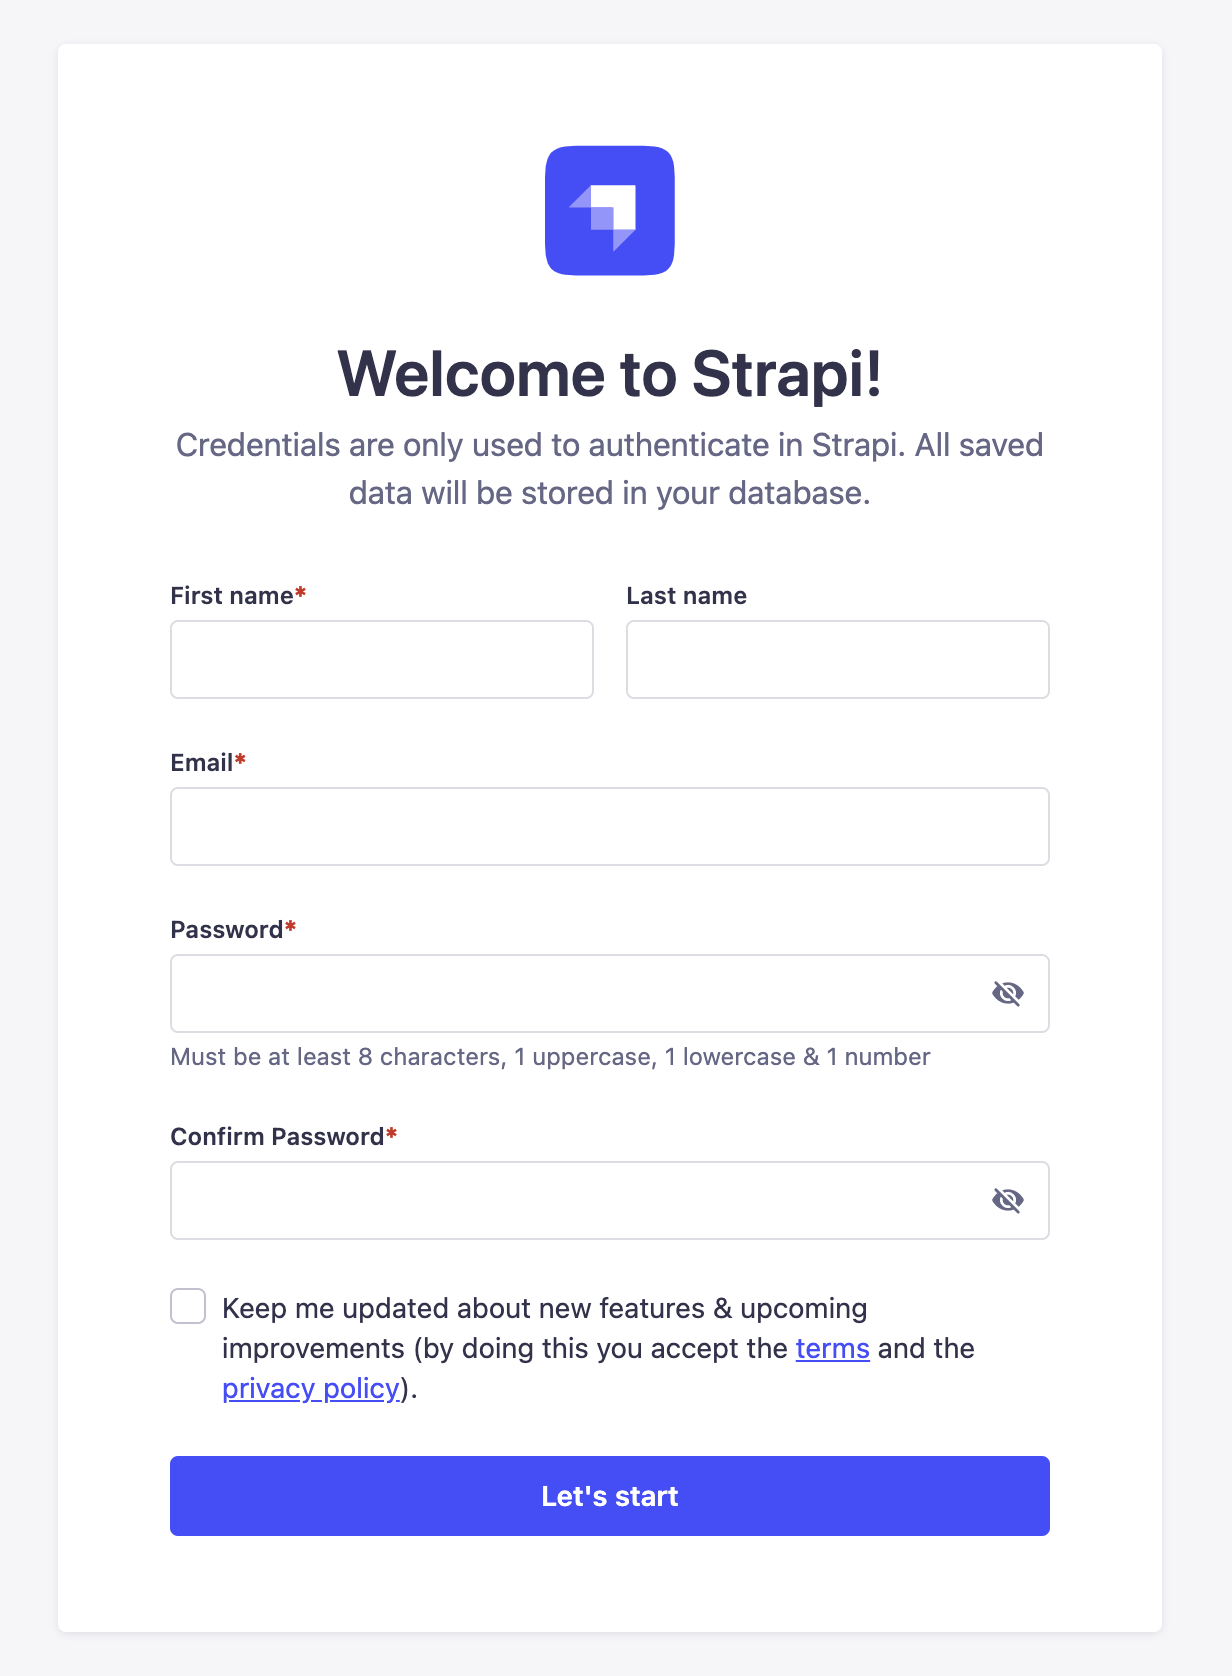
In a browser, go to
http://<Instance IP Address>:1337/admin.You should see the following:
-
Complete the form with your desired information to create an admin user, then click Let's Start. Next, we will essentially define a new database to hold our blog content.
-
Click Create Your First Content Type.
-
Enter Blog as the display name (UID will auto-complete), and click Continue:
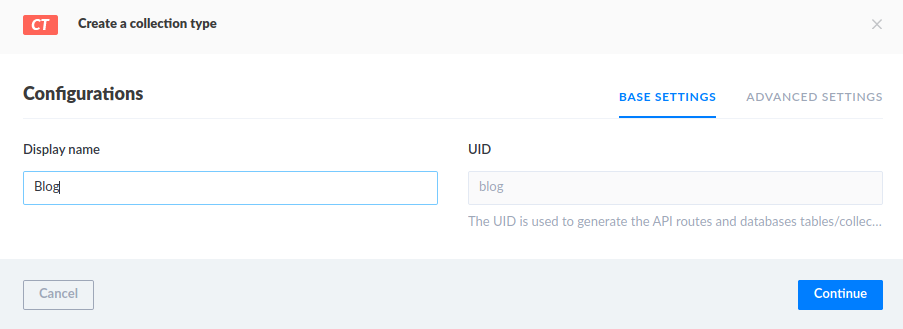
The following screen displays:
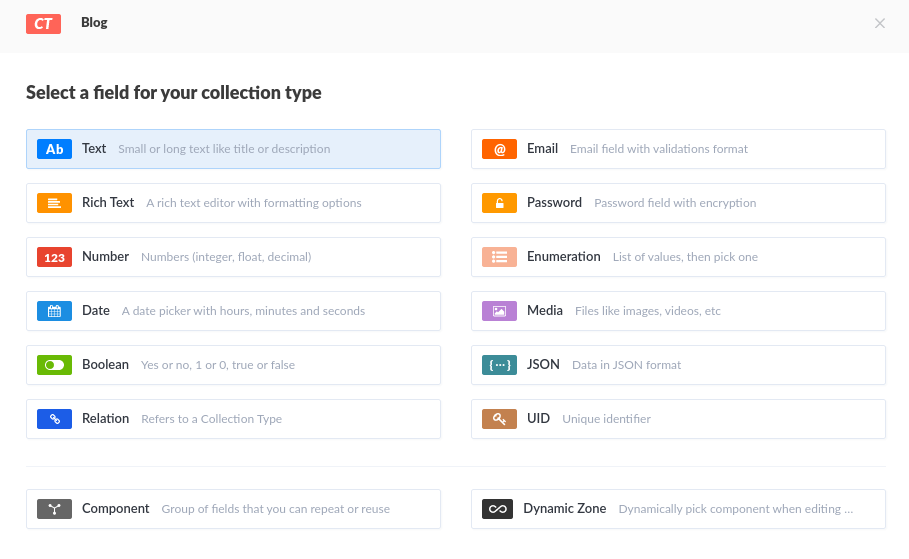
Next, we will define the fields for our Blog database. We will add two text fields, one to hold the title of each blog post and one to hold the content of each post:
-
Click Text. The following screen displays:

-
Enter
Titlein the name field, and click Add another field: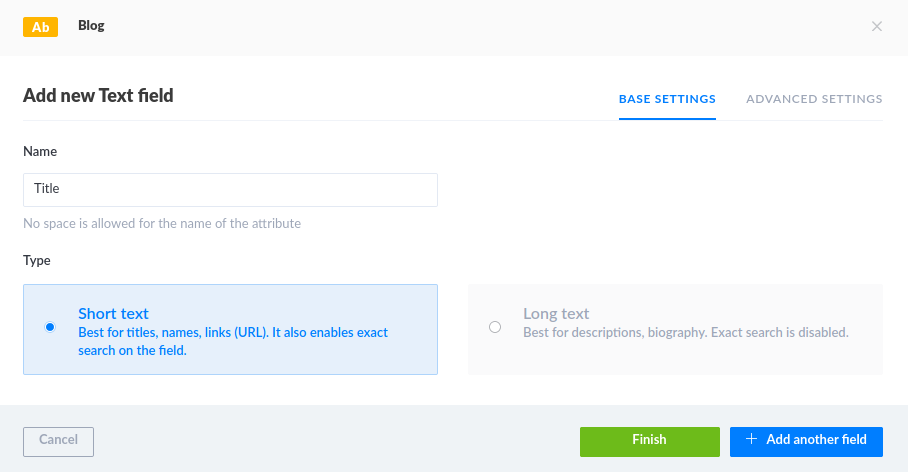
You are taken back to the list of possible field types:
-
Click Text. The following screen displays:
-
Enter Content in the name field, and select Long text underneath, then click Finish:
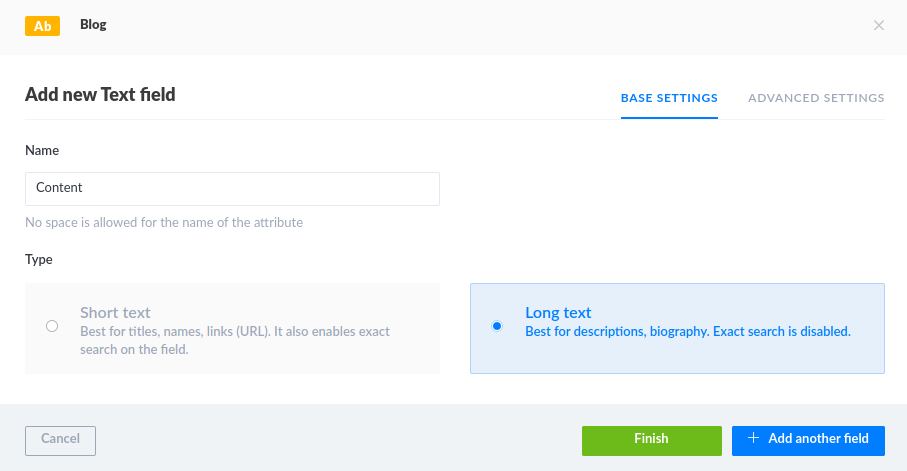
-
A summary of the Blog collection that you have just created displays. Click Save:
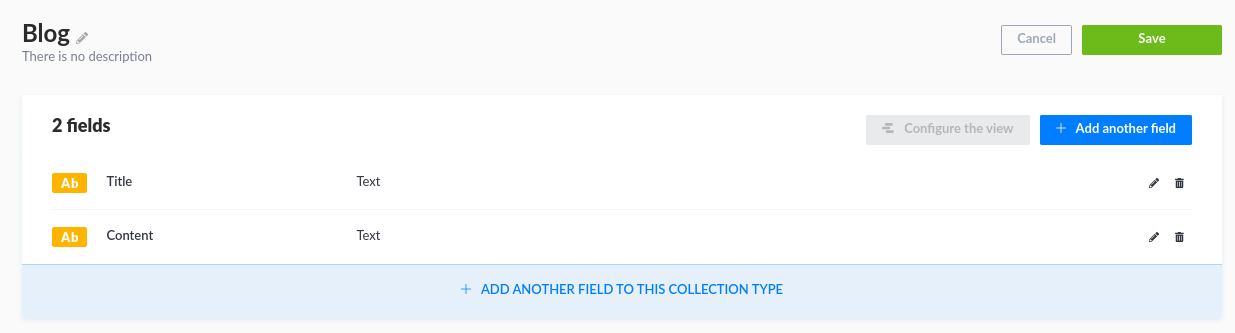
Strapi will restart and refresh your dashboard.
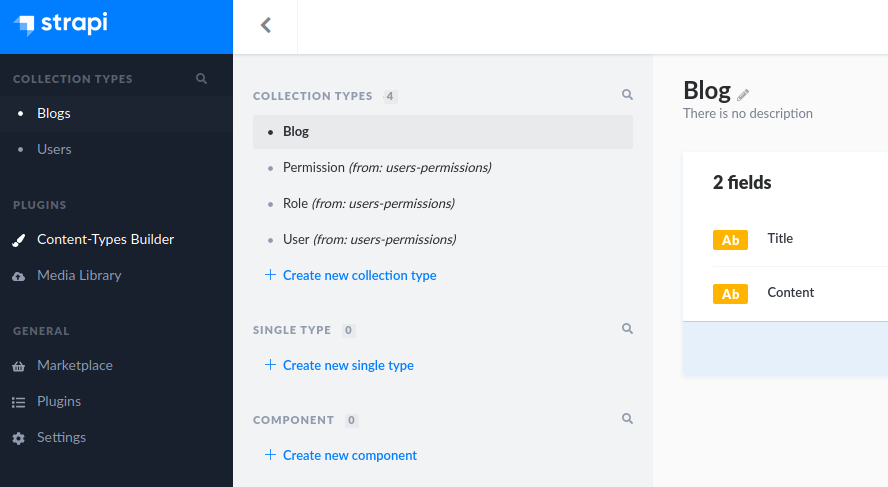
Now that we have set up the database to hold our blog, we will create a quick "Hello World" blog post.
-
Click Blog, which now appears as a Collection Type under the Content Manager section of the navigation menu:
-
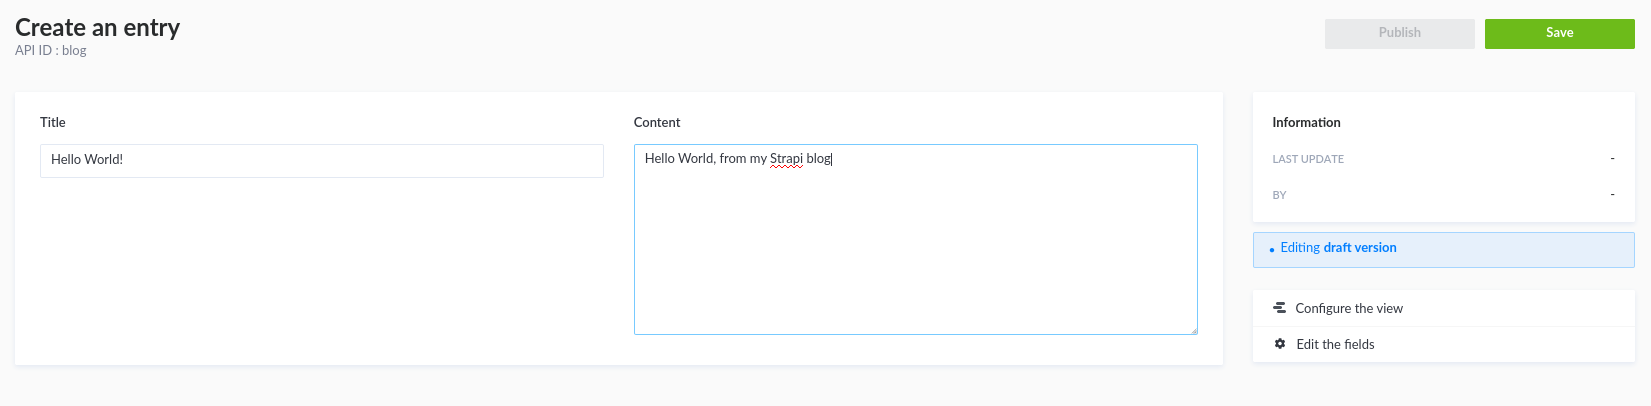
Click Create new entry in the top right.
-
Enter a title and content of your choice, or use the following 'Hello World' examples. Then click Save, followed by Publish:
The final step is to make the content of our blog publicly available.
-
Click Settings, then Roles under the Users and Permissions Plugin section of the navigation menu.
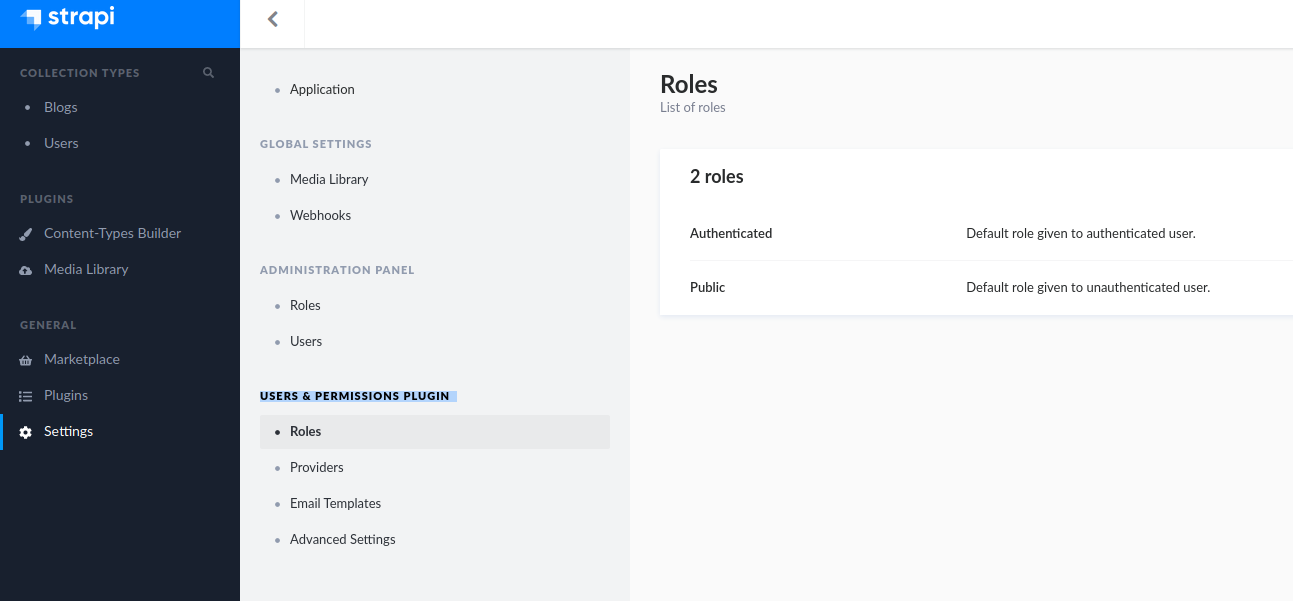
-
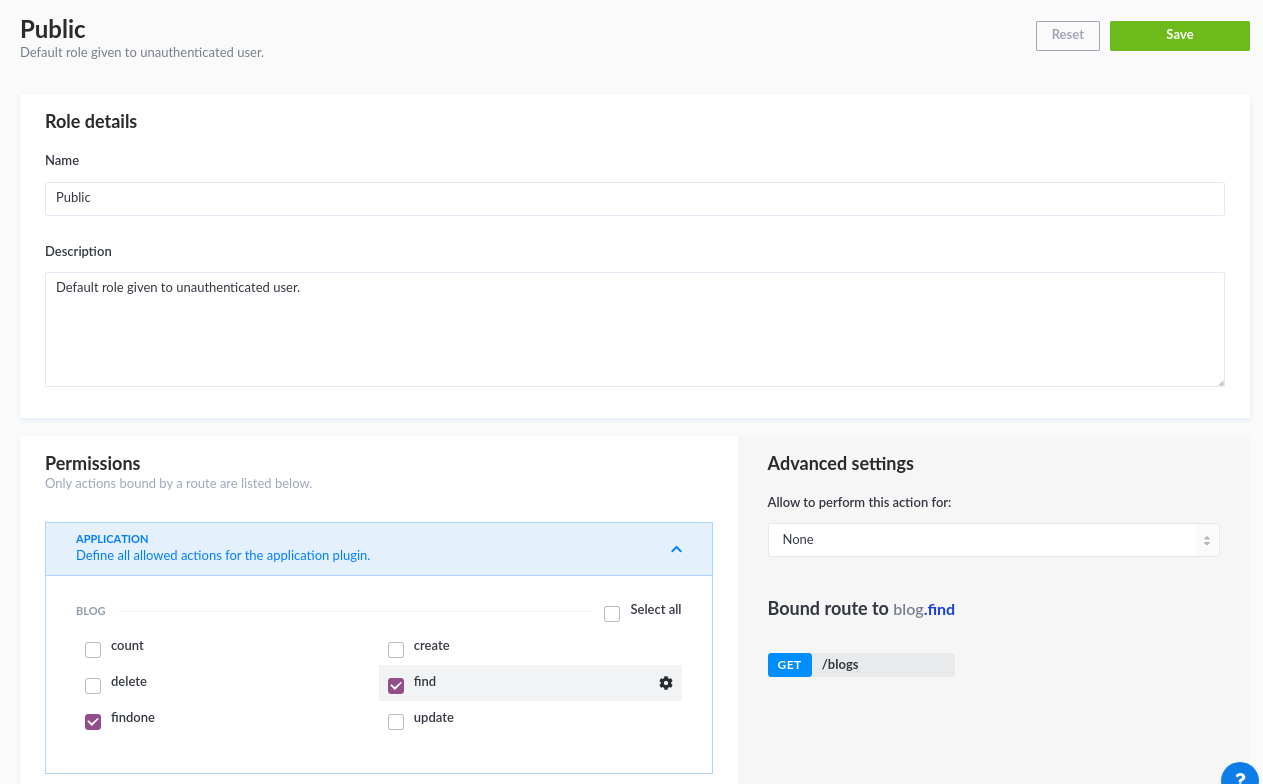
Click Public. Under Permissions, you can see our Blog application.
-
Check the findone and find boxes in the Blog application drop-down, to enable the public to find our blog posts. Then click Save:
Now we can access our "Hello World" blog post from the built-in API with the following action:
-
Open a new browser tab, and go to
http://<Your-Virtual-Instance-IP:1337/blogs. The following will display:
Deploying PM2 to run Strapi as-a-Service
Now you can access your Strapi admin interface, configure your app, create content, and access it via the API. However, there is a problem: as soon as you close your terminal or disconnect from your Instance, your Strapi project will go offline. Your content and admin interface will no longer be available until you reconnect to your Instance and restart Strapi. To get around this, you can use PM2, a daemon process manager, to run Strapi as-a-Service and keep your Strapi project online 24/7, even when you are disconnected from your Instance.
-
On your Instance, use yarn to install PM2:
yarn global add pm2Next, you need to edit your
.bashrcfile to permit the use of global Yarn packages: -
Open your
.bashrcfile with a text editor. Here, we use nano:nano ~/.bashrc -
Add the following to the very end of the file and save the changes:
export PATH="$PATH:$(yarn global bin)" -
Now, to get that modification to the
.bashrcfile to take effect, type:source ~/.bashrc -
Make sure you are in your Strapi app's directory, and run the following command to launch Strapi as-a-Service with PM2. You can replace
my-strapi-projectwith your chosen name:pm2 start npm --name my-strapi-project -- run developYou should see an output like the following:
[PM2] Starting /usr/bin/npm in fork_mode (1 instance)
[PM2] Done.
┌─────┬──────────────────────┬─────────────┬─────────┬─────────┬──────────┬────────┬──────┬───────────┬──────────┬──────────┬──────────┬──────────┐
│ id  │ name                 │ namespace   │ version │ mode    │ pid      │ uptime │ ↺    │ status    │ cpu      │ mem      │ user     │ watching │
├─────┼──────────────────────┼─────────────┼─────────┼─────────┼──────────┼────────┼──────┼───────────┼──────────┼──────────┼──────────┼──────────┤
│ 0   │ my-strapi-project    │ default     │ N/A     │ fork    │ 25501    │ 0s     │ 0    │ online    │ 0%       │ 28.4mb   │ root     │ disabled │
└─────┴──────────────────────┴─────────────┴─────────┴─────────┴──────────┴────────┴──────┴───────────┴──────────┴──────────┴──────────┴──────────┘
Now, even when you disconnect from your Instance, you will still be able to access your Strapi app's admin dashboard and API.
Conclusion
You now know how to deploy a simple Strapi app on a Scaleway Instance. Here, we've just seen the beginning of what you can do with Strapi. For more complex use cases, and more information on using the API, visit the official Strapi documentation.
Visit our Help Center and find the answers to your most frequent questions.
Visit Help Center