Installing Proxmox with software RAID on a Dedibox using KVM-over-IP
Proxmox - Overview
Proxmox Virtual Environment - or Proxmox VE is a server virtualization platform, based on Debian Linux. It allows the deployment of management of KVM-based virtual machines or LXC containers.
The tool provides a REST-API as well as a graphical web interface to manage the virtual machines and is licensed under the GNU Affero General Public License, version 3.
Before you start
To complete the actions presented below, you must have:
- A Dedibox account logged into the console
- Owner status or IAM permissions allowing you to perform actions in the intended Organization
- A Dedibox with KVM-over-IP access
Installing Proxmox
-
Create a KVM-over-IP session from your Dedibox console.
-
Mount the Proxmox ISO, available on the server virtualmedia.online.net. The mounting procedure may differ slightly depending on the KVM module of your Dedibox. The instructions for Proxmox VE 6 can be found here.
-
Boot the server from the ISO file by choosing the virtual CD-ROM drive in the boot options.
-
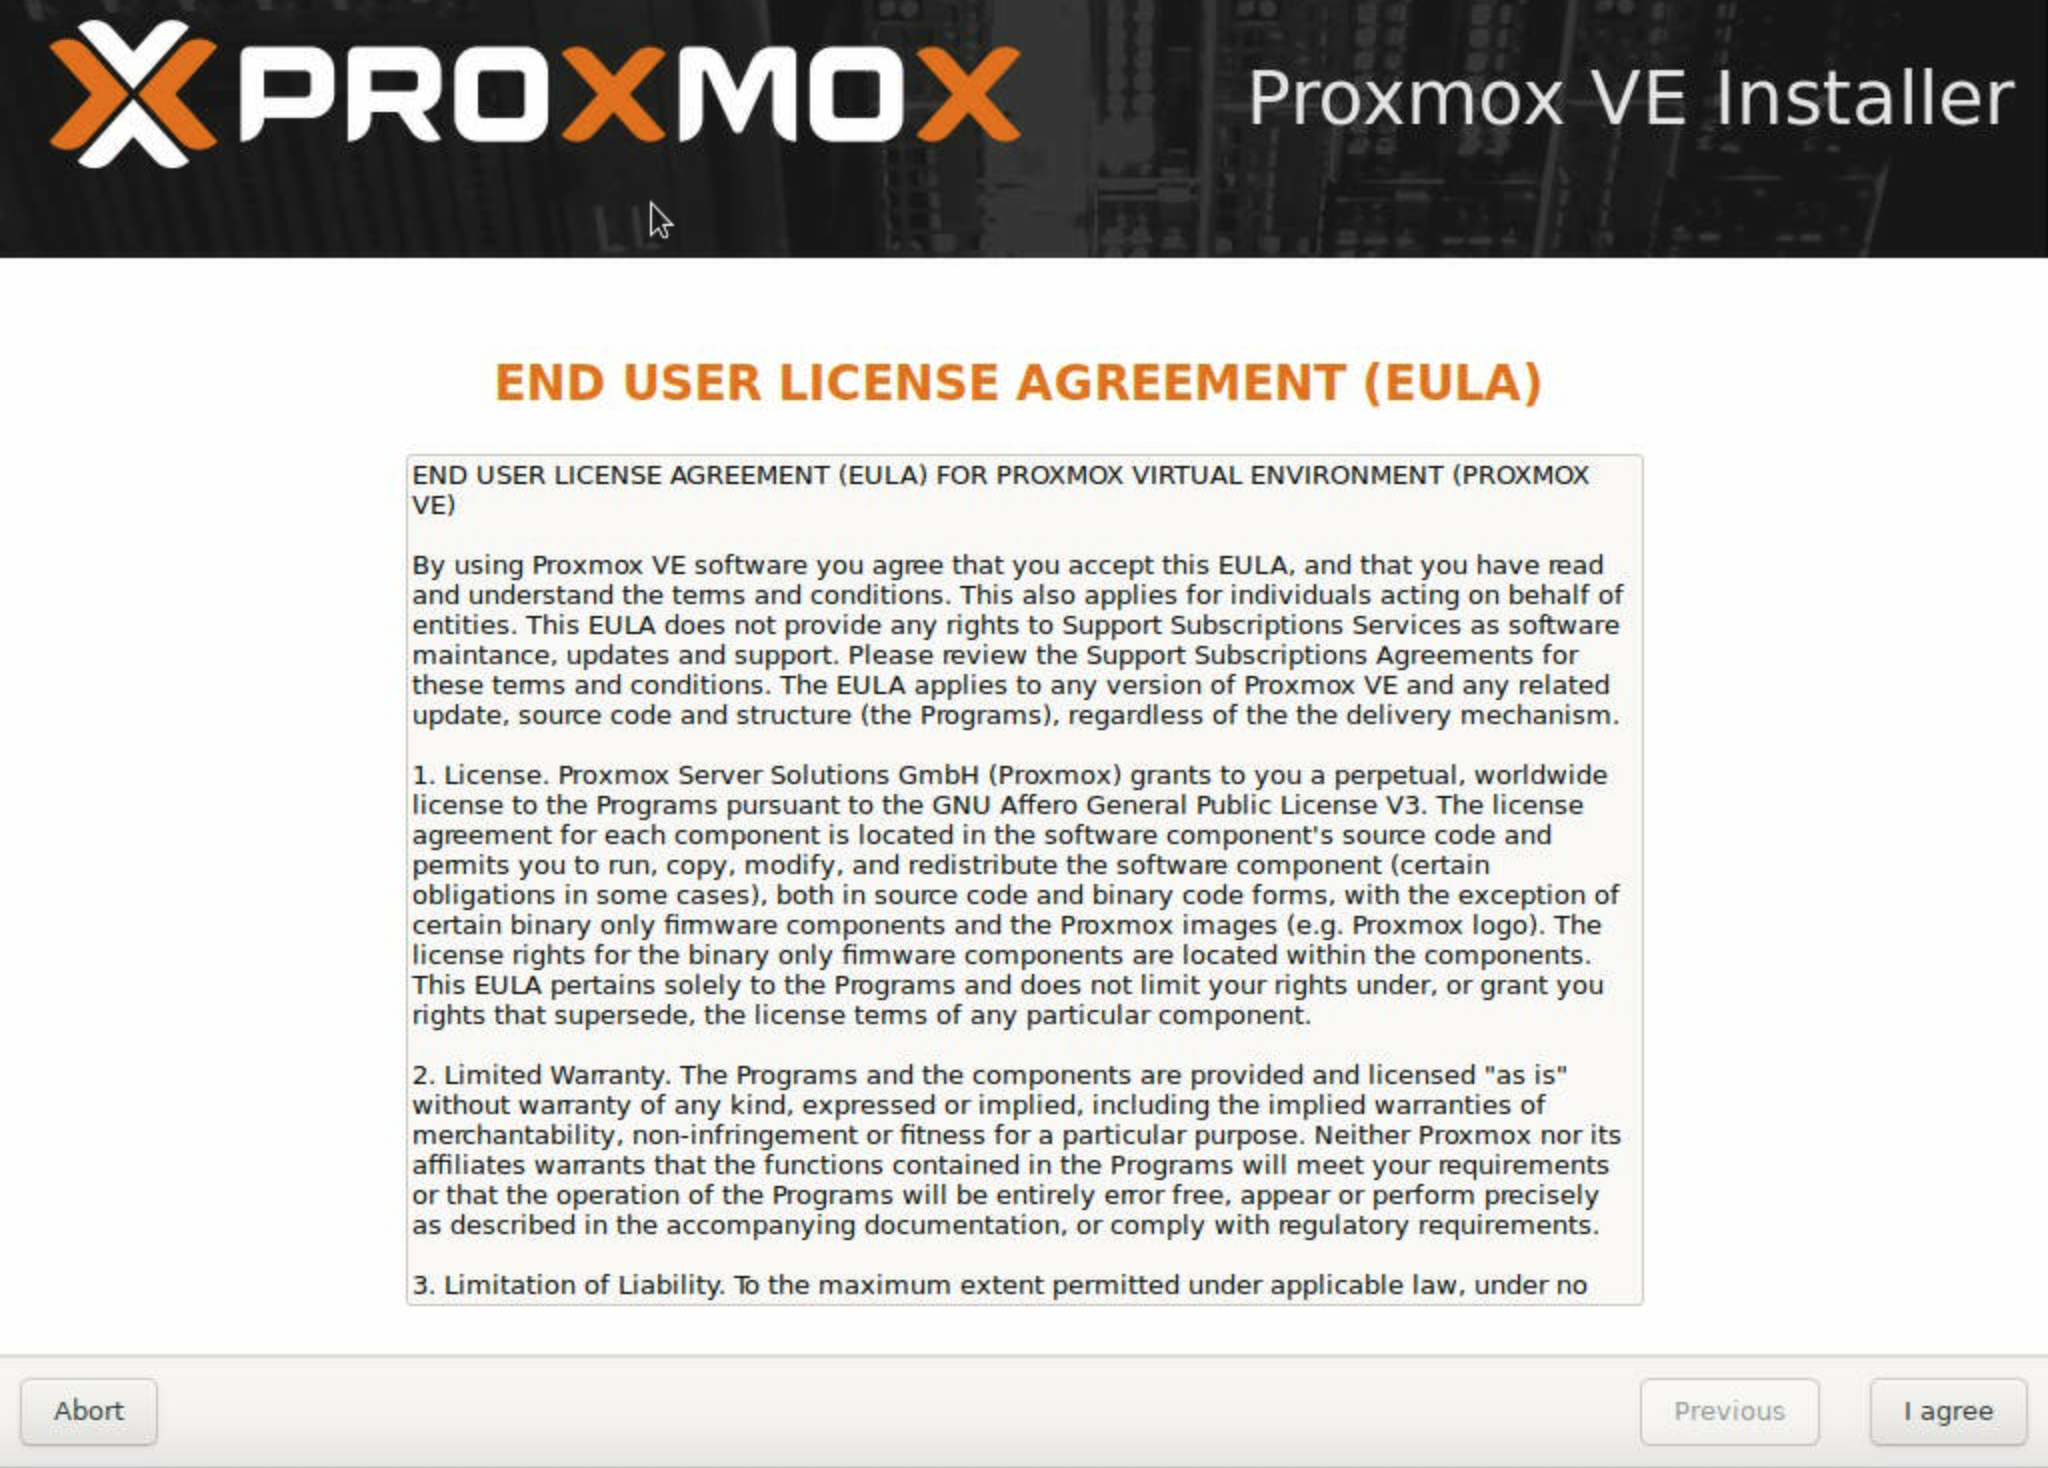
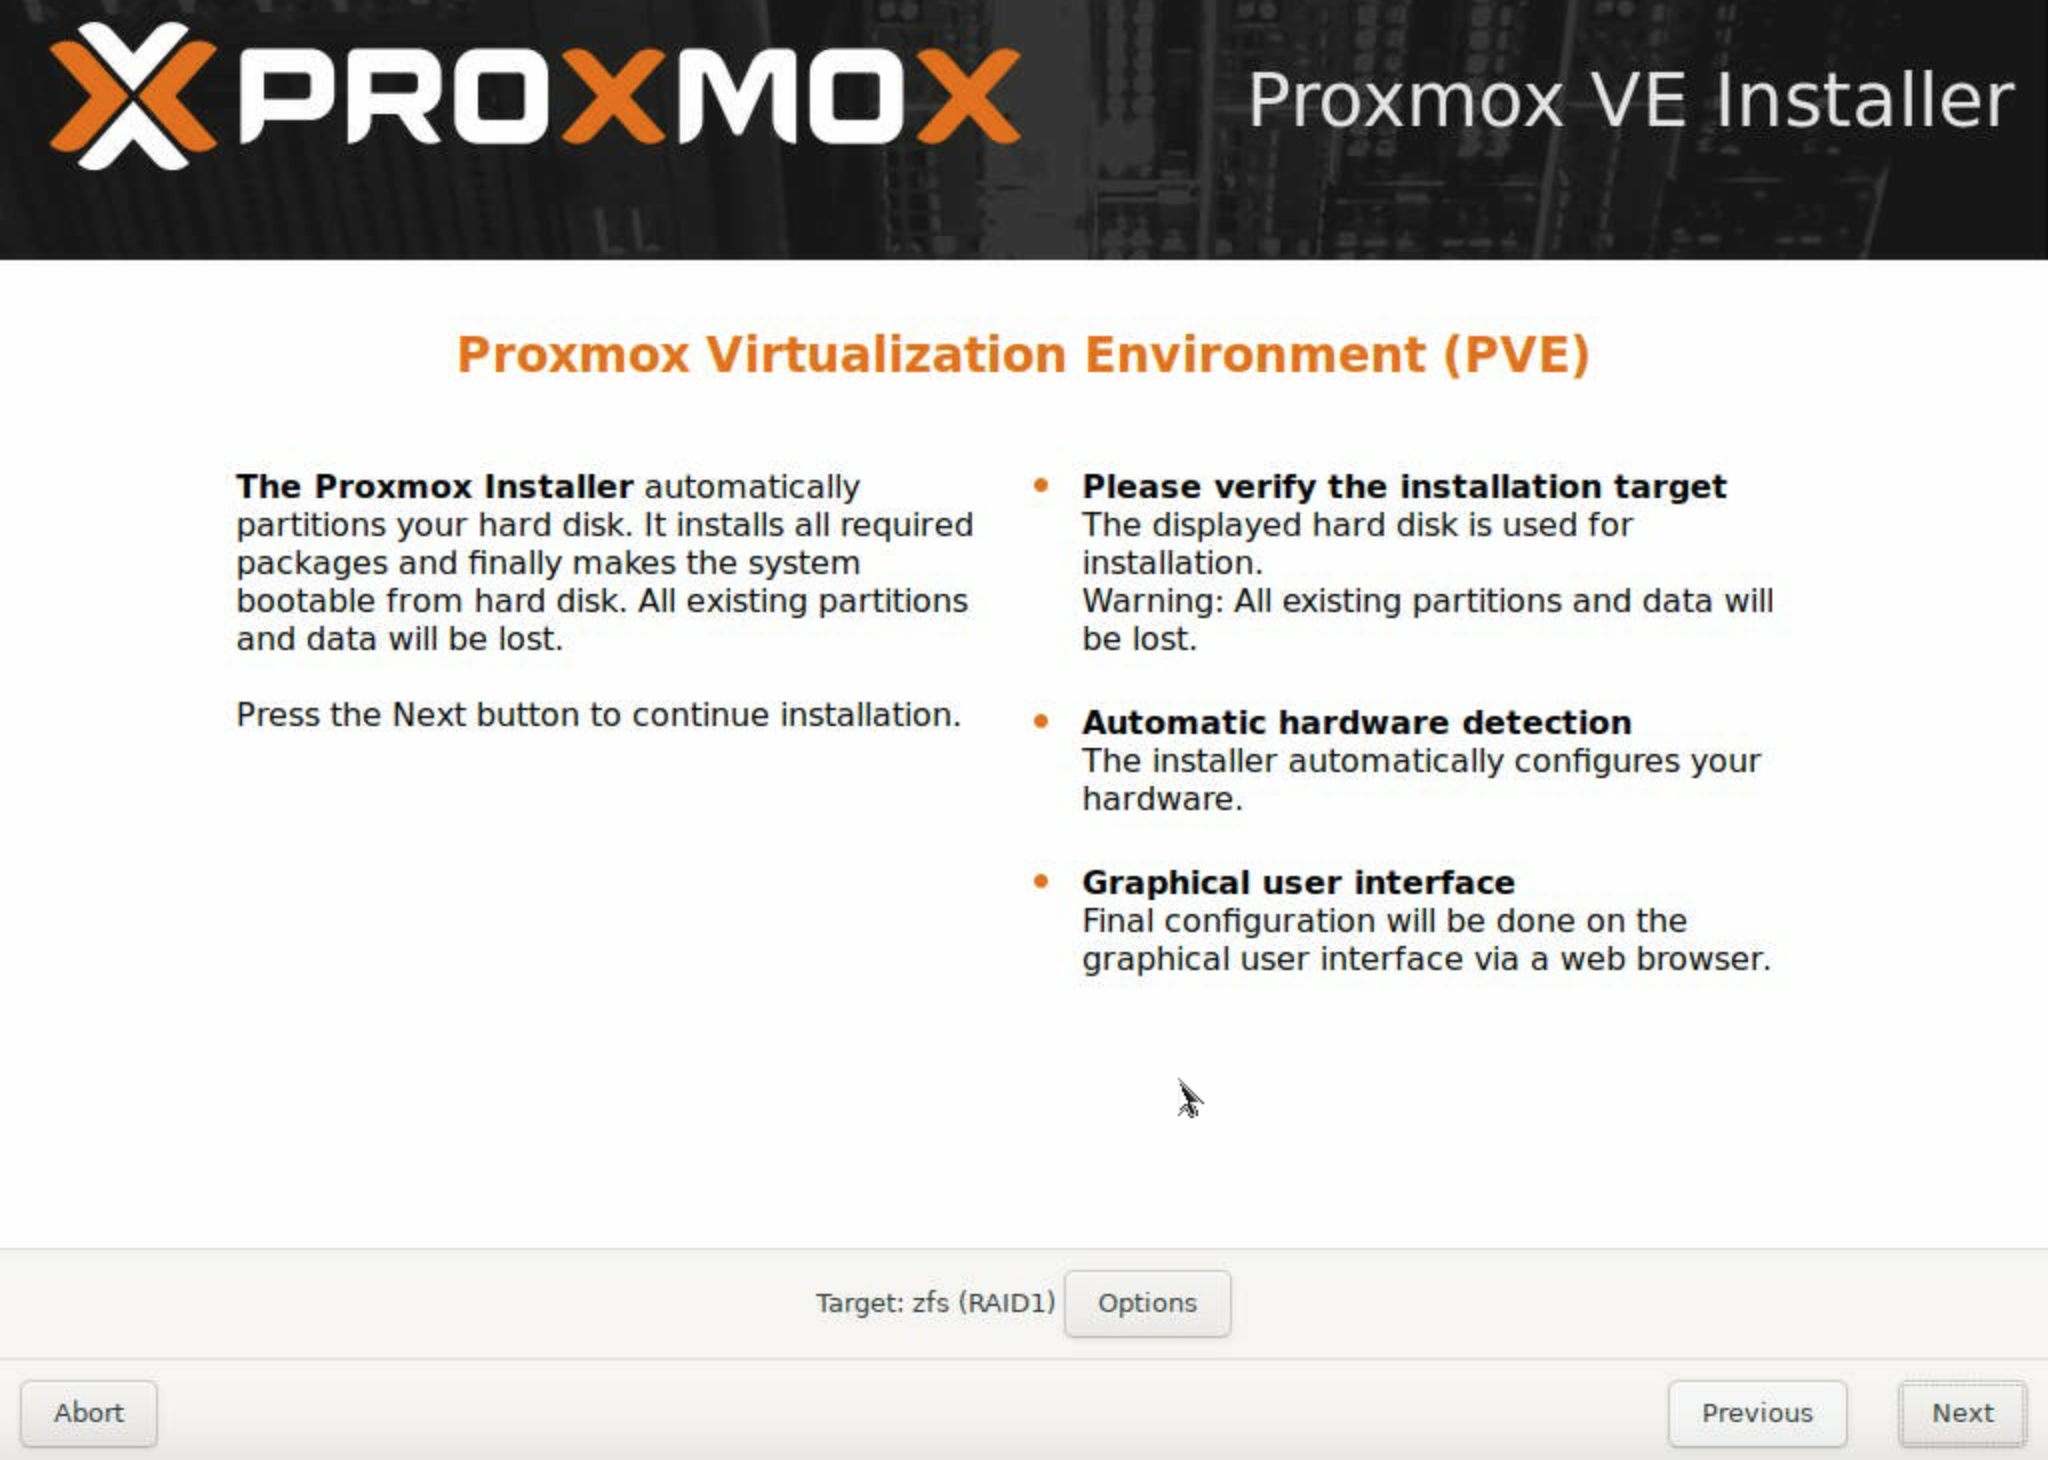
The Proxmox EULA displays. Agree to it by clicking I agree. A summary of the Proxmox installer displays.
-
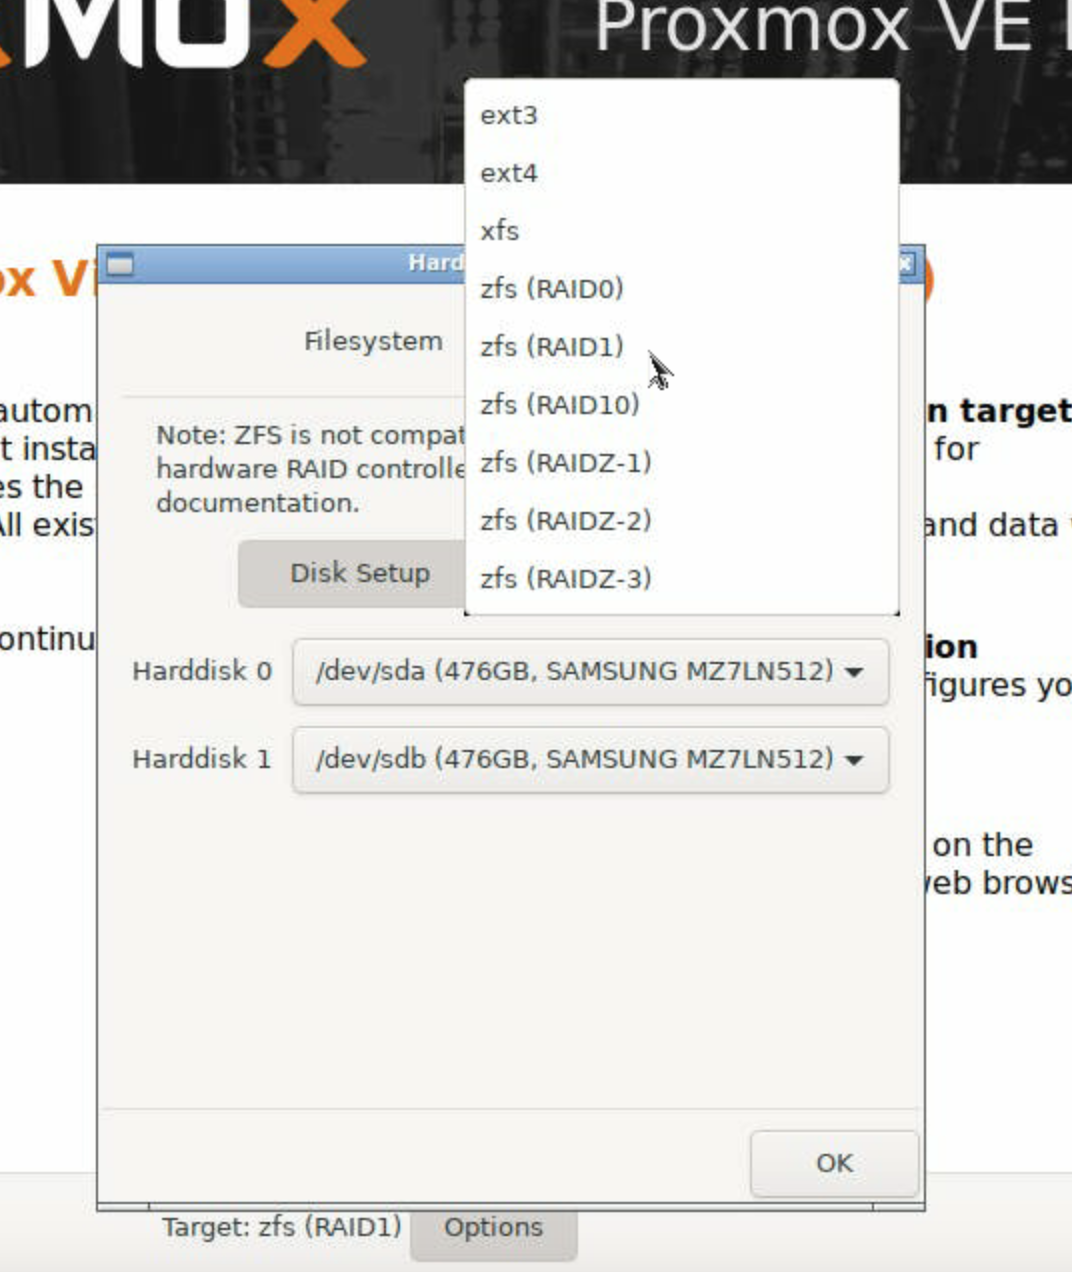
Click Options at the bottom of the page.
-
Choose the RAID level for Proxmox. To mirror the data on both drives, choose zfs (RAID1), then click Next to continue with the installation.
-
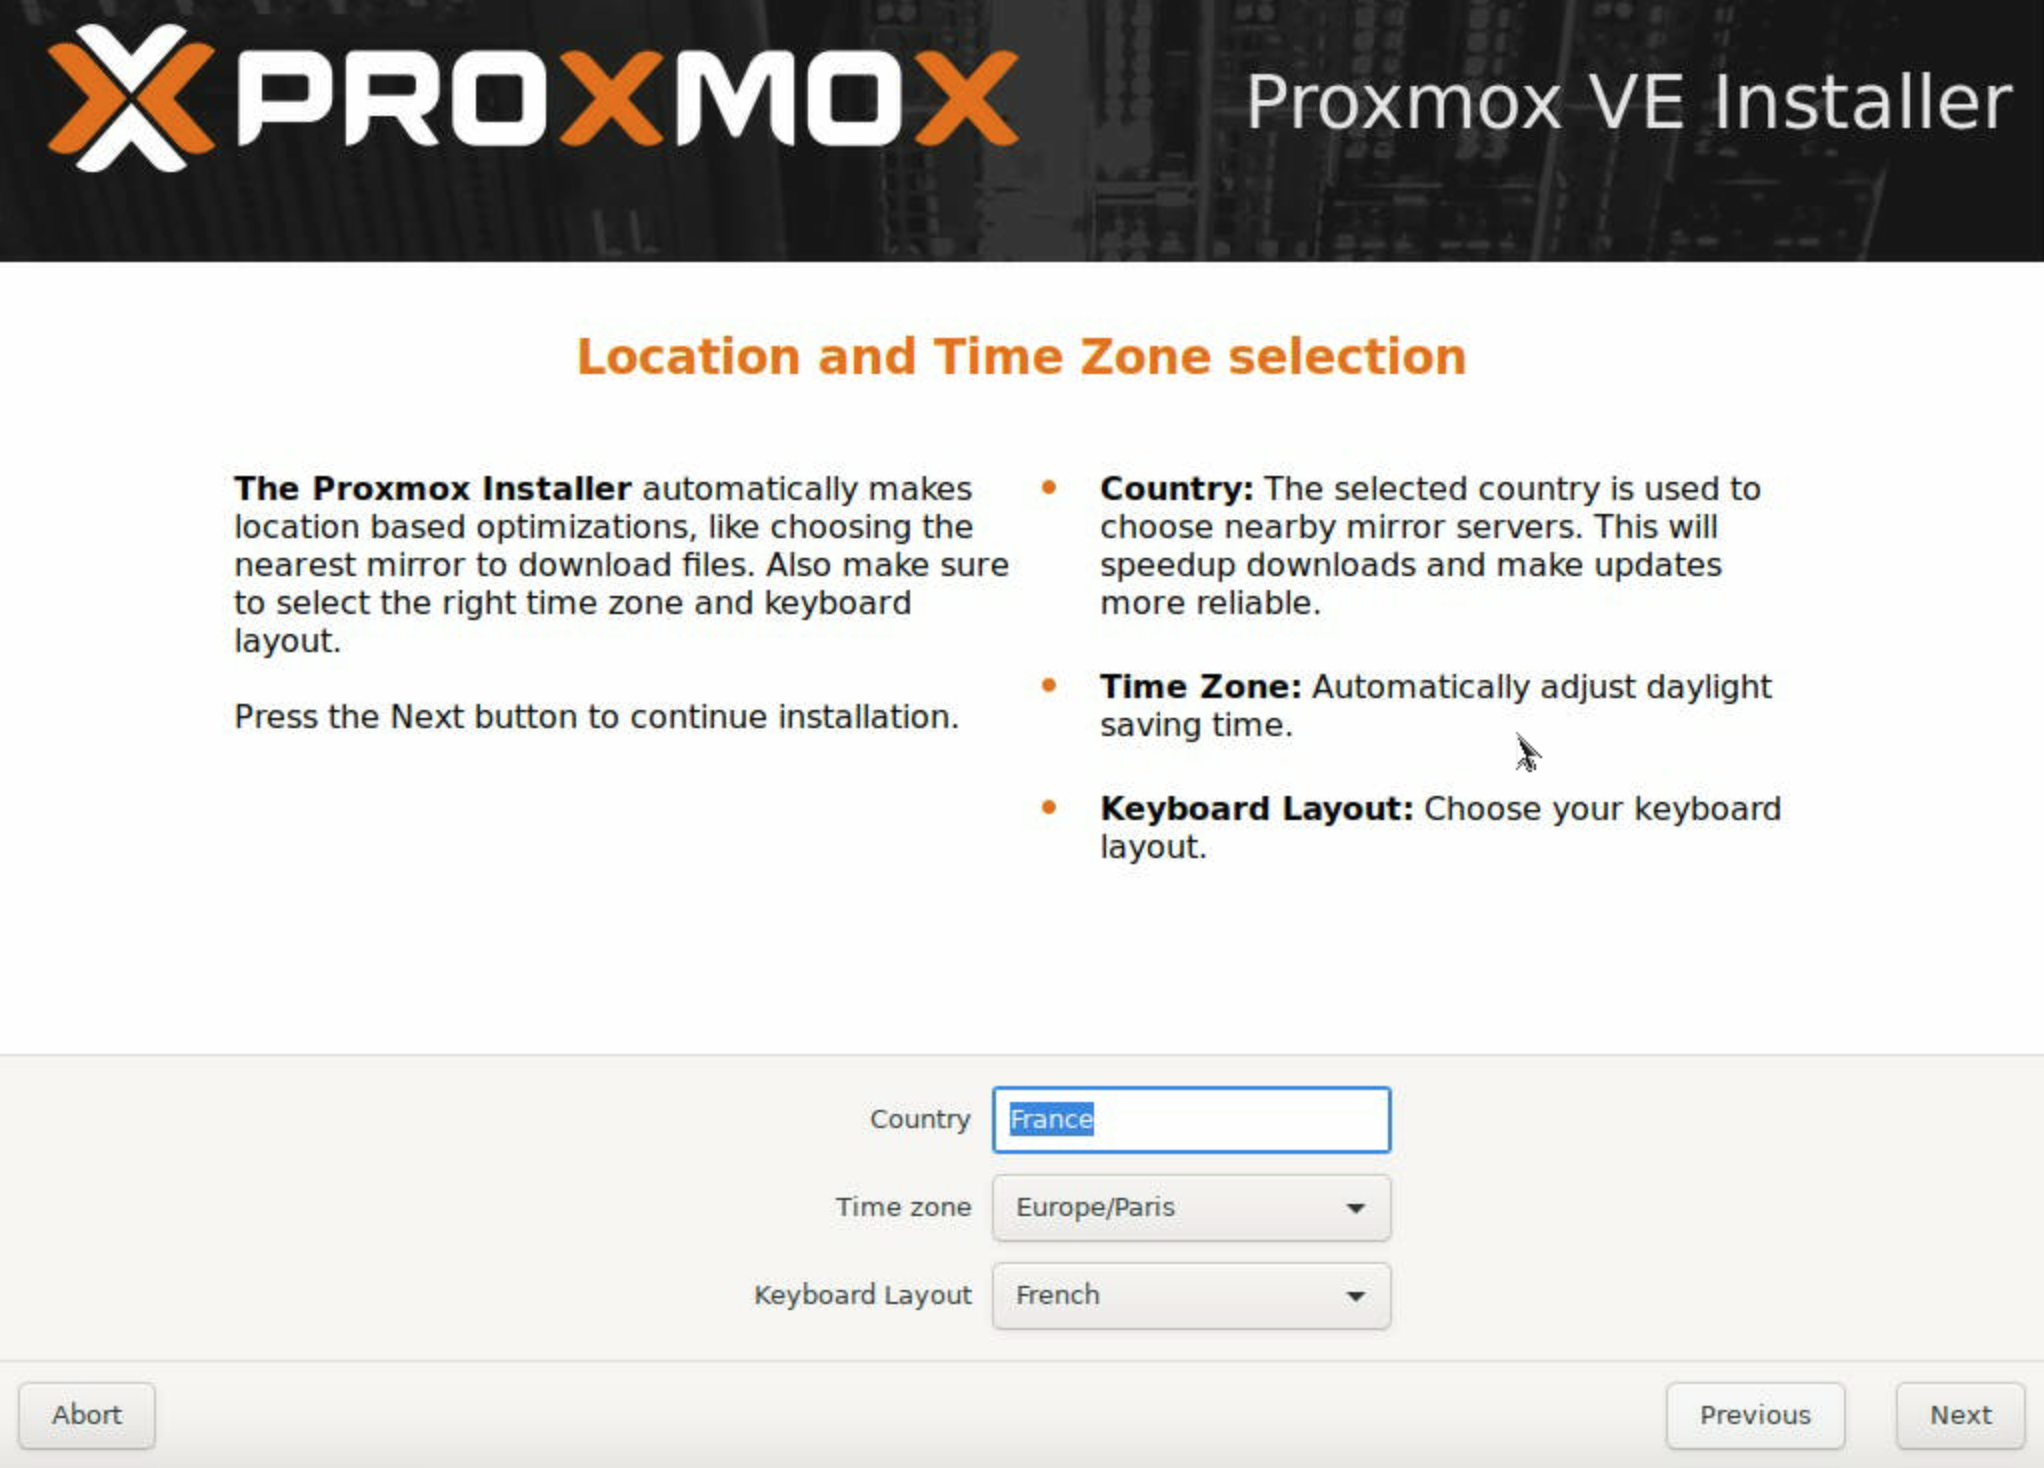
Enter the Location of your Server and select the timezone to use, then click Next.
-
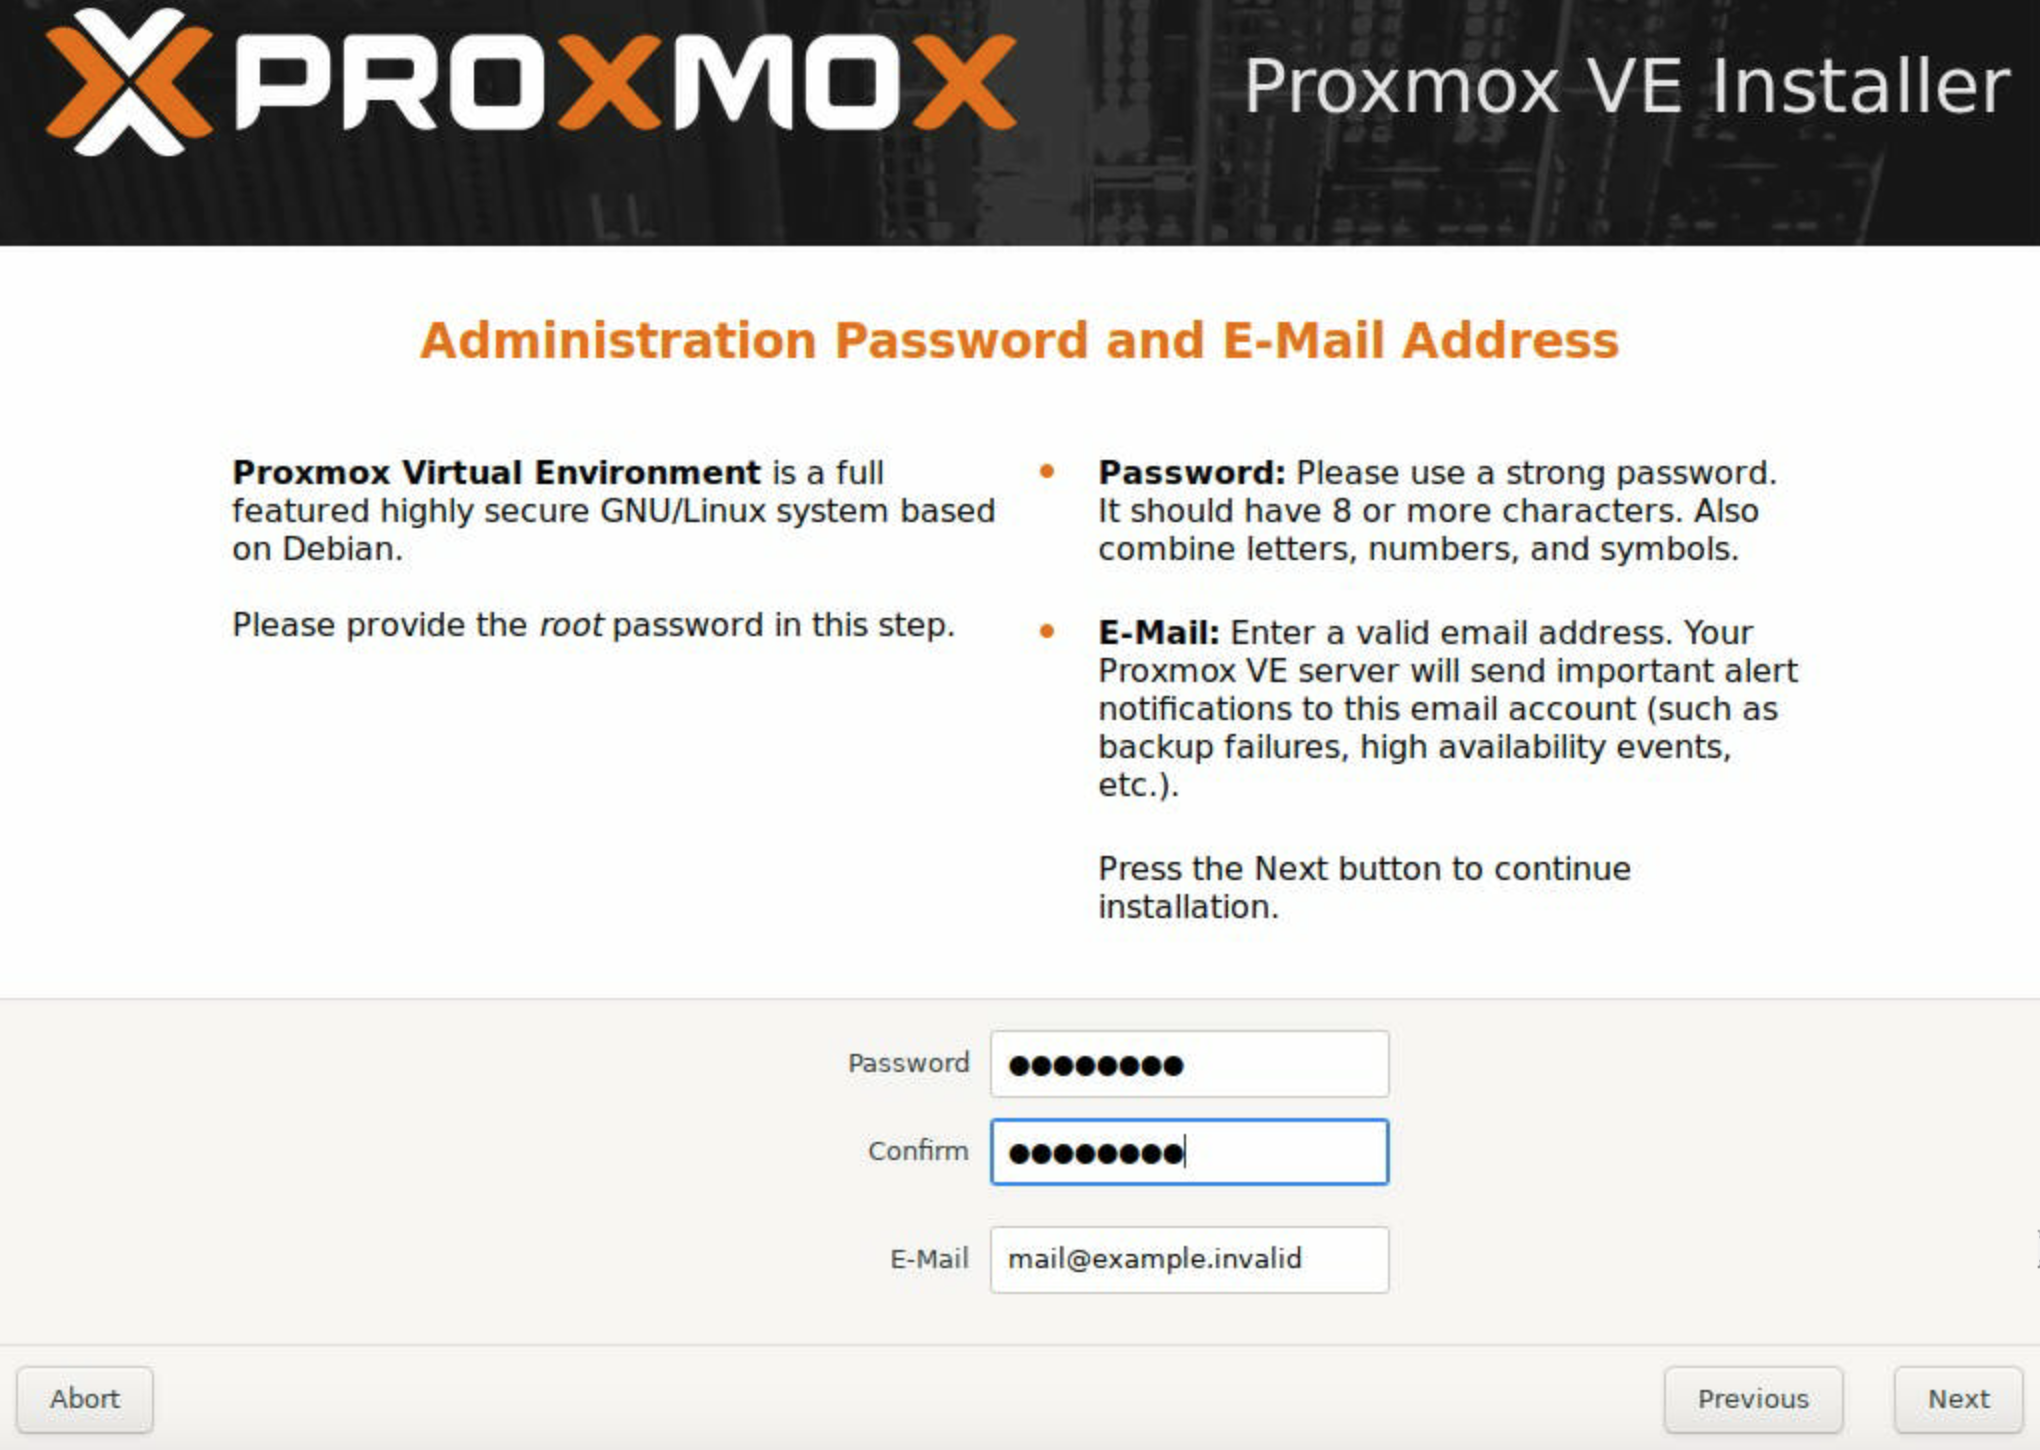
Enter a strong administration password with at least eight characters and its confirmation, and a contact email address. Proxmox will send important notifications to this email address, so make sure it is valid. Once all set, click Next.
-
Configure the Management Network. This will be the network interface on which the Proxmox web interface and APIs are available. We recommend you configure it on the primary email address of your Dedibox.
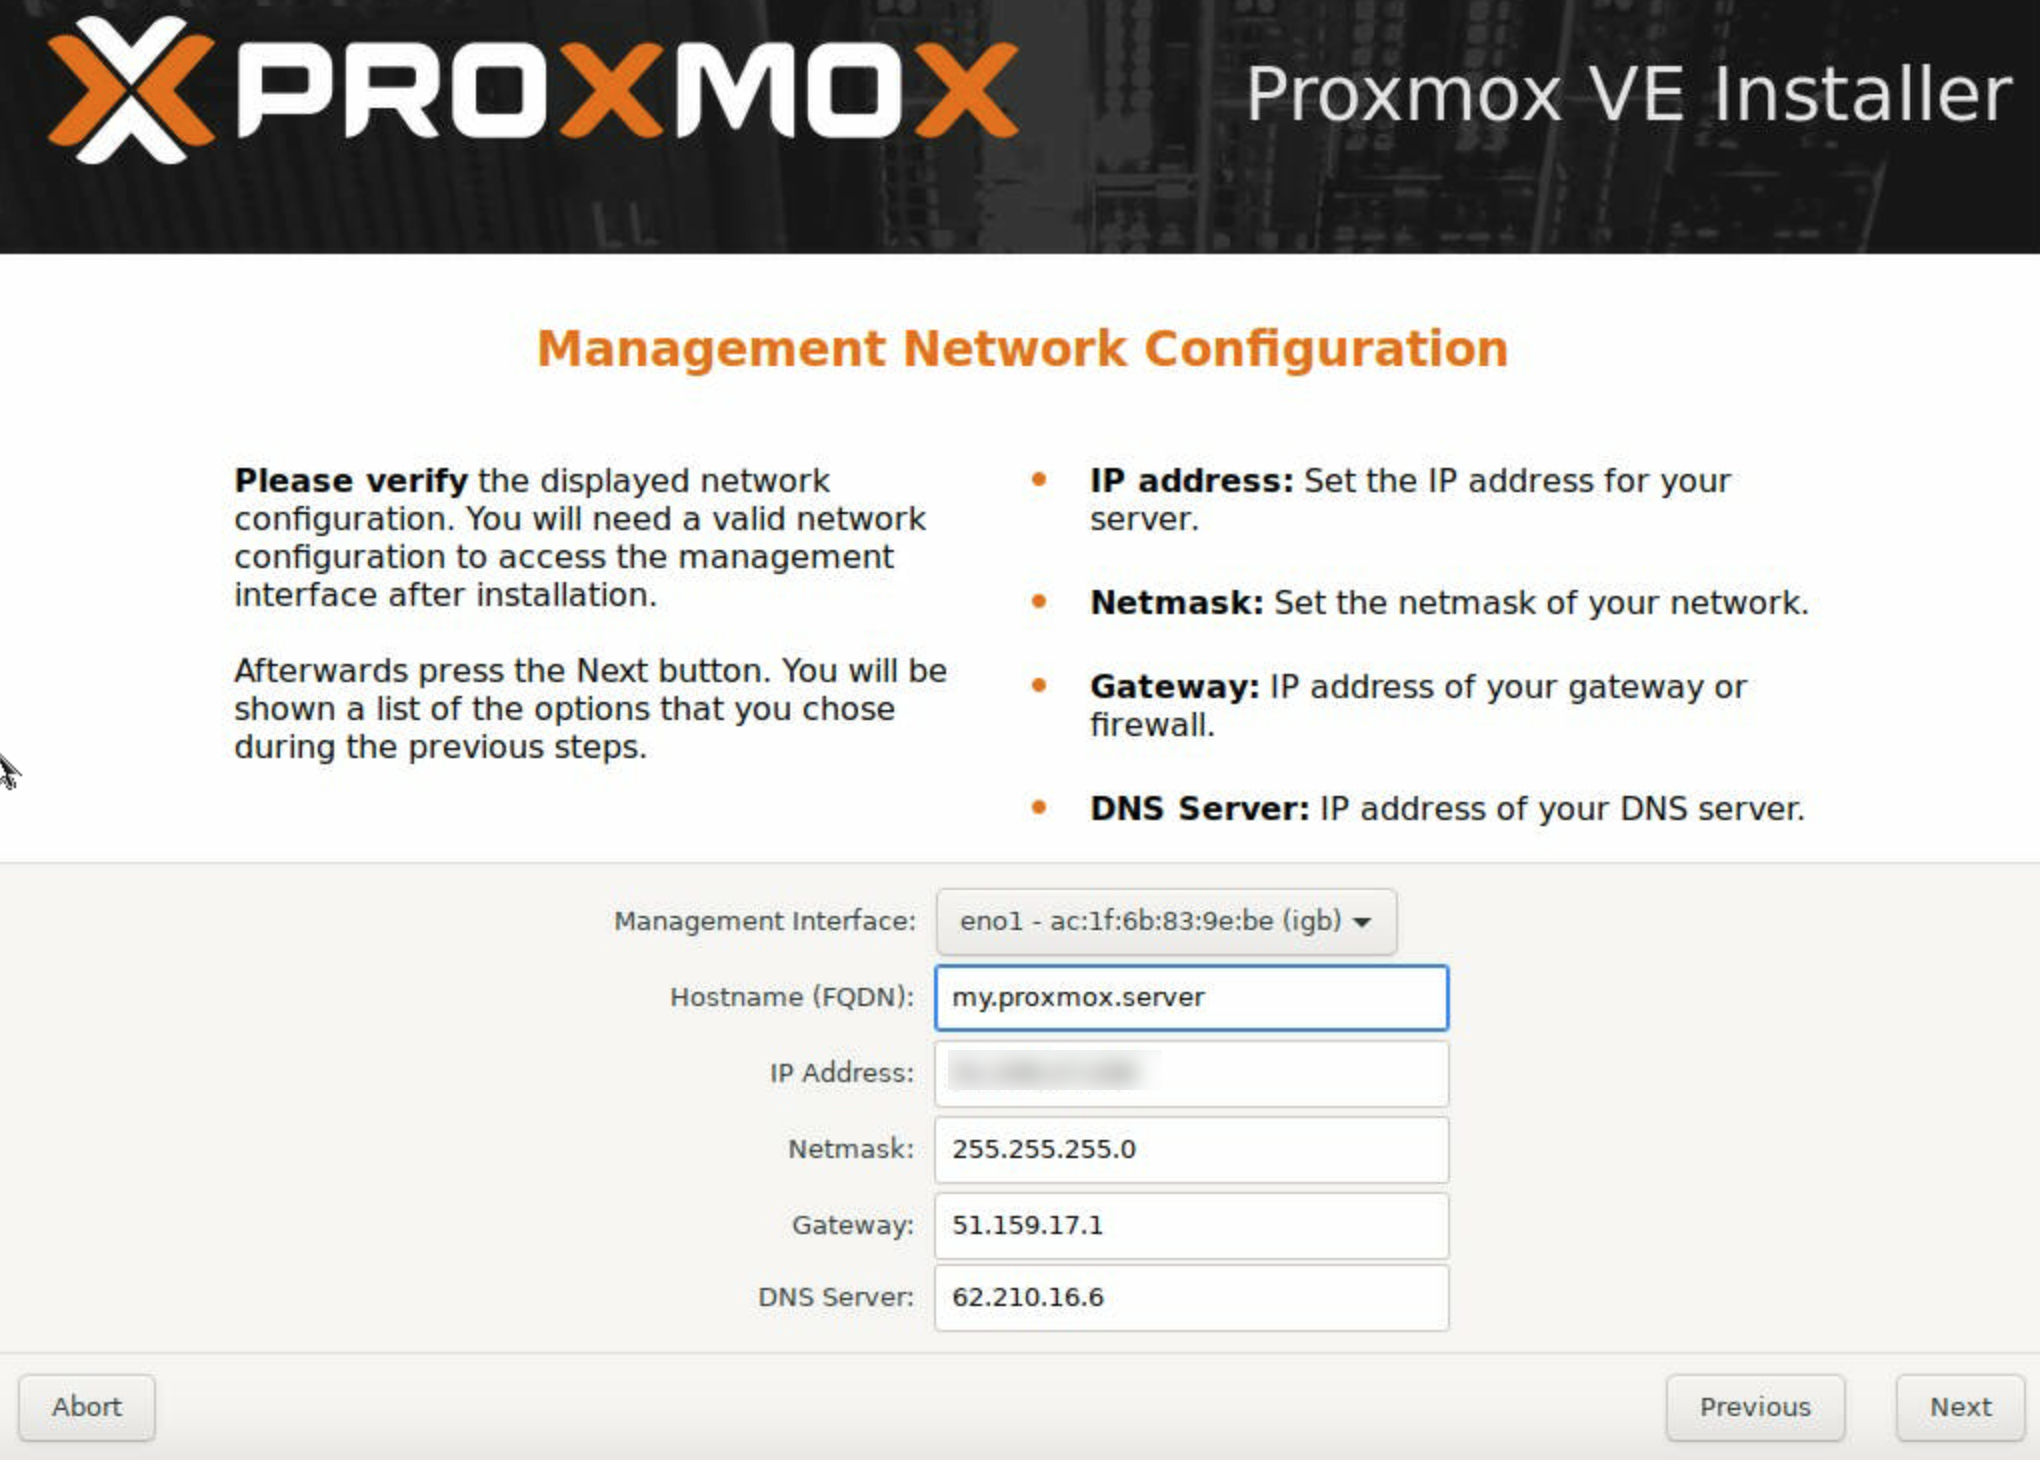
The network configuration should look as follows:
- Management Interface: The first network interface of your machine (i.e.
eno1) - Hostname (FQDN): A fully qualified domain name for your host (i.e.
proxmox.mydomain.com) - IP Address: The main IP address of your Dedibox (i.e.
62.210.16.37) - Netmask: The netmask of the subnet:
255.255.255.0 - Gateway: The Gateway for the machine. It is available on your server's main IP ending on
.1(i.e.62.210.16.1) - DNS Server: The resolving DNS server to use (i.e.
51.159.47.28or51.159.47.26)
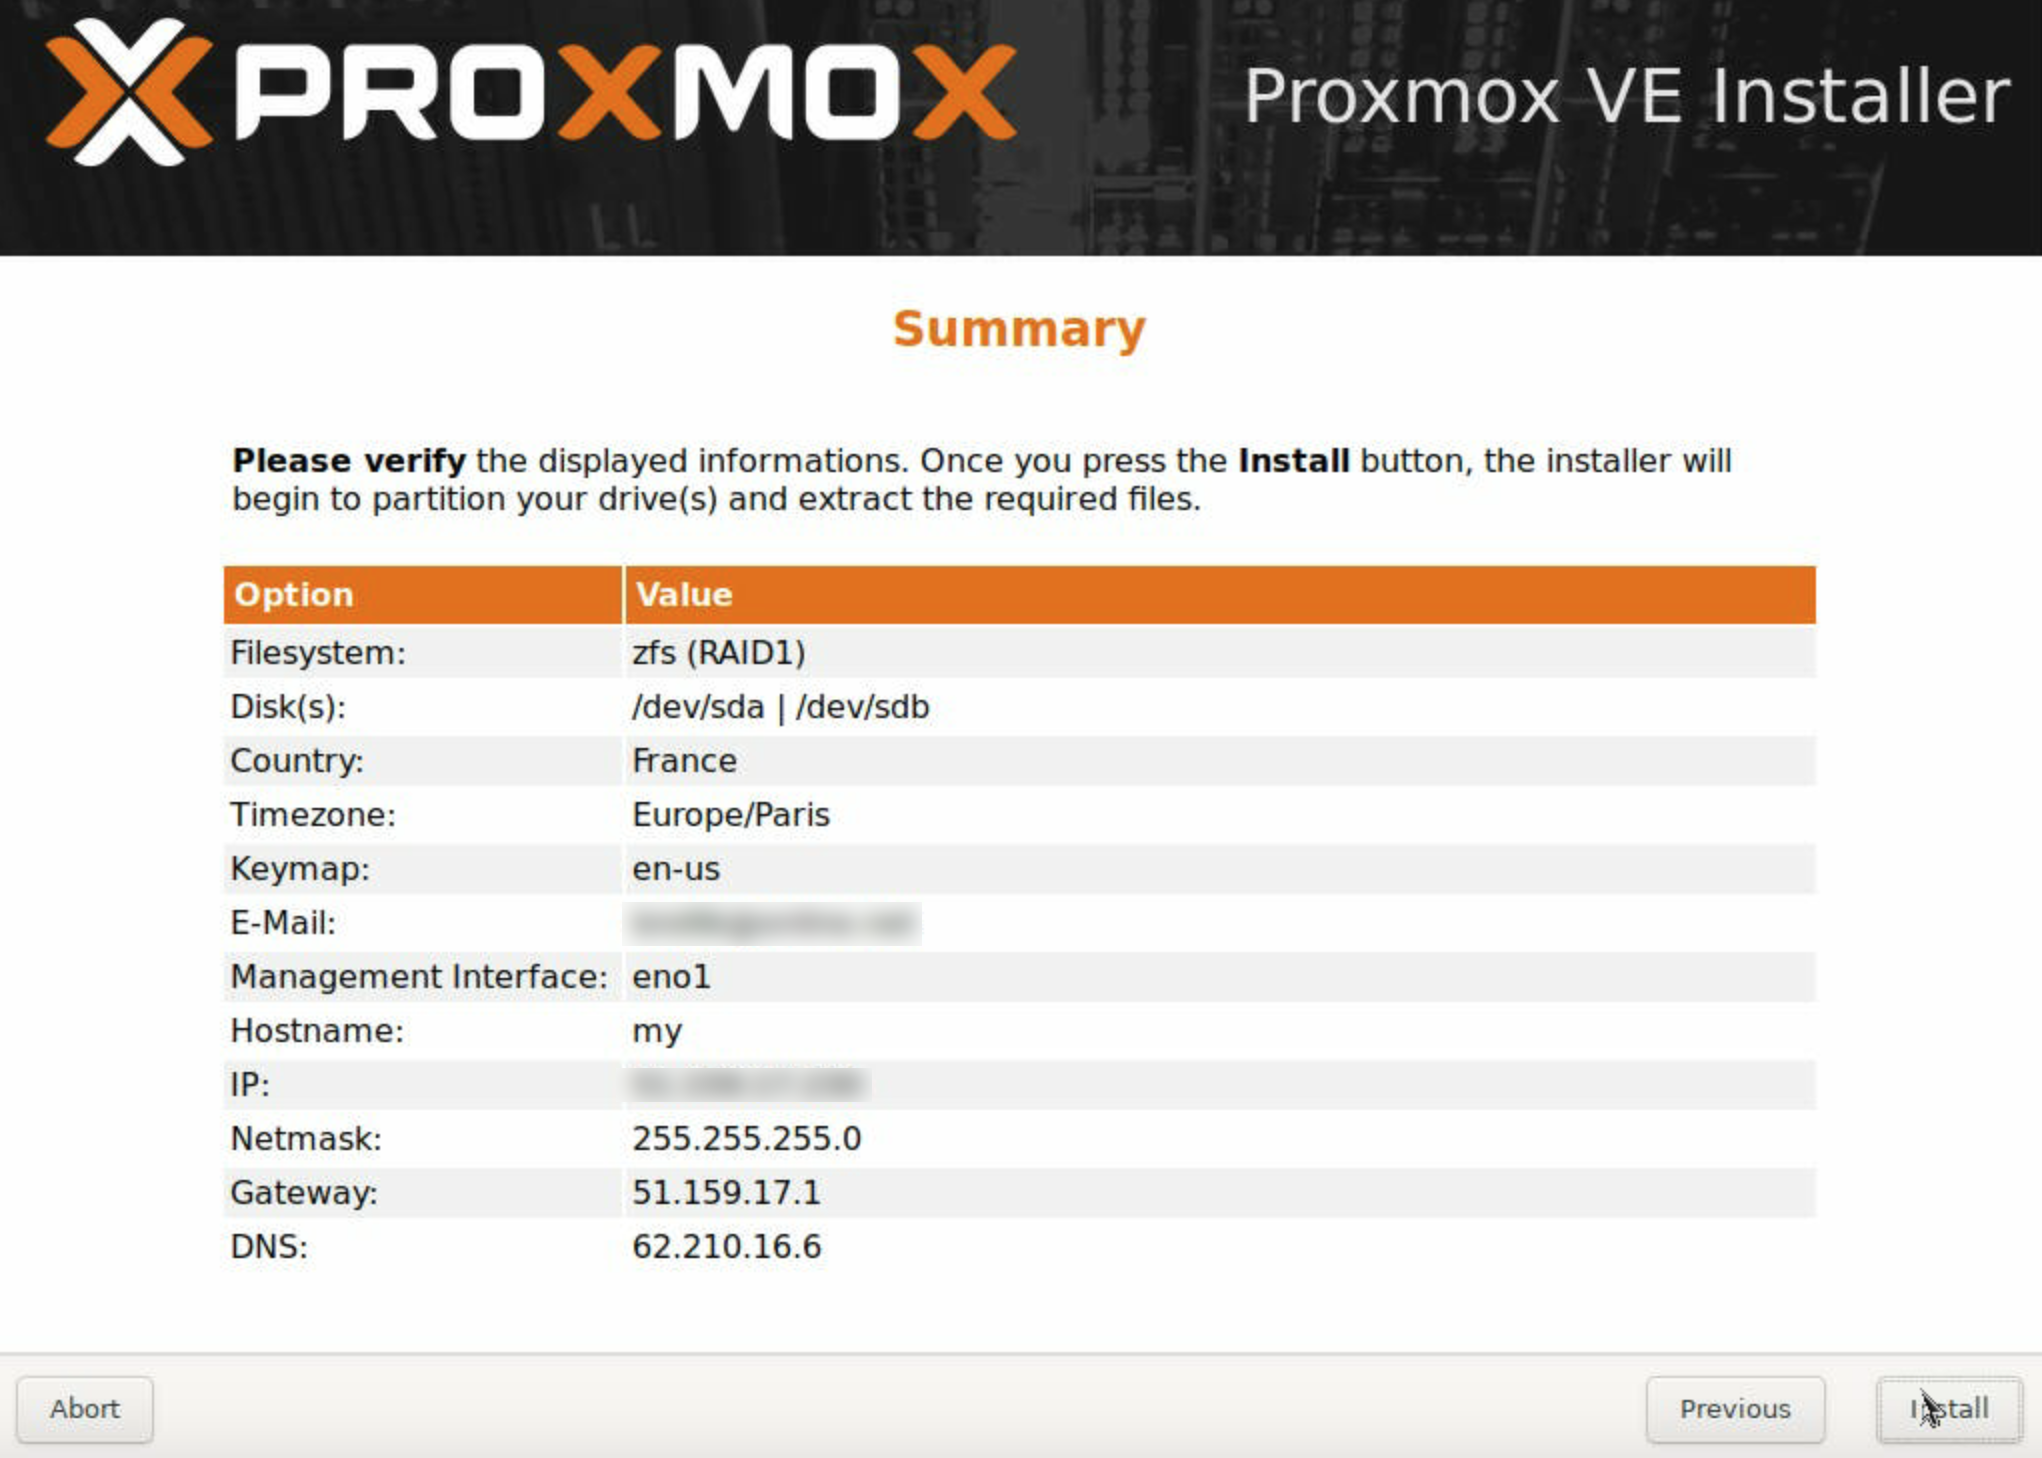
A summary of the configuration displays.
- Management Interface: The first network interface of your machine (i.e.
-
Verify that all parameters are correct and click Install to launch the installation.
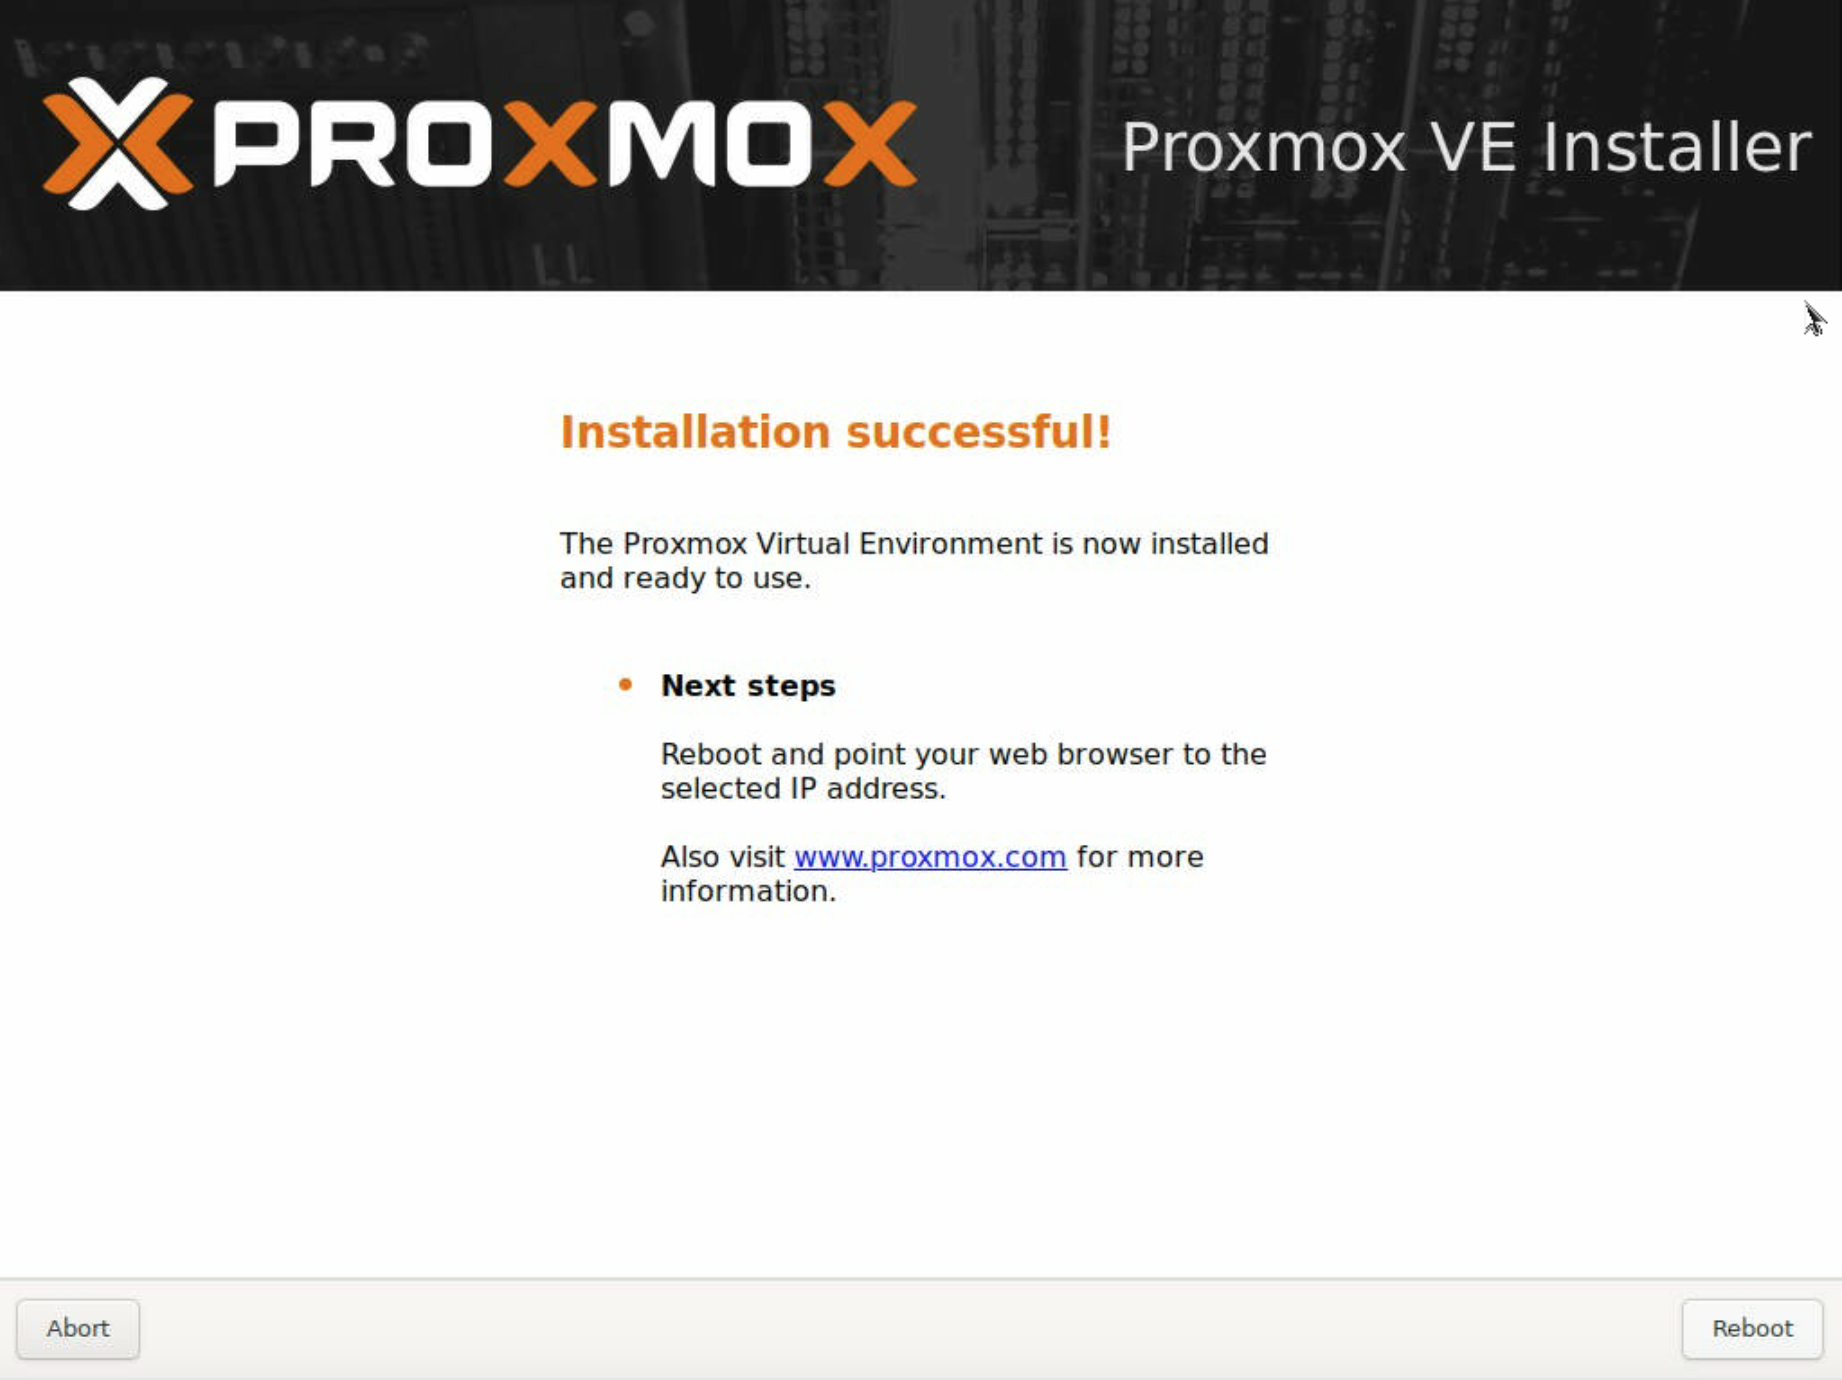
Once the installation is complete, a confirmation displays. 11. Click Reboot to reboot the server before accessing the Proxmox web interface:
Accessing Proxmox
Once the server has rebooted, the Proxmox web interface is available.
-
Open a web browser and go to
https://your_scaleway_dedibox:8006/. The login displays. Enter your credentials and click Login: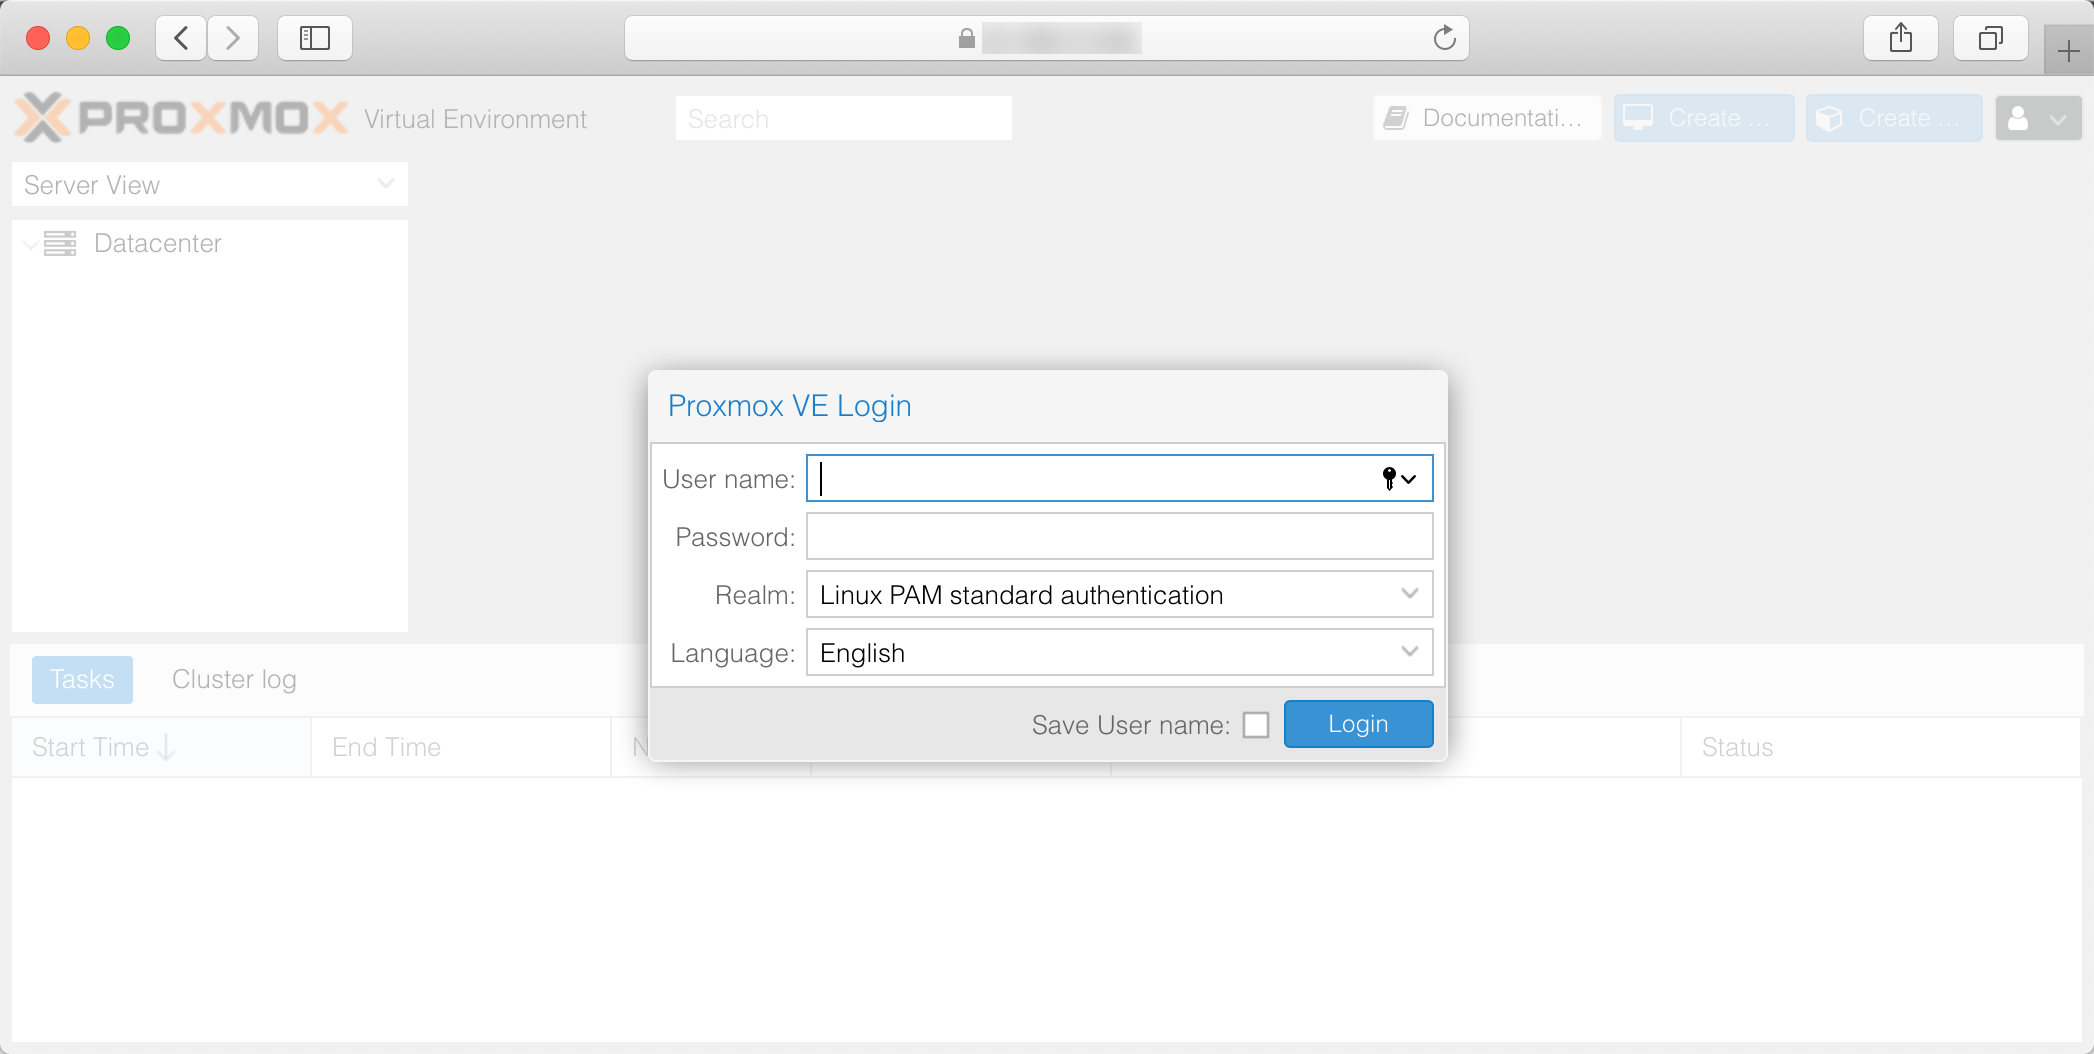
Enter the following credentials to log in:
- User Name:
root - Password: The password set during the installation of Proxmox
- Realm:
Linux PAM standard authentication - Language: The display language of the Proxmox interface (i.e.
English)
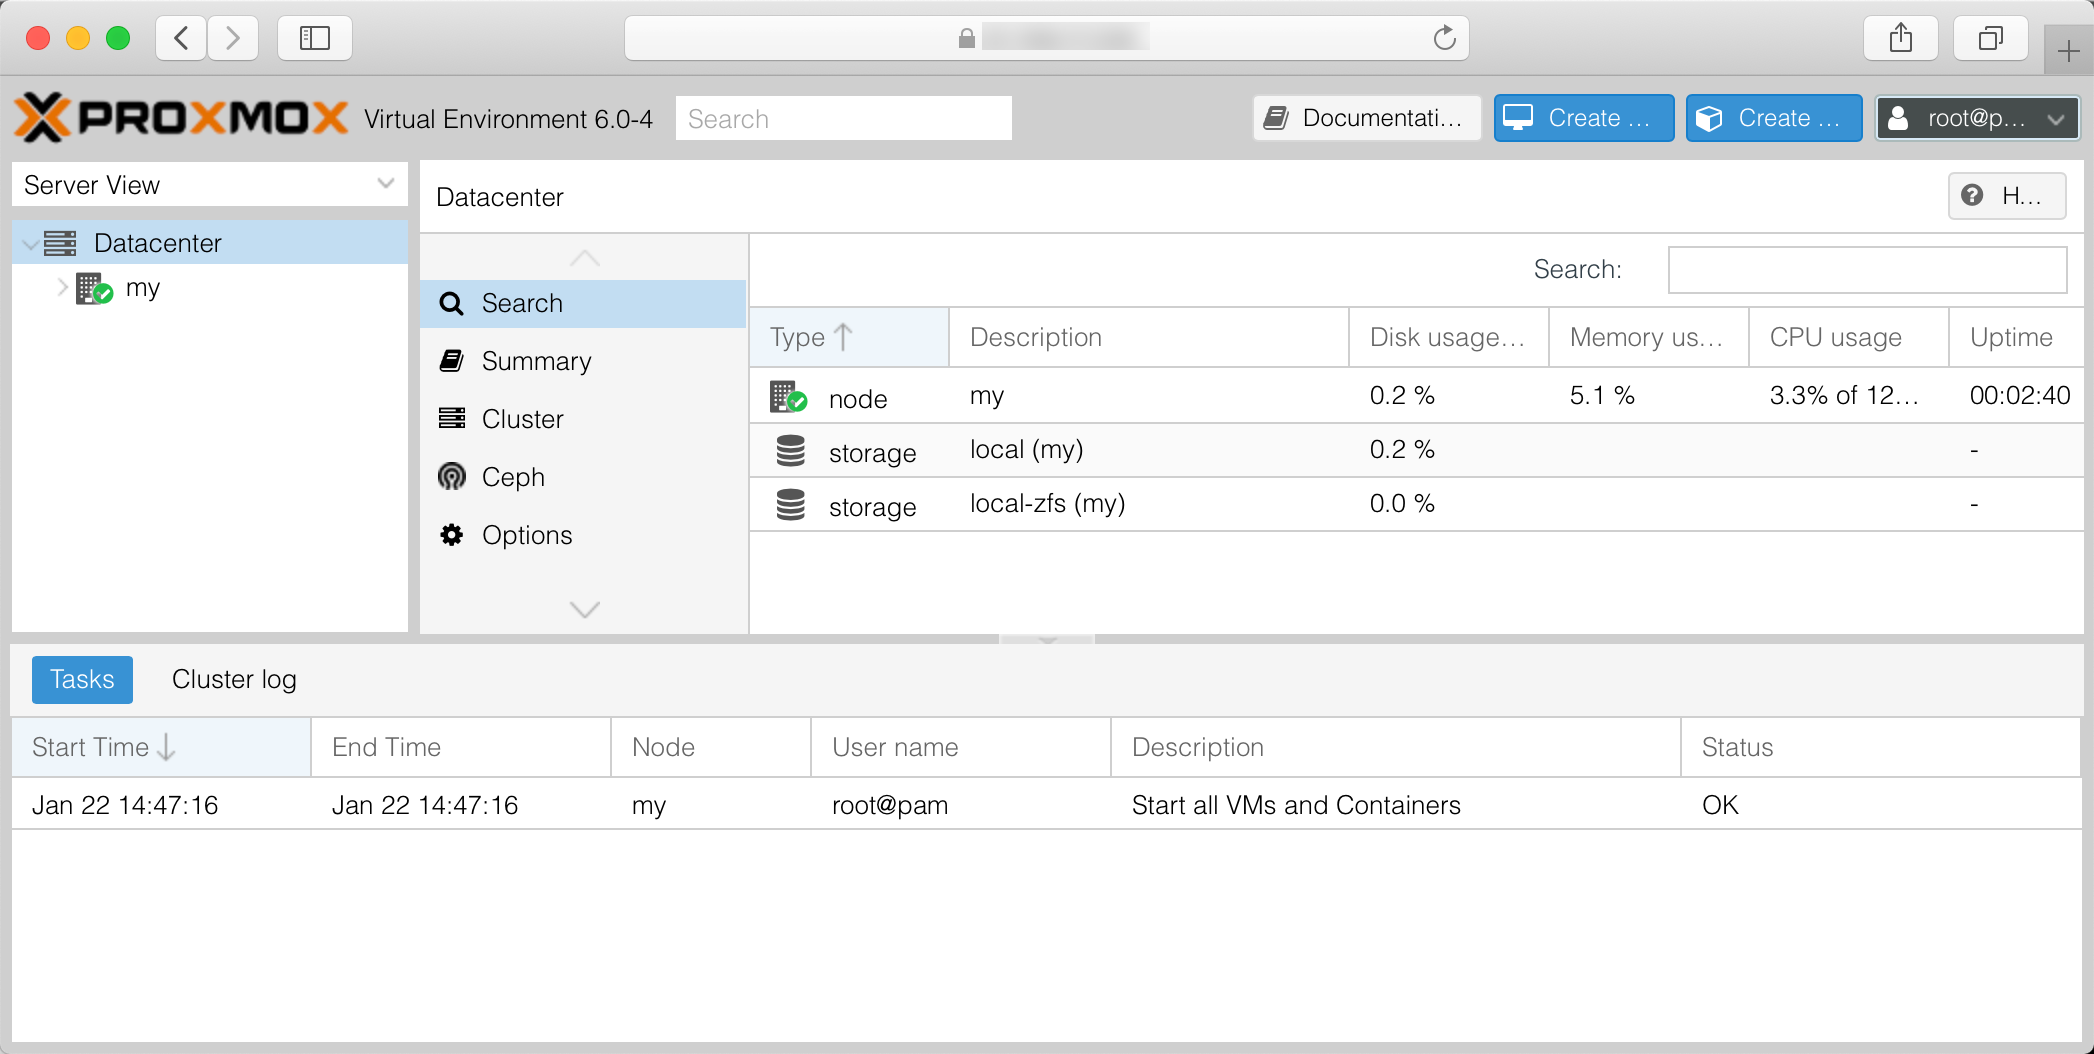
The Proxmox dashboard displays.
- User Name:
-
Continue to deploy and manage virtual machines.
Going further
- Deploy and Manage virtual machines with Proxmox
- Failover IP configuration for VMs on Dedibox servers
Visit our Help Center and find the answers to your most frequent questions.
Visit Help Center