Deploying an e-commerce website with PrestaShop
PrestaShop is a popular open-source e-commerce solution used by more than 300,000 shops worldwide and available in about 60 different languages. The software is written in the PHP programming language and uses the MySQL database management system to store its data. It is published under the Open Software License (OSL).
The application comes with several hundred built-in features for managing products, payments, shipping options, suppliers, and more. It uses a template system to allow users to customize their stores towards additional add-on modules available in the PrestaShop Addon marketplace, a platform enabling third-party developers to publish and sell additional themes and modules to shop owners.
In this tutorial, you will learn how to install and configure PrestaShop on Ubuntu Focal Fossa 20.04 on a Dedibox.
Before you start
To complete the actions presented below, you must have:
- A Scaleway account logged into the console
- Owner status or IAM permissions allowing you to perform actions in the intended Organization
- An SSH key
- A Dedibox server running Ubuntu Jammy Jellyfish (22.04 LTS)
- PHP version 7.4 or 8.0 installed (PrestaShop 8.x is not compatible with PHP 8.1, which is the default for Ubuntu 22.04).
- MariaDB or MySQL database installed and configured.
- Configured an A-record pointing to your server's IP address
sudoprivileges or access to the root user
Installing PrestaShop
-
Update and upgrade the system. Then, install the
apt-transport-httpspackage, which allows the use of repositories accessed via the HTTP Secure protocol (HTTPS).apt update && apt -y upgrade apt -y install apt-transport-https -
Install the
nginxweb server, PHP, andunzipusingapt.sudo apt update && sudo apt -y upgrade sudo apt -y install software-properties-common apt-transport-https sudo add-apt-repository ppa:ondrej/php sudo apt update sudo apt -y install nginx php7.4-fpm php7.4-xml php7.4-zip php7.4-gd php7.4-mysql php7.4-intl php7.4-curl unzip wget -
Create a directory for PrestaShop in the document root of Nginx:
mkdir /var/www/html/eshop -
Create an Nginx configuration file for your PrestaShop. In this tutorial, we assume our shop's domain name will be
eshop.example.com- replace it with the domain name you want to use for your shop.nano /etc/nginx/sites-available/eshop.example.comAnd put the following configuration into it:
server {
        listen 80;
        root /var/www/html/eshop;
        index index.php index.html index.htm;
        server_name eshop.example.com;

        location / {
                try_files $uri $uri/ =404;
        }

        location ~ \.php$ {
                include snippets/fastcgi-php.conf;
                fastcgi_pass unix:/var/run/php/php7.4-fpm.sock;
        }

        location ~ /\.ht {
                deny all;
        }
}
Then save the file and close the text editor.
-
Create a symbolic link to enable the server block:
ln -s /etc/nginx/sites-available/eshop.example.com /etc/nginx/sites-enabled/ -
Test the configuration for syntax errors:
nginx -t -
Reload Nginx to activate the new configuration:
systemctl reload nginx.service -
Download the latest version of PrestaShop from the official website. At the time of writing this tutorial, it is version 1.7.8.5, and we will use it here. Replace the link with the latest version if required.
cd /tmp wget https://github.com/PrestaShop/PrestaShop/releases/download/8.1.6/prestashop_8.1.6.zip unzip prestashop_*.zip unzip prestashop.zip -d /var/www/html/eshop rm prestashop_*.zip rm Install_PrestaShop.html rm index.php -
Set the ownership of the extracted files to the Nginx user and group:
chown -R www-data:www-data /var/www/html/eshop
Setting up MariaDB
PrestaShop relies on the MariaDB (MySQL) database engine. Initialize it and create a database in which PrestaShop will store its data.
-
Install MariaDB using the
aptpackage manager:apt install mariadb-server mariadb-client -
Run the interactive MariaDB initialization tool to configure the database server:
mysql_secure_installation -
You will be asked to enter the current root password for the MariaDB server. As by default, no password is configured, press Enter.
-
Press
Yto set a new password for the MariaDB root user:Setting the root password ensures that nobody can log into the MariaDB root user without the proper authorisation. Set root password? [Y/n] -
Enter the new password and press Enter, then repeat this step for its confirmation.
-
The installer will ask you some further questions. You can keep the settings proposed by default and validate them by pressing Enter on your keyboard.
-
Once the initial setup is done, connect to the MariaDB shell using the root account and its newly set password, and create the new database and its associated user for PrestaShop:
mysql -u root -pcreate database prestashop_db; create user 'prestashop'@'localhost' identified by 'A_SECRET_PASSWORD'; grant all privileges on prestashop_db.* TO 'prestashop'@'localhost'; flush privileges; exit;
Obtaining a Let's Encrypt TLS certificate
To secure the connection between your visitors and the server, we will use a TLS/SSL certificate issued by Let's Encrypt, a certificate authority providing free TLS certificates. The certificate request and management can be simplified by using the certbot tool.
Certbot is available in the Universe repositories of Ubuntu.
- Ensure the repositories are configured in your system to install the application using the
aptpackage manager.apt update apt install software-properties-common add-apt-repository universe apt update - Install
certboton the system.apt install certbot python3-certbot-nginx - Run the application to request the certificate for your e-shop and reconfigure your Nginx web server to use an encrypted connection by default.
certbot --nginx - Certbot will ask you a series of questions, answer them as in the following example:
Saving debug log to /var/log/letsencrypt/letsencrypt.log
Plugins selected: Authenticator nginx, Installer nginx
Enter email address (used for urgent renewal and security notices) (Enter 'c' to
cancel): myinbox@example.com <-- Enter your email address here

- - - - - - - - - - - - - - - - - - - - - - - - - - - - - - - - - - - - - - - -
Please read the Terms of Service at
https://letsencrypt.org/documents/LE-SA-v1.2-November-15-2017.pdf. You must
agree in order to register with the ACME server at
https://acme-v02.api.letsencrypt.org/directory
- - - - - - - - - - - - - - - - - - - - - - - - - - - - - - - - - - - - - - - -
(A)gree/(C)ancel: A <-- Type A to accept the Terms of Service of Let's Encrypt
- - - - - - - - - - - - - - - - - - - - - - - - - - - - - - - - - - - - - - - -
Would you be willing to share your email address with the Electronic Frontier
Foundation, a founding partner of the Let's Encrypt project and the non-profit
organization that develops Certbot? We'd like to send you email about our work
encrypting the web, EFF news, campaigns, and ways to support digital freedom.
- - - - - - - - - - - - - - - - - - - - - - - - - - - - - - - - - - - - - - - -
(Y)es/(N)o: Y <-- Type Y if you want to share your email address with the EFF, otherwise press N

Which names would you like to activate HTTPS for?
- - - - - - - - - - - - - - - - - - - - - - - - - - - - - - - - - - - - - - - -
1: eshop.example.com
- - - - - - - - - - - - - - - - - - - - - - - - - - - - - - - - - - - - - - - -
Select the appropriate numbers separated by commas and/or spaces, or leave input
blank to select all options shown (Enter 'c' to cancel): 1 <-- Press 1 to request the certificate for the domain name "eshop.example.com"
Obtaining a new certificate
Performing the following challenges:
http-01 challenge for eshop.example.com
Waiting for verification...
Cleaning up challenges
Deploying Certificate to VirtualHost /etc/nginx/sites-enabled/eshop.example.com

Please choose whether or not to redirect HTTP traffic to HTTPS, removing HTTP access.
- - - - - - - - - - - - - - - - - - - - - - - - - - - - - - - - - - - - - - - -
1: No redirect - Make no further changes to the web server configuration.
2: Redirect - Make all requests redirect to secure HTTPS access. Choose this for
new sites, or if you're confident your site works on HTTPS. You can undo this
change by editing your web server's configuration.
- - - - - - - - - - - - - - - - - - - - - - - - - - - - - - - - - - - - - - - -
Select the appropriate number [1-2] then [enter] (press 'c' to cancel): 1 <-- Press 1 here, you can enable the redirection directly in Prestashop after setup
Redirecting all traffic on port 80 to ssl in /etc/nginx/sites-enabled/eshop.example.com

- - - - - - - - - - - - - - - - - - - - - - - - - - - - - - - - - - - - - - - -
Congratulations! You have successfully enabled https://eshop.example.com

You should test your configuration at:
https://www.ssllabs.com/ssltest/analyze.html?d=eshop.example.com
- - - - - - - - - - - - - - - - - - - - - - - - - - - - - - - - - - - - - - - -

IMPORTANT NOTES:
- Congratulations! Your certificate and chain have been saved at:
  /etc/letsencrypt/live/eshop.example.com/fullchain.pem
  Your key file has been saved at:
  /etc/letsencrypt/live/eshop.example.com/privkey.pem
  Your cert will expire on 2020-11-09. To obtain a new or tweaked
  version of this certificate in the future, simply run certbot again
  with the "certonly" option. To non-interactively renew *all* of
  your certificates, run "certbot renew"
- Your account credentials have been saved in your Certbot
  configuration directory at /etc/letsencrypt. You should make a
  secure backup of this folder now. This configuration directory will
  also contain certificates and private keys obtained by Certbot so
  making regular backups of this folder is ideal.
- If you like Certbot, please consider supporting our work by:

  Donating to ISRG / Let's Encrypt:   https://letsencrypt.org/donate
  Donating to EFF:                    https://eff.org/donate-le
Configuring PrestaShop
The basic installation of your PrestaShop is done now, and you can start the configuration of the application using the web-based configuration wizard.
- Open your web browser and point it to
http://eshop.example.com/install. The configuration wizard displays. Choose the language you want to use for your e-commerce site and click Next.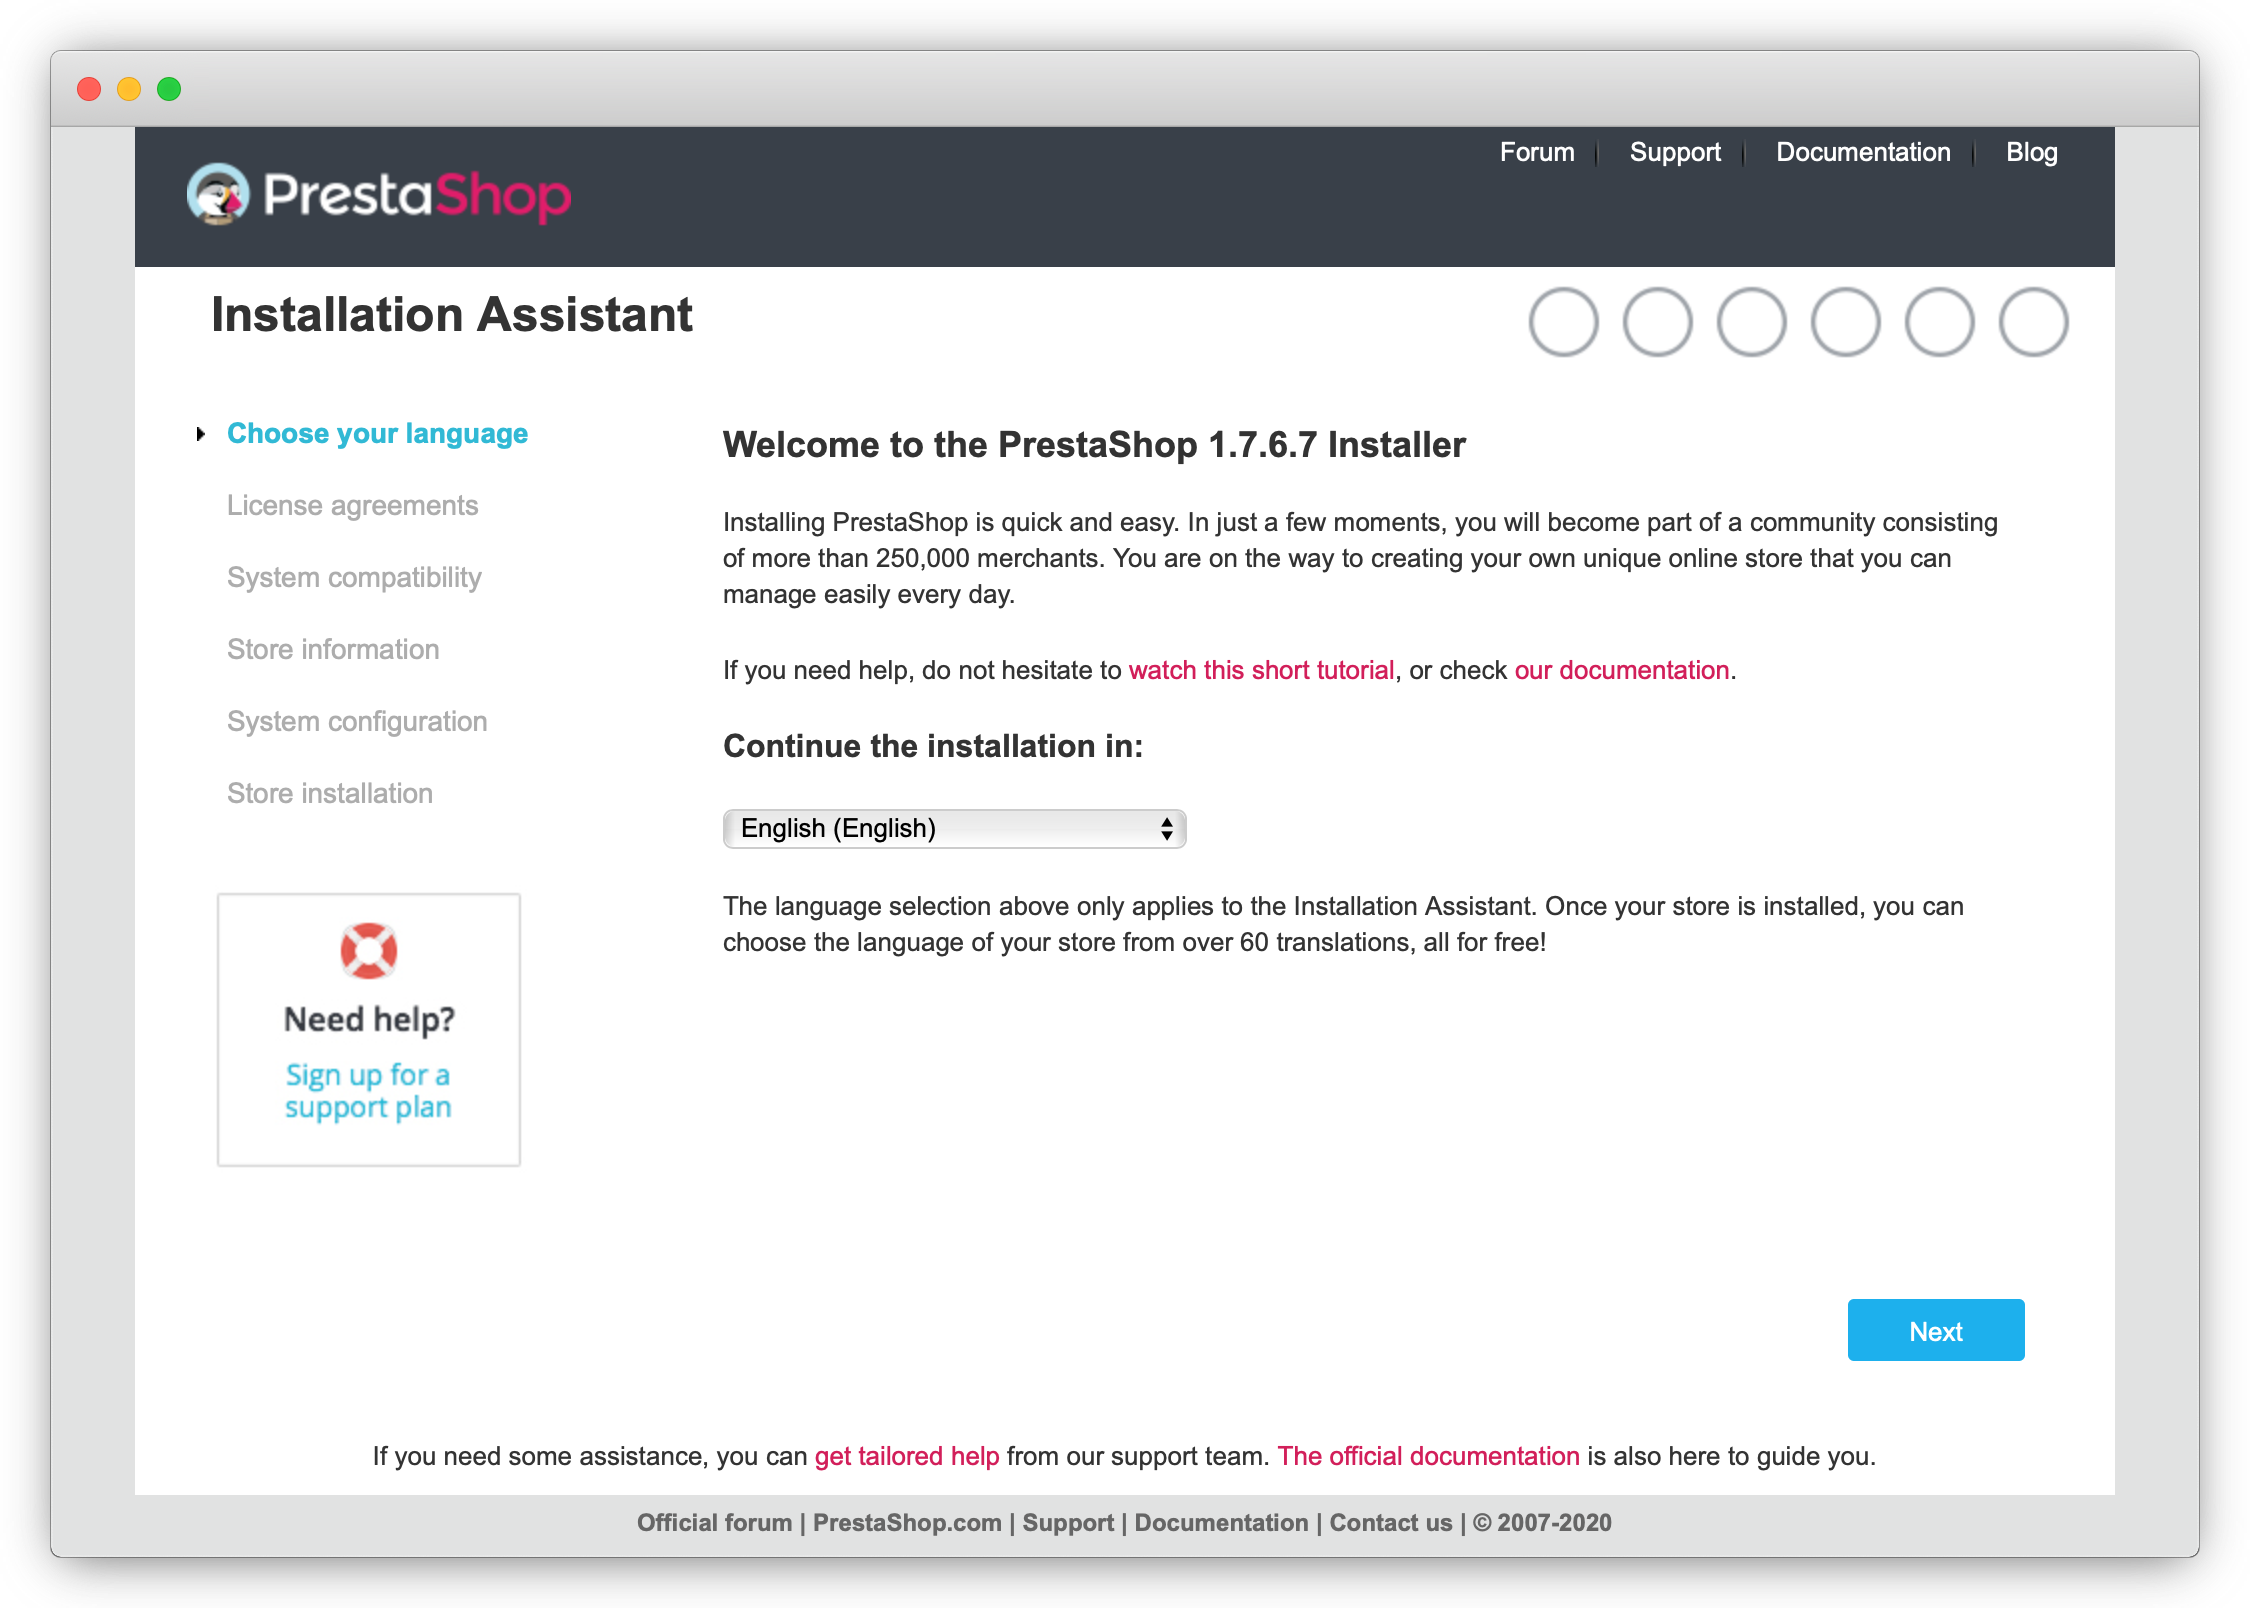
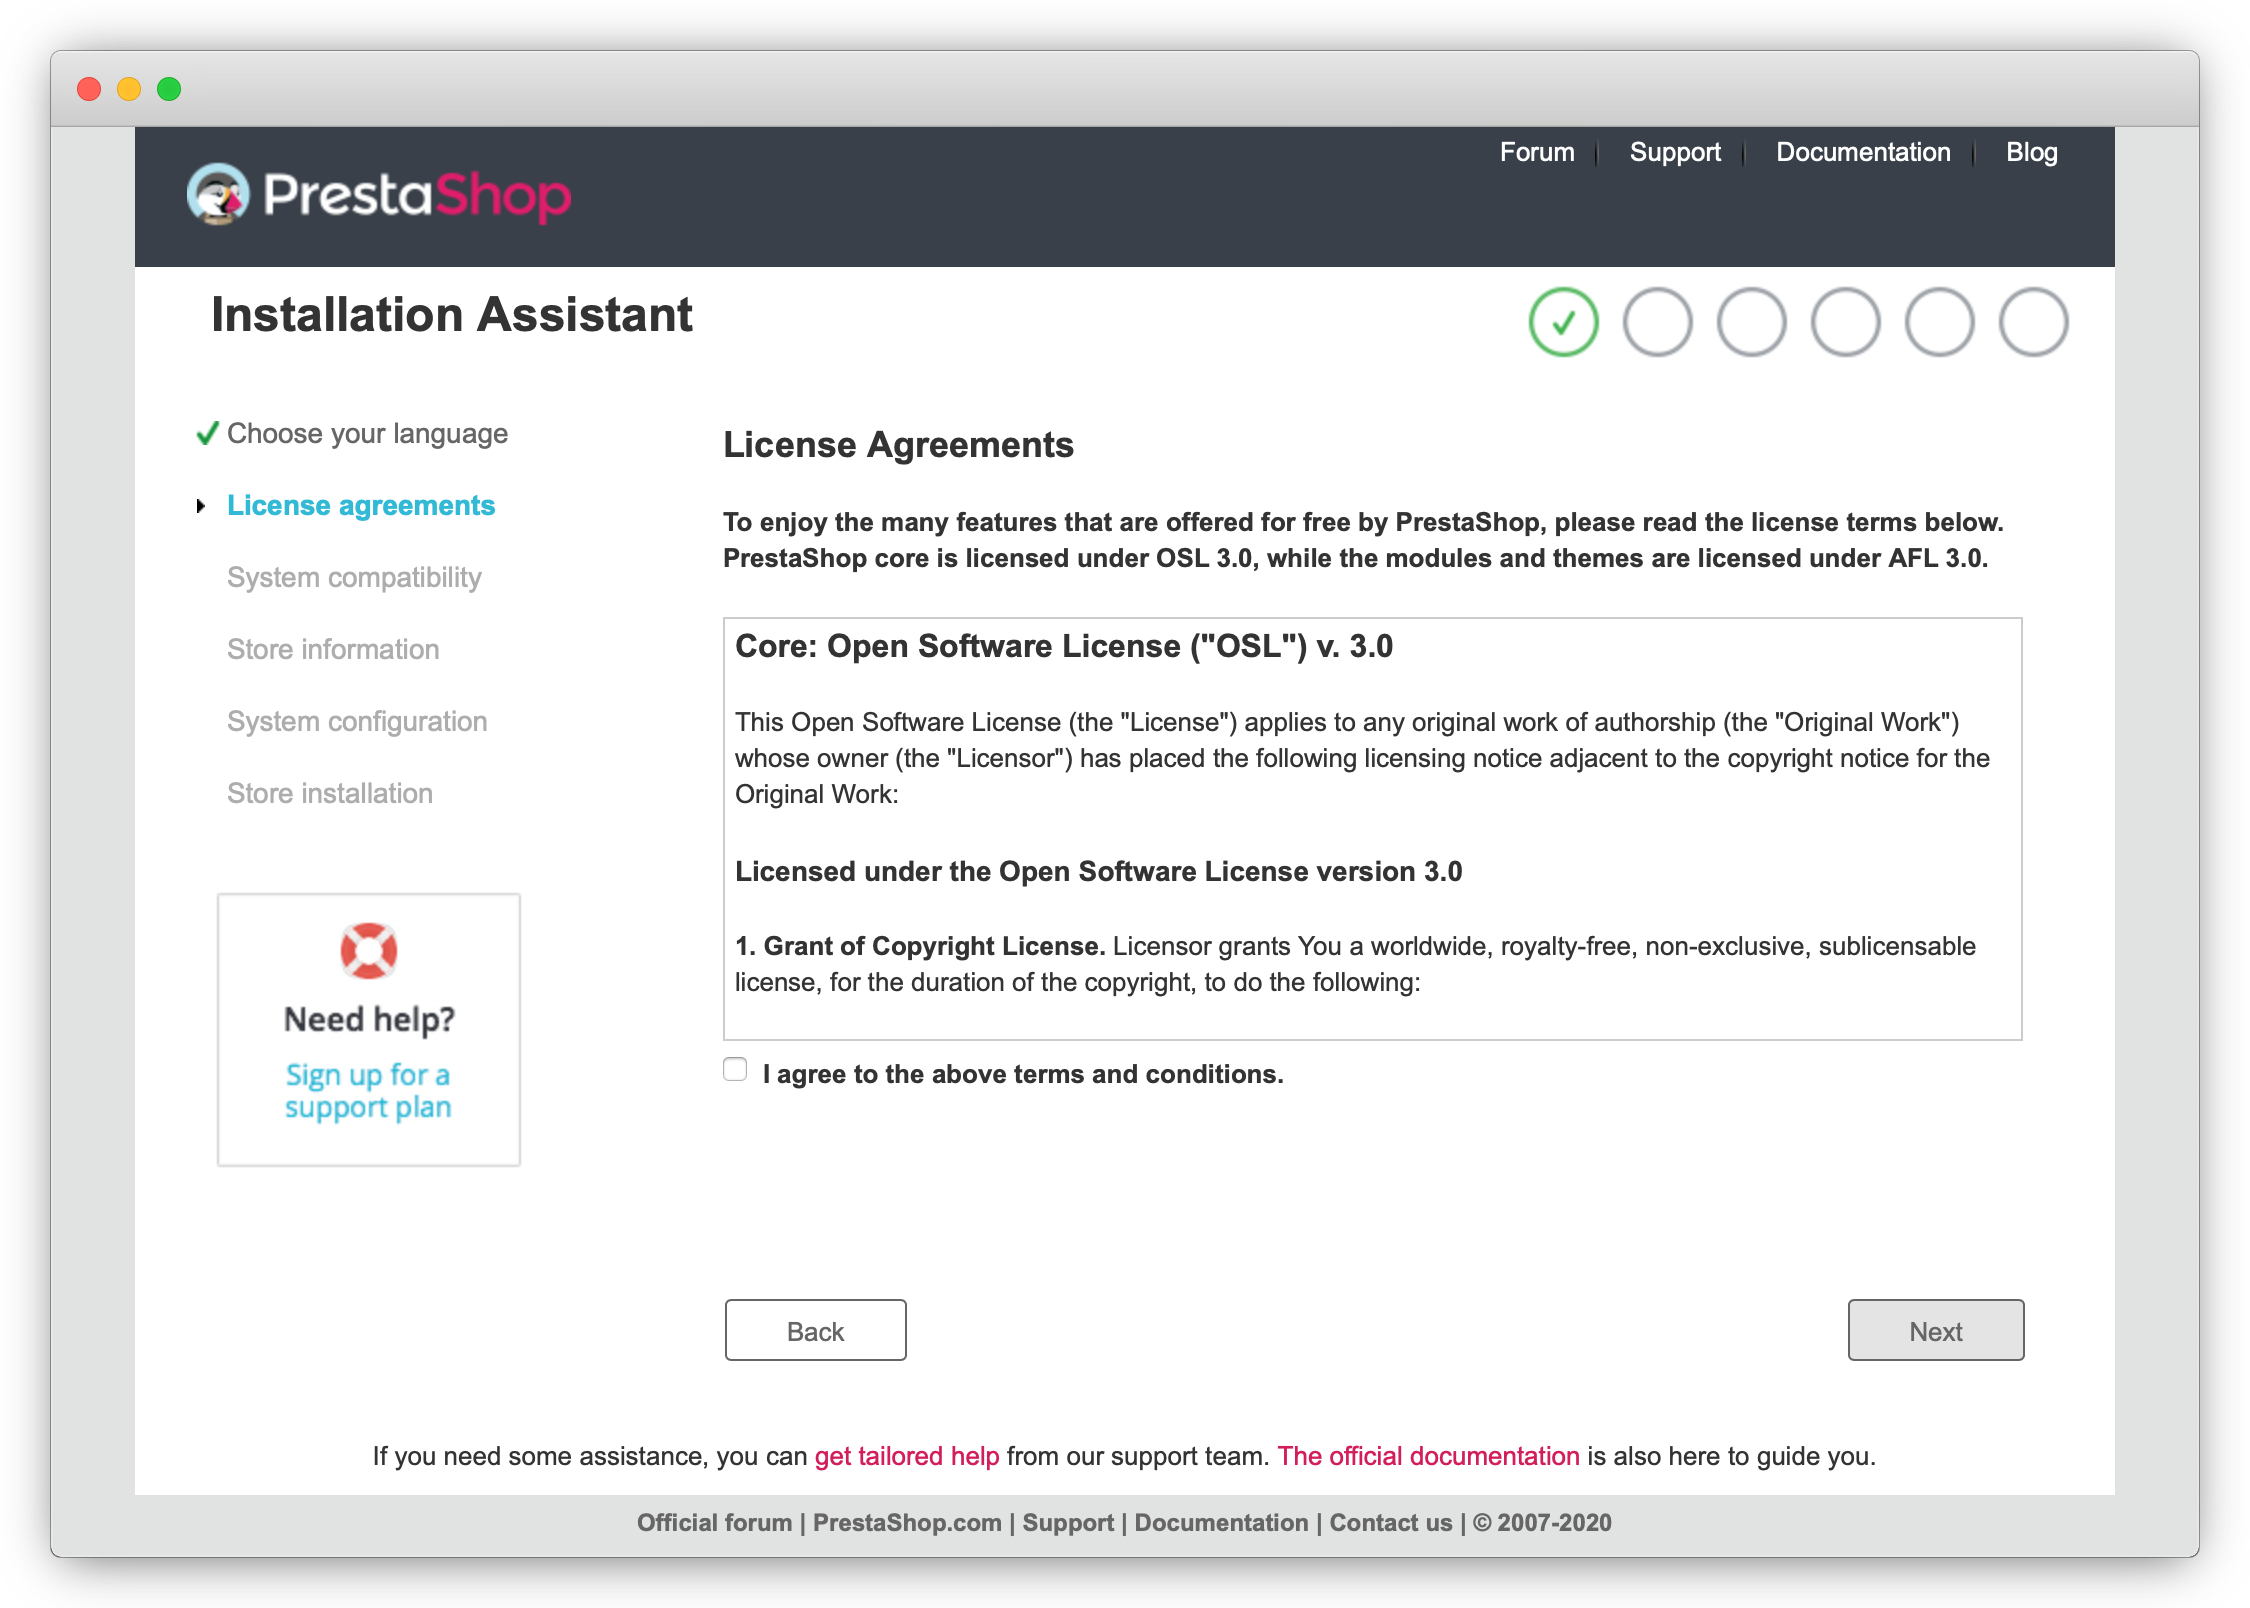
- Read the license terms of PrestaShop and tick the box I agree to the above terms and conditions, then click Next.
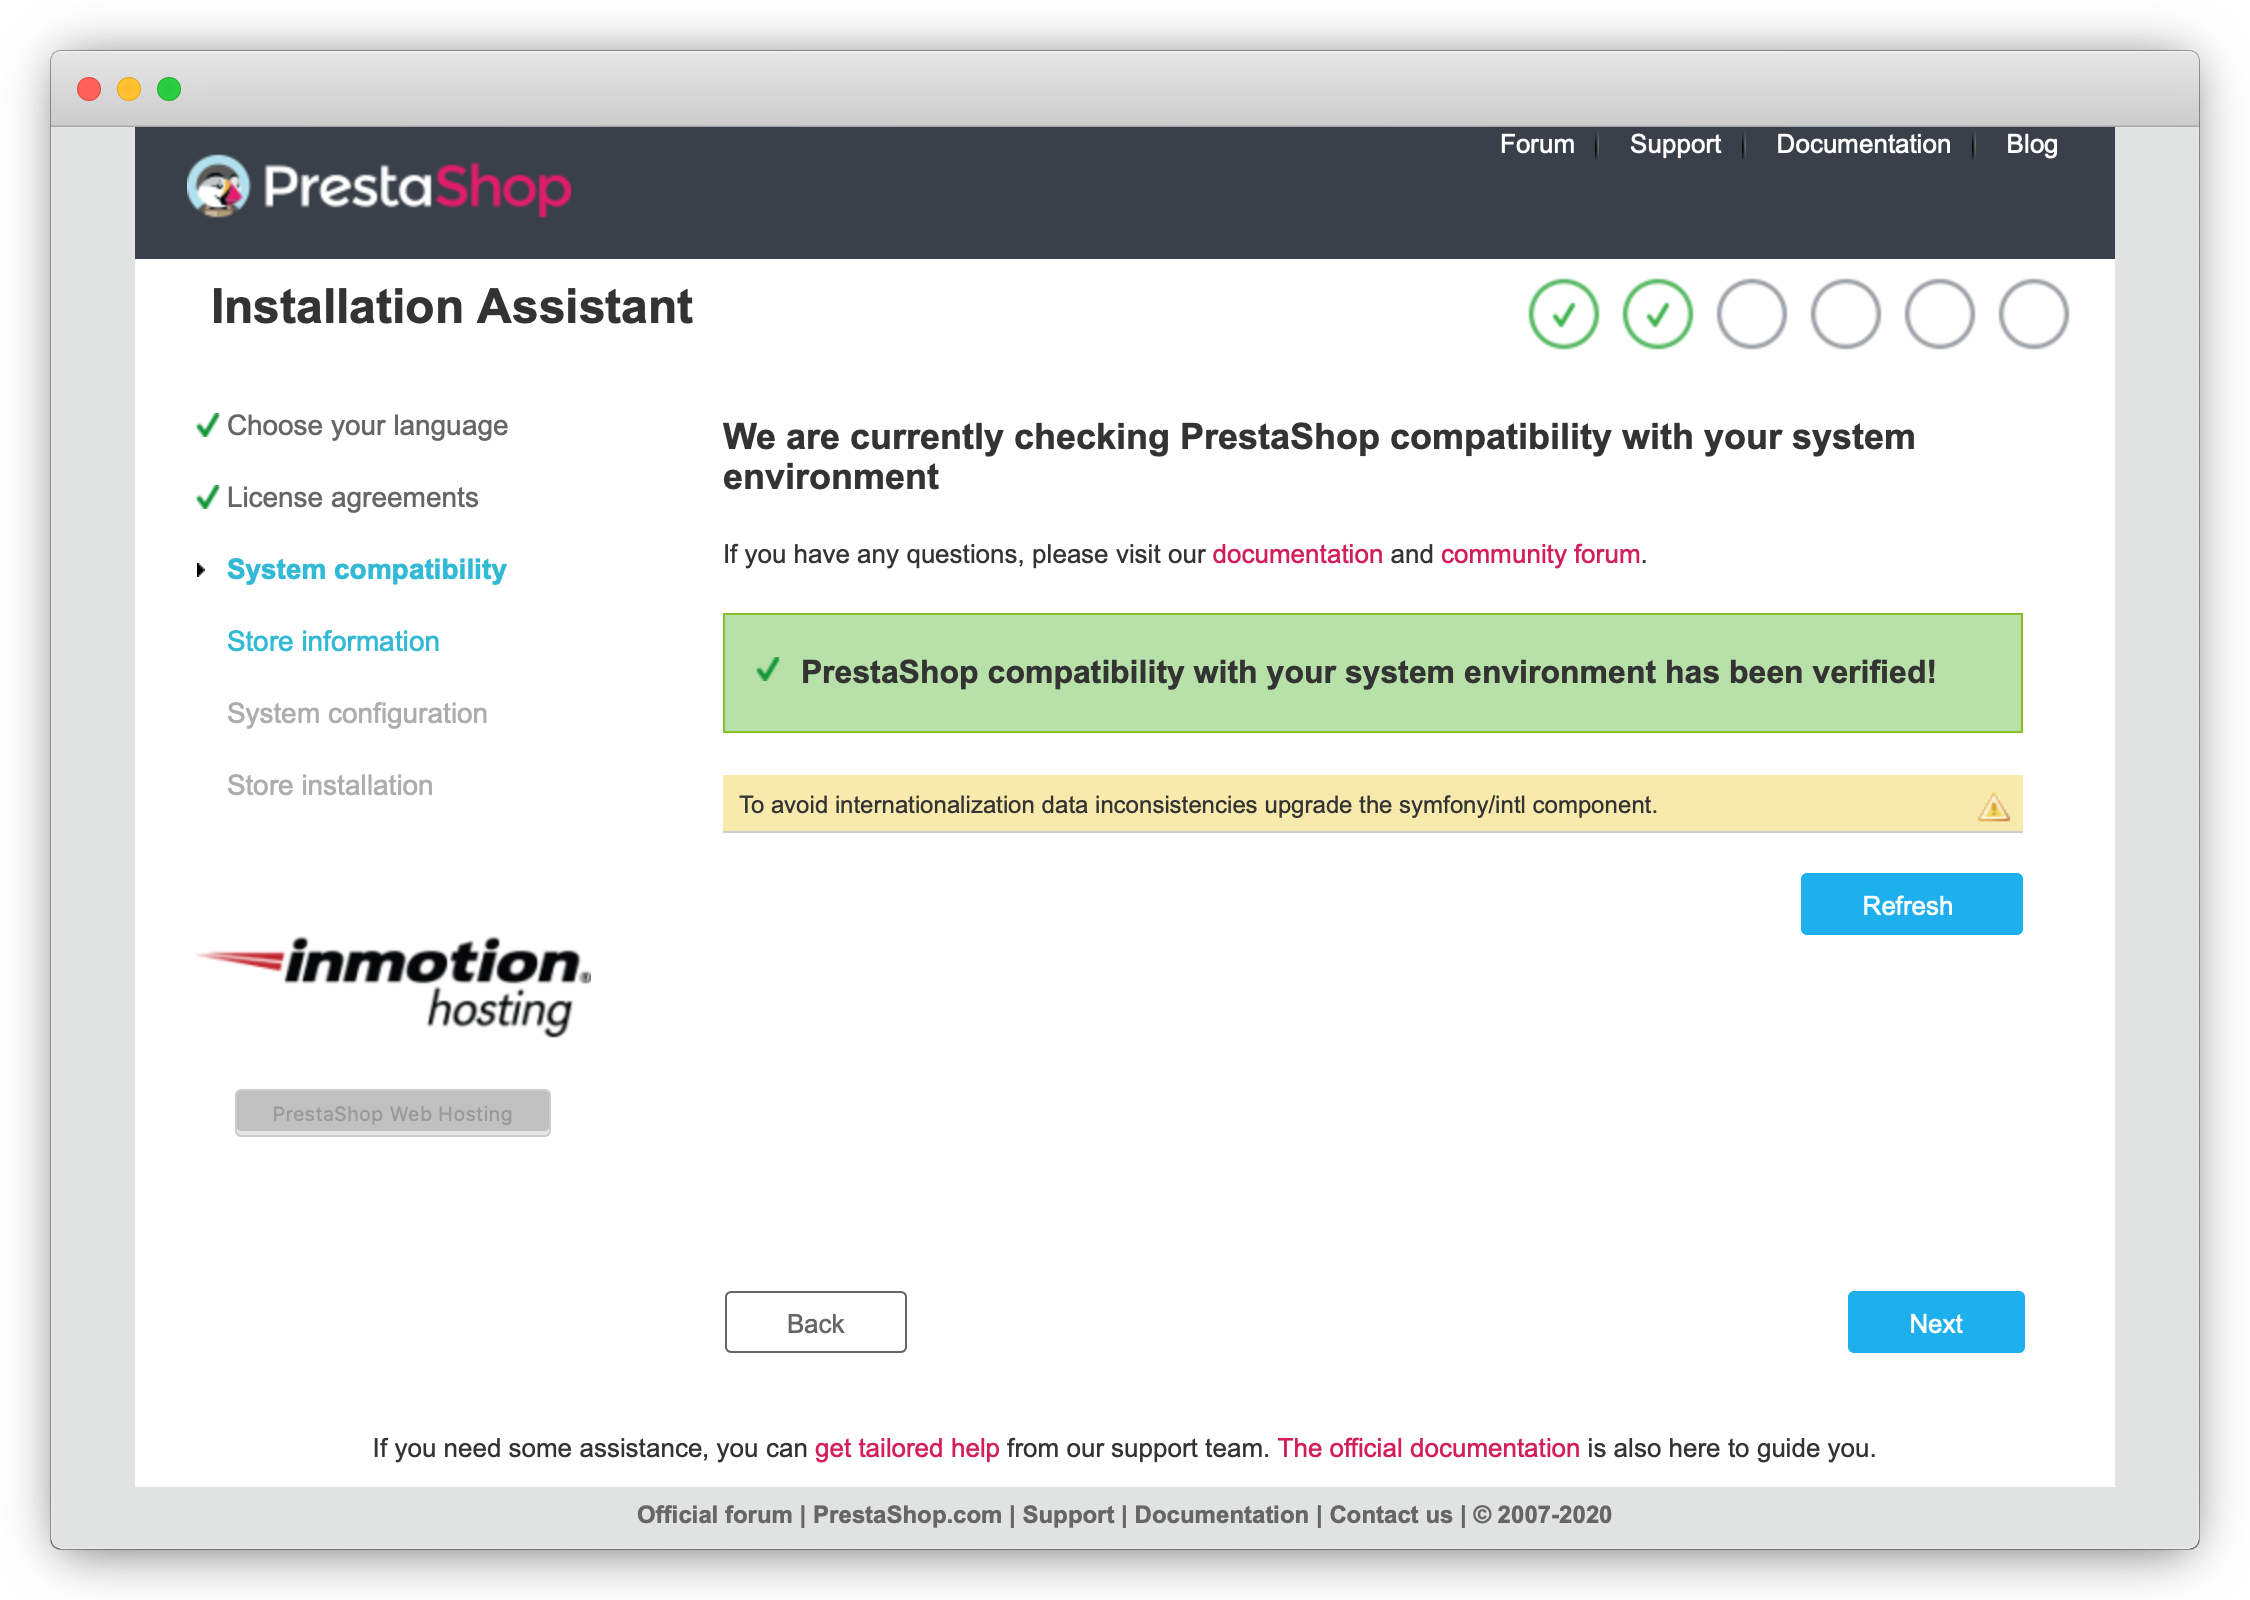
The configuration wizard checks the compatibility of your system. 3. If all requirements are fulfilled, you see a confirmation message, and you can click Next to proceed further with the configuration.
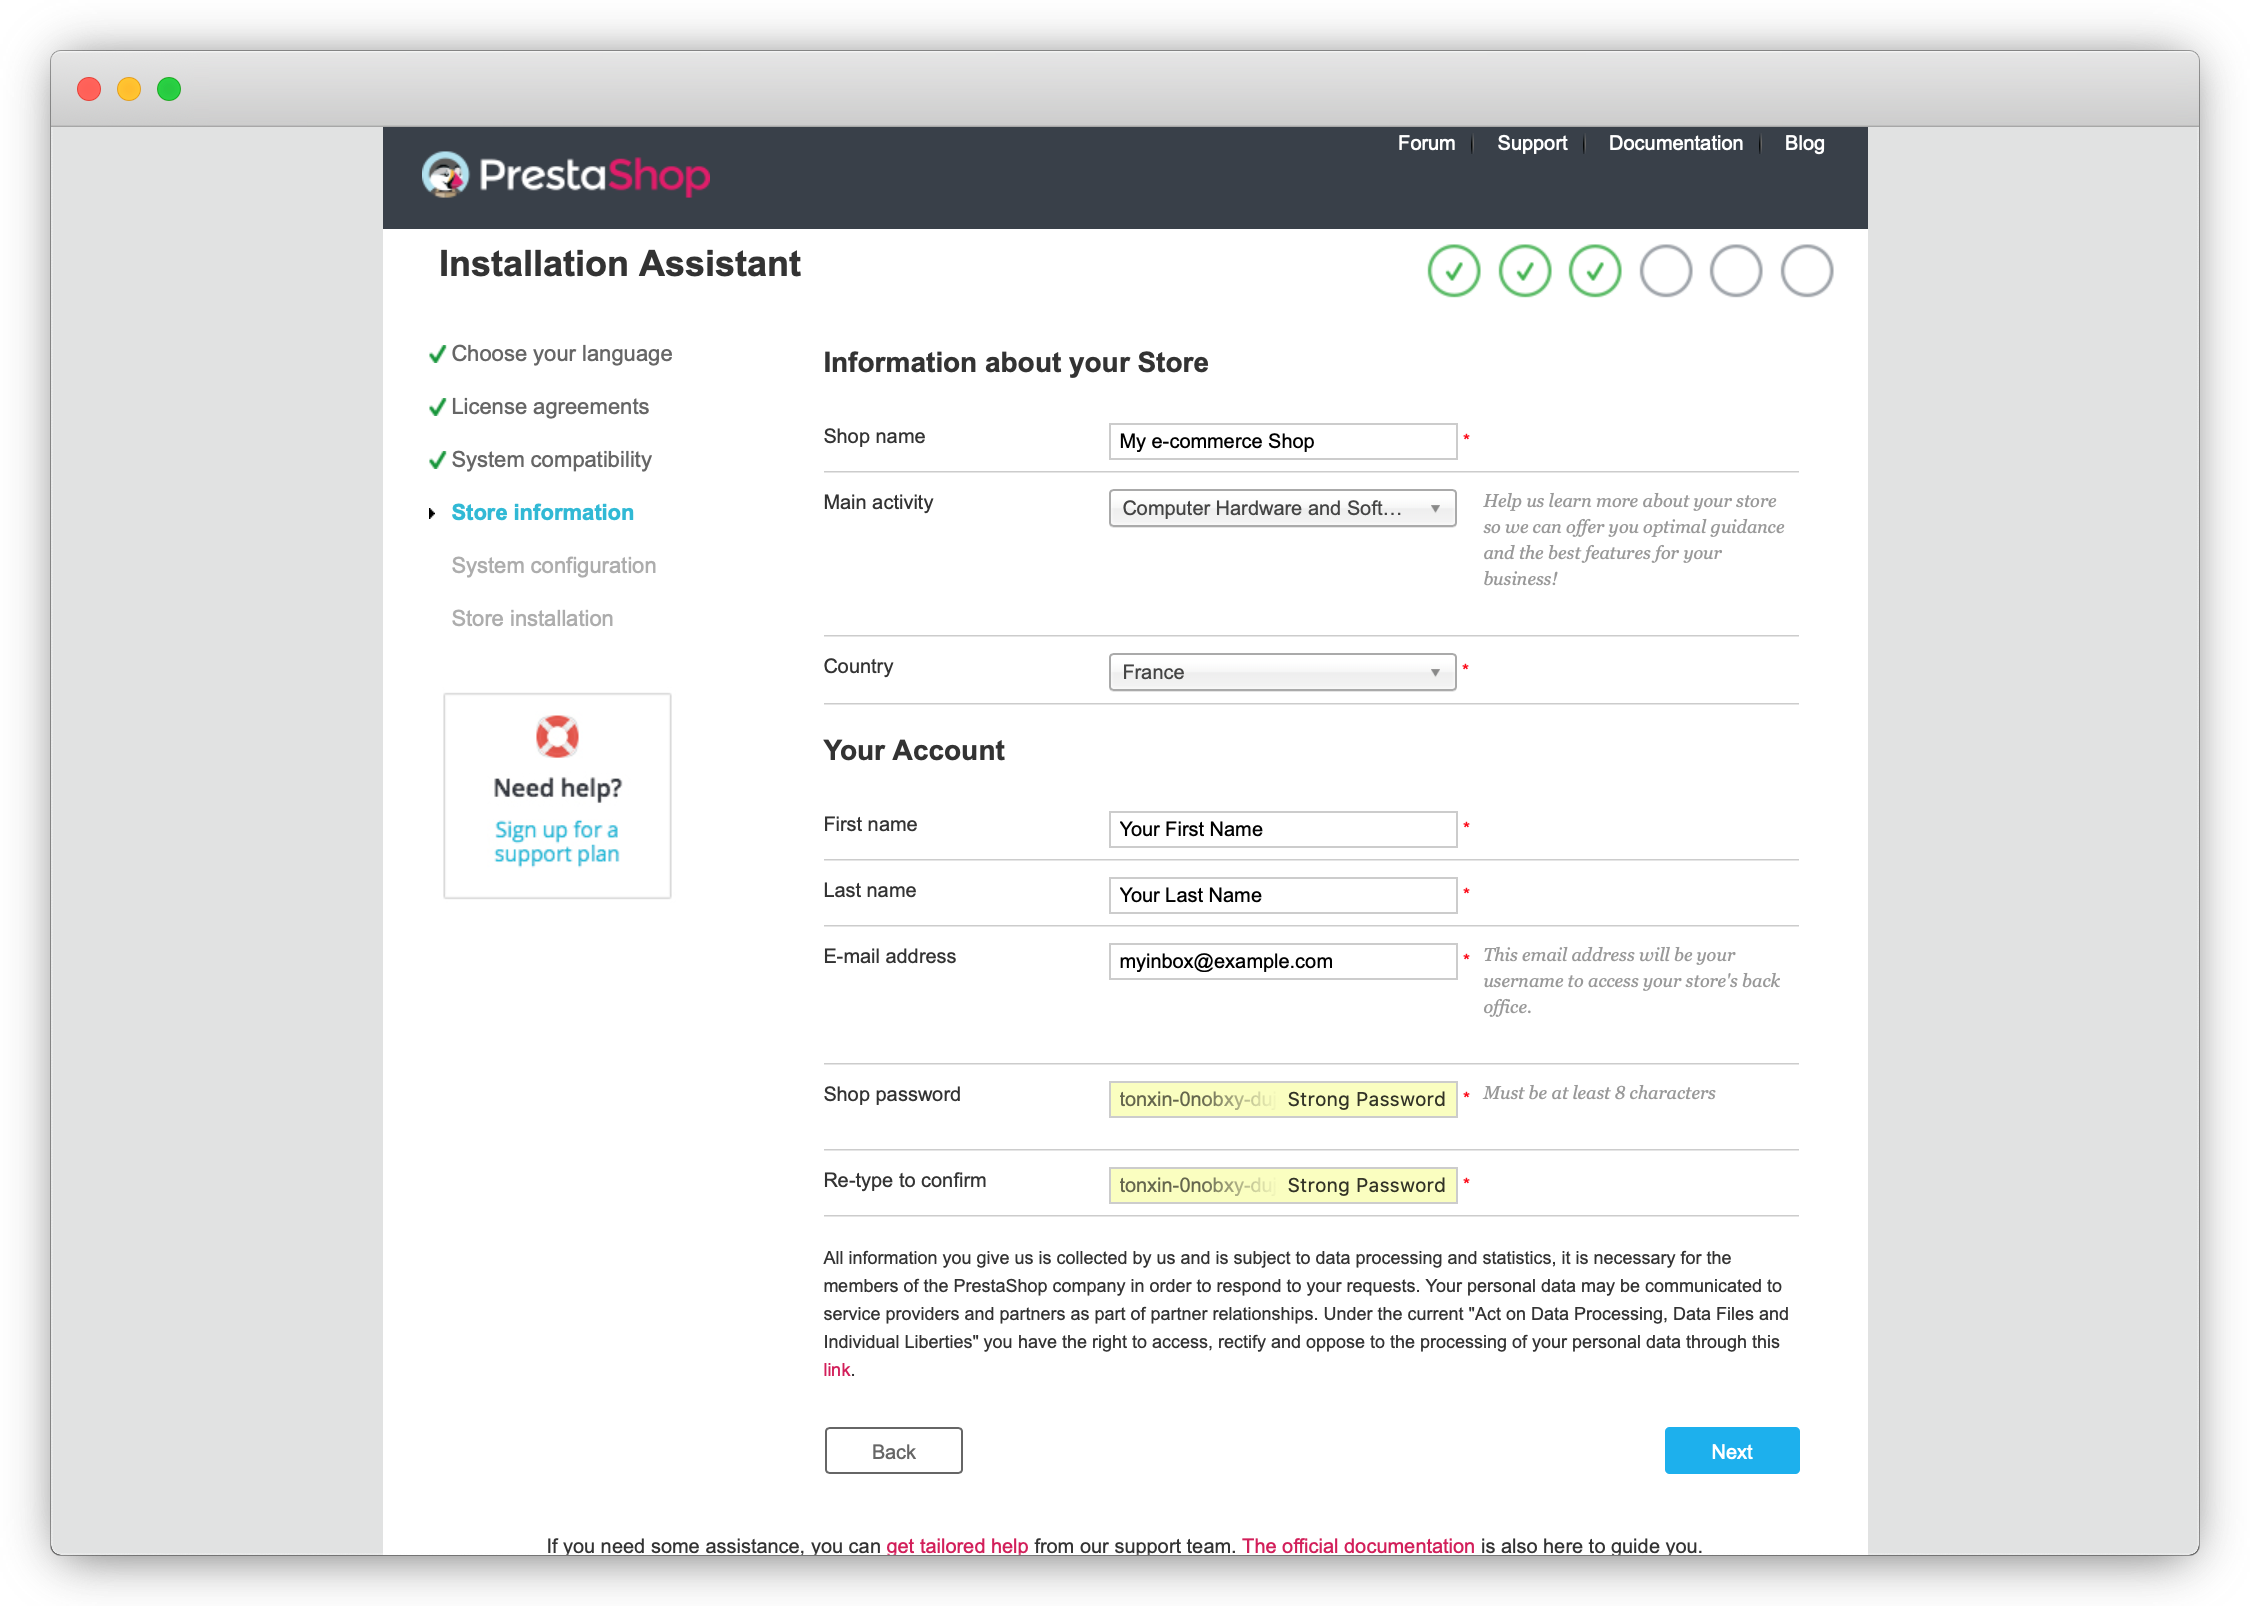
-
Enter the information about your shop, and your account credentials, and choose a secure password for your administrator account. Click Next to continue with the installation.
-
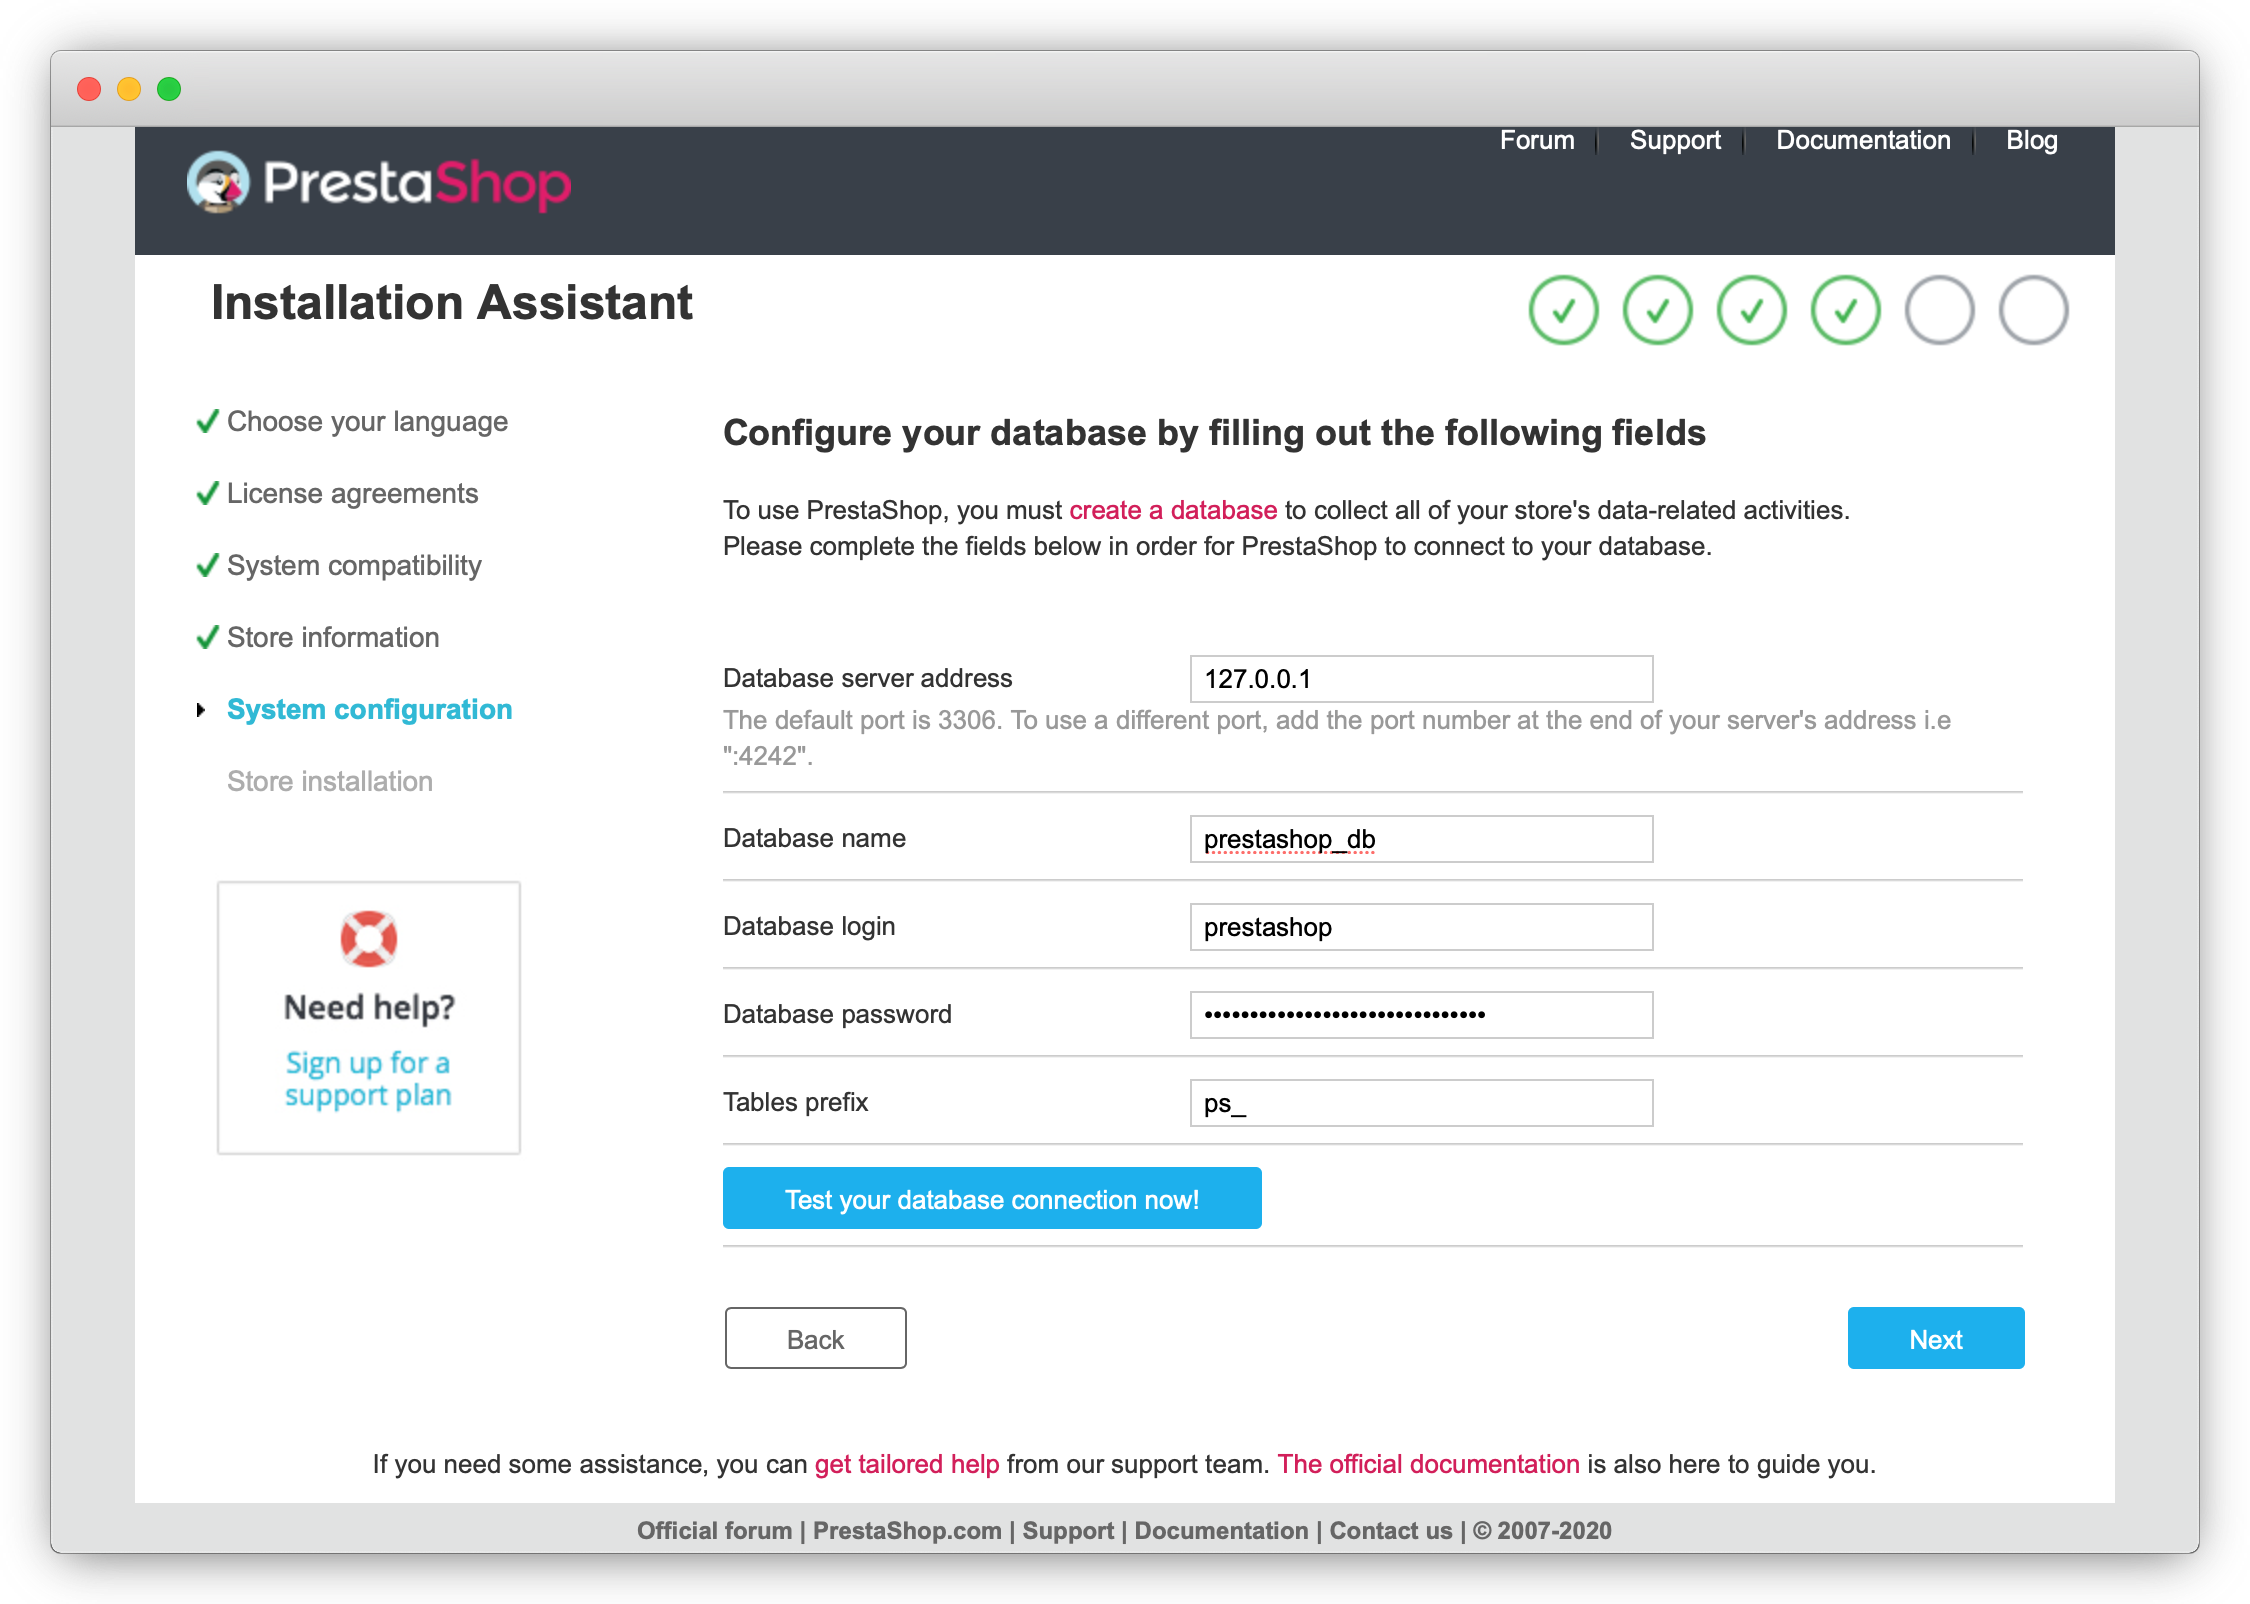
Enter the connection details for your database. You have set the credentials for the database user in a previous step. If you want to use PrestaShop with a Database for MySQL, you will find the credentials in your Scaleway console. Click Test your database connection now! to verify that the connection is successful. Once done, click Next to continue.
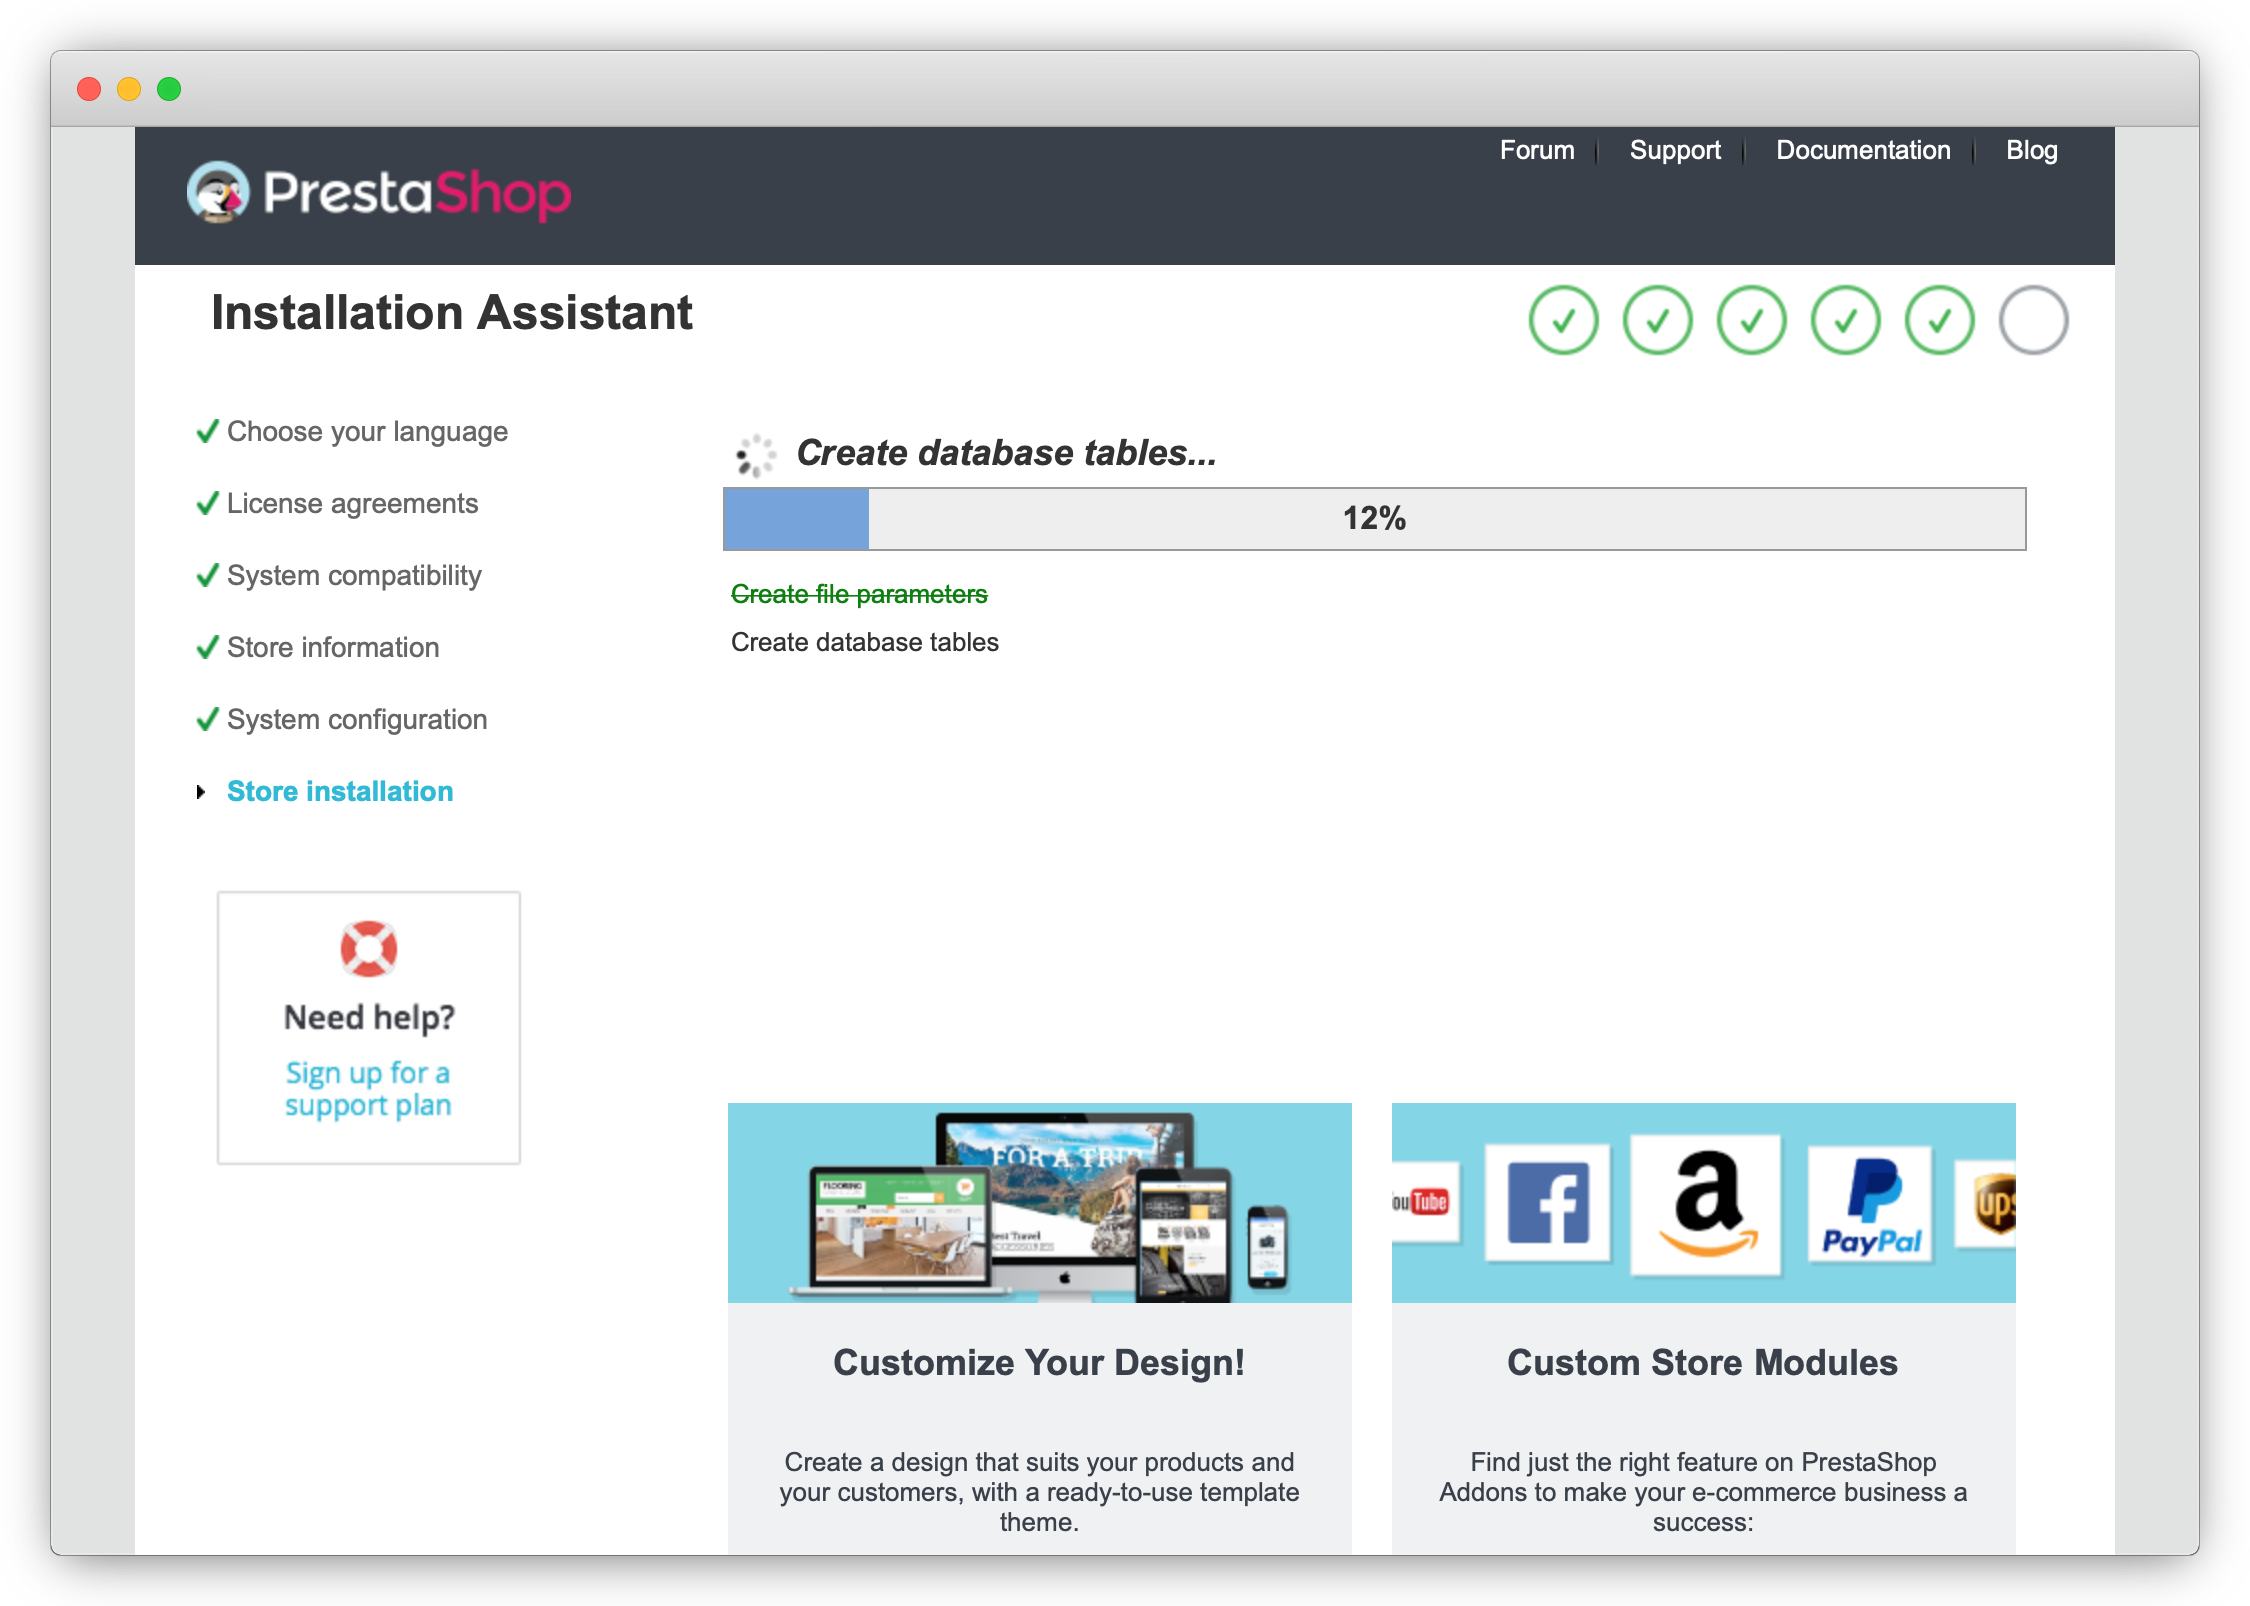
The setup wizard will create the database structure for PrestaShop. This step may take a moment, and you are redirected to the next page once the task is completed.
Once the installation is finished, a summary of the installation displays:
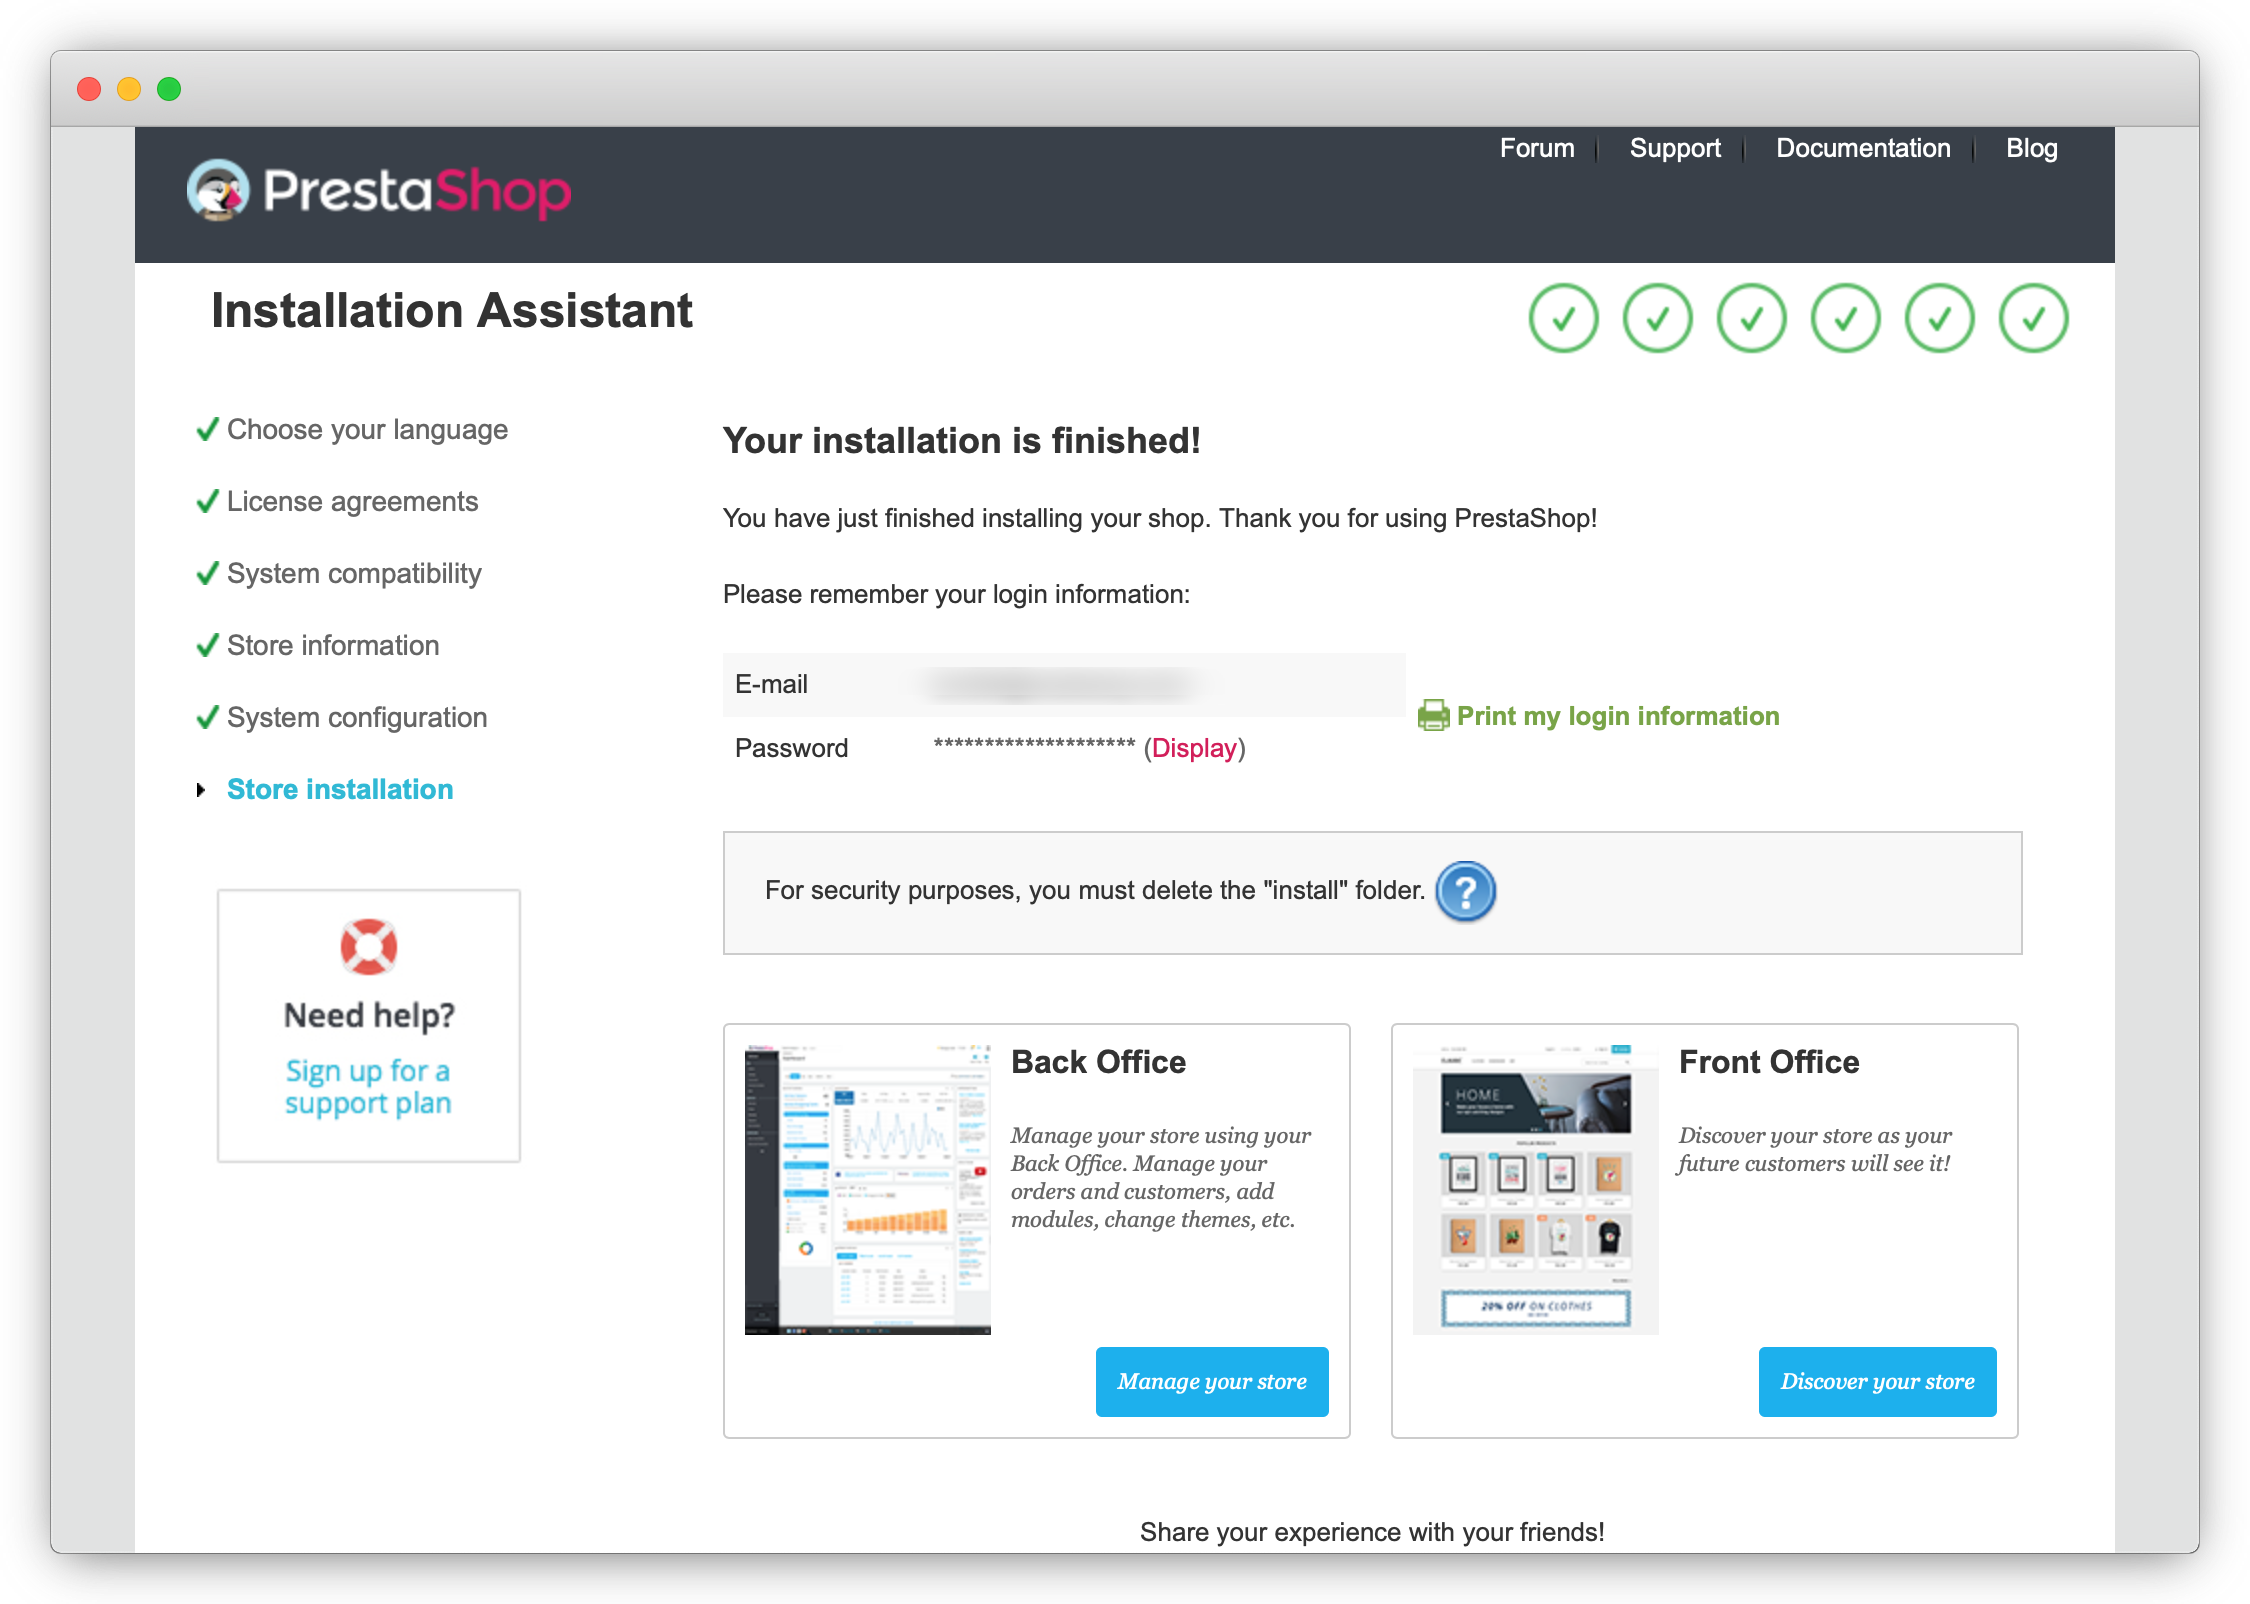
-
Remove the installation directory to complete the installation:
rm -rf /var/www/html/eshop/install
Setting up TLS encryption
By default, Prestashop uses plain, unencrypted HTTP connections, which could be a security risk. As we have already obtained a TLS certificate for our site, we will configure our PrestaShop installation to use HTTPS.
-
Go to
http://eshop.example.com/admin. The administrator login displays. Connect yourself to the administrator area using the credentials set during the installation: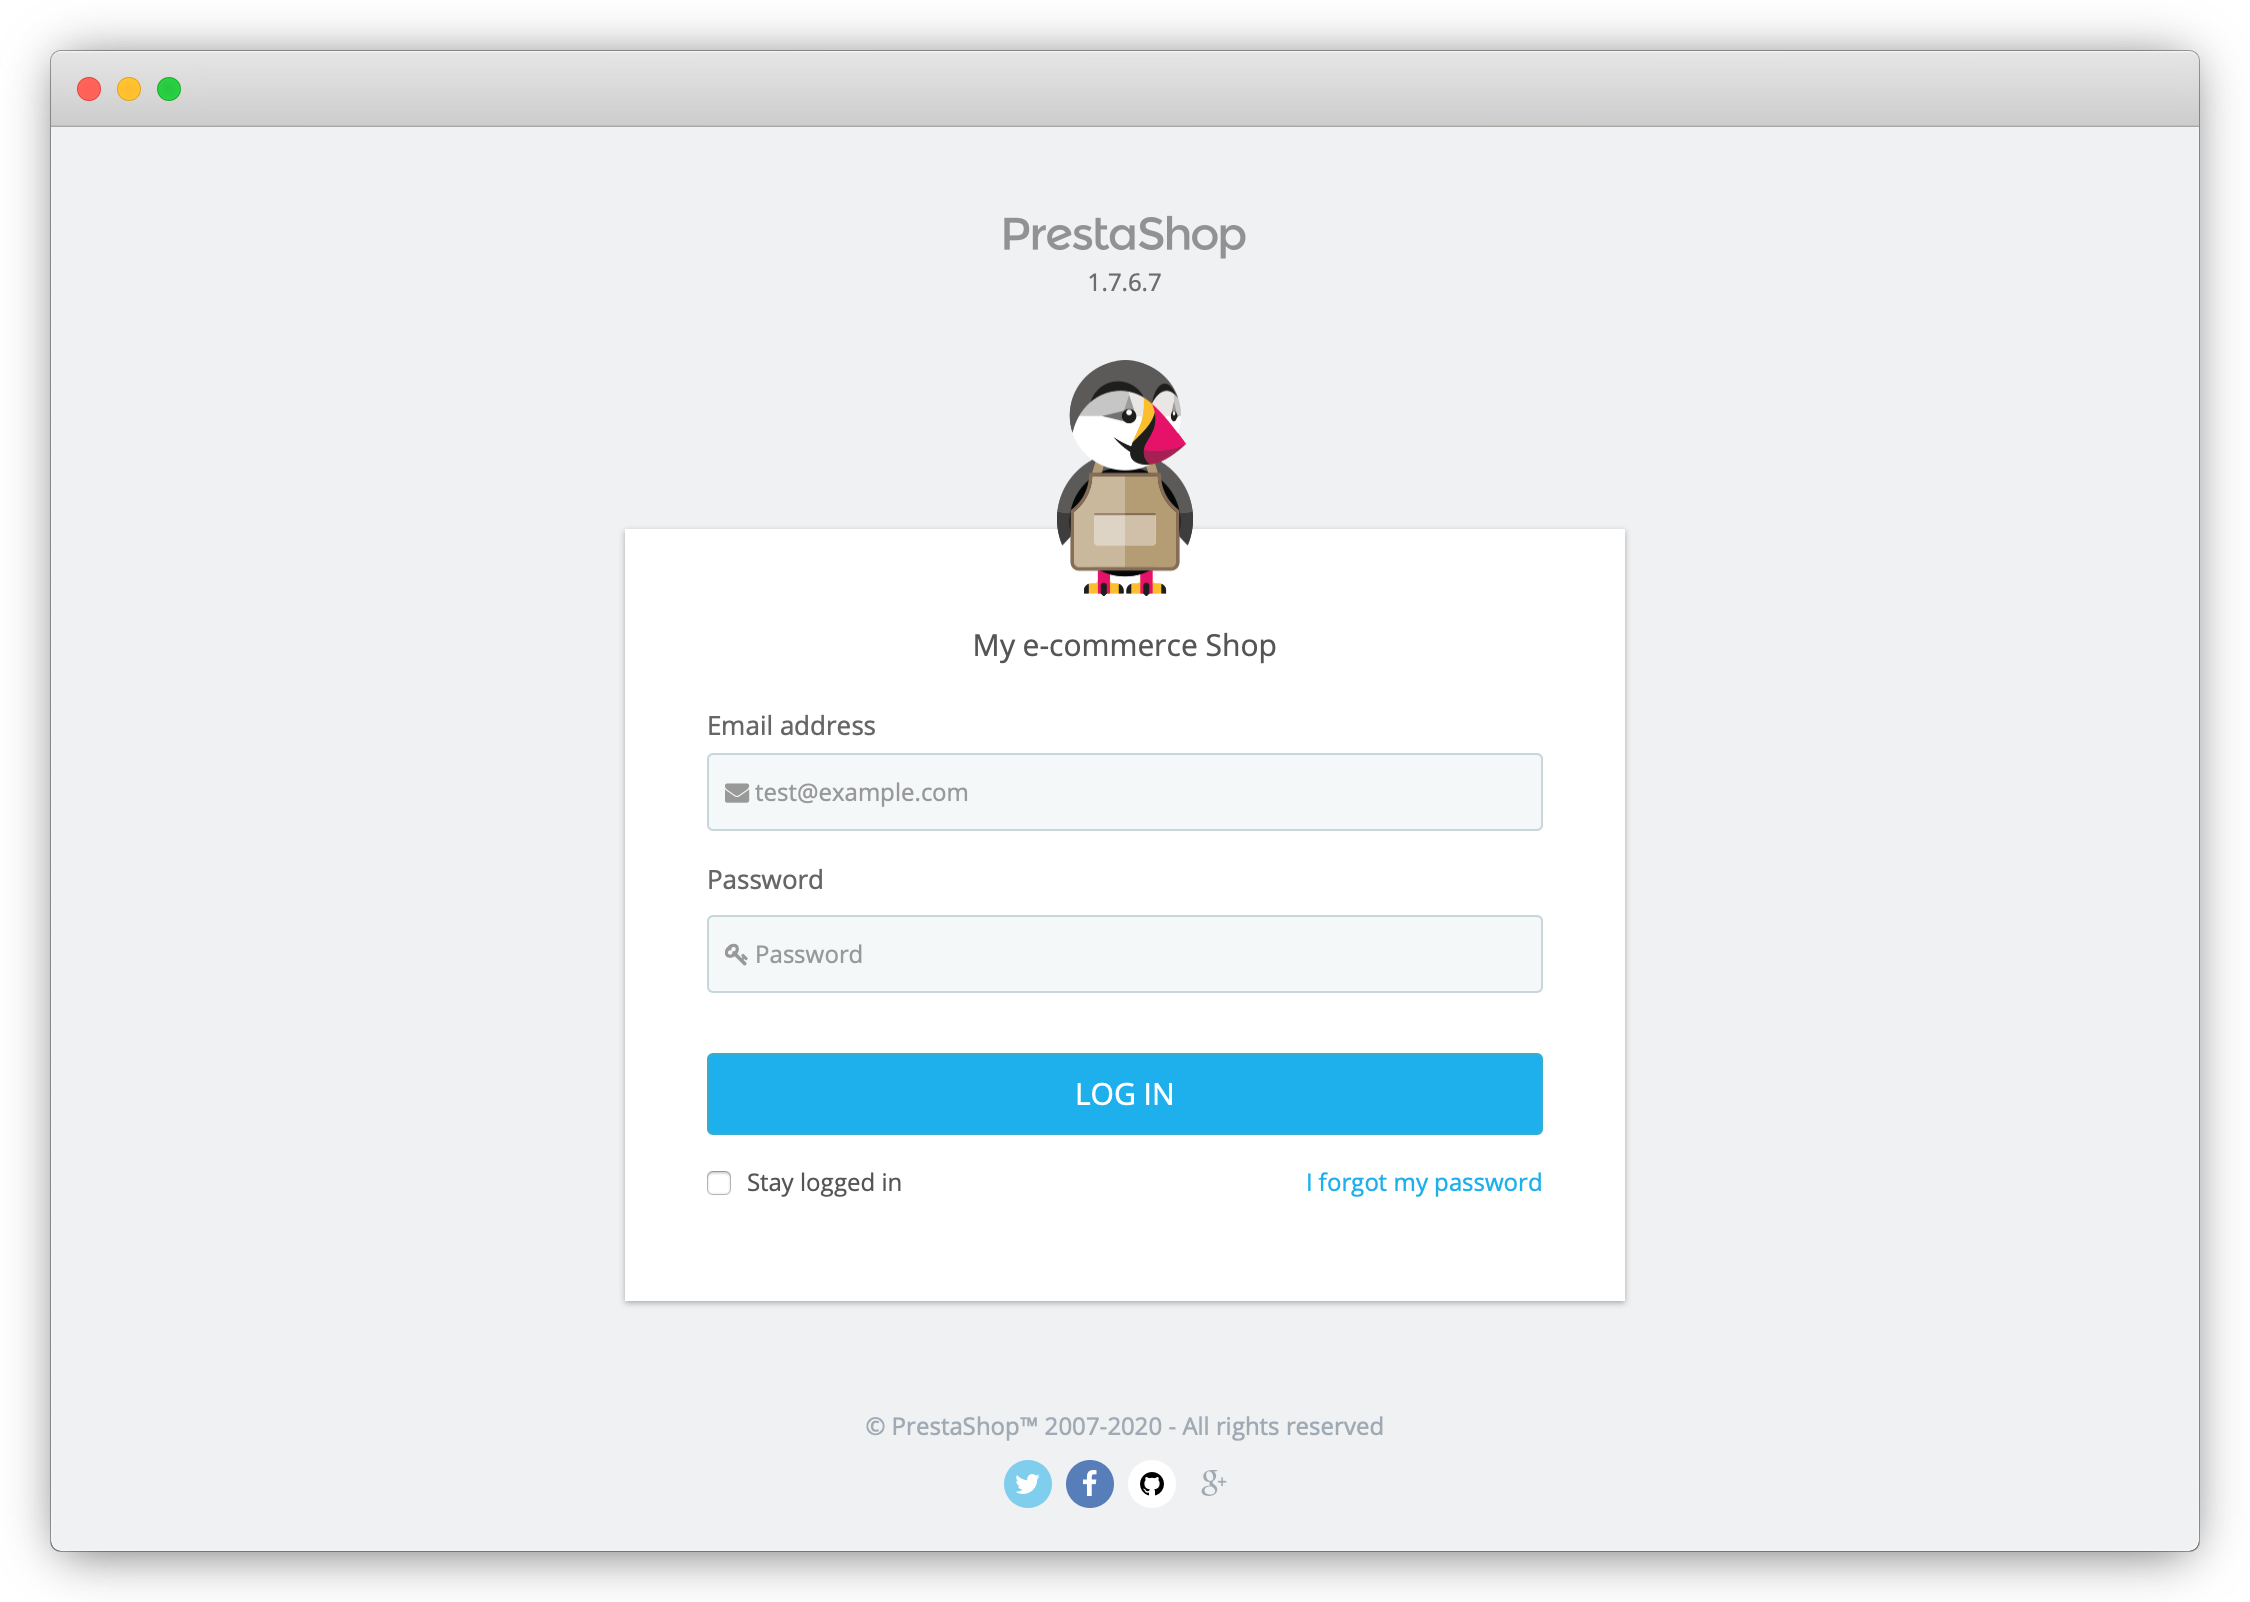
-
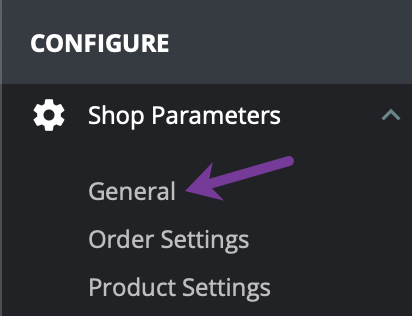
Click Shop Parameters > General in the menu on the left.
-
Click the link Please click here to check if your shop supports HTTPS. You are redirected to a secure HTTPS connection.

-
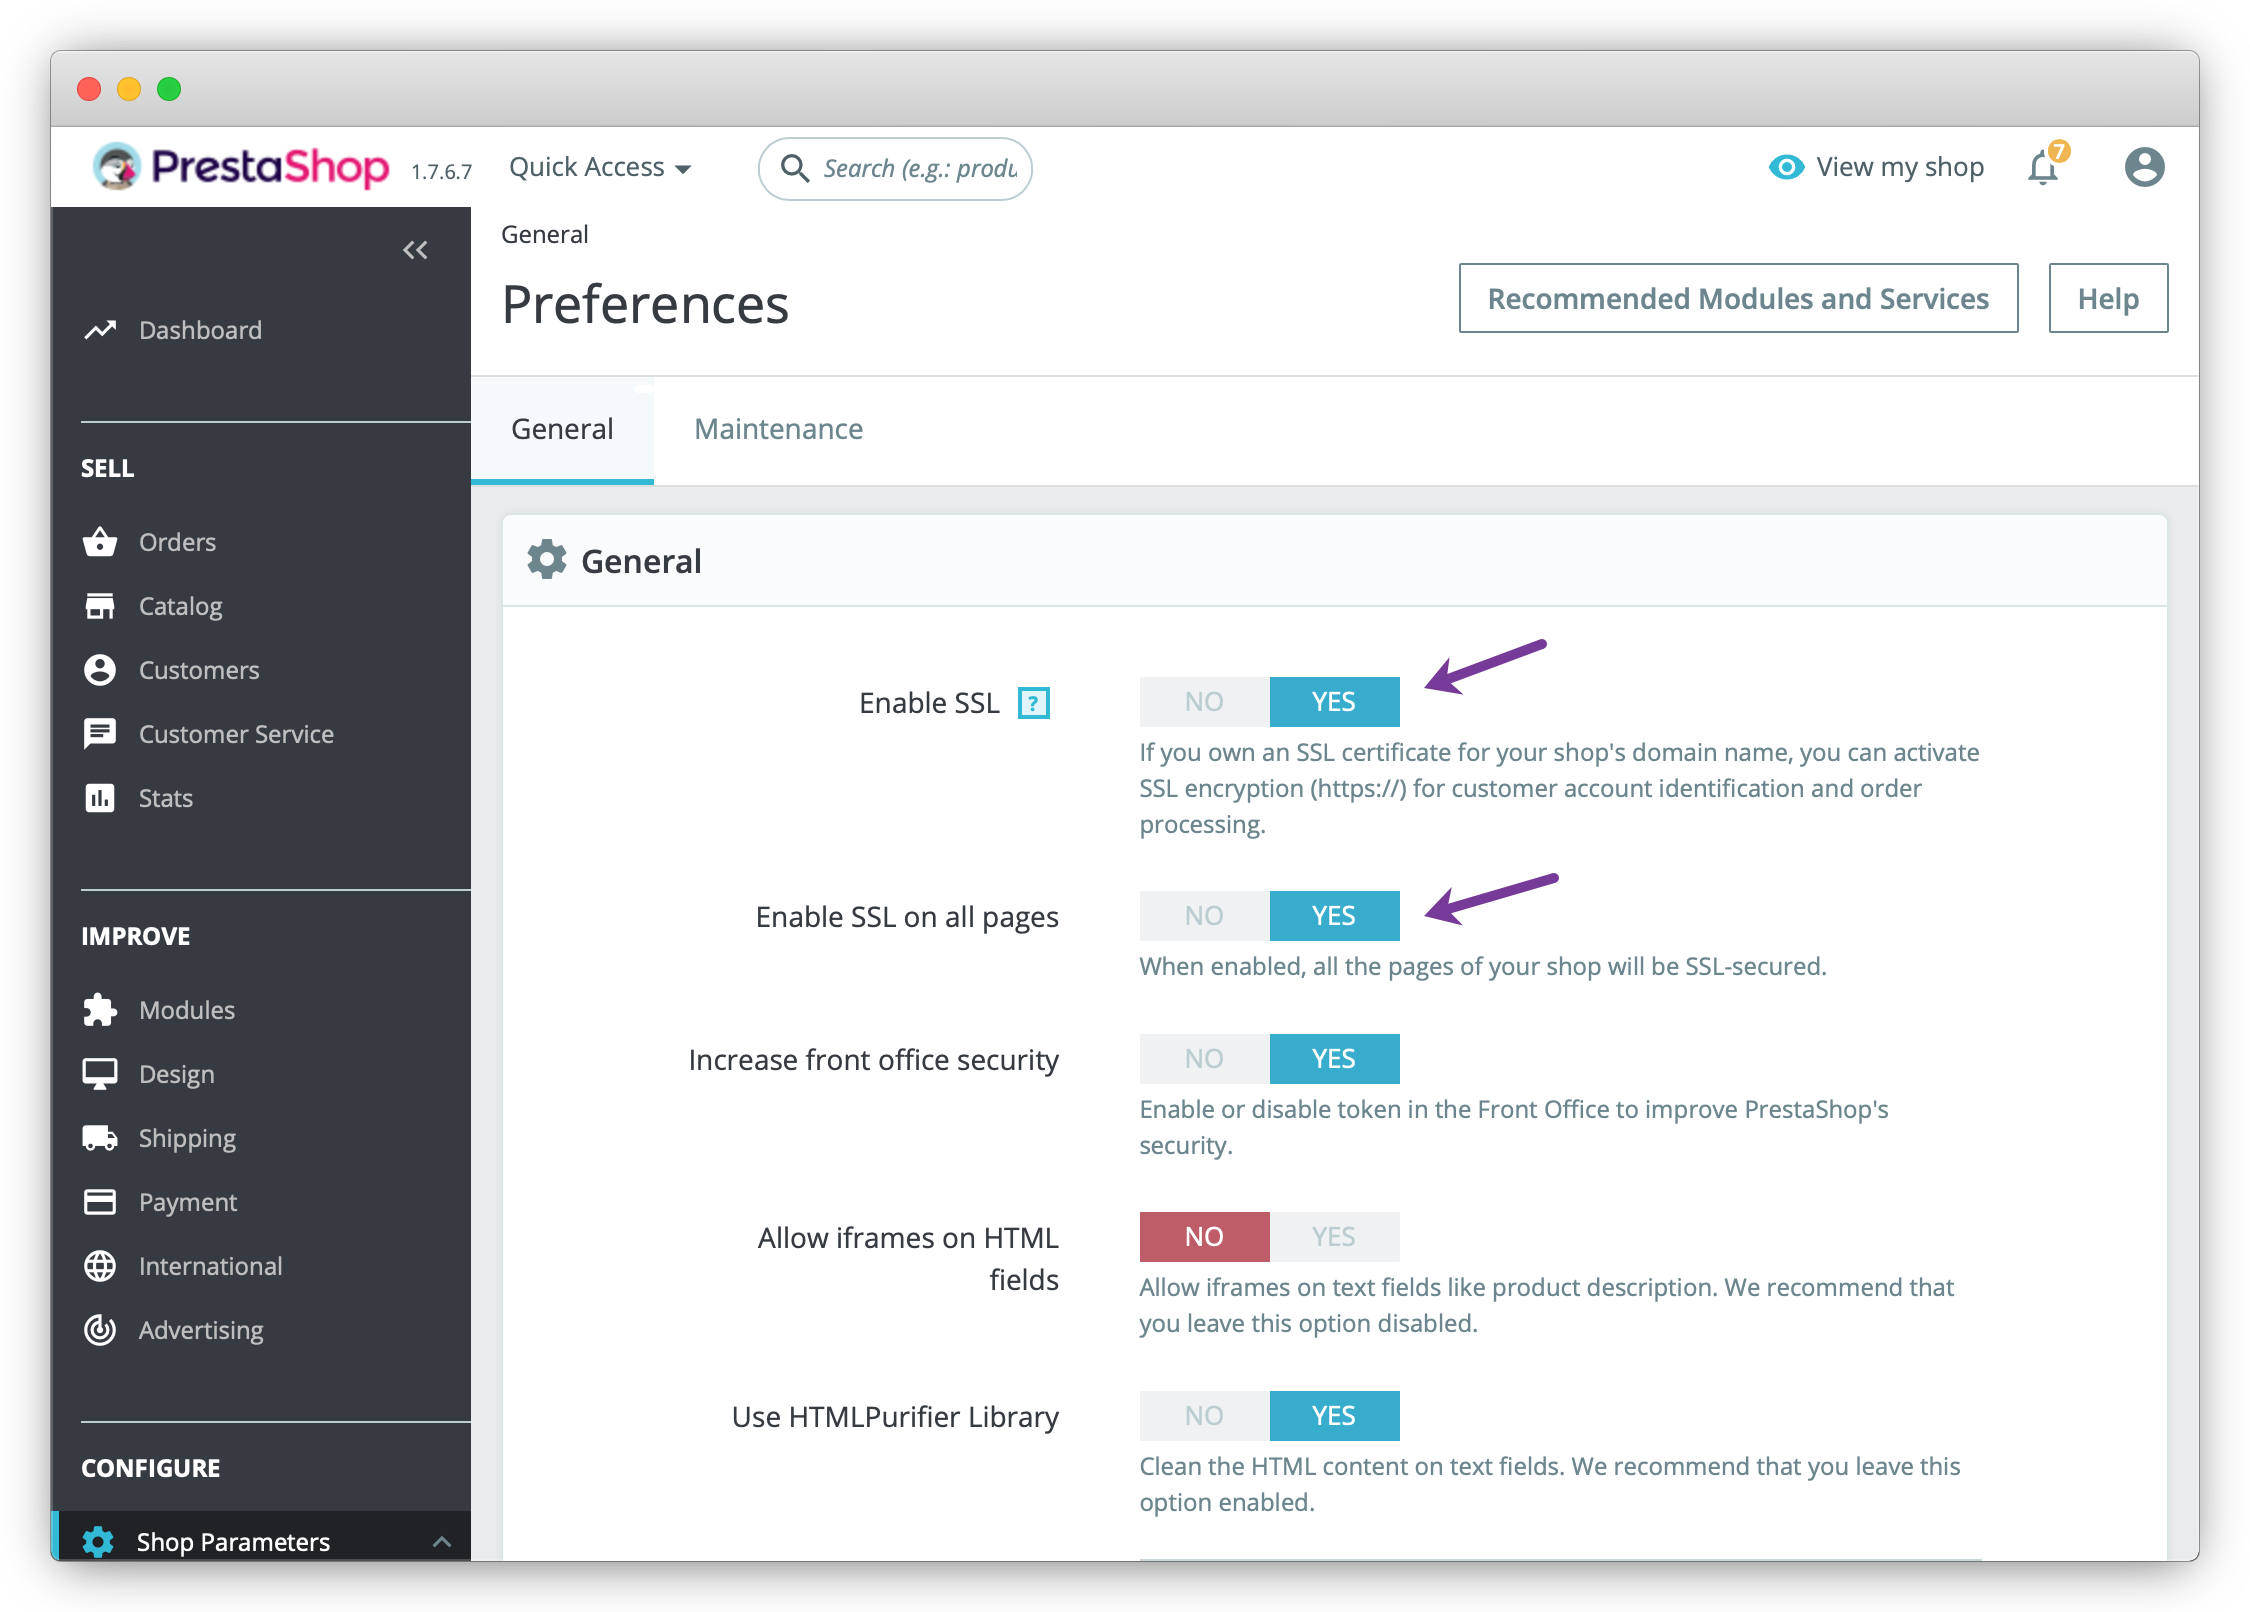
Enable HTTPS connections by clicking on the corresponding button. By default, PrestaShop uses HTTPS only on the member and checkout sections. If you want to use HTTPS on all pages, enable the option by clicking on the corresponding button. Then validate the configuration by clicking on Save at the bottom of the page.
Your e-commerce site now uses secure HTTPS for connections, and you can start adding products to your online shop.
Going further
Your e-commerce website is now ready to test the PrestaShop application. For production use, it is recommended to take additional security measures by installing a firewall, for example, UFW, which provides an easy-to-use command-line interface for iptables.
- Install UFW using the
aptpackage manager.apt install ufw - For security reasons, we deactivate by default all incoming connections to the server.
ufw default deny - Allow all outgoing connections from the server by default.
ufw default allow outgoing - Allow inbound traffic on the Nginx HTTP and HTTPS ports, as well as SSH connections.
ufw allow 'Nginx HTTP' ufw allow 'Nginx HTTPS' ufw allow 'OpenSSH' - Enable the firewall configuration.
sudo ufw enable
You now have a working firewall configured on your e-shop server. You can set additional rules for more complex setups and configure additional protection of the machine using fail2ban.
For more information on how to configure your PrestaShop e-shop towards your business requirements, refer to the official documentation.
Visit our Help Center and find the answers to your most frequent questions.
Visit Help Center