How to connect your deployment to PowerBI in a Private Network
This page explains how to integrate your Data Warehouse for ClickHouse® deployment located in a Private Network with PowerBI Service.
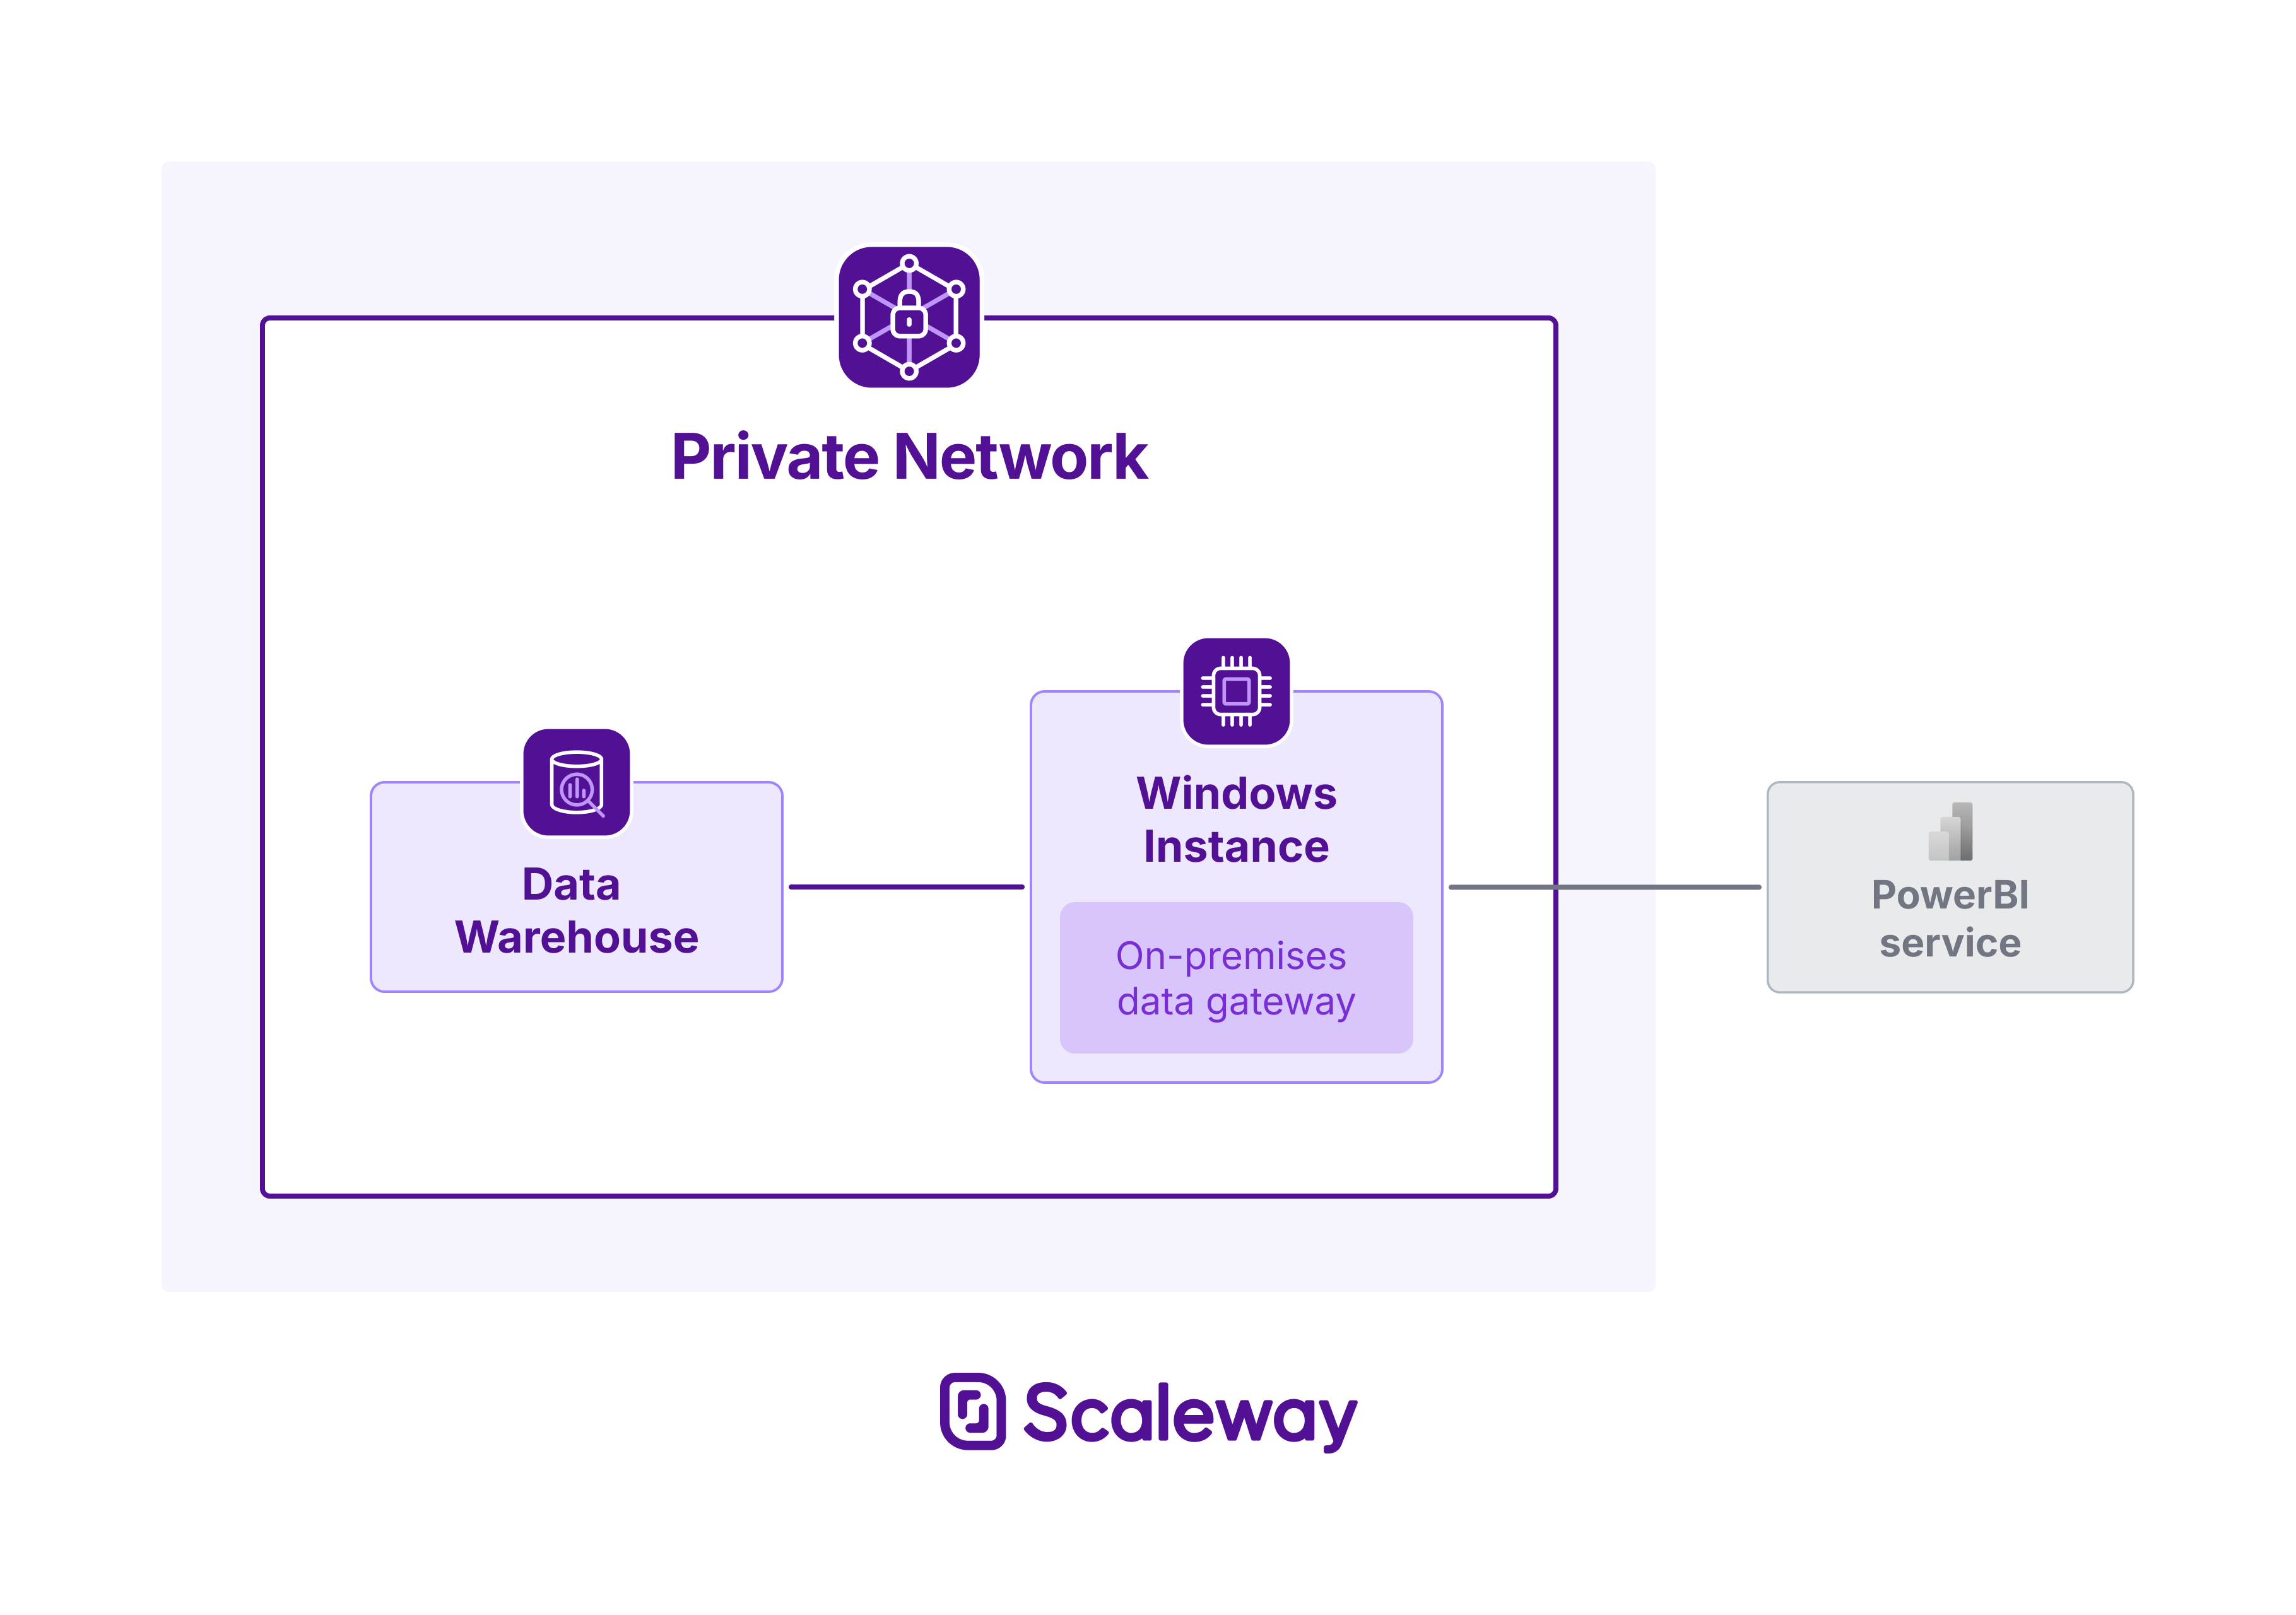
PowerBI Service is a robust data visualization tool that allows users to create dynamic reports and dashboards from various data sources. Connecting your Data Warehouse for ClickHouse® deployment within a Private Network to PowerBI requires installing the Microsoft On-premises data gateway on a dedicated Windows Instance located in the same Private Network, and using the ODBC protocol.
Before you start
To complete the actions presented below, you must have:
- A Scaleway account logged into the console
- Owner status or IAM permissions allowing you to perform actions in the intended Organization
- Created a Data Warehouse deployment and attached it to a Private Network
- Created a Windows Instance in the Private Network
Installing a data gateway on the Windows Instance
Download and install On-premises data gateway on your Windows Instance.
If everything goes well, the following message displays:
The gateway <gateway name> is online and ready to be used.
Configuring the ODBC data source
-
Download and install the latest Clickhouse ODBC driver.
-
From the Start Menu, open ODBC Data Sources (64-bit).
-
In the Drivers tab, make sure to view the following drivers:
- ClickHouse ODBC driver (ANSI)
- ClickHouse ODBC driver (Unicode)
-
Click Add, in the System DSN tab. A list of drivers displays.
-
Select **ClickHouse ODBC Driver (Unicode) from the list and click Finish. A creation wizard displays.
-
Enter the following values:
- Name: The name you want to give to your new data source
- Host: the private endpoint of your Data Warehouse deployment
- Port:
8443 - Database: default or any database of your choice
- User: A user with read permissions on the selected database
- Password: The user's password
- Check the SQL Compatibility Settings check box
-
Click Ok to create the data source.
Installing the TLS certificate on the Windows Instance
-
From your Data Warehouse deployment page in the Scaleway console, download the TLS certificate for your deployment.
-
Right-click the TLS certificate file you just downloaded, then select Install certificate. An import wizard displays.
- Select Local machine, then click Next.
- Select Place all certificates in the following store, then click Browse.
- Select Trusted Root Certification Authorities, then click Ok.
- Click Next, then click Finish.
-
In On-premises data gateway, go to Service Settings to restart the application.
Connecting PowerBI to your deployment
-
Log into PowerBI Service with the Microsoft account that you used to register the On-premises data gateway.
-
Click New report, then select Get data.
-
Select ODBC from the list. A connection wizard displays.
-
Enter the following values:
- ODBC connection string:
dsn=<name_of_data_source_created_earlier> - Connection: Create new connection
- Connection name: The name you want to give to your connection
- Data gateway: Your On-premises data gateway
- Authentication kind:
Basic - Username: The same username used in the System DSN previously created
- Password: The user's password
- ODBC connection string:
-
Click Next.
Your Data Warehouse for ClickHouse® is now integrated into your PowerBI platform.
Refer to the official ClickHouse® and PowerBI documentation portals for more information.