How to create an IPv6 subnet for Dedibox servers
Splitting your /48 IPv6 prefix into smaller subnets (e.g., /56 or /64) allows you to assign unique IPv6 address ranges to individual servers or virtual machines (VMs) on your Dedibox infrastructure. This enables better network organization, improved security through segmentation, and easier management of IP assignments across multiple devices or services. Each subnet has its own DUID (DHCP Unique Identifier) and can be configured individually.
Before you start
To complete the actions presented below, you must have:
- A Dedibox account logged into the console
- A Dedibox dedicated server
- Requested a /48 IPv6 prefix
-
Click Server > Network configuration in the Dedibox console. The network configuration pages displays. Scroll down to the IPv6 network configuration section.
-
Click the settings icon (cogwheel) next to your
/48prefix. Then click Create subnet.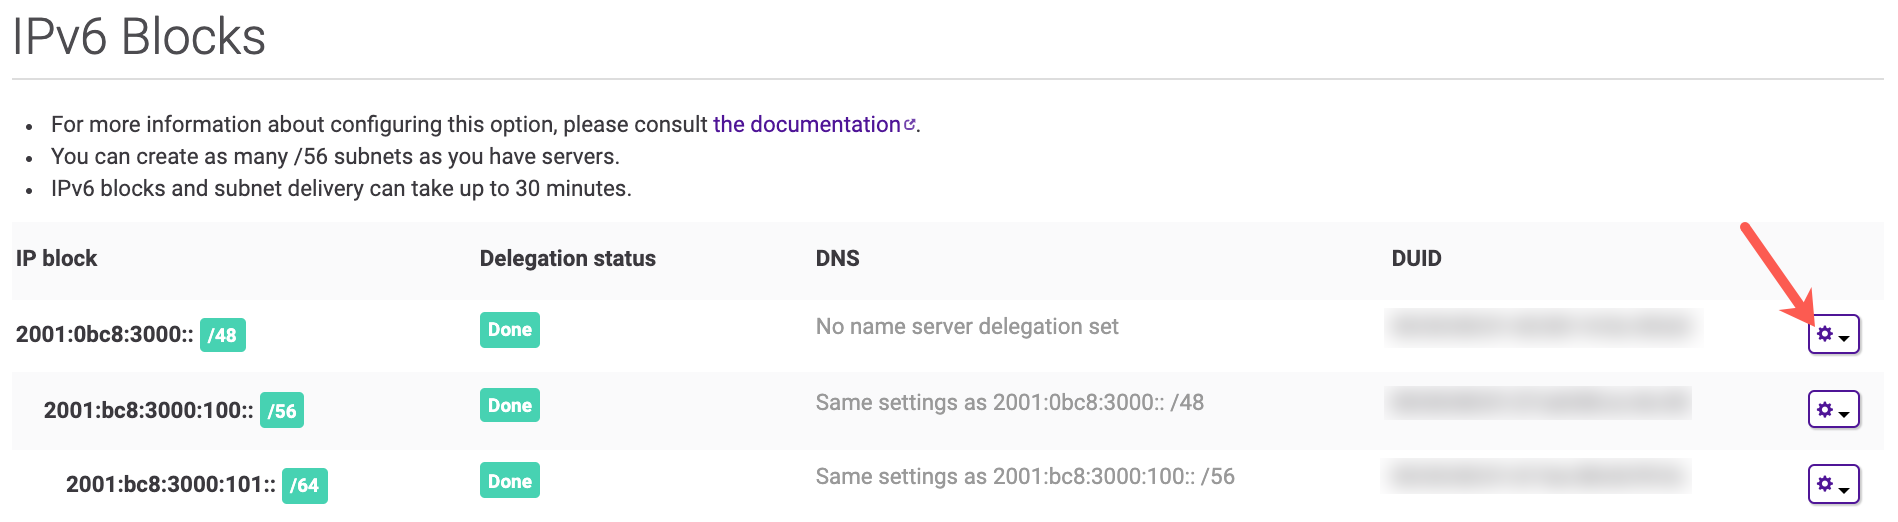
-
Select the subnet you want to create from the drop-down list. Then click Create subnet.
The subnet is created and visible in the list of your IPv6 subnets along with its DUID.