How to use the KVM DELL iDRAC 8
This page shows you how to use KVM on a Dedibox with DELL iDRAC 8.
Before you start
To complete the actions presented below, you must have:
- A Dedibox account logged into the console
- A Dedibox server with a DELL iDRAC 8 KVM-over-IP device
Accessing the KVM-over-IP device using HTML5
To access the KVM-over-IP device using HTML5, follow these steps:
Creating an iDRAC 8 session
- Click Server > Server List in your Dedibox console. The list of your dedicated servers displays.
- Click the name of the server you want to access. The server's status page displays.
- Click iDRAC in the menu on the right. A pop-up displays.
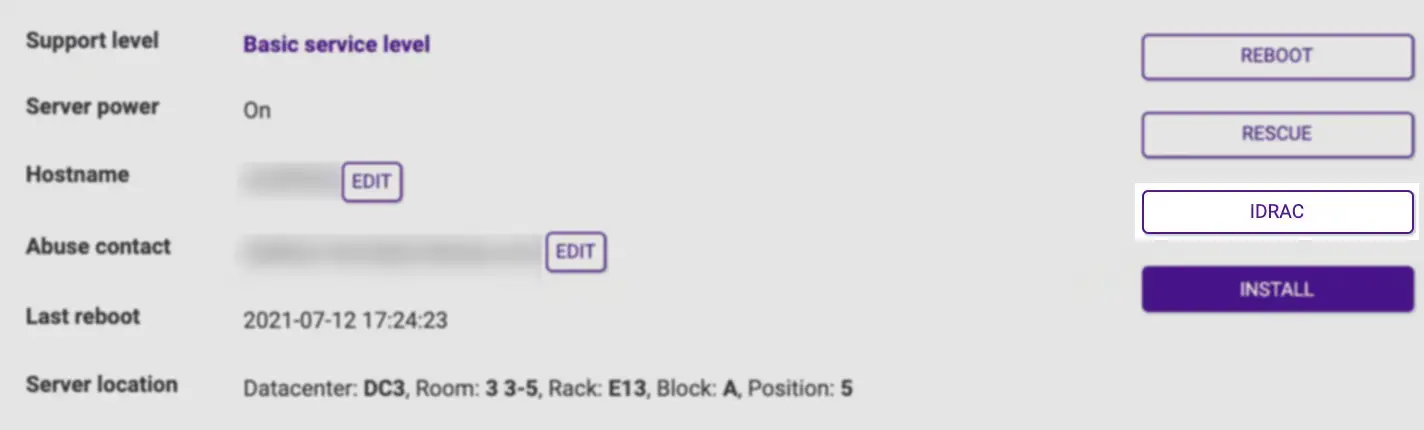
- Accept the terms for iDRAC access by clicking I Accept.
- Enter the authorized IPv4 address for the iDRAC connection. The IP address of your internet connection is already pre-filled in the form. Then click Create to generate your credentials.
The connection URL and your credentials display. Click on the link to access the iDRAC interface.
Accessing the KVM-over-IP device
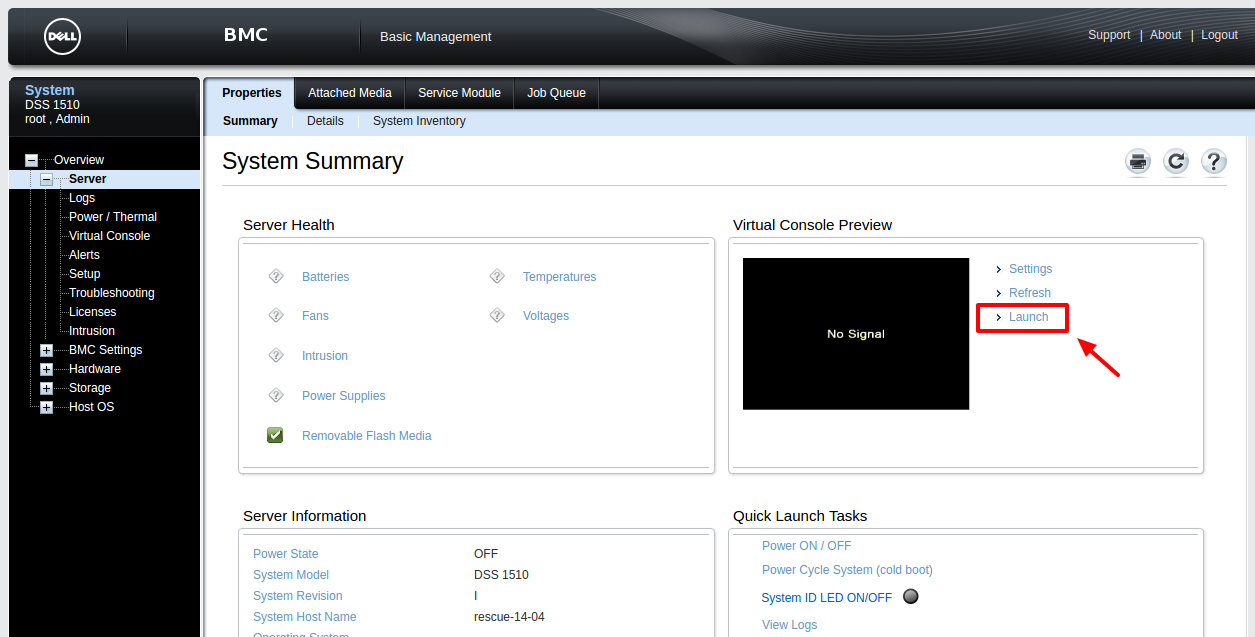
- Open the connection URL of your iDRAC in your web browser, then log in using the credentials displayed during access creation.
- Click Launch in the Virtual Console Preview section of the dashboard. The virtual console window displays.
Mounting an ISO file
To mount an ISO file, follow these steps:
Mounting an ISO file using the iDRAC interface
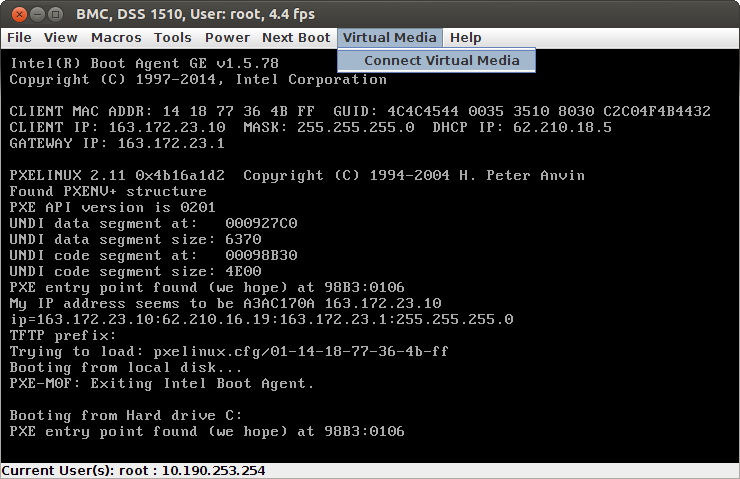
- Click Virtual Media > Connect Virtual Media.
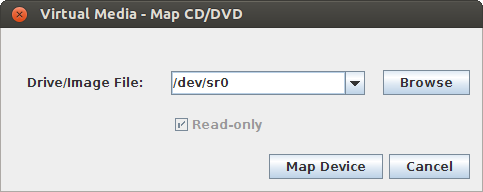
- Click Virtual Media > Map CD/DVD .... A pop-up displays.
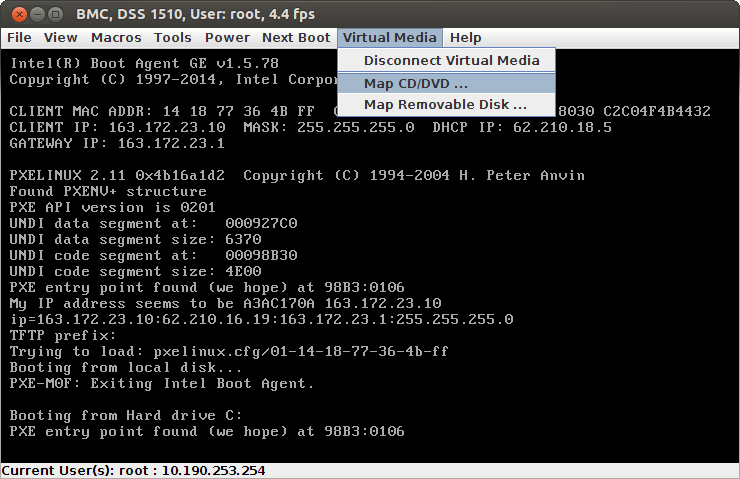
- Select the installation ISO file on your computer by clicking Browse. Then click Map Device and reboot the server.
- Press F12 during the boot process to enter the boot manager. Then select the virtual CD-ROM drive. Your server boots from the ISO file, and you can complete the installation of your operating system.
See Also
Still need help?Create a support ticket