How to configure your InterLink
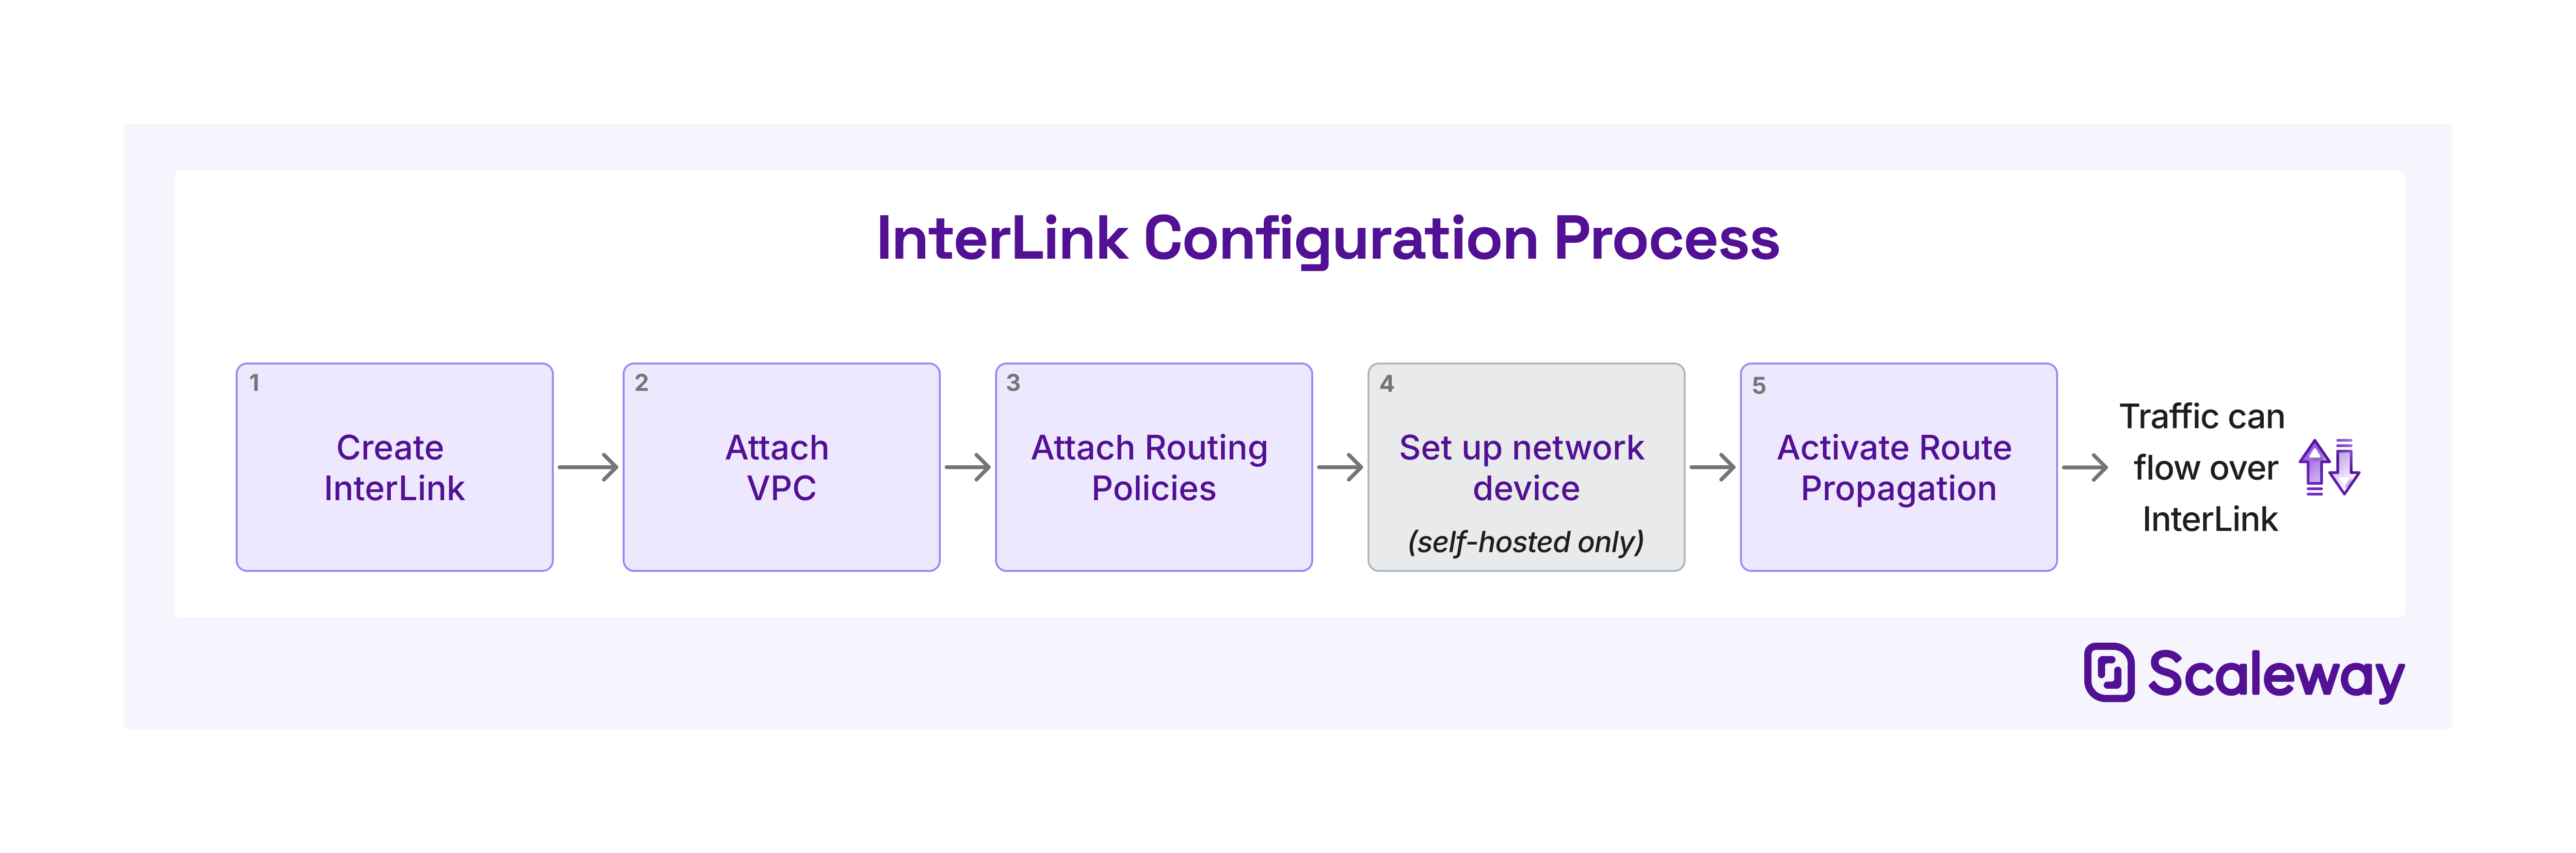
Once you have created your InterLink, you must configure it. These configuration steps must be carried out in order for traffic to successfully flow over your InterLink:
- Attach a VPC
- Create and attach routing policies
- Set up network device (self-hosted InterLinks only)
- Activate route propagation
This document explains how to complete these configuration steps with the Scaleway console.
Before you start
To complete the actions presented below, you must have:
- A Scaleway account logged into the console
- Owner status or IAM permissions allowing you to perform actions in the intended Organization
- Ordered an InterLink (which, if self-hosted, has been provisioned by the partner)
How to attach a VPC
Attaching an InterLink to a VPC allows you to complete the connection from your external infrastructure, across the InterLink, to the Scaleway resources in the selected VPC.
-
Click InterLink in the Network section of the Scaleway console side menu. A listing of your InterLinks displays.
-
Use the region selector at the top of the page to filter for the region of the InterLink you want to configure, then click the InterLink. The InterLink's Overview page displays.
-
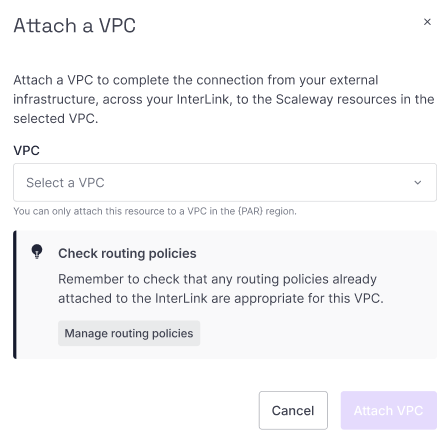
In the Attached VPC section, click Attach VPC. A pop-up displays:
-
Select one of your existing VPCs from the dropdown list. It must be in the same region as the InterLink. Alternatively, click + Create VPC to create and attach a new VPC.
-
Click Attach VPC
The VPC is attached and you are returned to the InterLink's Overview page.
To enable traffic to flow across the InterLink, you must still create and attach a routing policy, and activate route propagation.
How to attach routing policies
After attaching a VPC, the next step in configuring your InterLink is to create and attach routing policies.
The VPC and the external infrastructure's routers both announce their routes to each other via BGP when route propagation is activated. Still, all of these routes are blocked by default. Routing policies let you allow ranges of route announcements, so that traffic can flow along these routes across the InterLink.
An InterLink must have a minimum of one and a maximum of two attached routing policies, one for each IP traffic type to be routed (IPv4 and/or IPv6).
Each routing policy can be attached to multiple InterLinks, if desired.
See the dedicated documentation on creating a routing policy to create a policy, then follow these instructions to attach it:
-
Click InterLink in the Network section of the Scaleway console side menu. A listing of your InterLinks displays.
-
Use the region selector at the top of the page to filter for the region of the InterLink you want to configure, then click the InterLink. The InterLink's Overview page displays.
-
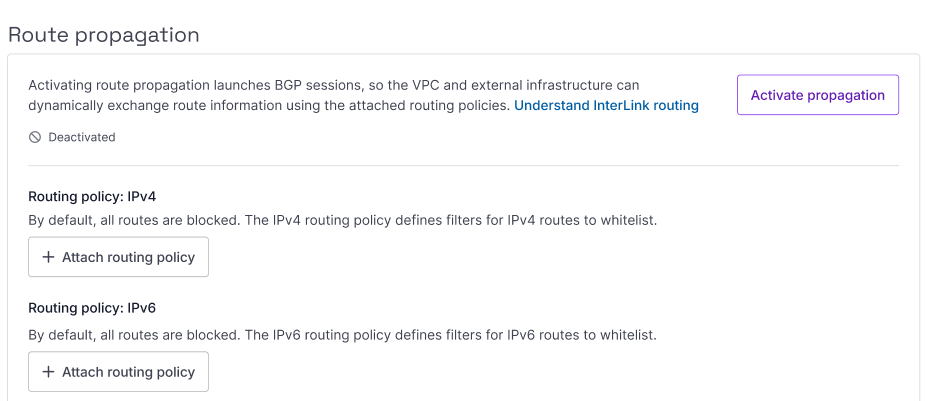
In the Route propagation section, click Attach routing policy for either IPv4 or IPv6 . A pop-up displays.
-
Select a routing policy from the drop-down list, and click Attach policy.
The policy is attached, ad you are returned to the InterLink's Overview page.
Repeat the process to attach up to two routing policies in total (one for IPv4 and one for IPv6).
How to set up your network device (self-hosted only)
You must configure the real physical or software-based networking device, located on the remote network you are connecting to your Scaleway VPC via the InterLink. You will need the following information, which is available from your InterLink's Overview screen in the Scaleway console:
- Scaleway ASN (12876)
- VLAN ID for the InterLink
You also need to set up route announcements and filters on the customer side. For this, you will need the following information, also available from the InterLink's Overview screen.
-
BGP interconnection subnet(s): The private subnet used for the VPC and external infrastructure to establish a BGP session and exchange routing information. For InterLinks that have both IPv4 and IPv6 routing policies, one IPv4 and one IPv6 subnet will be provided.
-
Routing policy: Take into account the routing policy(ies) you attached to the connection, when configuring routing policy on the customer gateway device.
How to activate route propagation
Activating route propagation is the final step in configuring your InterLink so that traffic can flow between the VPC and your external infrastructure: it triggers the dynamic exchange of route information between the VPC and external infrastructure.
-
Click InterLink in the Network section of the Scaleway console side menu. A listing of your InterLinks displays.
-
Use the region selector at the top of the page to filter for the region of the InterLink you want to configure, then click the InterLink. The InterLink's Overview page displays.
-
In the Route propagation section, click Activate propagation.
A pop-up displays, confirming that the action will launch the BGP session(s), allowing traffic to flow over the InterLink via the routes allowed in the attached routing policy(ies).
-
Click Activate route propagation.
Route propagation is activated. You are returned to your InterLink's overview page.
While route propagation remains active, the VPC and external infrastructure will dynamically exchange and update route information. Traffic can flow across the InterLink along the routes allowed in the routing policy(ies). You can deactivate route propagation at any time: if you do so, all routes are blocked, and no traffic can flow.
How to modify your InterLink configuration
You can modify the following aspects of your InterLink configuration at any time:
- The attached Scaleway VPC
- The attached routing policy
- The activation or deactivation of route propagation
How to detach or change the attached VPC
-
Click InterLink in the Network section of the Scaleway console side menu. A listing of your InterLinks displays.
-
Use the region selector at the top of the page to filter for the region of the InterLink you want to configure, then click the InterLink. The InterLink's Overview page displays.
-
In the Attached VPC section, click the unlink icon unlink icon next to the VPC to detach.
A pop-up displays, confirming that this action will detach the VPC, and the InterLink will not be connected to any Scaleway resources until you reattach a VPC.
-
Click Detach VPC.
The VPC is detached, and you are returned to the InterLink's Overview page. No traffic can currently flow over the InterLink, and all associated routes are removed from the VPC's route table.
If you want to attach a new VPC, follow the normal process for doing so. Remember to check that the InterLink's routing policies are appropriate for the new VPC.
How to replace or detach an attached routing policy
-
Click InterLink in the Network section of the Scaleway console side menu. A listing of your InterLinks displays.
-
Use the region selector at the top of the page to filter for the region of the InterLink you want to configure, then click the InterLink. The InterLink's Overview page displays.
-
In the Route propagation section, click the three dot icon more icon next to the routing policy you want to detach. Then click either Replace policy or Detach depending on the desired action.
A pop-up displays, asking you either to select the policy to replace the current one with, or to confirm that you want to detach the policy without selecting a new one.
-
Confirm the action.
The policy is detached or replaced, and you are returned to your InterLink's Overview page.
How to deactivate route propagation
-
Click InterLink in the Network section of the Scaleway console side menu. A listing of your InterLinks displays.
-
Use the region selector at the top of the page to filter for the region of the InterLink you want to configure, then click the InterLink. The InterLink's Overview page displays.
-
In the Route propagation section, click Deactivate propagation.
A pop-up displays, confirming that this action will turn off route propagation. All existing InterLink routes will be removed from the VPC route table. Traffic will not be able to flow over the InterLink until route propagation is reactivated.
-
Click Deactivate.
Route propagation is deactivated, and you are returned to your InterLink's Overview page.