How to create and manage routing policies
InterLink uses Border Gateway Protocol to exchange routing information between the customer’s infrastructure and the Scaleway VPC. Each side advertises IP prefixes for its own internal subnets and resources, allowing the other side to dynamically learn and update its internal routes, facilitating efficient traffic flow. However, by default, all routes across an InterLink are blocked. You must create and attach routing policies to set IP prefix filters for the route advertisements you want to allow. This facilitates traffic flow across the InterLink.
An InterLink must have a minimum of one and a maximum of two attached routing policies, one for each IP traffic type to be routed (IPv4 and/or IPv6).
When creating a routing policy, you specify one or many IP ranges representing the outgoing routes to announce from the Scaleway VPC, and one or many IP ranges representing the incoming route announcements to accept from the external infrastructure. When route propagation is activated, the route ranges defined in the routing policy are allowed, and traffic can flow across the InterLink along these routes.
Learn more about routing across an InterLink in our detailed overview.
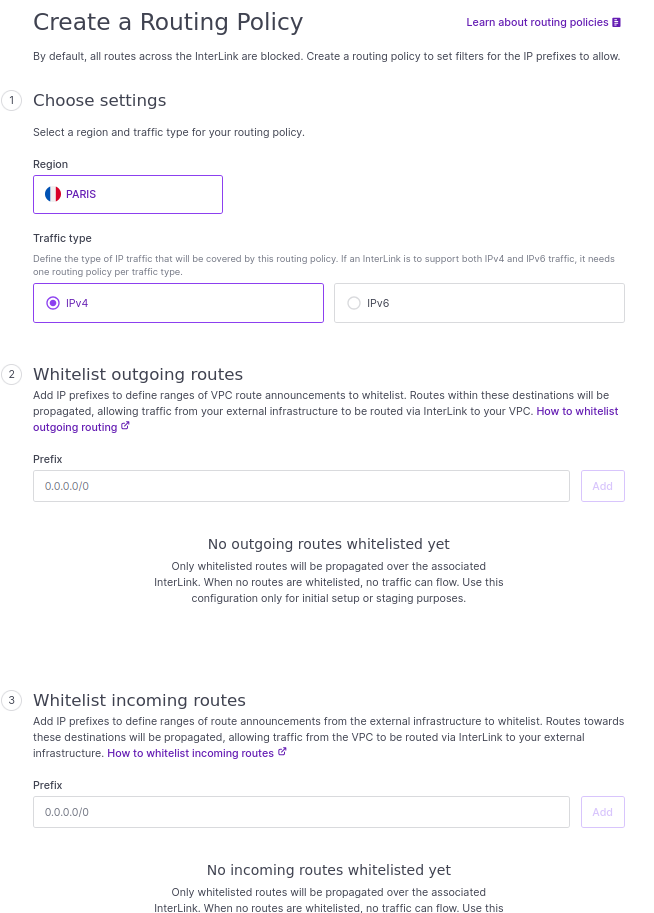
How to create a routing policy
-
Click InterLink in the Network section of the Scaleway console side menu. A listing of your InterLinks displays.
-
Click the Routing policies tab. A listing of your routing policies displays.
-
Click +Create routing policy. The Create a routing policy wizard displays.
-
Choose a region for the policy. It can only be attached to InterLinks within the same region.
-
Define the type of IP traffic to be covered by the routing policy.
-
Allow the outgoing routes to allow. For each entry:
-
Enter an IP prefix to define a range of route announcements to allow, e.g.,
172.16.4.0/22. -
Click Add when complete.
-
-
Allow the incoming routes to allow, in the same way you did for outgoing routes. Outgoing routes concern announcements to accept from the external infrastructure. Traffic can be routed via InterLink from your Scaleway VPC to your external infrastructure along these routes.
-
Enter a name for the policy, or leave the randomly-generated name in place. Optionally, you can also add tags.
-
Click Create routing policy.
The policy is created, and you are returned to the listing of your routing policies.
Remember to attach the policy to an InterLink for it to take effect. Each InterLink can have only one routing policy for each IP traffic type attached to it, but a single routing policy can be attached to multiple InterLinks, if desired.
How to edit an existing routing policy
-
Click InterLink in the Network section of the Scaleway console side menu. A listing of your InterLinks displays.
-
Click on the Routing Policy tab. A list of your routing policies displays. Use the region selector at the top of the page to filter for the region of the routing policy you want to edit.
-
Click more icon next to the routing policy to edit, and select Edit in the menu that displays.
-
The Edit routing policy wizard displays. See the dedicated documentation on creating and attaching a routing policy for help with routing policies.
-
Make the required edits, and click Edit routing policy
A warning displays, to remind you that modifications will immediately be propagated on InterLinks using this policy.
-
Click Save.
The policy is modified and modifications are immediately applied.