Protecting a server with Fail2Ban
Fail2Ban is a powerful tool that analyzes server log files for recurring patterns of failed login attempts, enabling the blocking of IPs attempting brute force attacks against a server. In this tutorial, you will learn how to configure Fail2Ban on an Ubuntu 24.04 LTS (Noble Numbat) server to protect the SSH service. Fail2Ban can be used with any service that generates log files.
Before you start
To complete the actions presented below, you must have:
- A Scaleway account logged into the console
- Owner status or IAM permissions allowing you to perform actions in the intended Organization
- An SSH key
- An Ubuntu Bionic Instance
sudoprivileges or access to the root user
Installing Fail2Ban
-
Install Fail2Ban and Postfix (optional, for email notifications) using the package manager:
sudo apt-get install fail2ban postfix -
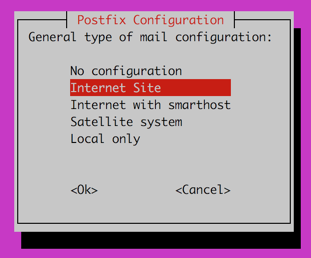
During Postfix installation, select Internet Site when prompted for configuration.
-
After installation, edit
/etc/aliasesto configure email notifications:sudo nano /etc/aliases -
Add the following line, replacing me@mydomain.tld with your email address:
root: me@mydomain.tld -
Save the file, exit nano and run the following command:
sudo newaliases
Configuring Fail2Ban
-
Copy the default configuration file to create a custom configuration:
cd /etc/fail2ban && sudo cp jail.conf jail.localThe jail.local file overrides jail.conf for custom settings, preserving the default configuration.
-
Edit
/etc/fail2ban/jail.localwith your preferred editor (e.g., nano):sudo nano /etc/fail2ban/jail.localModify the following parameters:
ignoreip = 127.0.0.1/8 - Ignores localhost IPs to prevent self-banning. Add other trusted IPs if needed (e.g., 127.0.0.1/8 192.168.1.0/24). bantime = 3600 - Duration of a ban, set to 1 hour (3600 seconds) by default in newer versions. Consider increasing to 86400 (1 day) for stronger protection. findtime = 3600 - Time window for counting failed attempts (1 hour). Adjust to 600 (10 minutes) for stricter monitoring if preferred. maxretry = 5 - Number of failed attempts before a ban. The default in Ubuntu 24.04 is 5. destemail = root@localhost - Email recipient for notifications. Leave as is if /etc/aliases is configured. sendername = Fail2Ban - Sender name for notification emails. banaction = nftables[multiport] - Default ban action using nftables, which is preferred in Ubuntu 24.04 over iptables. action = %(action_mwl)s - Sends email with logs when banning. Use %(action_mw)s for email without logs, or %(action_)s for no email. -
Enable the SSH jail by ensuring the following configuration is present:
[sshd]
enabled  = true
port     = ssh
filter   = sshd
logpath  = /var/log/auth.log
If your SSH service uses a non-standard port, update the
portline. For example, for ports 22 and 1234:port = ssh,1234Fail2Ban will monitor the specified ports for intrusion attempts.
-
Save the file. Fail2Ban uses filter files in
/etc/fail2ban/filter.dto parse logs. Thesshdfilter is pre-configured for SSH. Custom filters can be created for other services. -
Restart Fail2Ban to apply changes:
sudo systemctl restart fail2ban
Fail2Ban will now monitor SSH connections. Check logs at /var/log/fail2ban.log for activity.
Visit our Help Center and find the answers to your most frequent questions.
Visit Help Center