How to manage your Web Hosting with WordPress
This page shows you how to access WordPress, create a mailbox, access your WordPress webmail interface, and access your backups.
Before you start
To complete the actions presented below, you must have:
- A Scaleway account logged into the console
- Owner status or IAM permissions allowing you to perform actions in the intended Organization
- Registered a domain name at Scaleway or another registrar
How to access your WordPress hosting dashboard
- Order a WordPress Web Hosting plan. Upon creation, you will receive an email containing your username and a link to log in to your WordPress hosting dashboard.
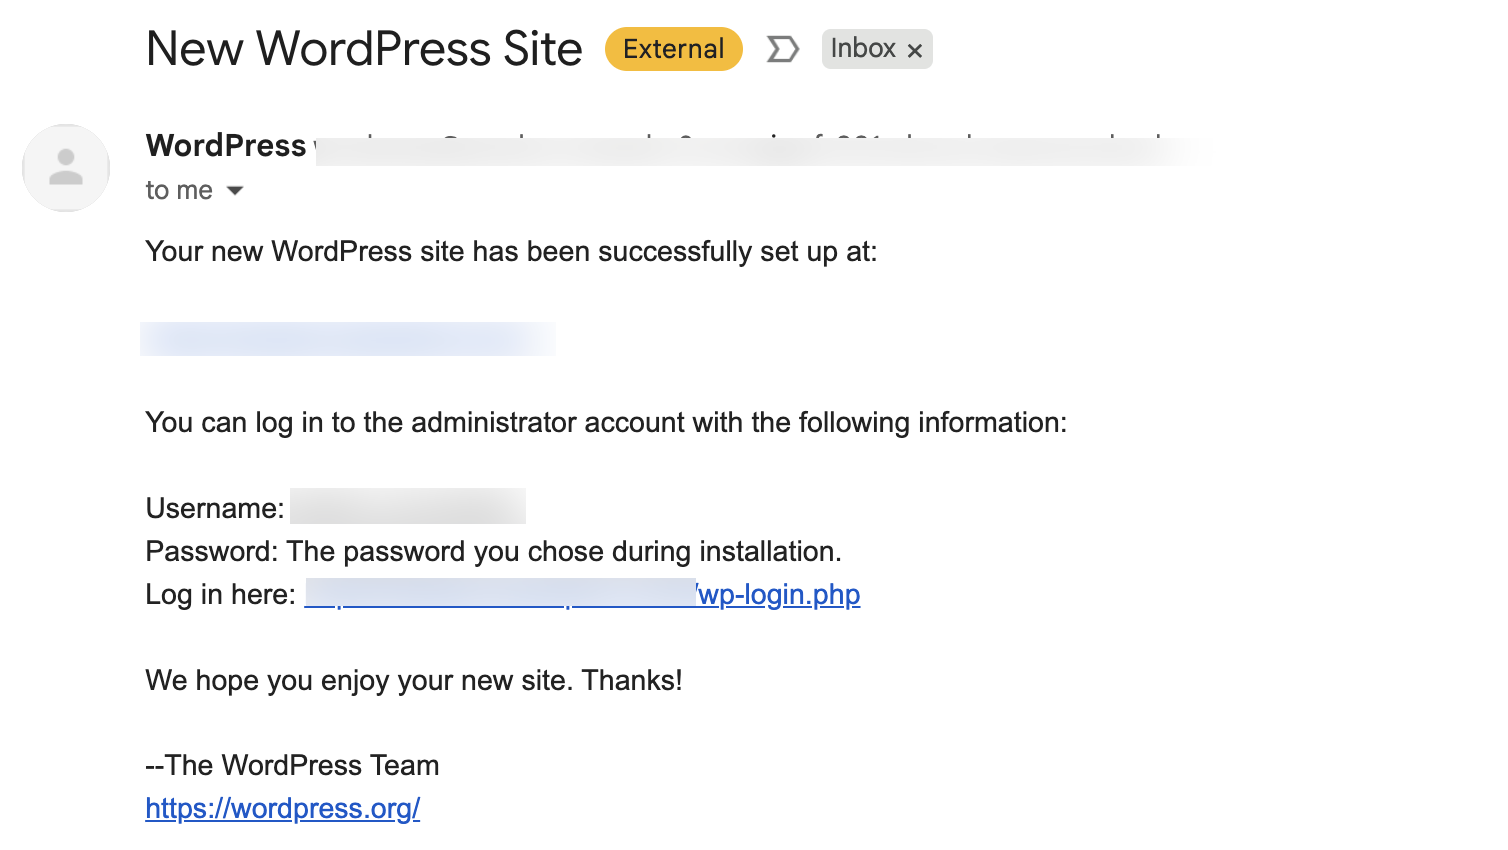
- Click the link next to Log in here. You are prompted to choose a language.
- Choose your preferred language and click Continue. The WordPress welcome page displays.
How to set up and log in to WordPress
- Enter the title of your website in the Side Title field.
- In the Username field, enter the username you received in the email from the previous steps.
- Enter a strong password.
- Enter your email address in the Your Email field.
- Optionally, tick the box to discourage search engines from indexing your website or leave it as is.
- Click Install WordPress. The Success page displays.
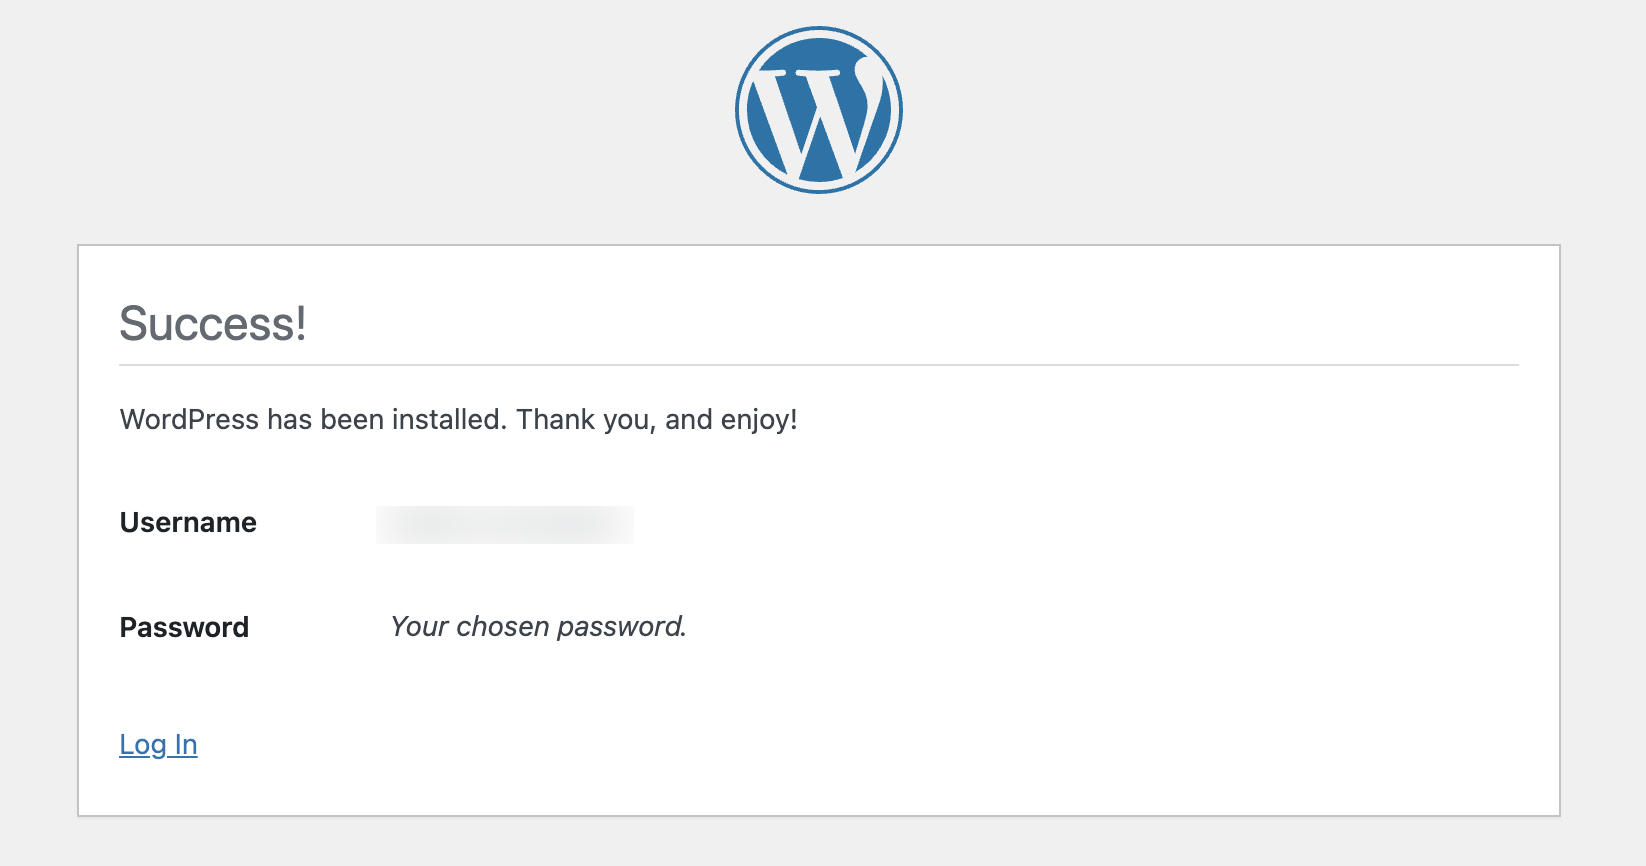
- Click Log in et log in using your credentials. Your WordPress hosting dashboard displays.
How to create a mailbox from the Scaleway console
- Click Web Hosting in the Domains & Web Hosting section of the console side menu. The Web Hosting overview page displays.
- Click more icon and More info, or the domain name of the Web Hosting service you want to configure. The Hosting information page displays.
- Click the Emails tab to display information related to your email accounts.
- Click Create email account to create a new one. A pop-up displays.
- Select the domain you want to associate the email account with from the drop-down list, then enter a username and password.
- Click Create email account to confirm the action and create the account.
How to access the webmail interface from the Scaleway console
You can access the webmail platform for your Web Hosting directly from your Scaleway console.
- Click Web Hosting in the Domains & Web Hosting section of the console side menu. The Web Hosting overview page displays.
- Click more icon and More info, or the domain name of the Web Hosting service you want to configure. The Hosting information page displays.
- Click the Emails tab to display information related to your email accounts.
- Click Access webmail next to the email address you want to access. The webmail interface displays in a new browser tab.
- Log in using the username and password you have defined in the previous section.
How to access your WordPress backup
- Click Web Hosting in the Domains & Web Hosting section of the console side menu. The Web Hosting overview page displays.
- Click more icon and More info, or the domain name of the Web Hosting service you want to configure. The Hosting information page displays.
- Scroll down to the Hosting options section.
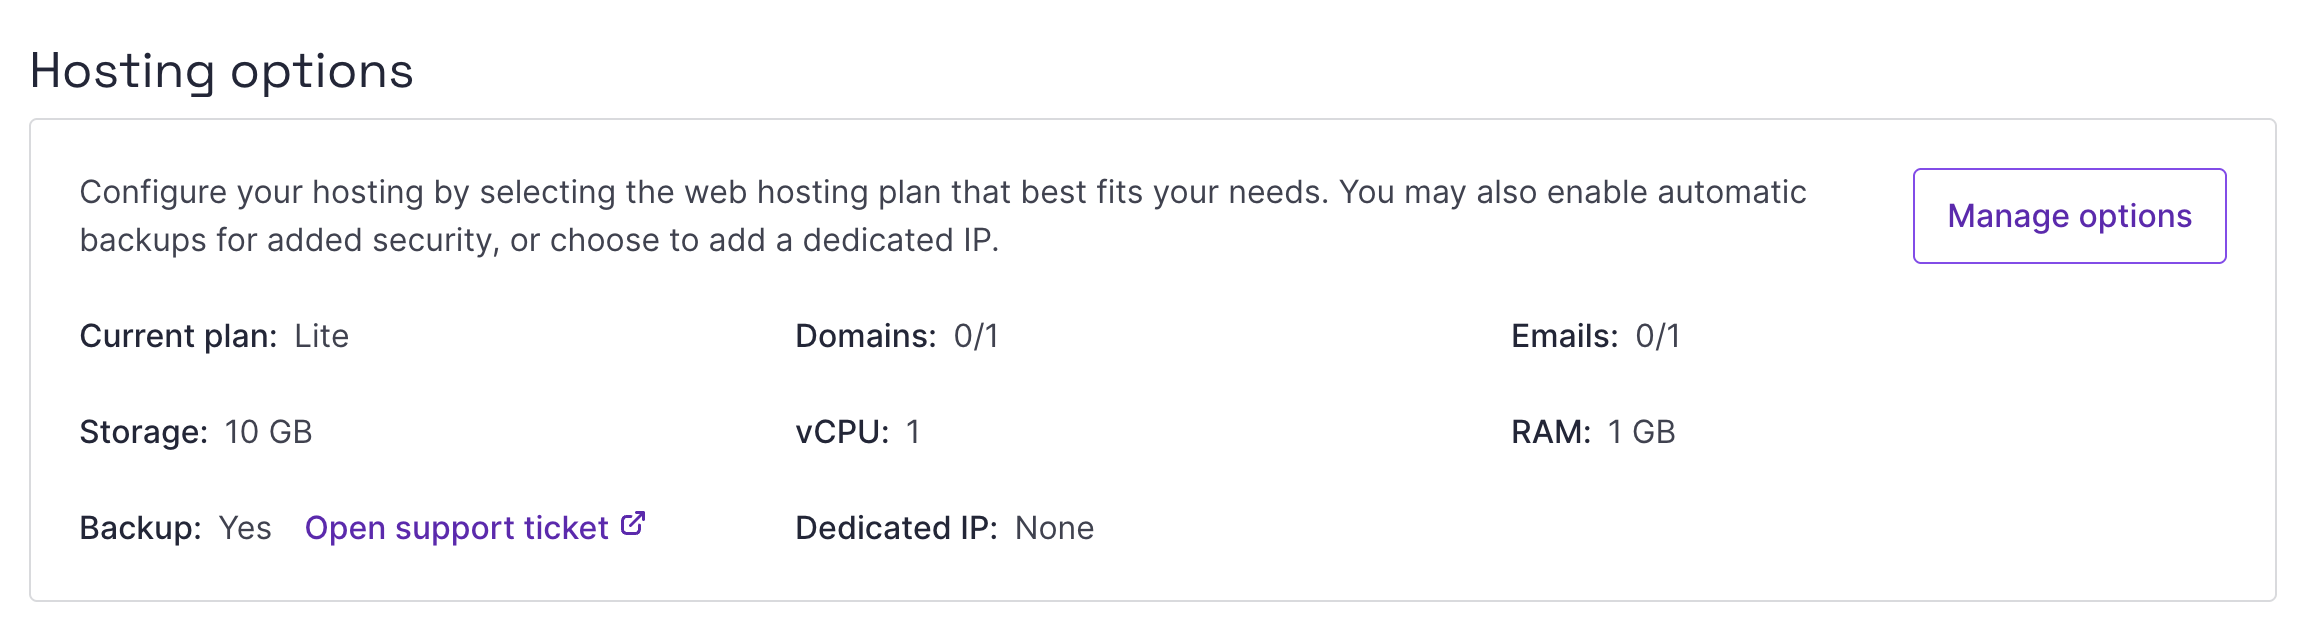
- Click Open support ticket next to
Backup: Yes. The support ticket creation page displays. - Select or type
Web Hostingin the Selected product drop-down. - Select the domain associated with your WordPress Web Hosting in the Related resource drop-down.
- Copy and paste the following title
Request WordPress backup access from engineering teamin the Subject field. - Add any relevant information in the Description field.
- Click Submit ticket. Our Support team will then transfer your request to the Web Hosting team and you will be granted access to your backup.
See Also
Still need help?Create a support ticket