Deploying a self-hosted Penpot Instance using the Docker InstantApp
Penpot is an open-source design and prototyping platform designed for cross-domain teams. It is completely web-based and works with open web standards (SVG). Penpot can run in almost any modern browser, regardless of the underlying operating system.
In this tutorial, you learn how to deploy your own Penpot Instance using the Docker InstantApp.
Before you start
To complete the actions presented below, you must have:
- A Scaleway account logged into the console
- Owner status or IAM permissions allowing you to perform actions in the intended Organization
- Created a Scaleway Instance with a Docker InstantApp
- A domain
Installing Penpot using Docker Compose
-
Connect to your Instance using SSH:
ssh root@<docker_instance_ip> -
Download the Docker configuration from the Penpot repository:
wget https://raw.githubusercontent.com/penpot/penpot/main/docker/images/docker-compose.yaml -
Open
docker-compose.yamlin a text editor:nano docker-compose.yaml -
Set the
PENPOT_PUBLIC_URIto your Penpot domain. Then save the file and exit the editor.PENPOT_PUBLIC_URI=https://penpot.your-domain.com -
Update the APT package cache on your system to make sure you have the latest releases available.
apt update -
Install the Nginx web server and
certbotusing APT. These serve as a frontend for the Penpot application and provide a secured TLS connection by using Let's Encrypt certificates.apt install nginx python3-certbot-nginx -
Disable the default virtual host, that is pre-configured when Nginx is installed via Ubuntu’s package manager.
unlink /etc/nginx/sites-enabled/default -
Create an Nginx configuration file for the reverse proxy:
nano /etc/nginx/sites-available/penpot.conf -
Paste the following content into the file. Make sure that you replace
your-domain.comwith your domain. Save the file and exit.server { listen 80; listen [::]:80; server_name penpot.your-domain.com; access_log /var/log/nginx/reverse-access.log; error_log /var/log/nginx/reverse-error.log; location / { proxy_pass http://127.0.0.1:9001/; proxy_http_version 1.1; proxy_set_header Upgrade $http_upgrade; proxy_set_header Connection "upgrade"; proxy_set_header Host $http_host; proxy_set_header X-Real-IP $remote_addr; proxy_set_header X-Forward-For $proxy_add_x_forwarded_for; proxy_set_header X-Forward-Proto http; proxy_set_header X-Nginx-Proxy true; proxy_redirect off; } } -
Link the configuration file to enable it with Nginx.
ln -s /etc/nginx/sites-available/penpot.conf /etc/nginx/sites-enabled/penpot.conf -
Reload Nginx to activate the new configuration:
service nginx reload
Securing the connection using TLS
-
Log into your domain registrar, access your DNS zone, and add an A record with the following information.
- Name:
penpot - IP address or Hostname or Value:
<your-instance-public-IPv4-address> - TTL: default
- Name:
-
Run
certbot, a tool that automatizes most of the configuration work related to requesting, installing, and managing the TLS certificate:certbot --nginx -
Answer the prompts that display on the screen to request a valid Let’s Encrypt TLS certificate:
Saving debug log to /var/log/letsencrypt/letsencrypt.log
Plugins selected: Authenticator nginx, Installer nginx

Which names would you like to activate HTTPS for?
- - - - - - - - - - - - - - - - - - - - - - - - - - - - - - - - - - - - - - - -
1: penpot.mydomain.eu
- - - - - - - - - - - - - - - - - - - - - - - - - - - - - - - - - - - - - - - -
Select the appropriate numbers separated by commas and/or spaces, or leave input
blank to select all options shown (Enter 'c' to cancel): 1
Obtaining a new certificate
Performing the following challenges:
http-01 challenge for your-domain.com
Waiting for verification...
Cleaning up challenges
Deploying Certificate to VirtualHost /etc/nginx/sites-enabled/reverse-proxy.conf

Please choose whether or not to redirect HTTP traffic to HTTPS, removing HTTP access.
- - - - - - - - - - - - - - - - - - - - - - - - - - - - - - - - - - - - - - - -
1: No redirect - Make no further changes to the webserver configuration.
2: Redirect - Make all requests redirect to secure HTTPS access. Choose this for
new sites, or if you're confident your site works on HTTPS. You can undo this
change by editing your web server's configuration.
- - - - - - - - - - - - - - - - - - - - - - - - - - - - - - - - - - - - - - - -
Select the appropriate number [1-2] then [enter] (press 'c' to cancel): 2
Redirecting all traffic on port 80 to ssl in /etc/nginx/sites-enabled/reverse-proxy.conf

- - - - - - - - - - - - - - - - - - - - - - - - - - - - - - - - - - - - - - - -
Congratulations! You have successfully enabled HTTPS on https://your-domain.com
- - - - - - - - - - - - - - - - - - - - - - - - - - - - - - - - - - - - - - - -
Running Penpot
- Run
docker-composeto start Penpot:docker-compose -p penpot -f docker-compose.yaml up -d - Open your Penpot Instance in a browser:
http://penpot.your-domain.com - Click Create an account.
- Enter an email address and a password, then click Create an account.
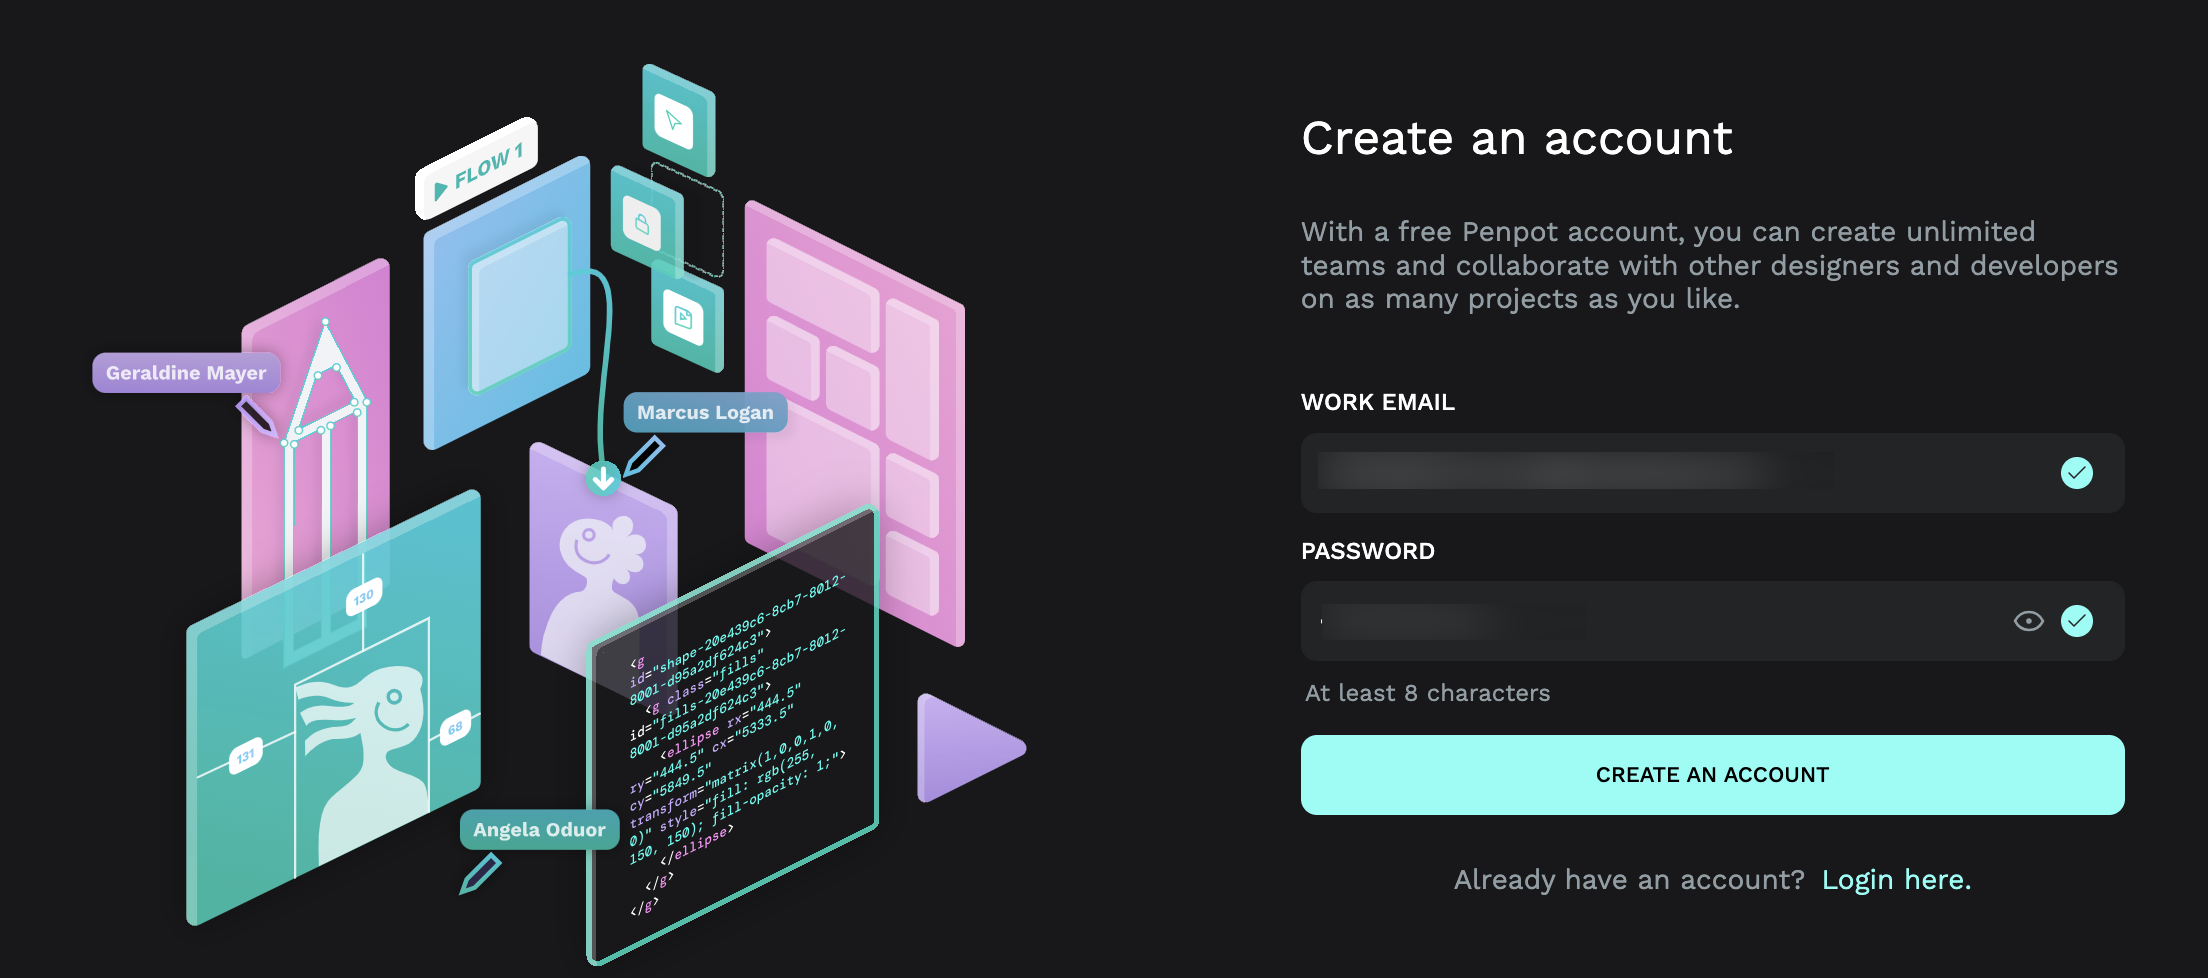
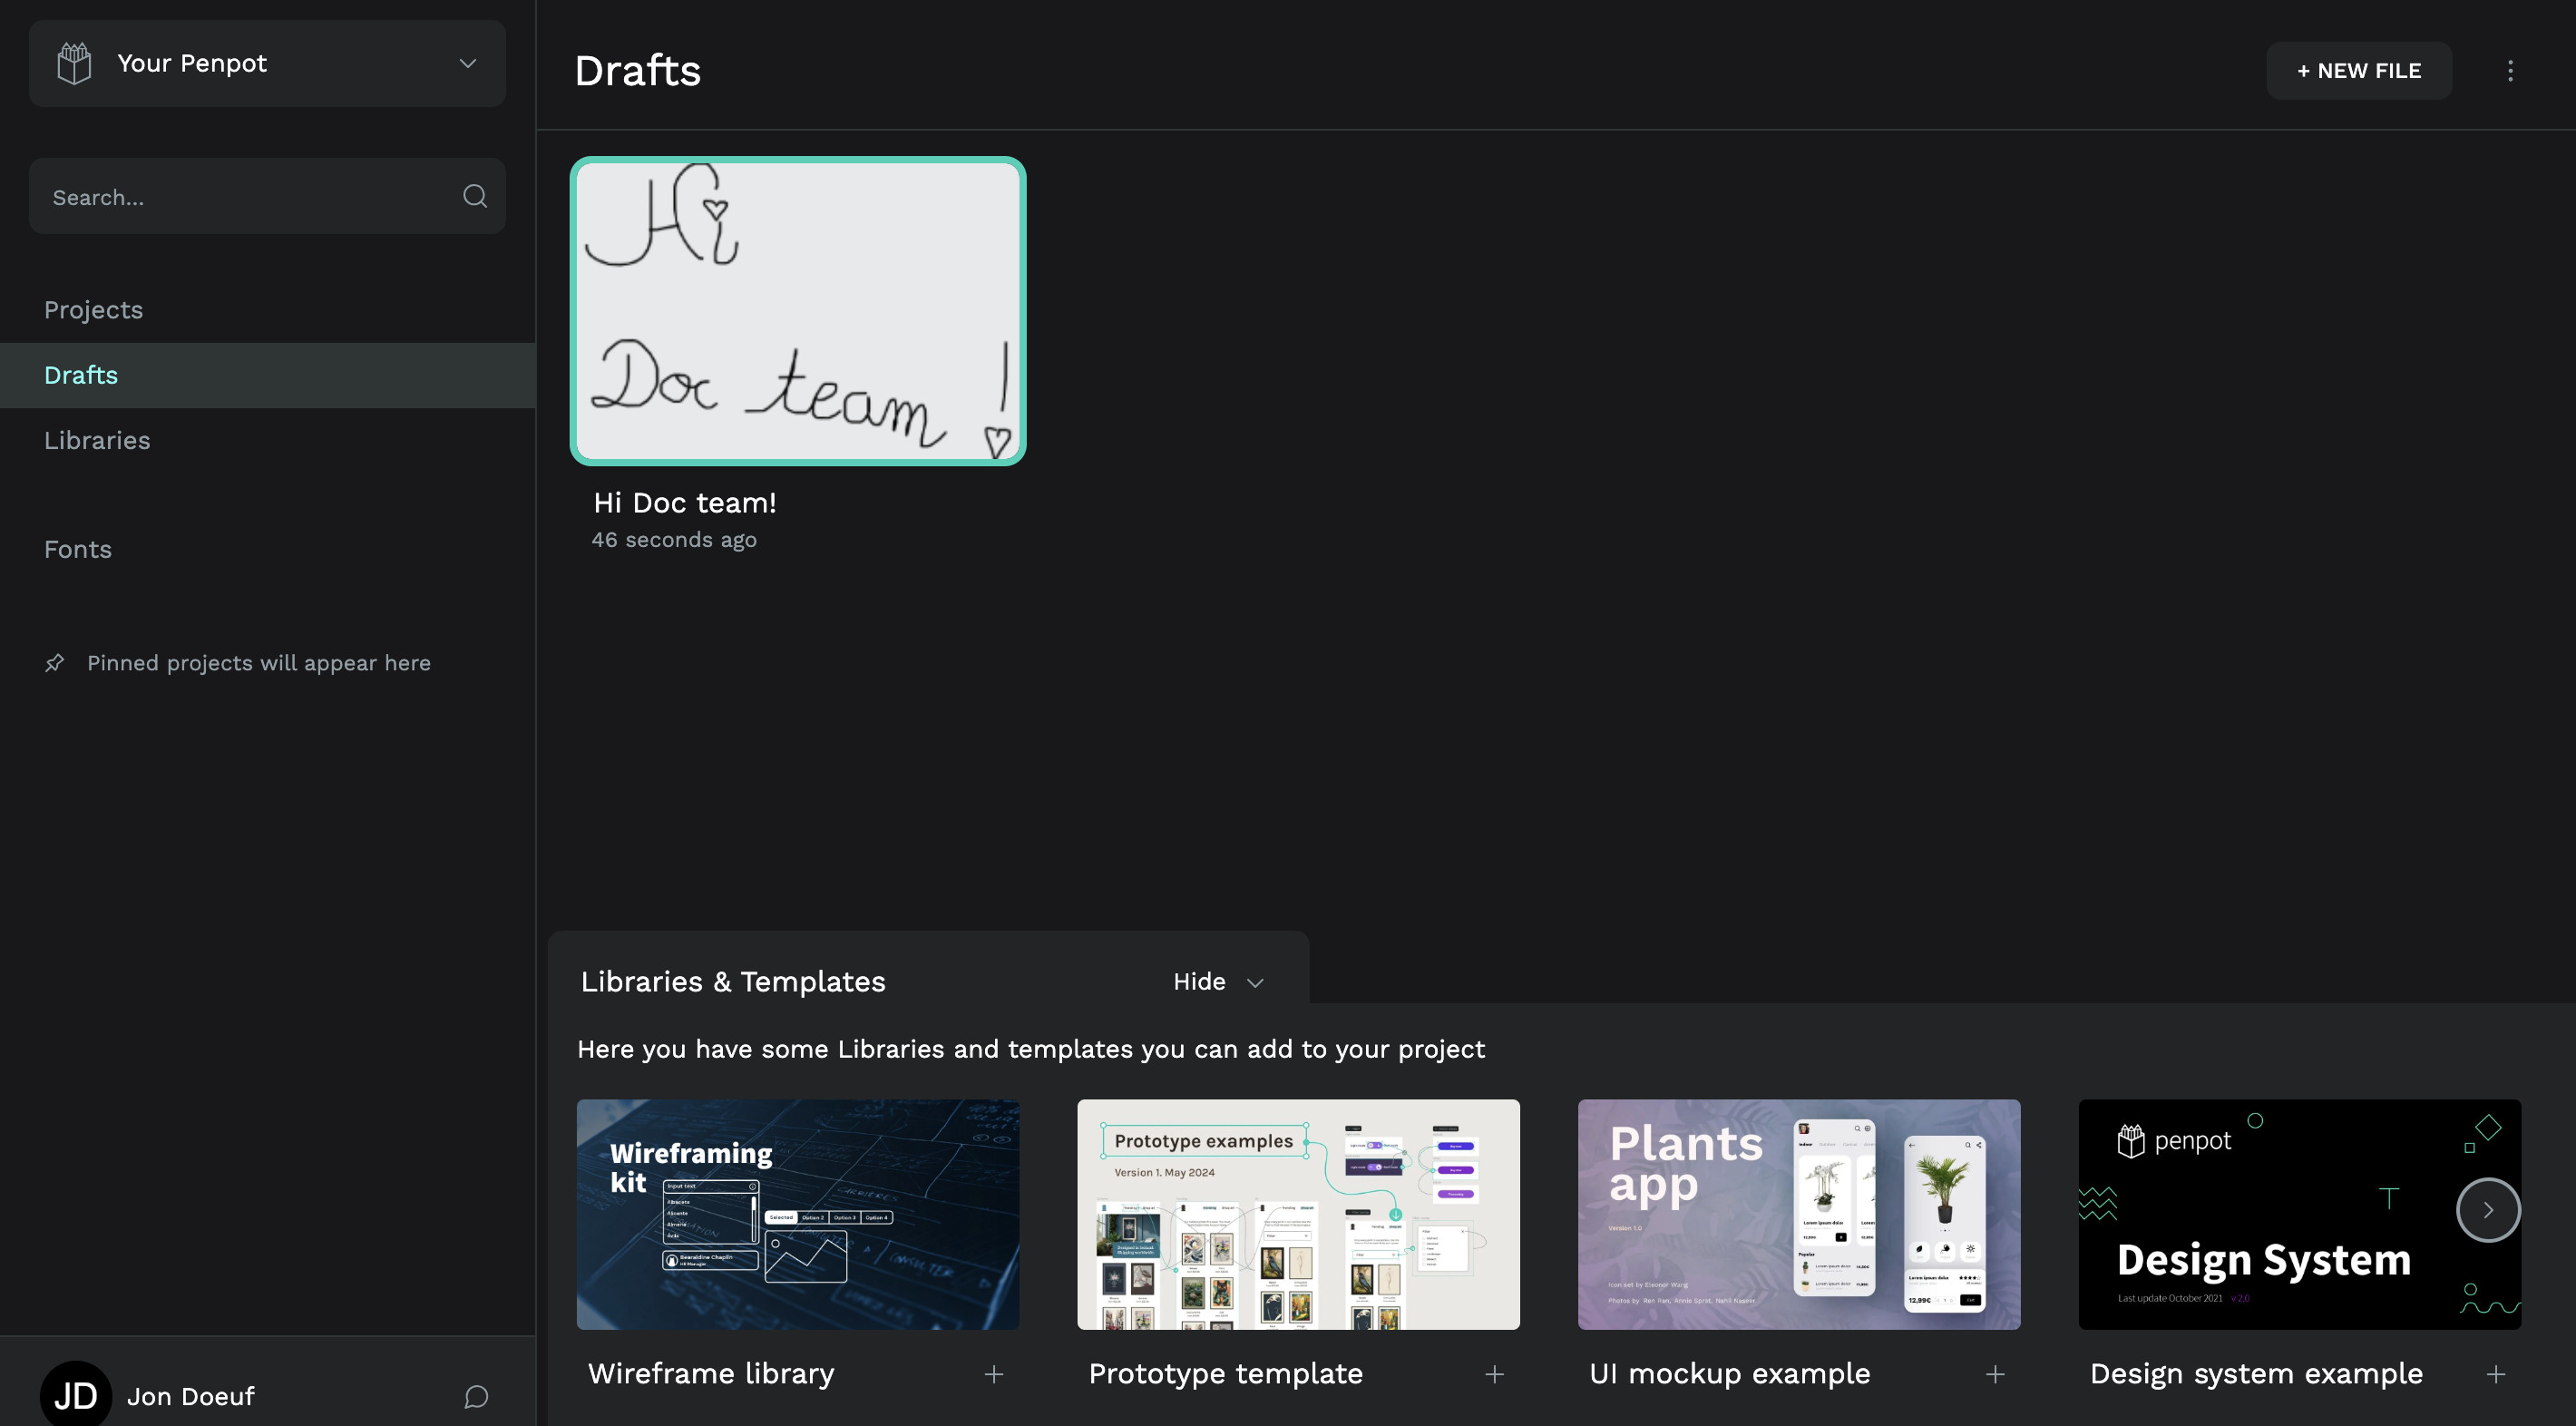
- Enter a name and click Create an account again to confirm. The Penpot dashboard displays. You can now start designing your assets.
For a more advanced configuration of additional features, refer to the official documentation.
Visit our Help Center and find the answers to your most frequent questions.
Visit Help Center