One-click Docker deployment on Scaleway Instances using InstantApp
Docker is an open-source containerization platform. Docker allows developers to package their applications into containers, using OS-level virtualization. This page shows you how to create an Instance with Docker preinstalled using the Docker InstantApp based on Ubuntu 22.04, and then how to start using Docker for your containerization projects.
Before you start
To complete the actions presented below, you must have:
- A Scaleway account logged into the console
- Owner status or IAM permissions allowing you to perform actions in the intended Organization
- An SSH key
Creating and connecting to your Docker InstantApp Instance
- Create the Instance by following our dedicated instructions. When choosing your Image, click the InstantApps tab and select the Docker InstantApp.
- Connect to your Instance via SSH.
Building your first container
Docker allows you to ship applications in containers. Containers are standardized units of software that bundle the application's code and all its dependencies into one package, so the application runs quickly and reliably from one computing environment to another.
Docker can build images automatically by reading the instructions from a Dockerfile. This is a text document that contains all the commands a user would execute on the command line to assemble an image.
Here, we create a new Dockerfile for a small Python web application with Flask, that will run on the Instance:
-
Create a new directory to develop your environment.
mkdir my-application -
Enter the directory:
cd my-application -
Type
nano Dockerfileto create a new file, calledDockerfile. -
Copy and paste the following content into
Dockerfileand save:# Use an official Python runtime as a parent image FROM python:3.7-slim # Set the working directory to /app WORKDIR /app # Copy the current directory contents into the container at /app ADD . /app # Install the Flask framework RUN pip install --trusted-host pypi.python.org Flask # Make port 80 available to the world outside this container EXPOSE 80 # Define environment variable ENV NAME World # Run app.py when the container launches CMD ["python", "app.py"]The Dockerfile is now ready, and we can proceed to creating the application.
-
Open a text editor, copy and paste the following content, and save the file as
app.py:from flask import Flask import os import socket app = Flask(__name__) @app.route("/") def hello(): html = "<h1>Hello {name}!</h1>" \ "<b>Hostname:</b> {hostname}<br/>" return html.format(name=os.getenv("NAME", "world"), hostname=socket.gethostname(),) if __name__ == "__main__": app.run(host='0.0.0.0', port=80)The application will run a simple web server on port 80 and return the values of the environment variable
NAMEset in the Dockerfile, as well as the hostname of the container when it is running. -
Build the image. The
-ttag is used to set a friendly name for the image:docker build -t helloworld .Docker now downloads the Python base image and processes the tasks defined in the Dockerfile to create the image for our application:
[+] Building 5.5s (10/10) FINISHED                               docker:default
=> [internal] load build definition from Dockerfile                       0.2s
=> => transferring dockerfile: 507B                                       0.0s
=> [internal] load .dockerignore                                          0.4s
=> => transferring context: 2B                                            0.0s
=> [internal] load metadata for docker.io/library/python:3.7-slim         0.8s
=> [auth] library/python:pull token for registry-1.docker.io              0.0s
=> [1/4] FROM docker.io/library/python:3.7-slim@sha256:b53f496ca43e5af69  0.0s
=> [internal] load build context                                          0.2s
=> => transferring context: 9.70kB                                        0.0s
=> CACHED [2/4] WORKDIR /app                                              0.0s
=> [3/4] ADD . /app                                                       0.2s
=> [4/4] RUN pip install --trusted-host pypi.python.org Flask             3.3s
=> exporting to image                                                     0.3s
=> => exporting layers                                                    0.2s
=> => writing image sha256:a2cd192b6a93e0119b48b009f6c311e25ce9a720b674e  0.0s
=> => naming to docker.io/library/helloworld
The image is now available in the local docker registry:
docker image ls

REPOSITORY   TAG       IMAGE ID       CREATED          SIZE
helloworld   latest    a2cd192b6a93   41 seconds ago   137MB
Running the application
Run the application with the -p option to map the port 4000 of your Instance to port 80 of the container:
docker run -p 4000:80 helloworldA message displays, showing that the application called app is running:
* Serving Flask app 'app'
 * Debug mode: off
 WARNING: This is a development server. Do not use it in a production deployment. Use a production WSGI server instead.
 * Running on all addresses (0.0.0.0)
 * Running on http://127.0.0.1:80
 * Running on http://172.17.0.2:80
 Press CTRL+C to quit
The message displays the information that the application is running on port 80.
Remember, this is the internal port of the container. To reach the application, type http://your_instances_ip:4000 in the address bar of your browser:
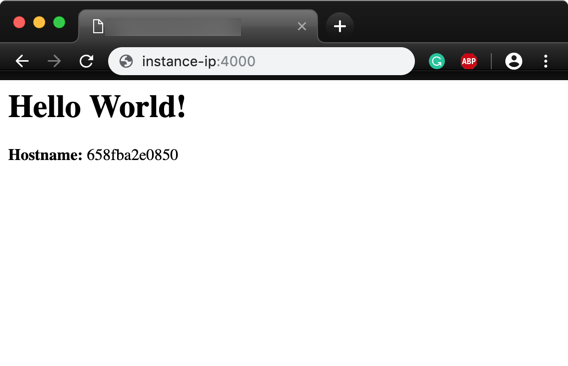
The application displays the internal hostname of the container and retrieves the word "World" from the environment variable that was set in the Dockerfile.
Sharing the application
Docker makes it easy to ship images to a registry to share with others.
In this example, the public Docker registry is used ("Docker Hub"), but it is also possible to set up a private registry to distribute the image on your infrastructure, or to use the Scaleway Container Registry.
- Log in to the Docker registry:
docker login - Tag the image, using the
docker tagcommand followed by the notationyourimageID yourusername/yourrepository:tag. This associates your local image with a repository on the registry. The tag at the end is not mandatory but recommended, as it is the mechanism that registries use to give Docker images a version.docker tag yourimageID yourusername/yourepository:tag - Push your image to the Docker Hub:
An output similar to the following displays:
docker push myusername/myrepository:tagThe push refers to repository [docker.io/yourusername/yourrepository] 9d626cf8e4b7: Pushed 84b2ed30b56f: Pushed 403c7edd8408: Pushed b8594deafbe5: Mounted from library/python 8a55150afecc: Mounted from library/python ad34ffec41dd: Mounted from library/python f19cb1e4112d: Mounted from library/python d310e774110a: Mounted from library/python tag: digest: sha256:4378dcea4f8452feff54ceb3d063598e1758581207f9d0e5a207ec93fba52cf3 size: 1995 Once the image has been pushed to [Docker Hub](https://hub.docker.com) it will be publicly available, and you can see the image with its pull command in your account.
Pulling and running an image from a remote repository
Your image is now available on the Docker Hub, and you can run it from anywhere.
docker run -p 4000:80 yourusername/yourrepository:tagIf the image is not available yet on the local machine, Docker will automatically download (pull) it from the registry.
No matter on which machine you run it, it will always run in the same environment that you configured when you built the image.
Visit our Help Center and find the answers to your most frequent questions.
Visit Help Center