GPU Instances - Quickstart
Before you start
To complete the actions presented below, you must have:
Scaleway GPU Instances are virtual compute instances equipped with dedicated high-end Nvidia graphics processing units (GPUs). They are ideal for data processing, artificial intelligence, rendering, and video encoding. After you have created your GPU Instance, you can connect to it via SSH and run one of our ready-made Docker images to access a preinstalled environment with all your favorite AI libraries and tools preinstalled.
In addition to this, GPU Instances have all the features of our regular Instances, including flexible IPs, security groups, Private Networks, backups and more. When you are done using your GPU Instance, you can easily delete it from the Scaleway console.
How to create a GPU Instance
- Navigate to Instances under the Compute section in the side menu of the Scaleway console. This action will direct you to the Instance dashboard.
- Click + Create Instance to proceed to the Instance creation page.
- Follow these steps to configure your GPU Instance:
- Availability Zone: Choose the geographical region, represented by the Availability Zone, where your Instance will be deployed.
- Instance Type (GPU): Select the desired GPU Instance type, considering factors such as processing power, memory, storage options, and bandwidth. Refer to our guide on choosing the right GPU Instance type for more information.
- Image: Pick an operating system image suitable for your GPU Instance. For example, select Ubuntu Jammy GPU OS 12, which comes with preinstalled Nvidia drivers and an Nvidia Docker environment. You can customize your working environment using Docker with our provided Docker images or your own containers.
- Instance name and tags: Assign a name to your Instance for easy identification. You can also add tags to organize your Instances efficiently.
- Volumes: Optionally, add storage volumes for your Instance. You can adjust settings such as Block and Local Storage volumes according to your requirements.
- Network configuration: You can allocate routed IPv4 and IPv6 addresses as needed, with a maximum of 5 IPs per Instance.
- Cloud-init: Configure
cloud-initsettings if required, or leave them at default values. - SSH keys: Verify the SSH keys that will grant you access to your Instance.
- Estimated cost: Review the estimated cost of your GPU Instance based on the selected specifications.
- Once you have completed the configuration, click on Create Instance to initiate the creation process. You will receive a notification once the GPU Instance is ready for use.
How to connect to your GPU Instance
See our documentation on how to connect to your Instance via SSH.
How to launch a Docker container
To access a preinstalled working environment with all your favorite Python packages, you need to launch a Docker container.
- Choose one of our Docker AI images (eg Tensorflox, Pytorch, Jax) based on your needs.
- Run the following command to launch the Docker container. In the following example, we launch a container based on the Tensorflow image:
docker run --runtime=nvidia -it --rm -p 8888:8888 -p 6006:6006 rg.fr-par.scw.cloud/scw-ai/tensorflow:latest /bin/bash
How to use the preinstalled environment
When you run your Docker container as shown above, the container launches and you are taken to its ai directory, where the Pipenv virtual environment is already activated.
Launching an application in your local browser
Some applications, such as Jupyter Lab, Tensorboard and Code Server, require a browser to run. You can launch these from the ai virtual environment of your Docker container, and view them in the browser of your local machine. This is possible thanks to the addition of port mapping arguments when launching a container with the docker run command. In our example, we added the port mapping arguments -p 8888:8888 -p 6006:6006 when we launched our container, mapping 8888:8888 for Jupyter Lab and 6006:6006 for Tensorboard.
-
Launch an application. Here, we launch Jupyter Lab:
jupyter-labWithin the output, you should see something similar to the following:
[I 2022-04-06 11:38:40.554 ServerApp] Serving notebooks from local directory: /home/jovyan/ai [I 2022-04-06 11:38:40.554 ServerApp] Jupyter Server 1.15.6 is running at: [I 2022-04-06 11:38:40.554 ServerApp] http://7d783f7cf615:8888/lab?token=e0c21db2665ac58c3cf124abf43927a9d27a811449cb356b [I 2022-04-06 11:38:40.555 ServerApp] or http://127.0.0.1:8888/lab?token=e0c21db2665ac58c3cf124abf43927a9d27a811449cb356b [I 2022-04-06 11:38:40.555 ServerApp] Use Control-C to stop this server and shut down all kernels (twice to skip confirmation). -
On your local computer, open a browser window and enter the following URL. Replace
<ip-address>with the IP address of your Scaleway GPU Instance, and<my-token>with the token shown displayed in the last lines of terminal output after thejupyter-labcommand<ip-address>:8888/lab?token=<my-token>Jupyter Lab now displays in your browser. You can use the Notebook, Console, or other features as required:
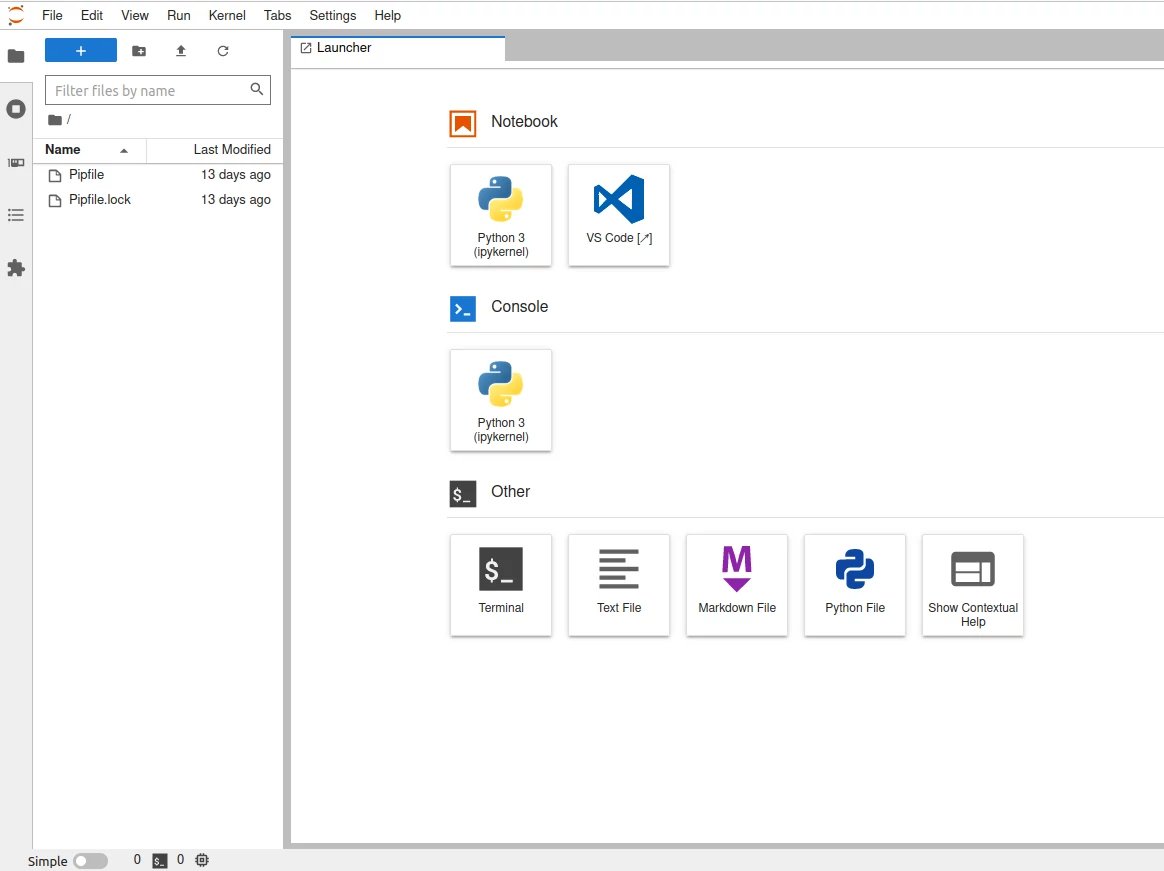
You can display the GPU Dashboard in Jupyter Lab to view information about CPU and GPU resource usage. This is accessed via the System Dashboards icon on the left side menu (third icon from the top).
-
Use CTRL+C in the terminal window of your GPU Instance / Docker container to close down the Jupyter server when you have finished.
Exiting the preinstalled environment and the Docker container
When you are in the activated Pipenv virtual environment, your command line prompt will normally be prefixed by the name of the environment. Here, for example, from (ai) jovyan@d73f1fa6bf4d:~/ai we see that we are in the activated ai environment, and from jovyan@d73f1fa6bf4d:~/ai that we are in the ~/ai directory of our container:
-
Type
exitthe following command to leave the preinstalledaienvironment.You are now outside the preinstalled virtual environment.
-
Type
exitagain to exit the Docker container.Your prompt should now look similar to the following. You are still connected to your GPU Instance, but you have left the Docker container:
root@scw-name-of-instance:~# -
Type
exitonce more to disconnect from your GPU Instance.