Configuring a Prometheus monitoring Instance with a Grafana dashboard
Prometheus is a flexible monitoring solution developed since 2012. It stores all data in a time series database, offering a multi-dimensional data model and a powerful query language to generate reports of the monitored resources.
In this tutorial, you will learn how to use a Prometheus Monitoring Instance with a Grafana dashboard.
Before you start
To complete the actions presented below, you must have:
- A Scaleway account logged into the console
- Owner status or IAM permissions allowing you to perform actions in the intended Organization
- An SSH key
- An Instance running on Ubuntu Jammy Jellyfish (22.04 LTS) or later
Preparing your environment
-
Create users for Prometheus and Node Exporter:
useradd --no-create-home --shell /usr/sbin/nologin prometheus useradd --no-create-home --shell /bin/false node_exporter -
Create necessary directories:
mkdir /etc/prometheus mkdir /var/lib/prometheus -
Set ownership of directories:
chown prometheus:prometheus /etc/prometheus
chown prometheus:prometheus /var/lib/prometheus
Downloading and installing Node Exporter
-
Download Node Exporter:
wget https://github.com/prometheus/node_exporter/releases/download/v1.9.1/node_exporter-1.9.1.linux-amd64.tar.gz -
Unpack the archive:
tar xvf node_exporter-1.9.1.linux-amd64.tar.gz -
Copy the binary and set ownership:
cp node_exporter-1.9.1.linux-amd64/node_exporter /usr/local/bin chown node_exporter:node_exporter /usr/local/bin/node_exporter -
Remove unnecessary files to avoid clutter in your system:
rm -rf node_exporter-1.9.1.linux-amd64.tar.gz node_exporter-1.9.1.linux-amd64 -
Create systemd service file:
nano /etc/systemd/system/node_exporter.service -
Add the following content to the
node_exporter.servicefile:[Unit] Description=Node Exporter Wants=network-online.target After=network-online.target [Service] User=node_exporter Group=node_exporter Type=simple ExecStart=/usr/local/bin/node_exporter [Install] WantedBy=multi-user.target -
Reload systemd and start Node Exporter:
systemctl daemon-reload systemctl start node_exporter.service -
Verify Node Exporter status:
systemctl status node_exporter.service -
Enable Node Exporter at boot:
systemctl enable node_exporter.service
Downloading and installing Prometheus
-
Download and unpack Prometheus:
apt-get update && apt-get upgrade wget https://github.com/prometheus/prometheus/releases/download/v3.5.0/prometheus-3.5.0.linux-amd64.tar.gz tar xfz prometheus-3.5.0.linux-amd64.tar.gz cd prometheus-3.5.0.linux-amd64/ -
Copy binaries and set ownership:
cp ./prometheus /usr/local/bin/ cp ./promtool /usr/local/bin/ chown prometheus:prometheus /usr/local/bin/prometheus chown prometheus:prometheus /usr/local/bin/promtool -
Copy console libraries and set ownership:
cp -r ./consoles /etc/prometheus cp -r ./console_libraries /etc/prometheus chown -R prometheus:prometheus /etc/prometheus/consoles chown -R prometheus:prometheus /etc/prometheus/console_libraries -
Remove source files:
cd .. && rm -rf prometheus-\*
Configuring Prometheus
-
Create a configuration file:
nano /etc/prometheus/prometheus.yml -
Add the following configuration:
global: scrape_interval: 15s evaluation_interval: 15s rule_files: # - "first.rules" # - "second.rules" scrape_configs: - job_name: 'prometheus' scrape_interval: 5s static_configs: - targets: ['localhost:9090'] - job_name: 'node_exporter' scrape_interval: 5s static_configs: - targets: ['localhost:9100'] -
Set ownership of configuration file:
chown prometheus:prometheus /etc/prometheus/prometheus.yml
Running Prometheus
-
Start Prometheus from the command line:
sudo -u prometheus /usr/local/bin/prometheus --config.file /etc/prometheus/prometheus.yml --storage.tsdb.path /var/lib/prometheus/ --web.console.templates=/etc/prometheus/consoles --web.console.libraries=/etc/prometheus/console_libraries -
Access Prometheus web interface: Open
http://IP.OF.YOUR.SERVER:9090in your browser. -
Create systemd service file for Prometheus:
nano /etc/systemd/system/prometheus.service -
Add the following content:
[Unit] Description=Prometheus Monitoring Wants=network-online.target After=network-online.target [Service] User=prometheus Group=prometheus Type=simple ExecStart=/usr/local/bin/prometheus \ --config.file /etc/prometheus/prometheus.yml \ --storage.tsdb.path /var/lib/prometheus/ \ --web.console.templates=/etc/prometheus/consoles \ --web.console.libraries=/etc/prometheus/console_libraries ExecReload=/bin/kill -HUP $MAINPID [Install] WantedBy=multi-user.target -
Reload systemd and enable Prometheus service:
systemctl daemon-reload systemctl enable prometheus.service -
Start Prometheus:
systemctl start prometheus.service
Prometheus web interface
Prometheus provides a basic web interface running on http://your.instance.ip:9090 that provides access to the collected data. You can perform queries and verify the status of your Prometheus instance.
Installing Grafana
-
Install Grafana:
apt-get install -y adduser libfontconfig1 wget https://dl.grafana.com/oss/release/grafana_9.3.6_amd64.deb dpkg -i grafana_11.2.4_amd64.deb -
Enable and start Grafana service:
systemctl daemon-reload && systemctl enable grafana-server.service && systemctl start grafana-server.service
Grafana is now running and can be accessed at http://your.instance.ip:3000. The default username and password is admin / admin.
Configuring Grafana
- Add Prometheus data source:
- Click the settings icon (cogwheel) on the sidebar
- Click Data Sources
- Choose Add data source
- Select Prometheus as the data source
- Set the Prometheus instance URL to
http://localhost:9090/ - Click Save & test to test the connection and save the new data source
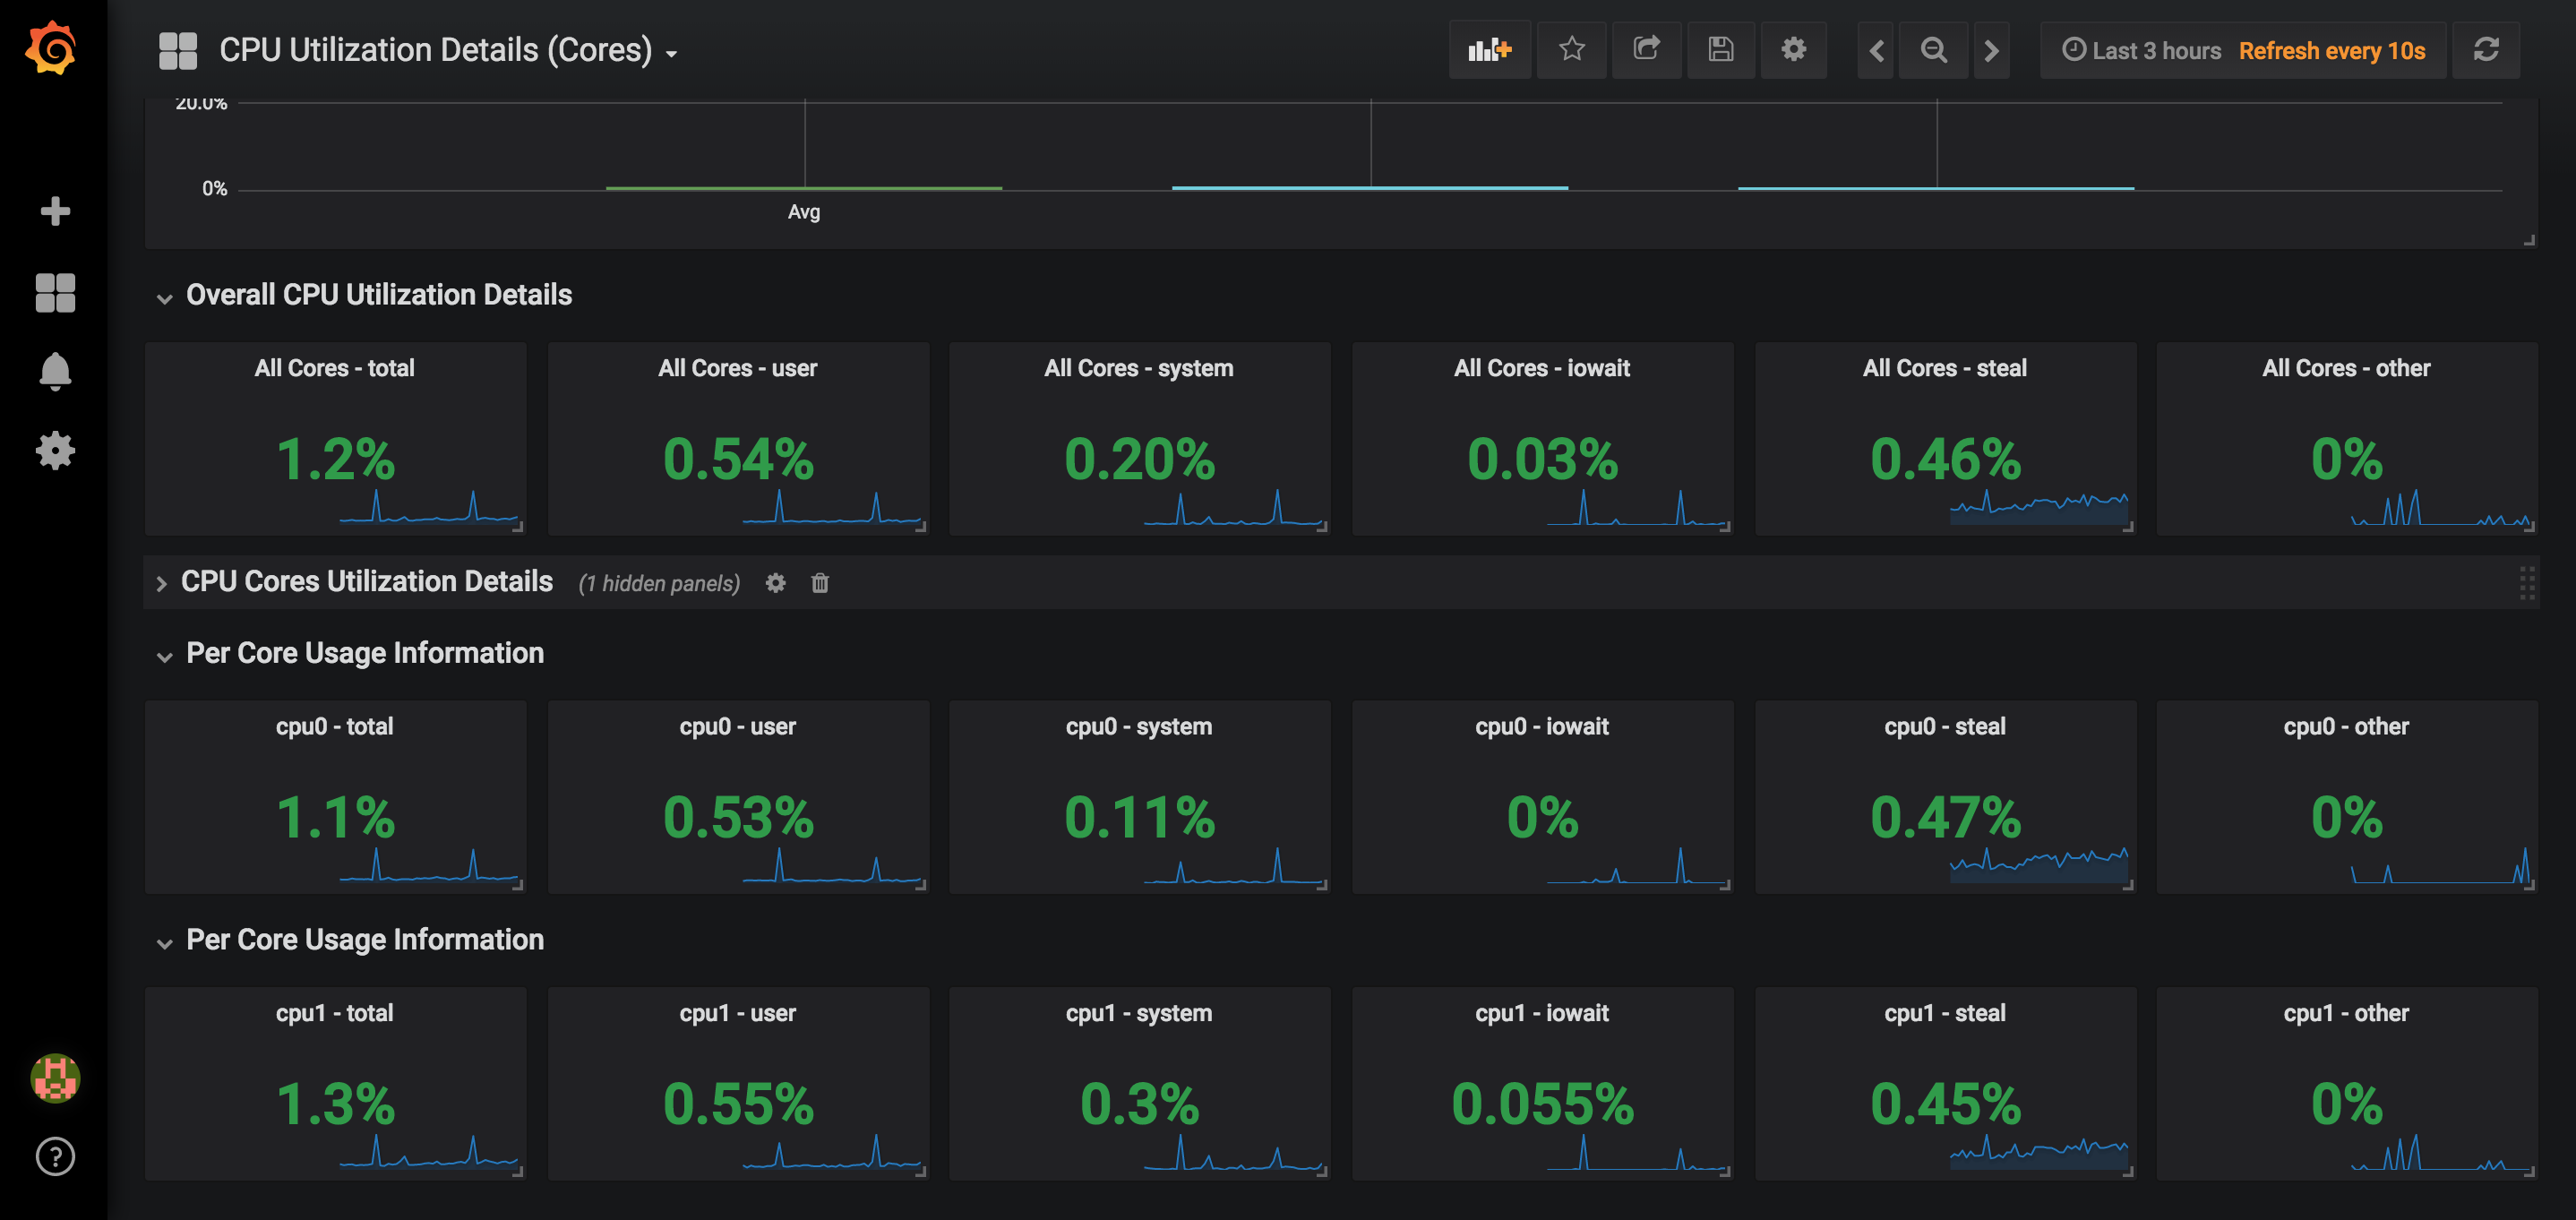
You are now ready to create your first dashboard from the information collected by Prometheus. You can also import some dashboards from a collection of shared dashboards.
Below is an example of a dashboard that uses the CPU usage of our node and presents it in Grafana:
Visit our Help Center and find the answers to your most frequent questions.
Visit Help Center