How to create subdomains
Subdomains are an additional part to extend your main domain name. Mostly, they are created to organize and navigate to different sections of your website. For example, you can host your main website at www.example.com and your blog at blog.example.com.
Before you start
To complete the actions presented below, you must have:
- A Dedibox account logged into the Online console
- Created a Webhosting Classic
How to create a subdomain from the Dedibox console
- Click Hosting. A list of your webhosting accounts displays.
- Click Manage next to the hosting you want to configure. The webhosting overview page displays.
- Click Subdomains under Linked domains in the side menu. The list of your subdomains displays.
- Click Add subdomain. A pop-up displays.
- Enter the name of your subdomain and click Add subdomain. The new subdomain will appear in the list of your subdomains.
How to upload content to your subdomain
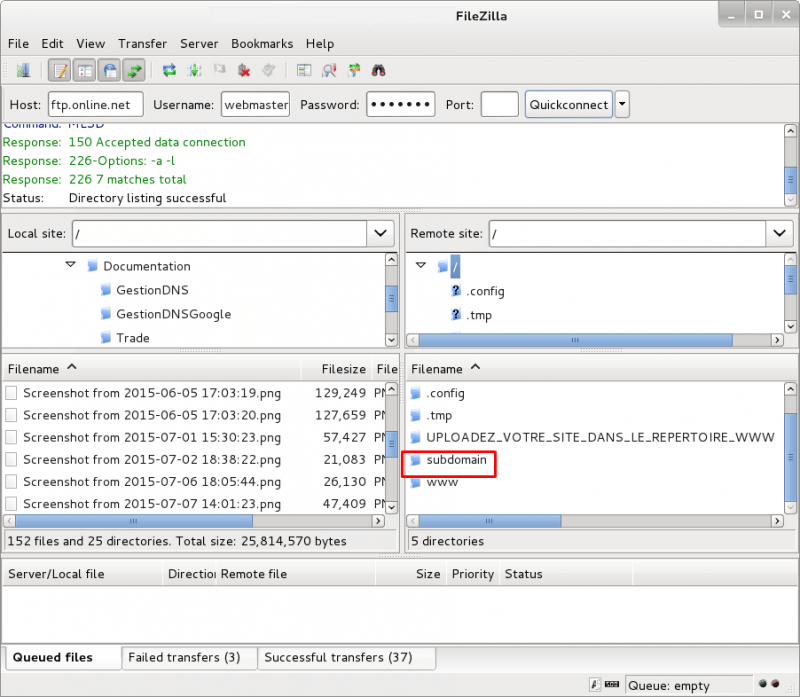
- Connect to your webhosting using your FTP account. A listing of your remote files and folders displays in the right part of the FTP client:

- Double-click the folder with the same name as your subdomain to access it.
- Upload your files into this directory.
How to create subdomains using the FTP client (advanced mode)
It is also possible to create subdomains directly using your FTP client, without needing to create them via the Dedibox console.
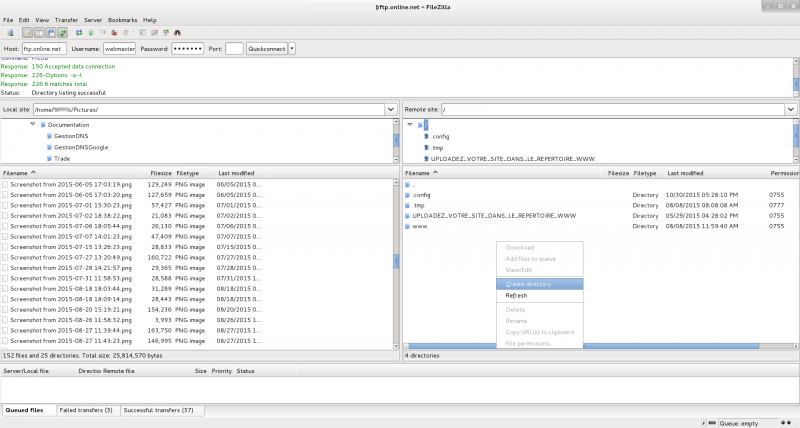
- Log into your webhosting using an FTP client. Your remote files are listed in the right part of the FTP client.

- Create a new folder in the document root of your hosting, named after your subdomain:

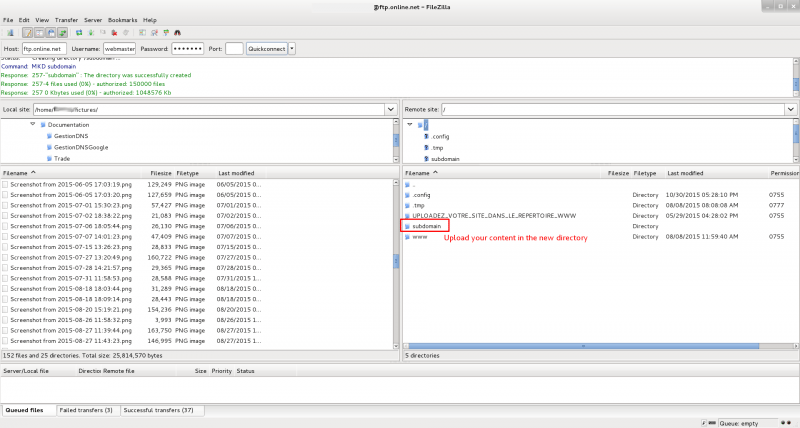
- Enter the newly created directory and upload your files into it:

You now can access the files located in this directory as a subdomain of your webhosting.
See Also
Still need help?Create a support ticket