How to configure a Dedibox failover IP on Windows Server 2019
This page shows you how to configure a failover IP on Dedibox servers running on Windows Server 2019.
Before you start
To complete the actions presented below, you must have:
- A Dedibox account logged into the console
- A Dedibox dedicated server
- Log into your Dedibox using the Remote Desktop client.
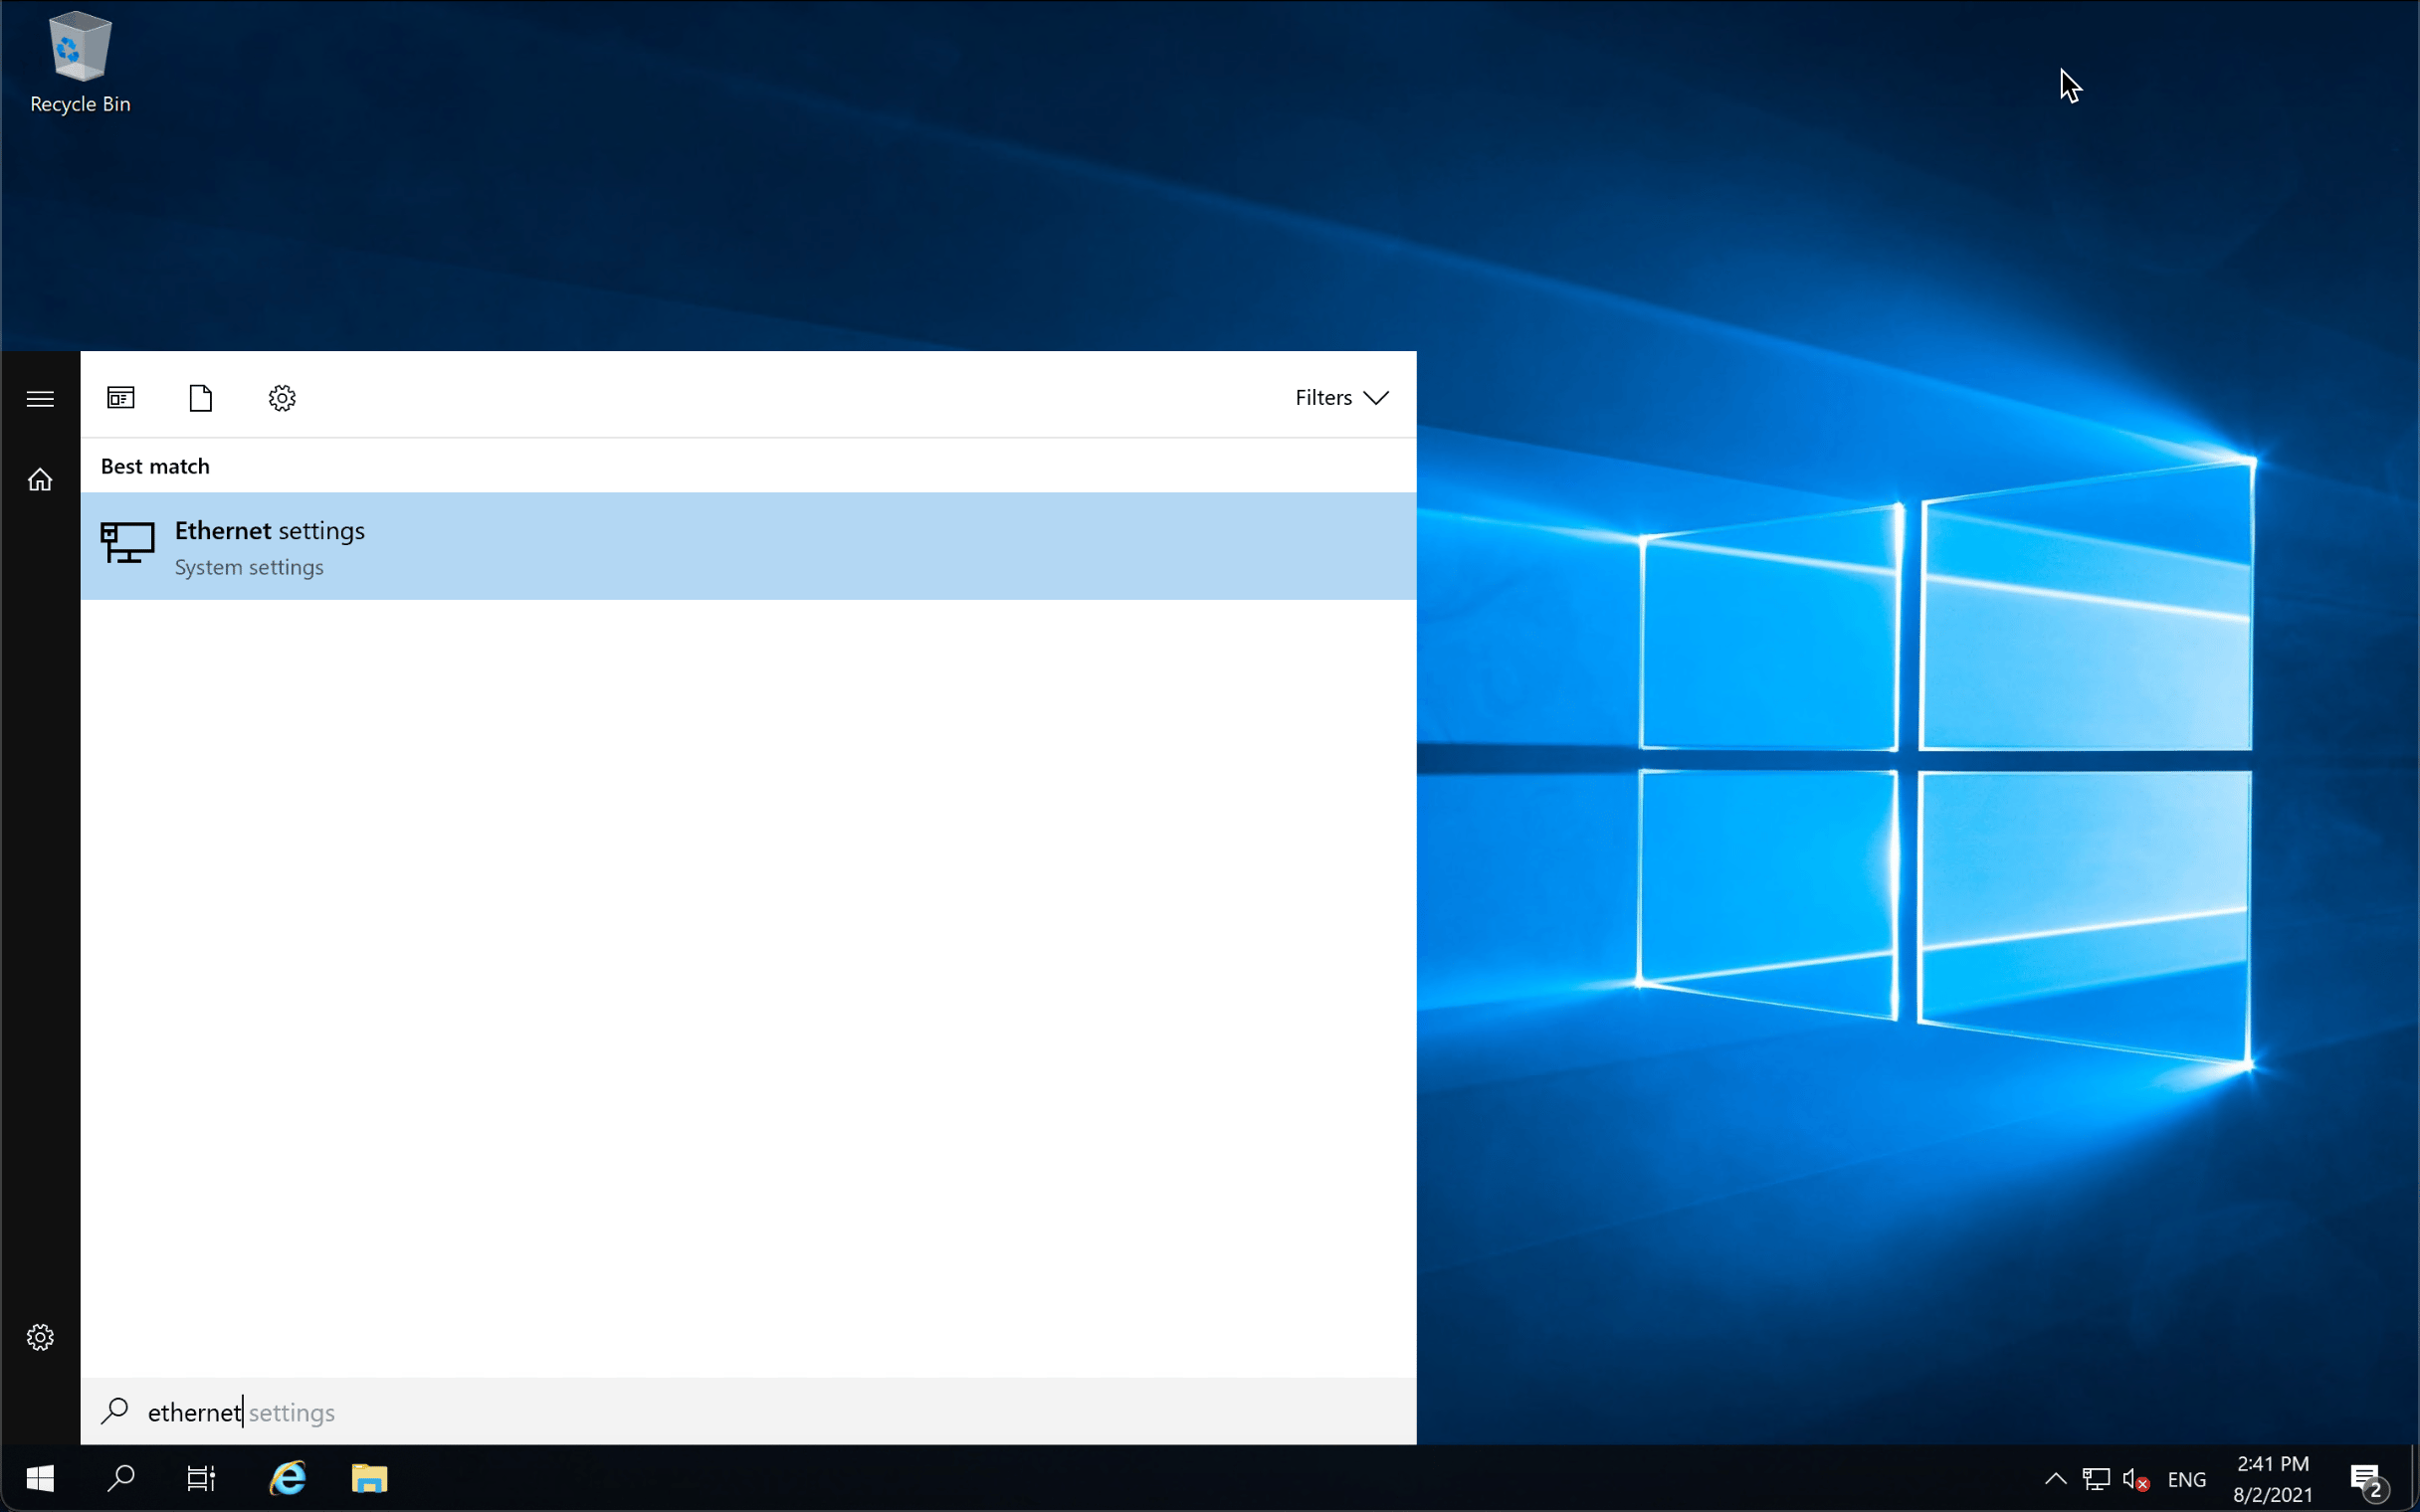
- Open the start menu and type Ethernet settings. The Ethernet window displays.
- Click Change adapter options. The network connections window displays.
- Right-click on the internet connection. Then click Properties in the pop-up menu.
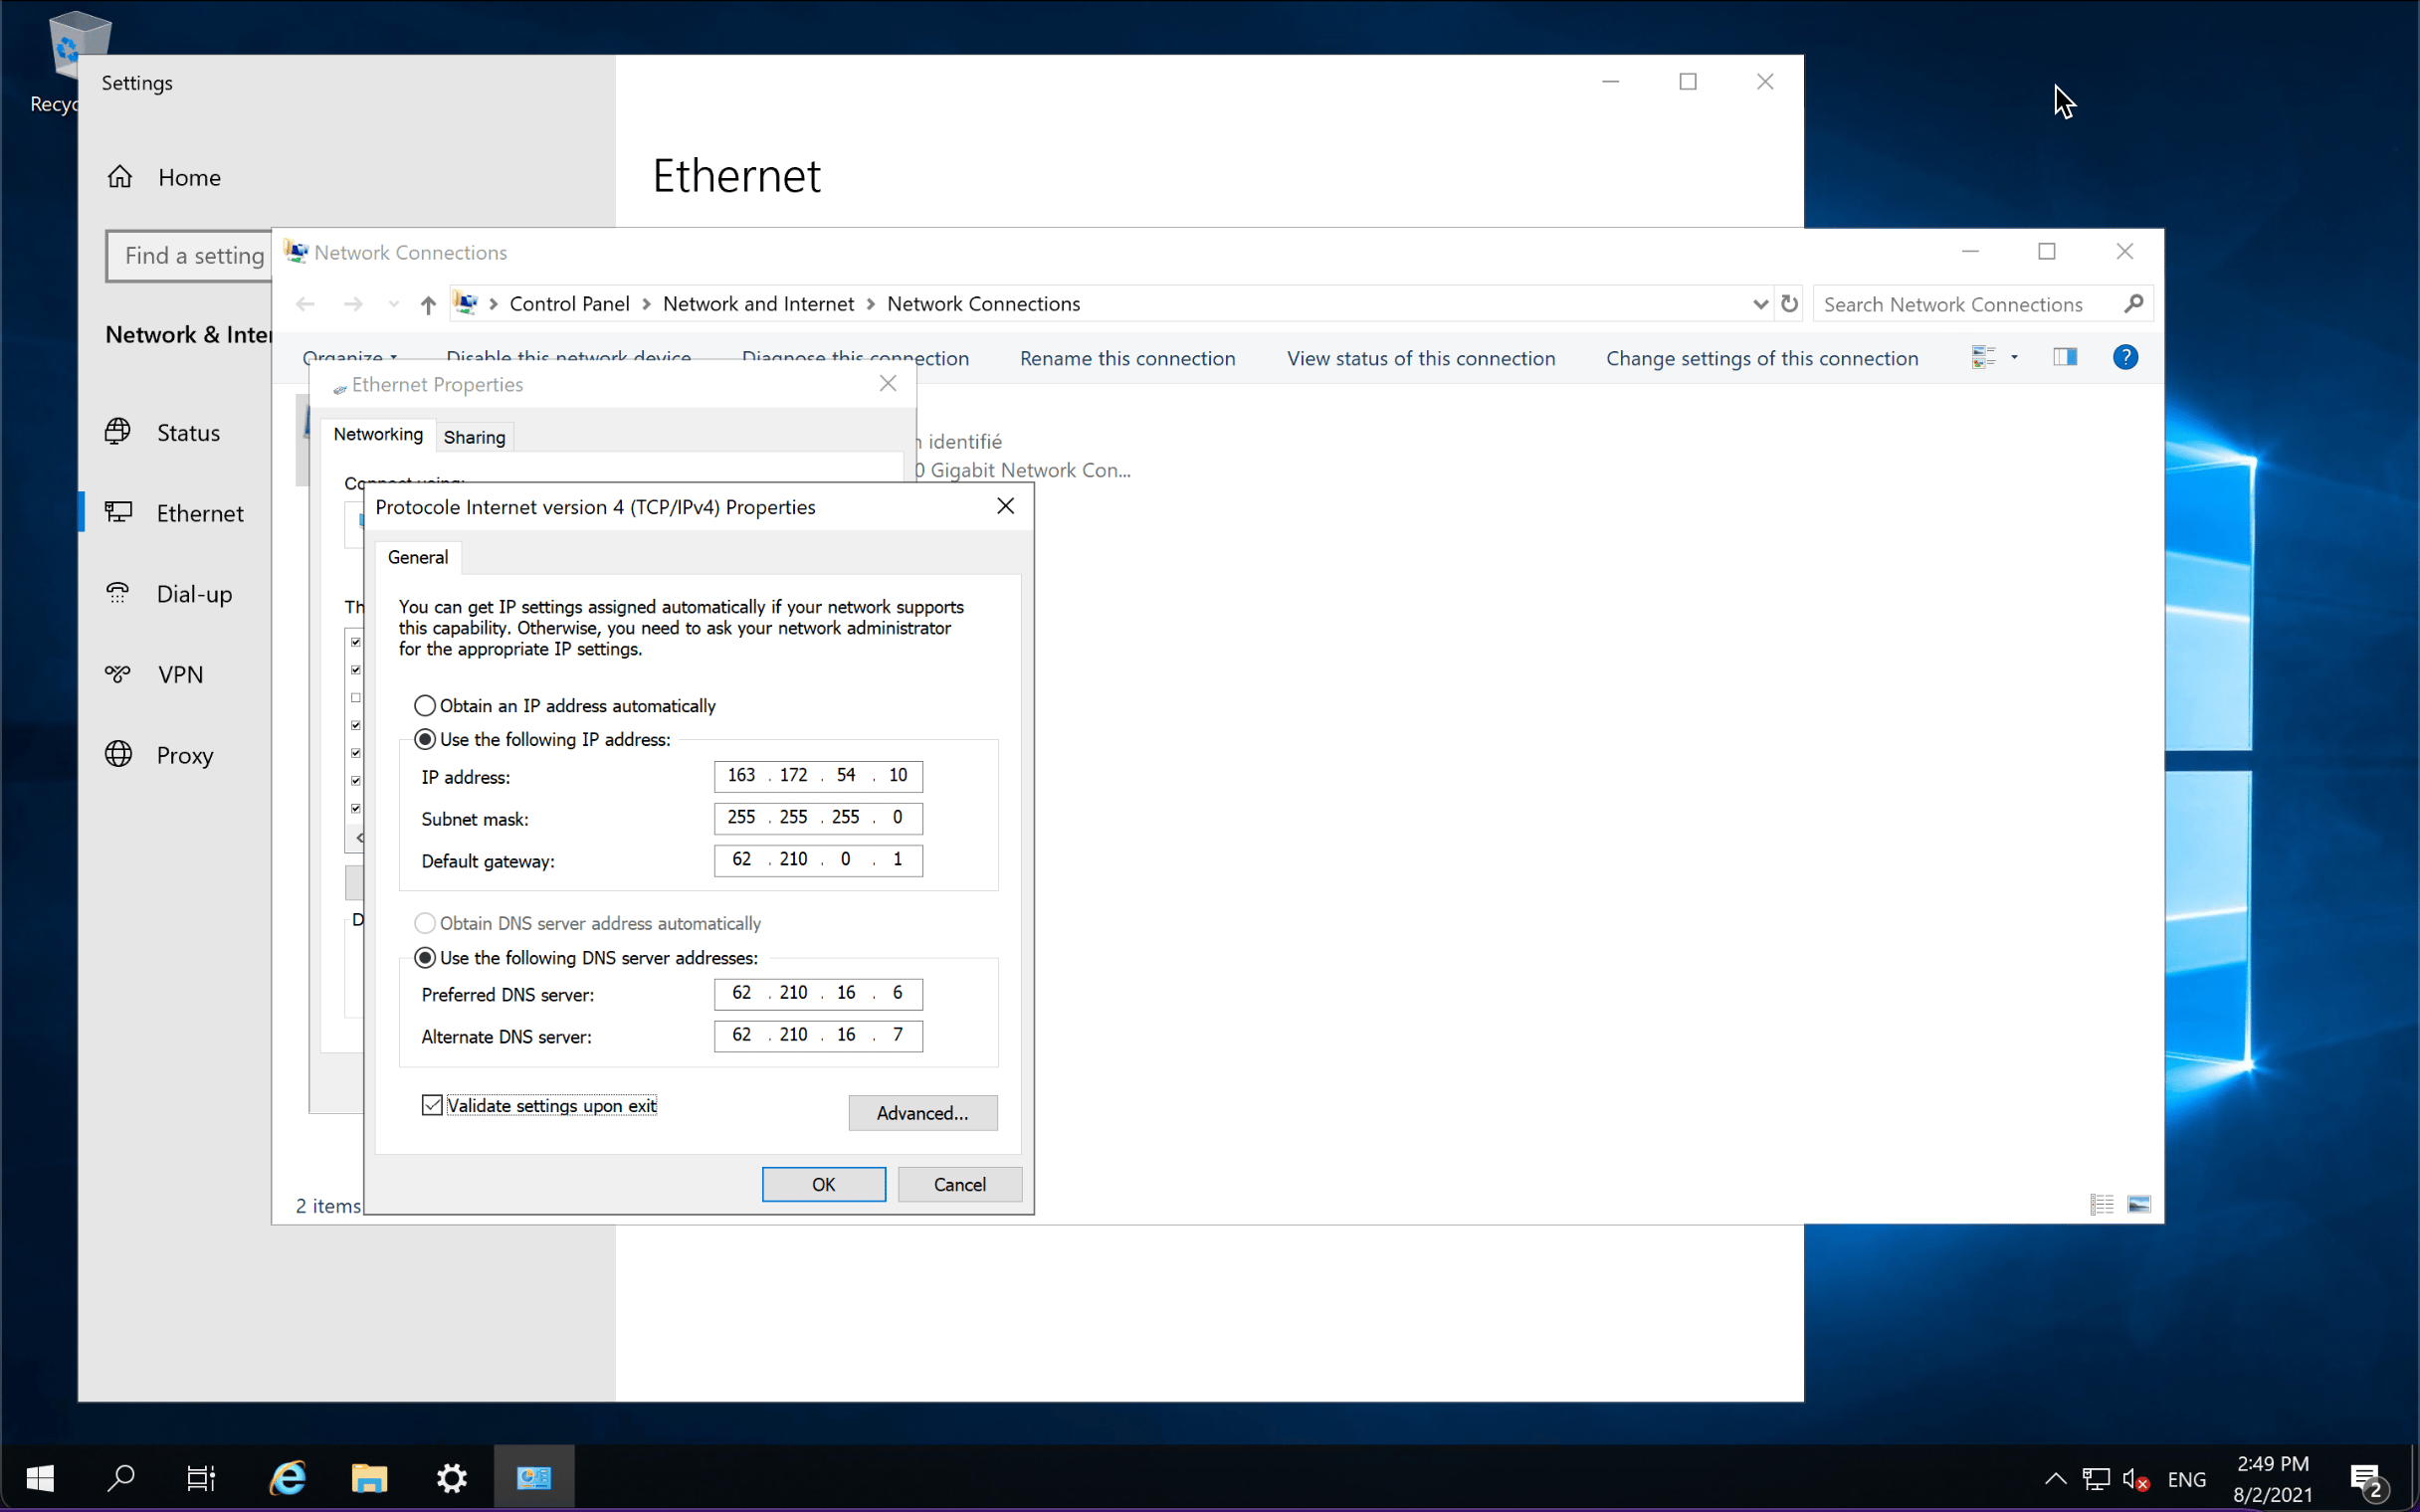
- Select Internet Protocol version 4 (TCP/IPv4) in the list of connection items and click Properties.
- Enter the static configuration of the principal IP address of the server. Then click Advanced. The advanced configuration window displays.
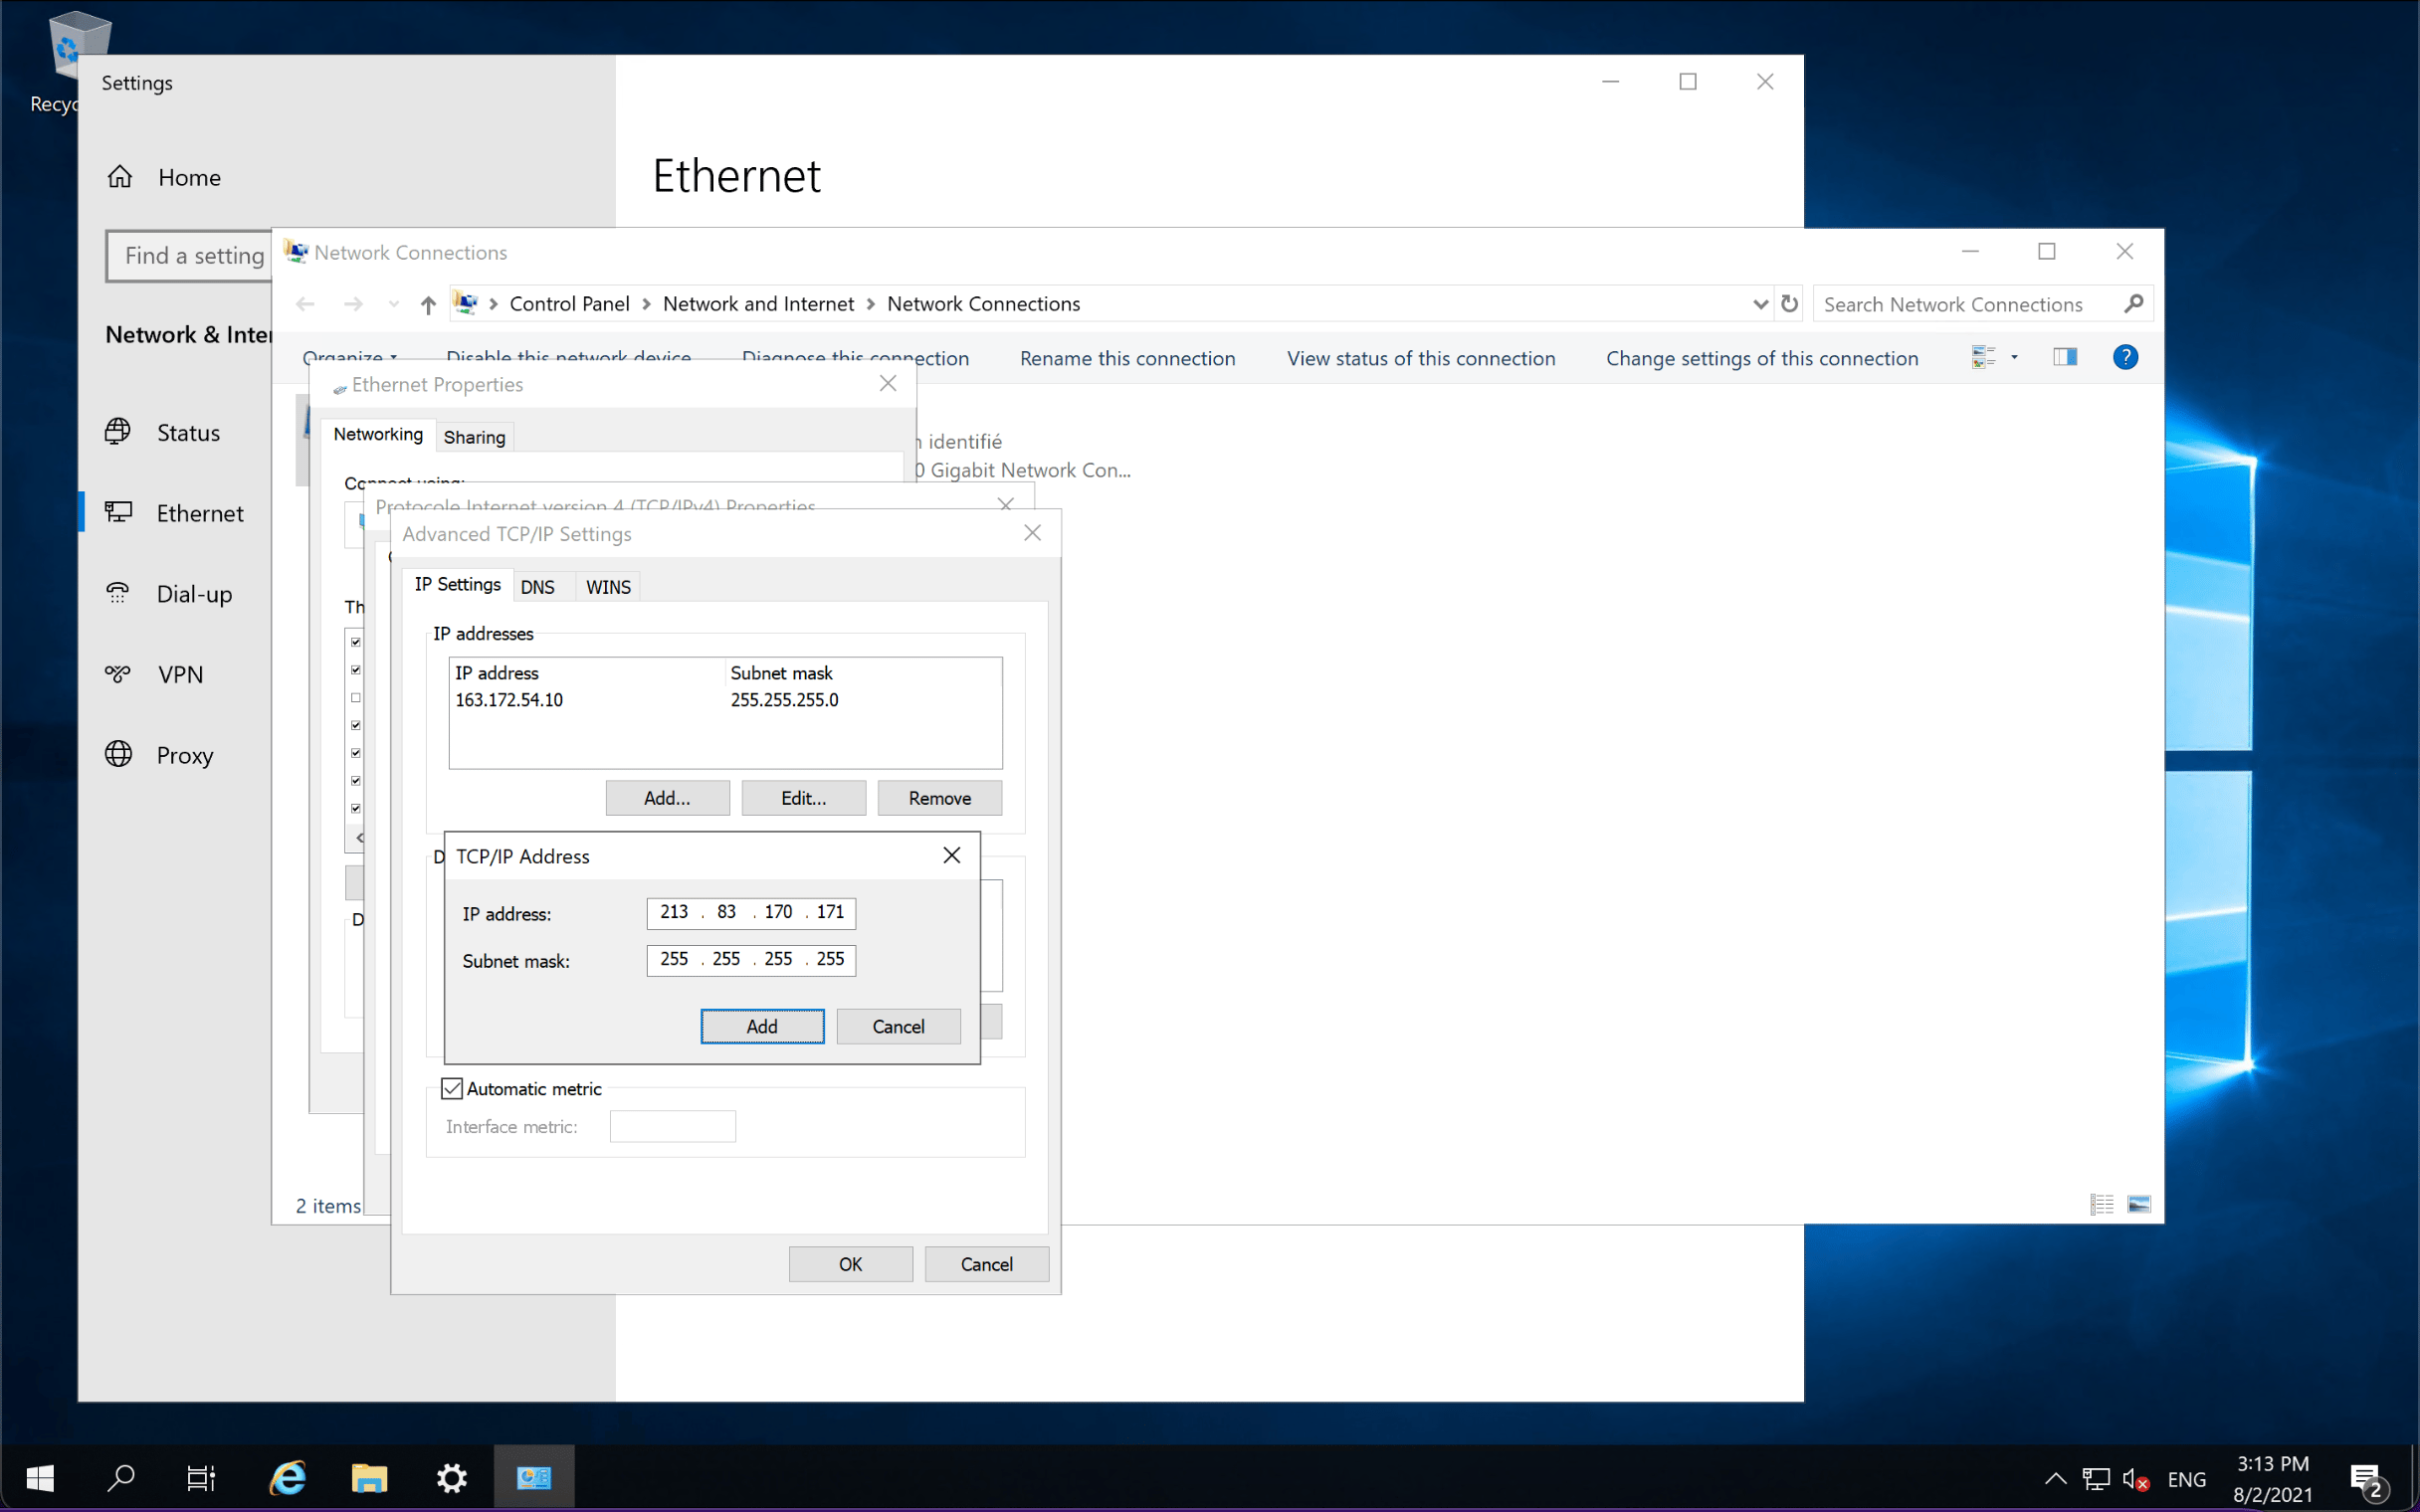
- Click Add. Then enter the configuration details for the failover IP. Finally, click Add.
- Click OK to close the advanced configuration window. Then click OK to validate the IP configuration and to close the Ethernet configuration windows.
See Also
Still need help?Create a support ticket