How to configure the RPNv1 gateway on an RPNv2 Dedibox
If you have services that are available only on the RPNv1 (RPN SAN, server not compatible with RPNv2 etc), you can add a compatibility layer through your console.
In the RPNv2 management console, click on the corresponding button, and select an RPNv1 group that will be able to access it.
Once you have done that, you can either restart your DHCLIENT on your RPNv1 servers for them to get the new routes or manually add a route to 10.88.0.0/13 through your existing RPN Gateway.
You can do it with the following snippet:
ip route add 10.88.0.0/13 via $RPNGWOn the RPNv2 servers, you will be provided with an RPNv1 subnet usable on your VLAN ID. If, for example, you get the following block: 10.88.101.0/28.
- The IP
10.88.101.1will be your gateway on the RPNv1 network for the RPNv2 server. - The IPs
10.88.101.2-14can be used on your RPNv2 servers.
-
Configure your interfaces as shown below in
/etc/network/interfaces(on a Debian-based machine):iface eth1.3900:0 inet static address 10.88.101.2 netmask 255.255.255.240 -
Add the route for the whole network:
ip route add 10.88.0.0/13 via 10.88.101.1
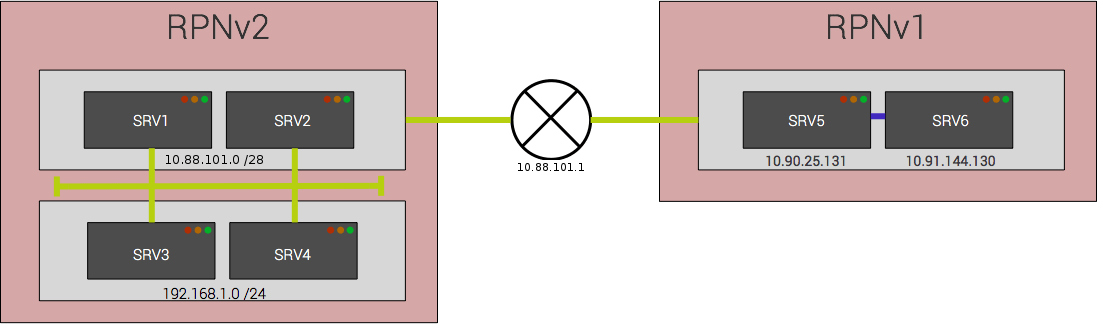
Find below a schema of how this works for all your RPN services (v1 and v2):