How to use the BMC (IPMI/Redfish) on a Dedibox server
Intelligent Platform Management Interface (IPMI) and Redfish are industry standards to describe the subsystem of a server providing remote management and monitoring capabilities. IPMI and Redfish you a way to manage and monitor a server even if it is powered off or unresponsive, by using a network connection to the hardware. IPMI is made possible by the Baseboard Management Controller, an independent piece of hardware connected to a network card, composed of an I2C bus and a dedicated processor.
Some examples of features that can be remotely monitored via the BMC include:
- Ventilation,
- Temperature,
- Voltage,
- Operating time.
Actions that can be carried out via IPMI include:
- Rebooting via KVM,
- Switching the server off and/or on,
- Configuration of automatic notification in case of hardware problems (power supply failure, temperature anomalies, etc.),
- Viewing of logs from the BIOS,
- Accessing the serial port and BIOS over the network via serial console.
In this document, we show you how to access the BMC for a Dell or HPE server. See the KVM-over-IP documentation for information about other server models.
Before you start
To complete the actions presented below, you must have:
- A Dedibox account logged into the console
- Created and installed a Dedibox server with a dedicated KVM over IP device
How to use a Dell iDRAC
On a Dell server, the BMC is known as the iDRAC: the Integrated Dell Remote Access Controller.
-
From the console, click Server > Server list. A list of your servers displays.
-
Click Manage next to the relevant server.
-
Click the IDRAC button on the right. A disclaimer displays.
-
Click I Accept to agree with the terms of the disclaimer.
-
Enter the authorized IPv4 address for the iDRAC connection. The IP address of your internet connection is already pre-filled in the form. Then click Create to generate your credentials.
The connection URL and your credentials display. Click on the link to access the iDRAC interface.
-
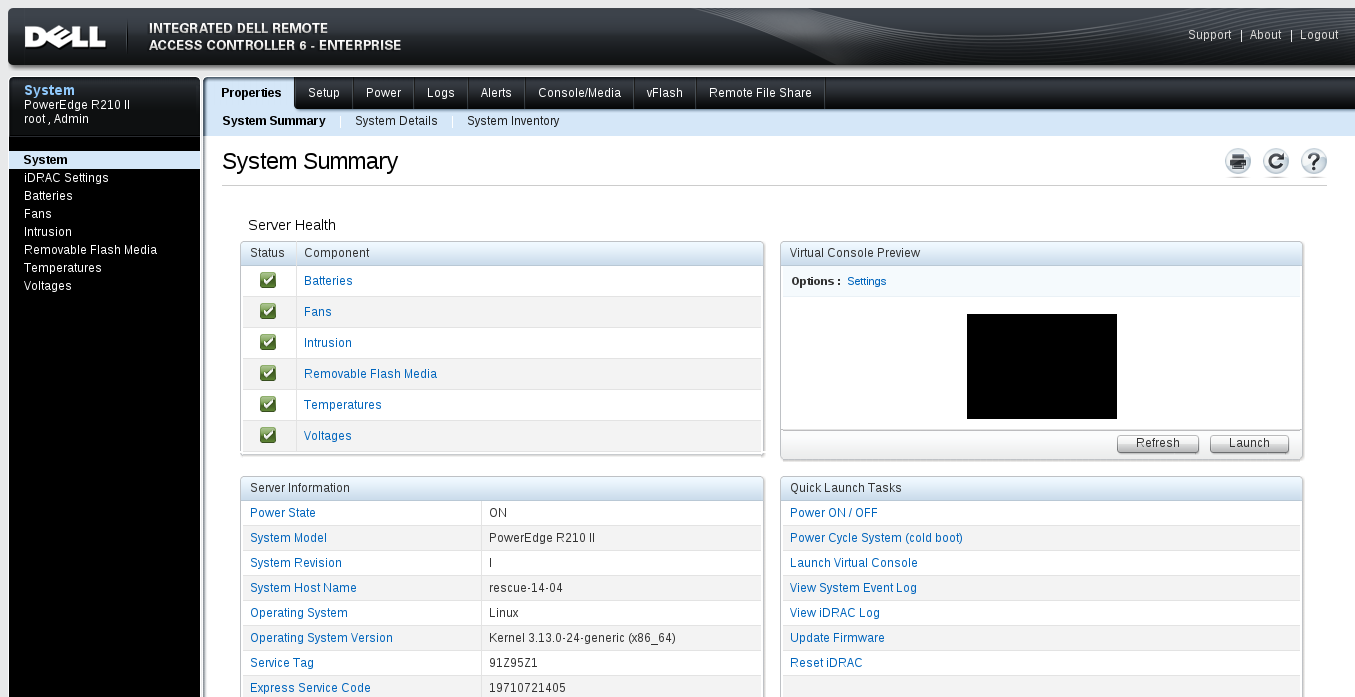
Use the interface to monitor and manage your server's hardware:
- The System tabs let you view various system information including system details, logs, and power status. You can also use the Console/Media > Virtual Media tab to install your server remotely with a custom OS by connecting virtual media. To launch the KVM, click Remote Access Controller under System Details.
- The iDRAC tabs show you information about the iDRAC itself.
- Click the other relevant links on the left sidebar to see information about Batteries, Temperatures, Voltages, etc., as required.
How to use a HPE iLO
On an HPE server, the BMC is known as the iLO, the Integrated Lights-Out processor.
-
From the console, click Server > Server list. A list of your servers displays.
-
Click Manage next to the relevant server.
-
Click the iLO button on the right. A disclaimer displays.
-
Click I Accept to agree with the terms of the disclaimer.
-
Enter the authorized IPv4 address for the iLO connection. The IP address of your internet connection is already pre-filled in the form. Then click Create to generate your credentials.
The connection URL and your credentials display. Click on the link to access the iLO interface.

-
Use the interface to monitor and manage your server's hardware:
- The Information pages let you view various system information including system details, logs, and diagnostics.
- The Remote Console pages let you launch the KVM.
- The Virtual Media pages let you install your server remotely with a custom OS by connecting virtual media.
- Click the other relevant links on the left sidebar to see more information.