How to configure the HP Smart Array P420 RAID controller from the KVM
The personalized RAID configuration allows you to create a RAID mode that cannot be created via the management console of Online.net (RAID10, for example).
Before you start
To complete the actions presented below, you must have:
- A Dedibox account logged into the console
- A Dedibox dedicated server with an HP Smart Array P420 RAID controller
-
Click Server > Server list to display the list of your servers. Click the identifier of the server you want to configure. The server information page displays.
-
Click iLO in the menu on the right and validate the terms. Then enter your connection's IP address and click CREATE. Your iDRAC session credentials display. Login to iDRAC using the credentials shown.
-
The iDRAC dashboard displays. Click Launch in the Virtual Console Preview section to launch the Java-based KVM-over-IP applet. Once the server's screen output is visible in the KVM applet, reboot the machine.
-
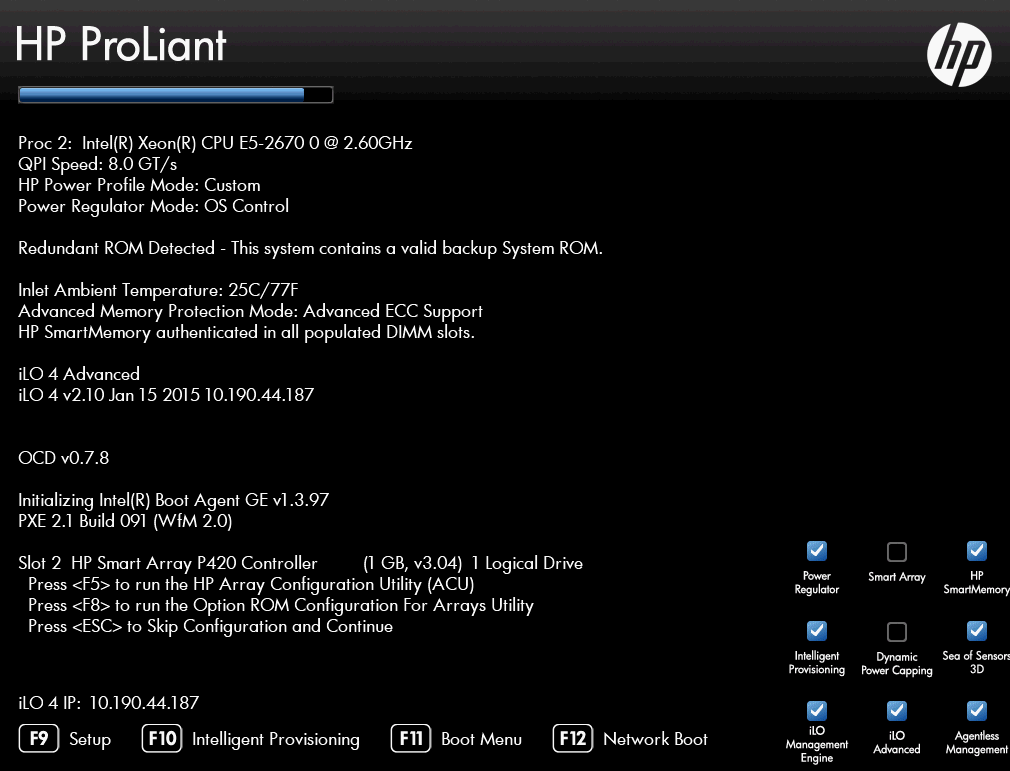
Press F8 during the boot process to enter the RAID configuration utility:
-
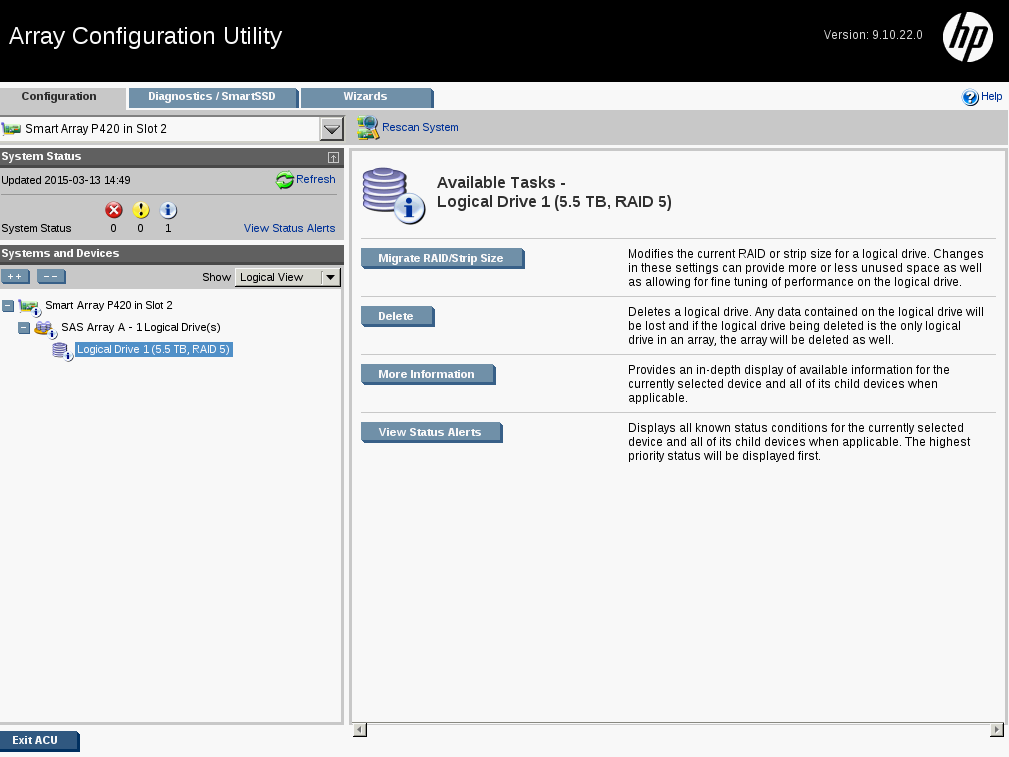
Select the RAID controller from the drop-down menu. The current array configuration displays:

-
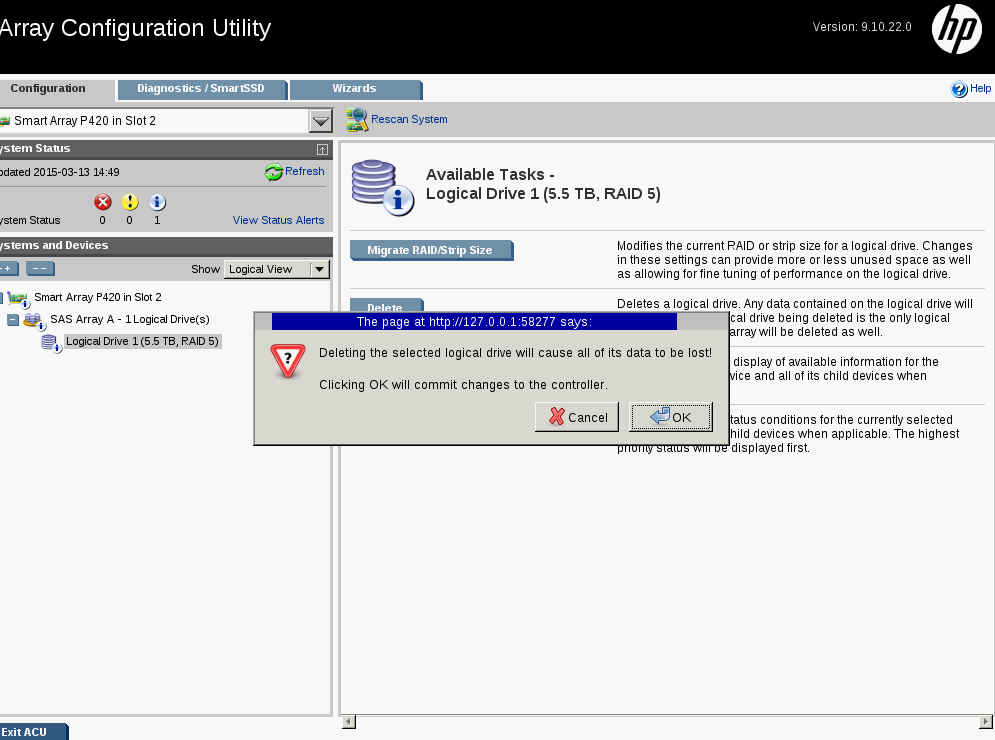
Click Delete to delete the existing virtual disk. A pop-up displays. Click OK to confirm deletion of the logical drive:
-
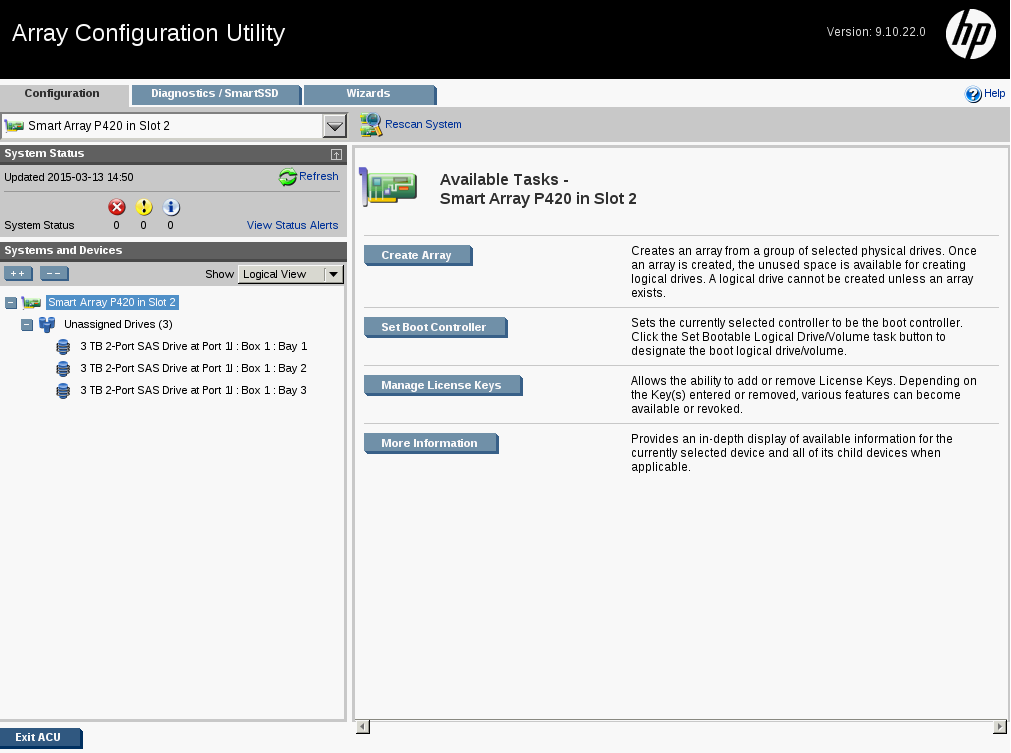
Create a new logical array once the previous one is deleted. To do so, click Create Array:
-
Select the physical disks you want to use for the virtual device and confirm by clicking OK:
-
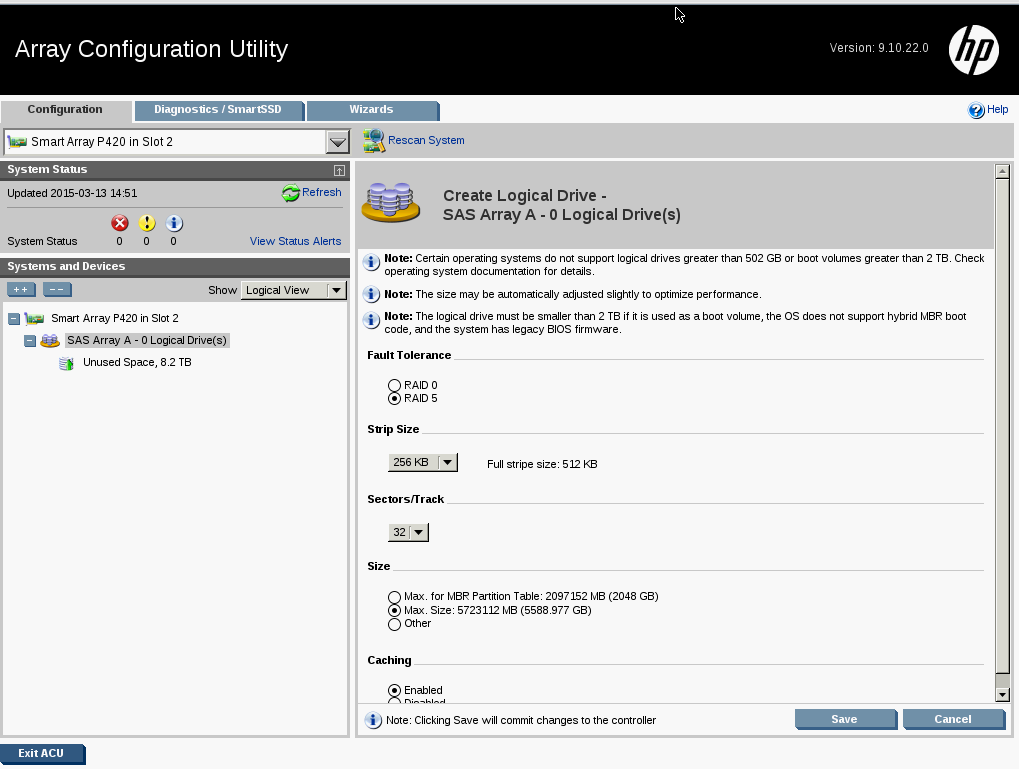
Select the parameters for the array and click Save to write the changes to the disks:
-
Click Exit ACU to quit the array configuration and reboot your server.