How to use the QuantaPlex KVM
This page shows you how to use KVM on a QuantaPlex Dedibox.
Before you start
To complete the actions presented below, you must have:
- A Dedibox account logged into the console
- A Dedibox server with a Quanta Computer QuantaPlex KVM-over-IP device
Creating a KVM session
- Navigate to Server > Server List in your Dedibox console to view the list of your dedicated servers.
- Click the name of the server you wish to access. This will open the server's status page.
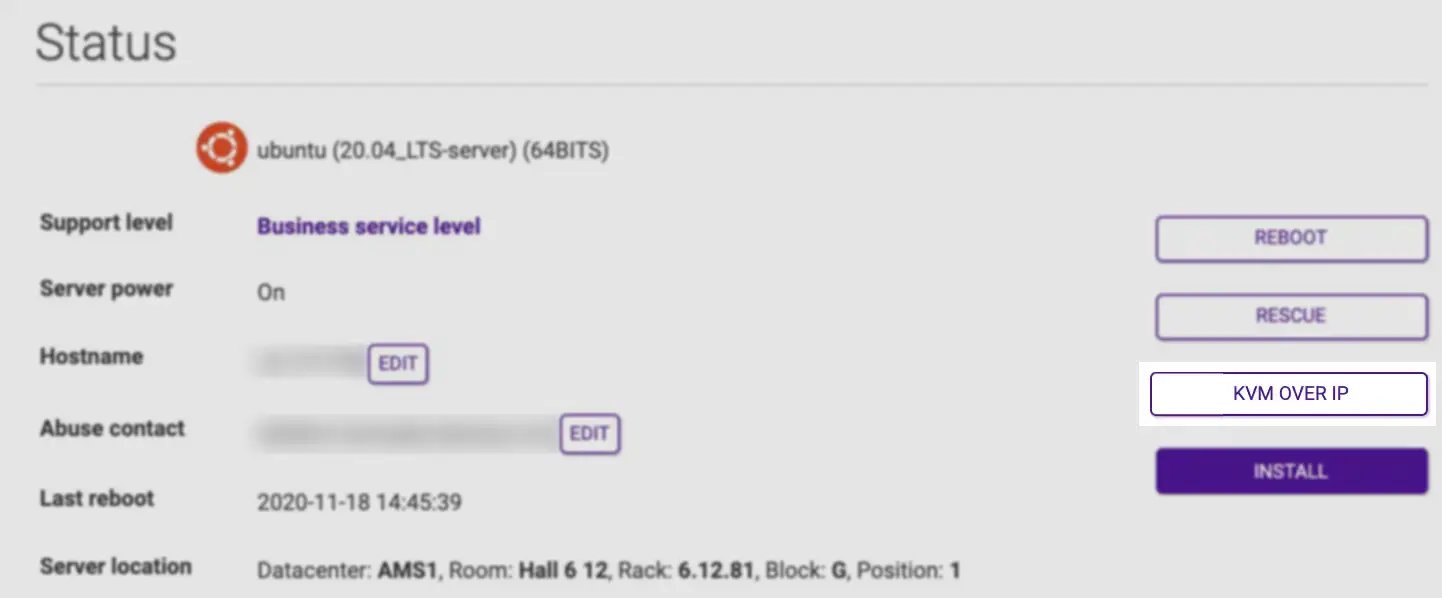
- Click KVM OVER IP on the right-hand menu. A pop-up window displays.
- Confirm your acceptance of the terms for KVM access by clicking I Accept.
- Provide the authorized IPv4 address for the KVM connection. The form will autofill with the IP address of your current internet connection. Proceed by clicking Create to generate your credentials.
Upon completion, the connection URL and your credentials will be displayed. Click on the provided link to access the KVM interface.
Accessing the KVM-over-IP device
- Open the connection URL of your KVM in your web browser, then log in using the credentials provided during access creation.
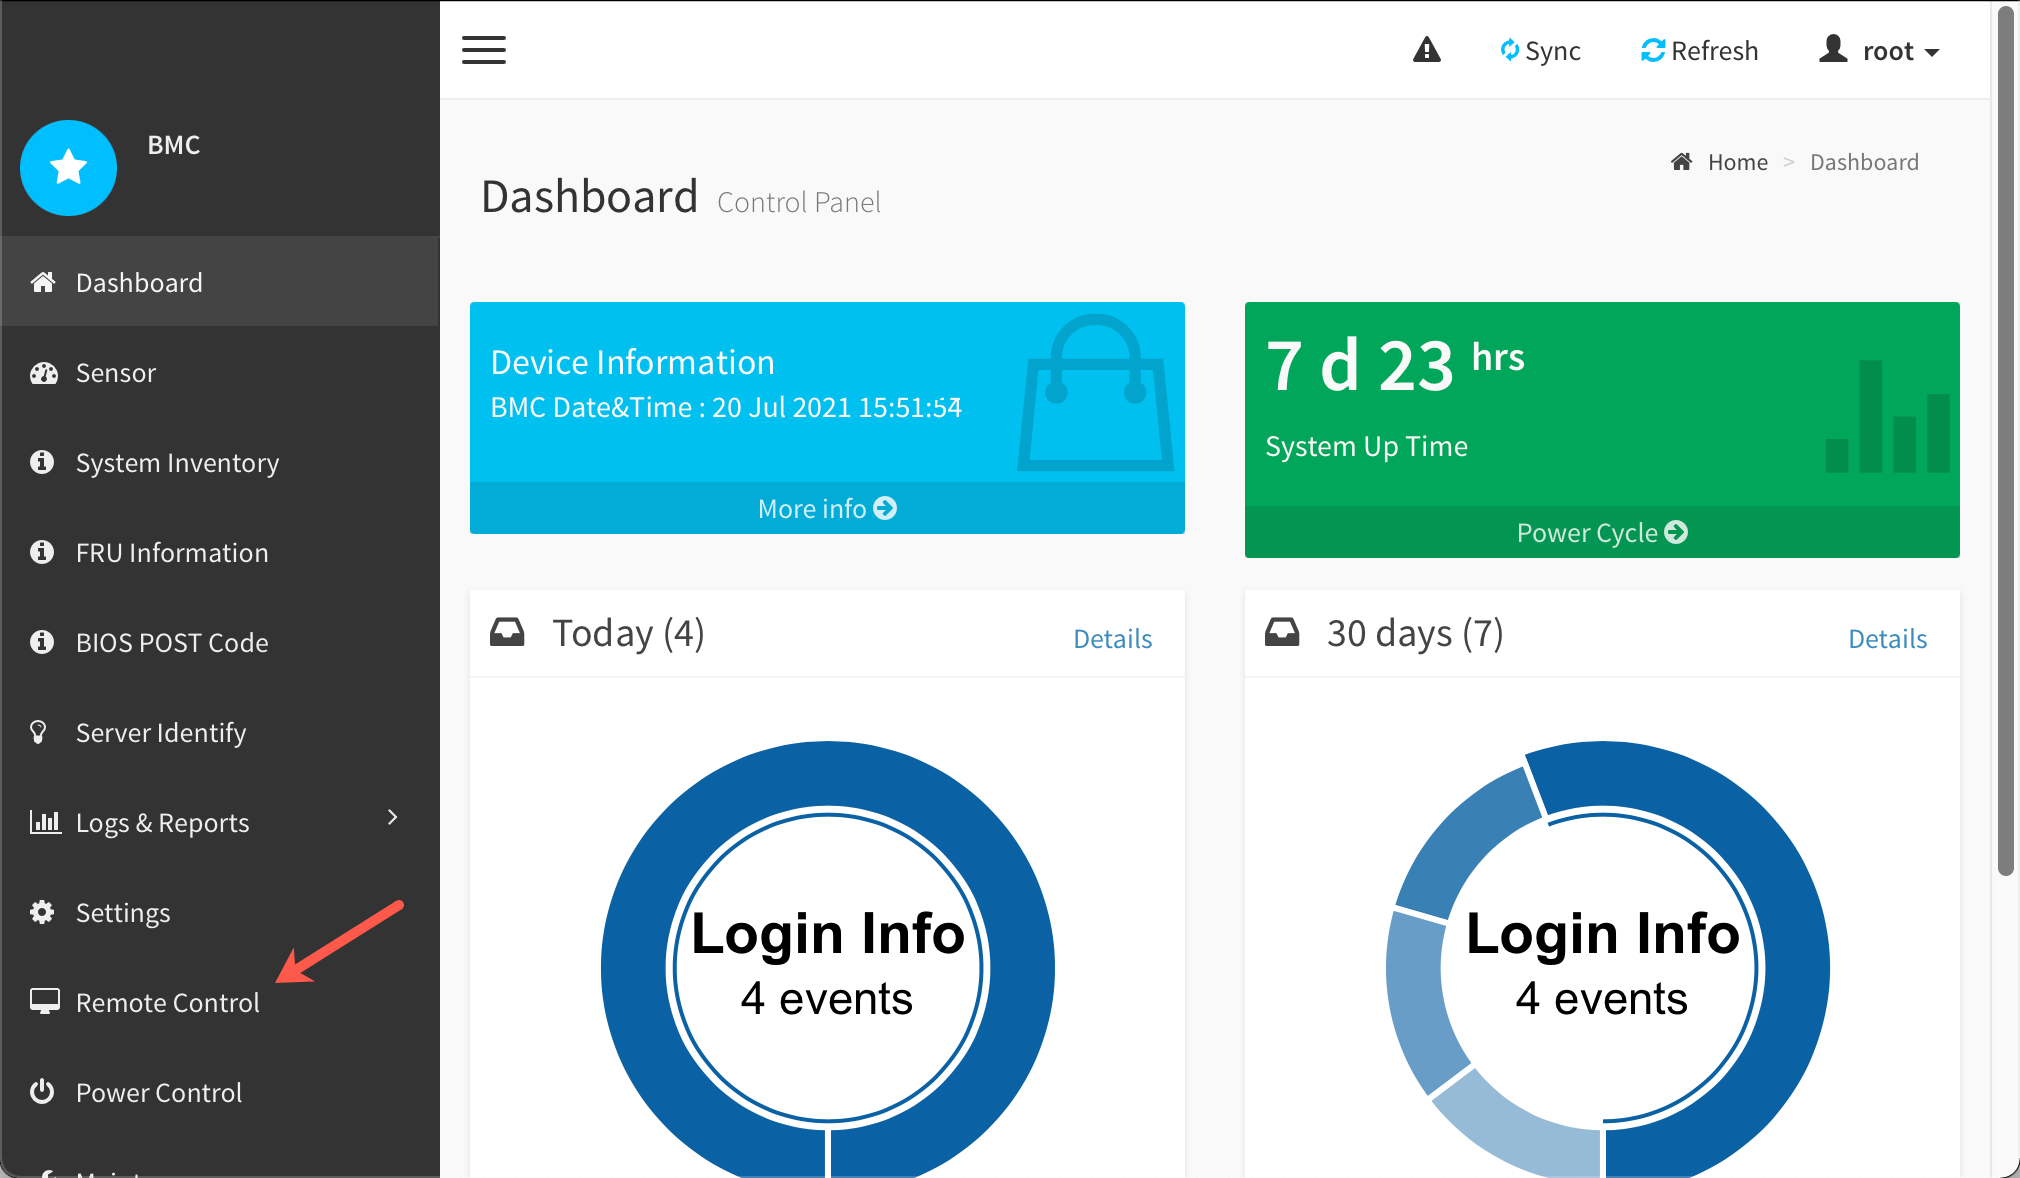
- Navigate to Remote Control in the side menu of the BMC device.
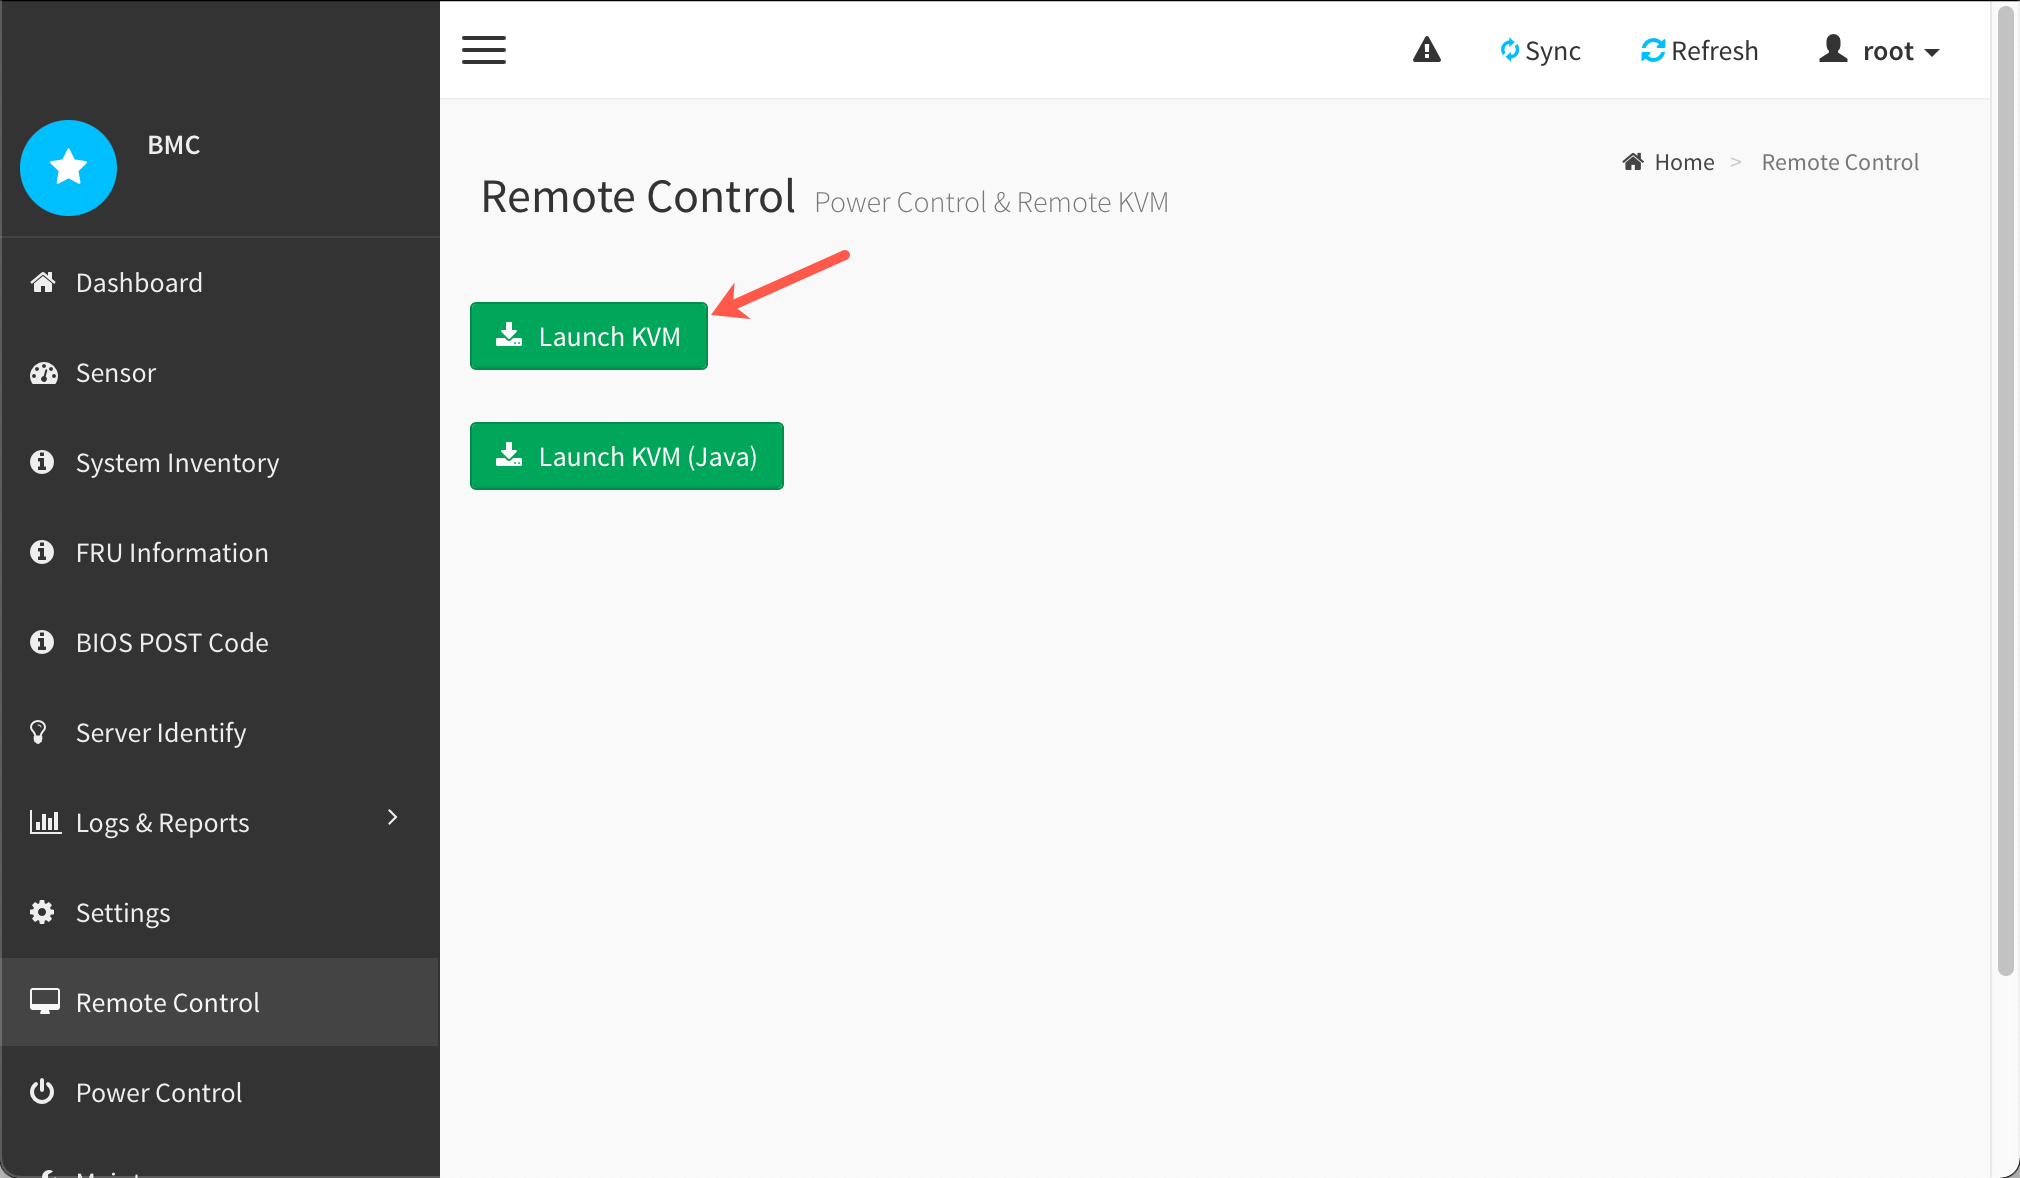
- Click Launch KVM on the Remote Control page:
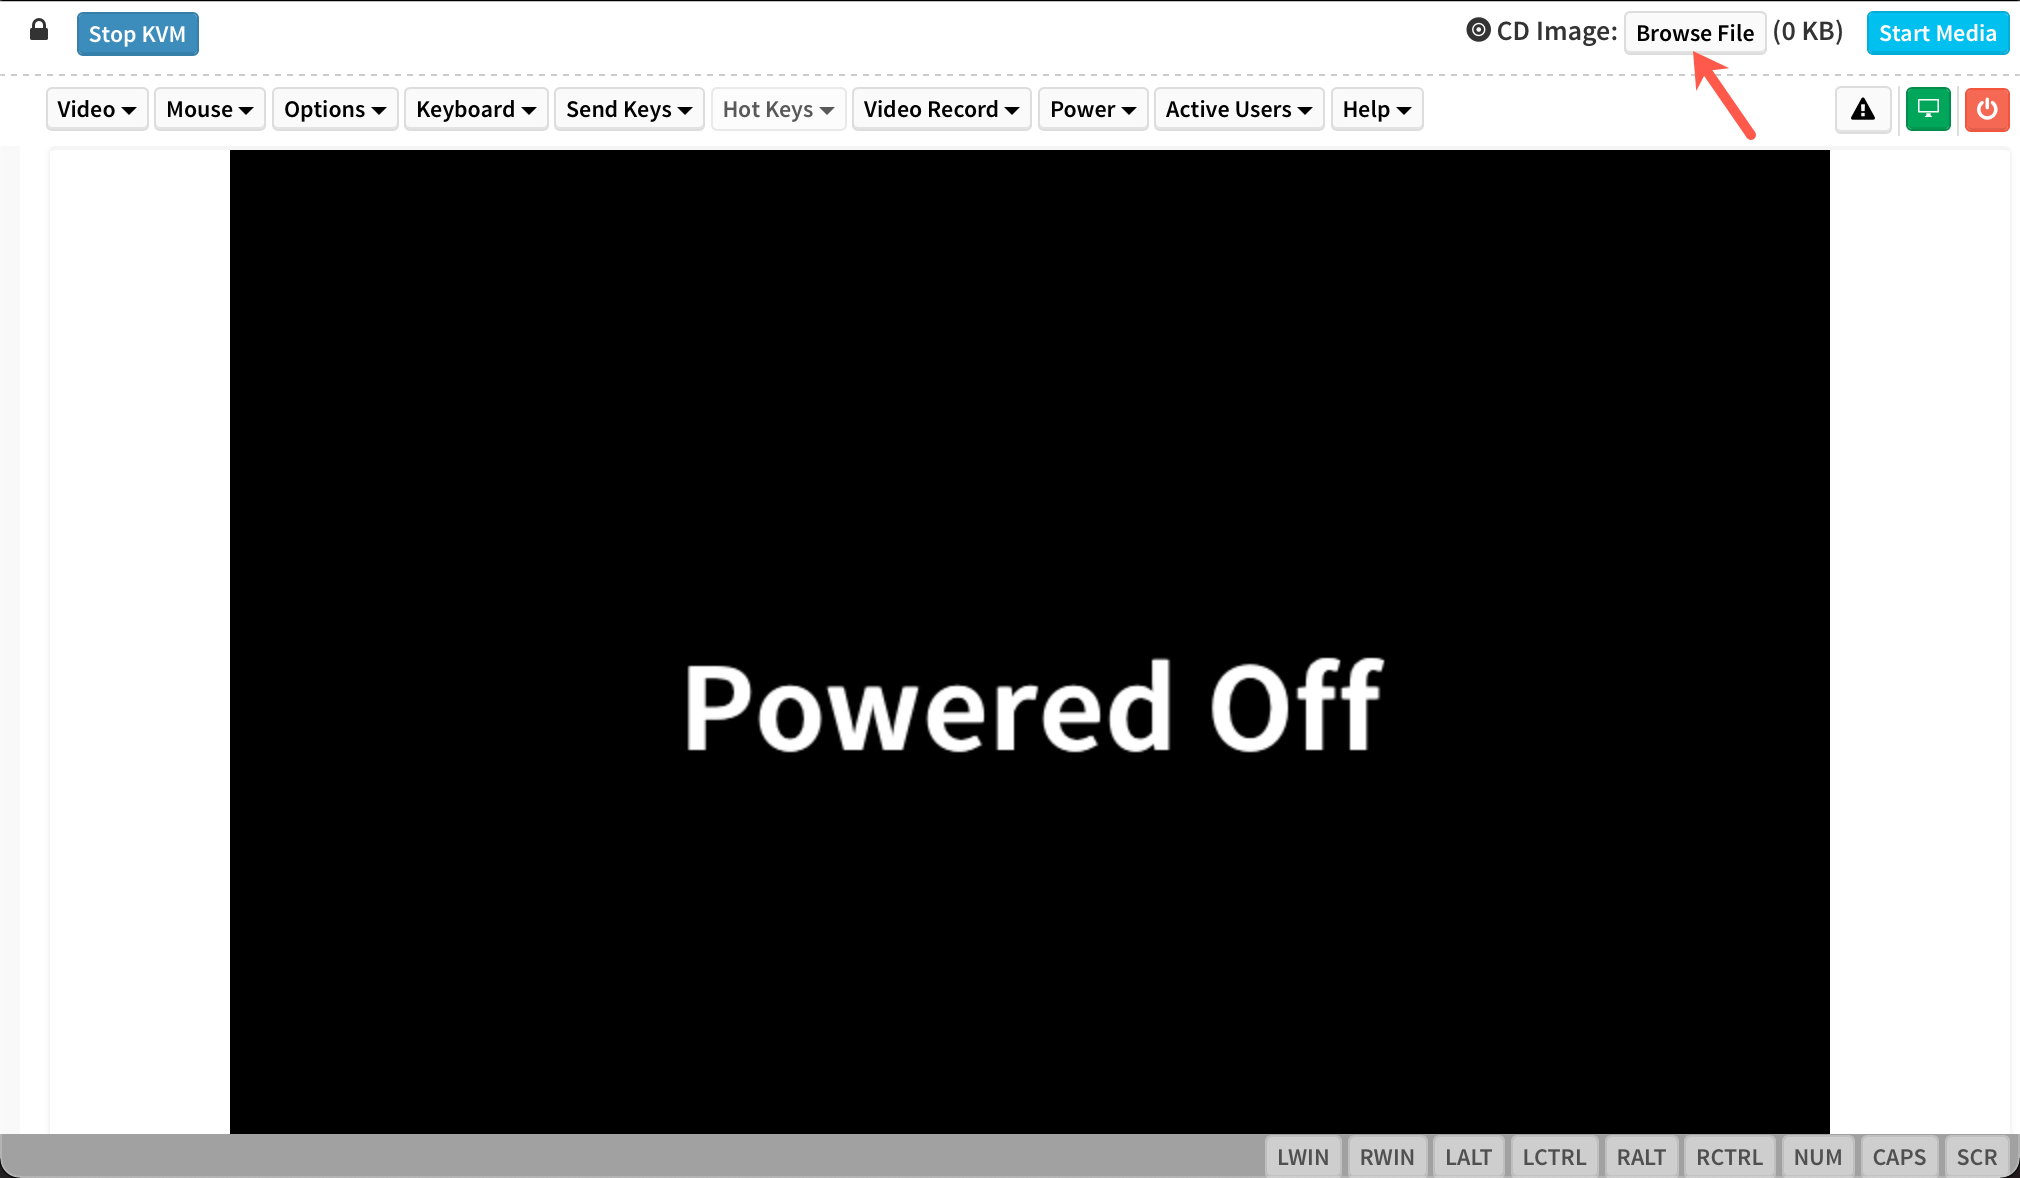
- In the KVM window, click Browse File and select your operating system's ISO file.
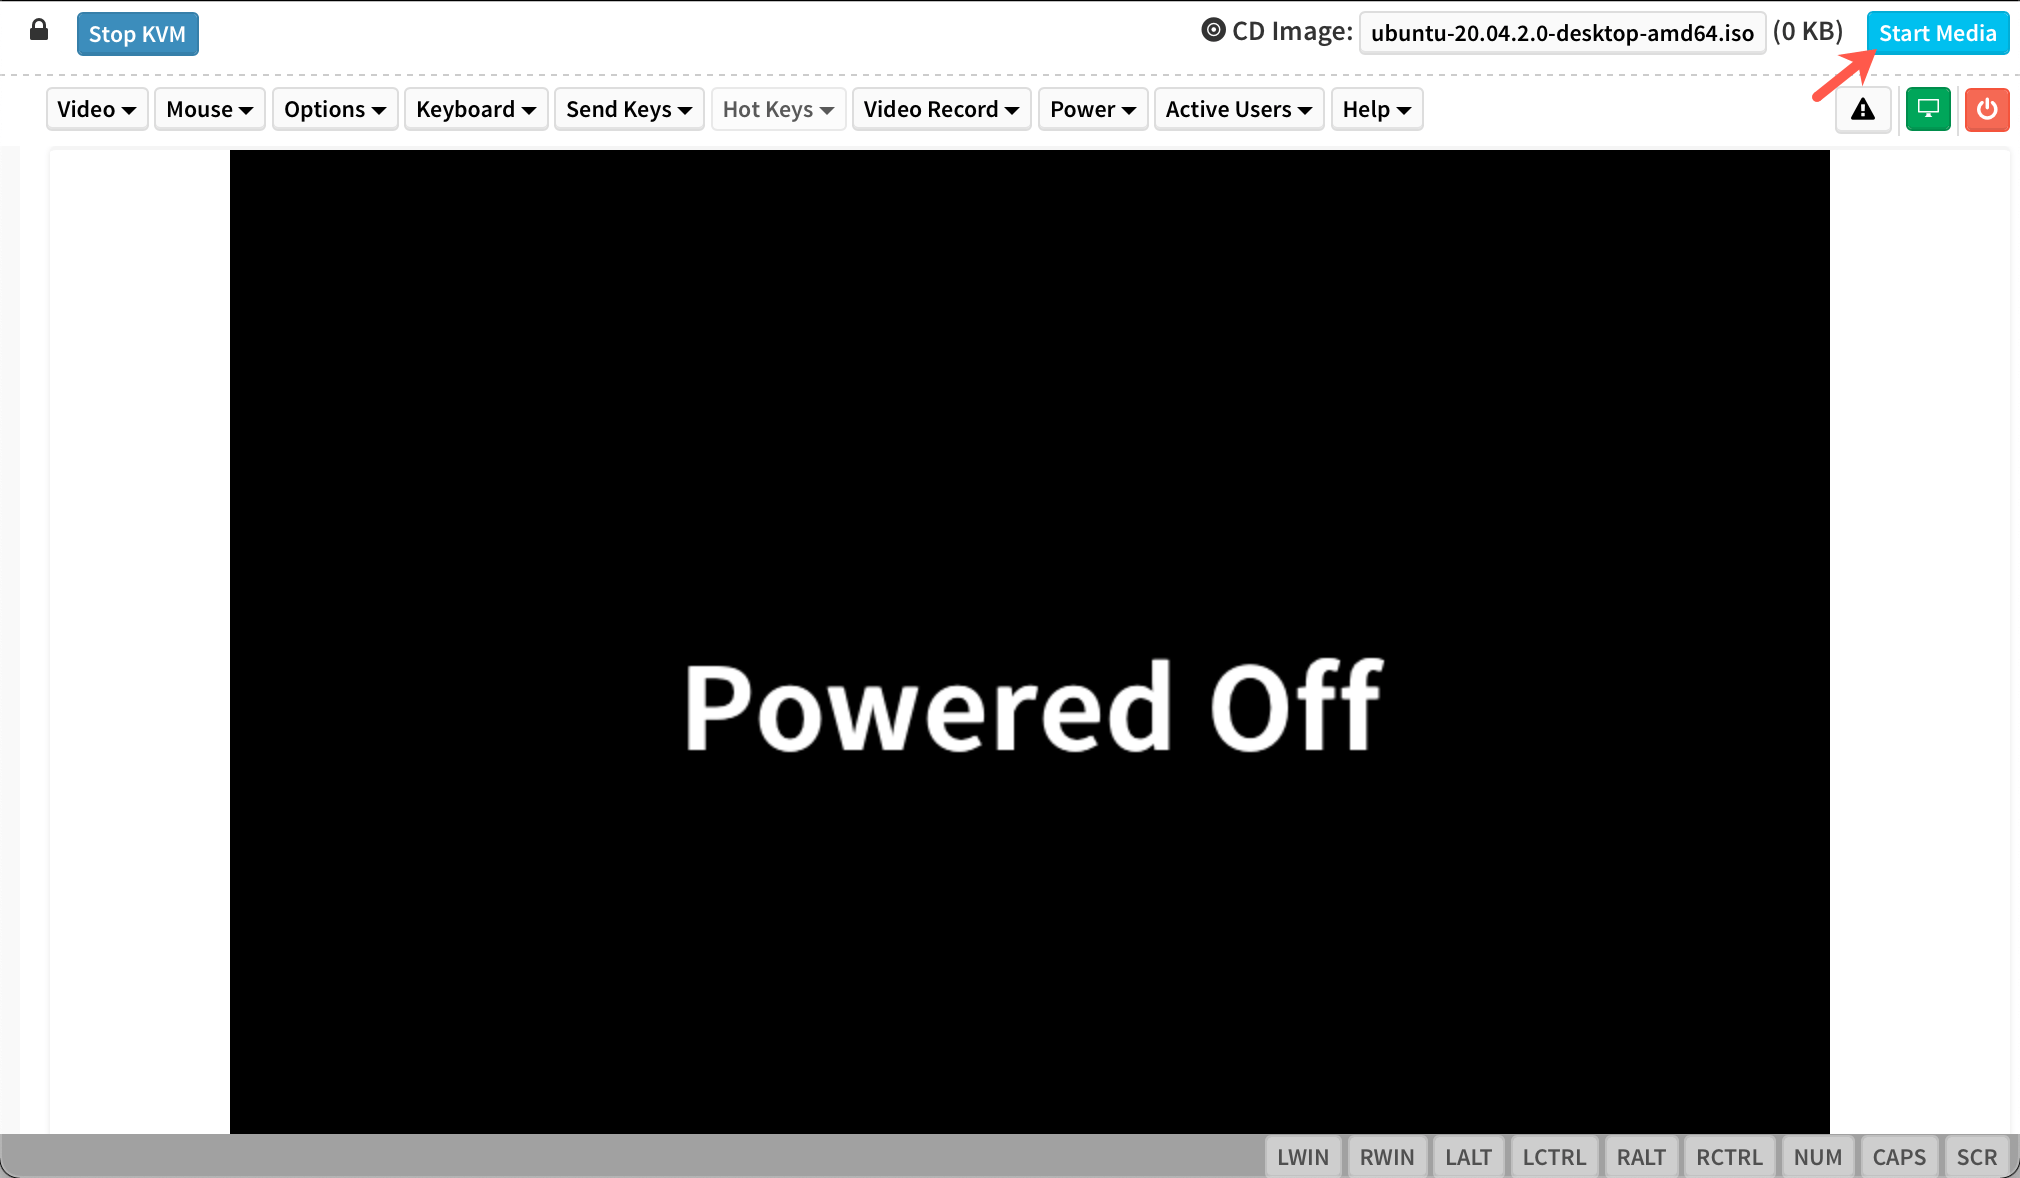
- Click Start Media to mount the virtual drive and reboot the machine:
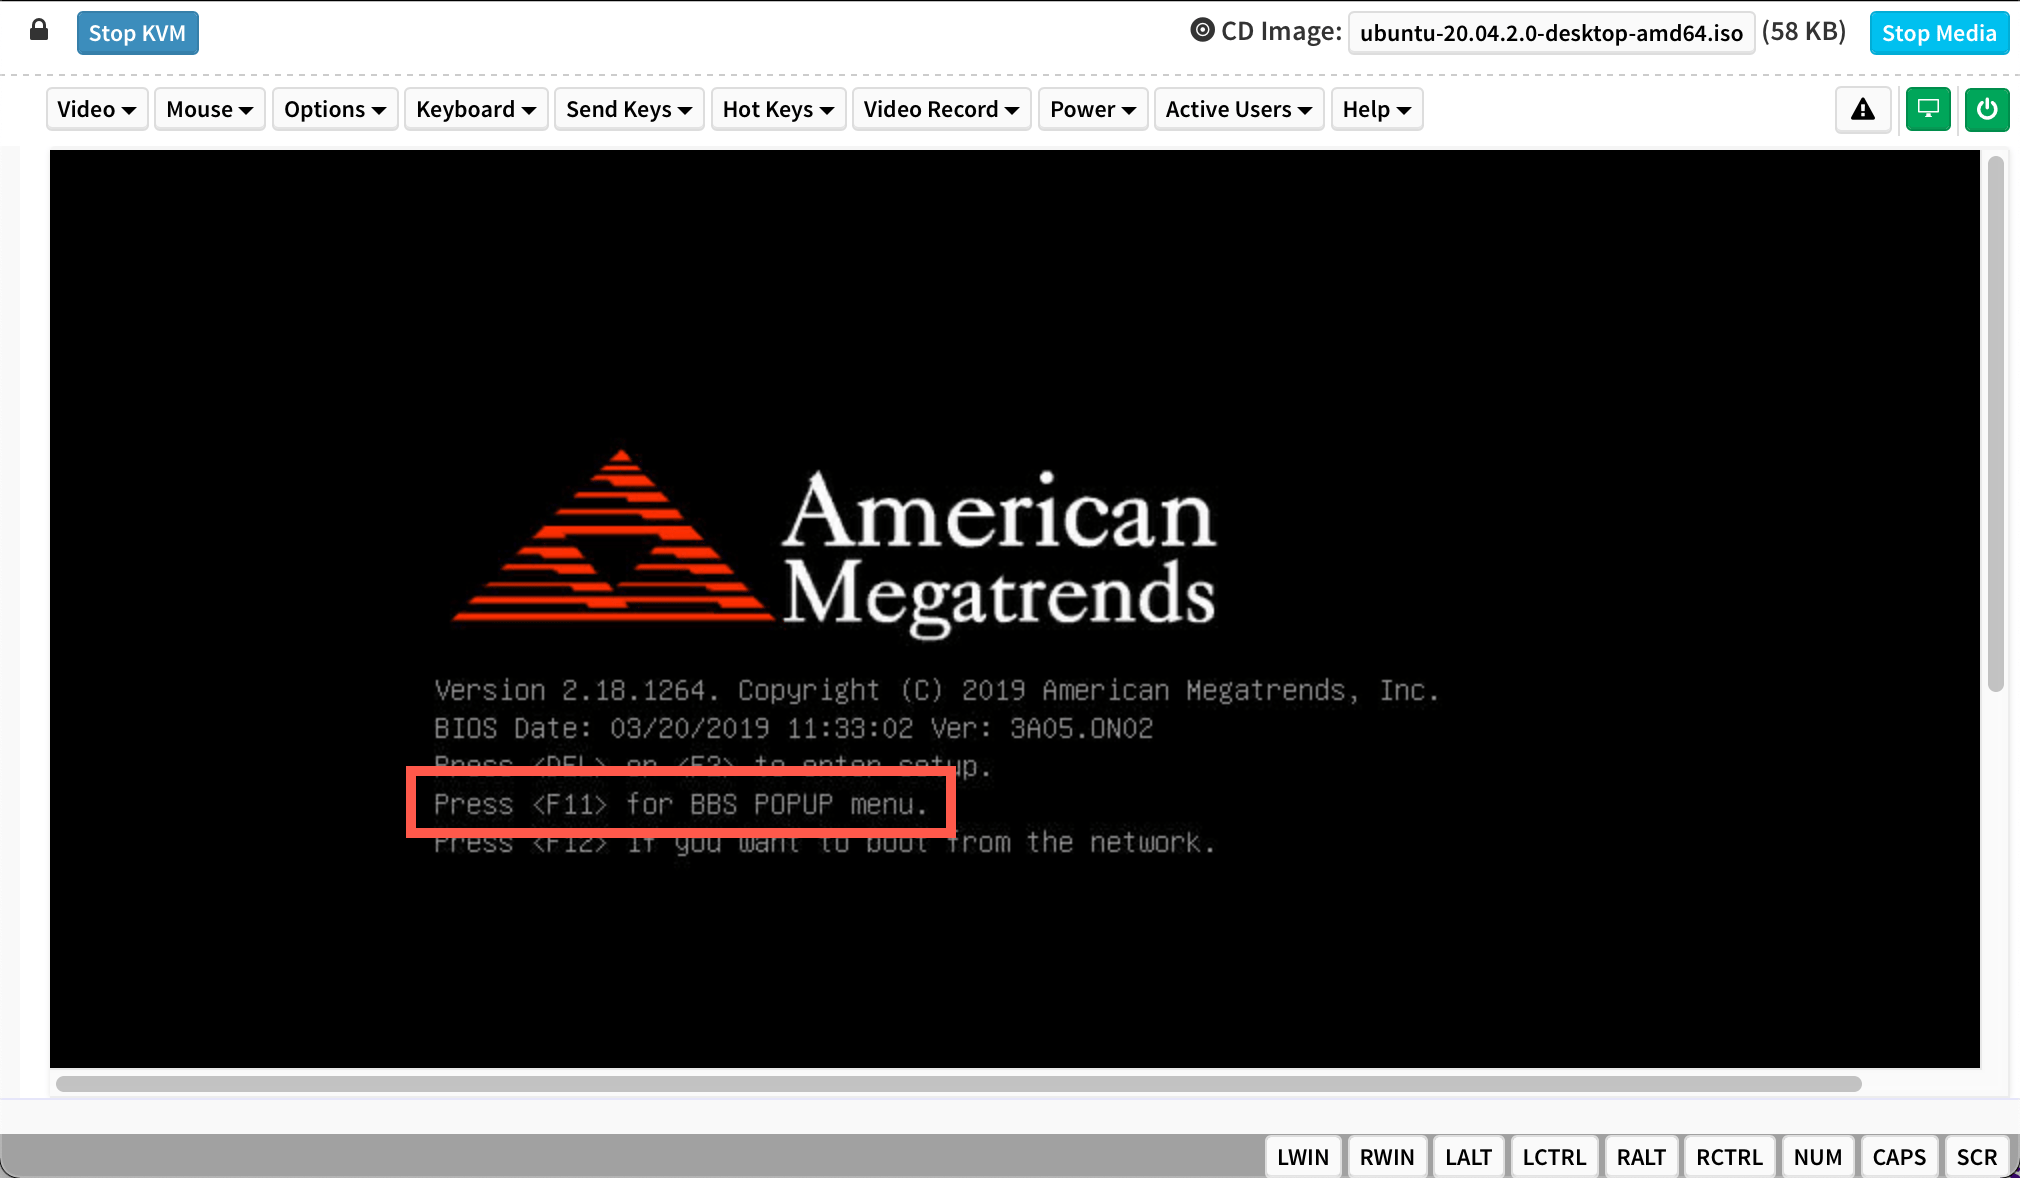
- During the boot process, press F11 to enter the boot menu:
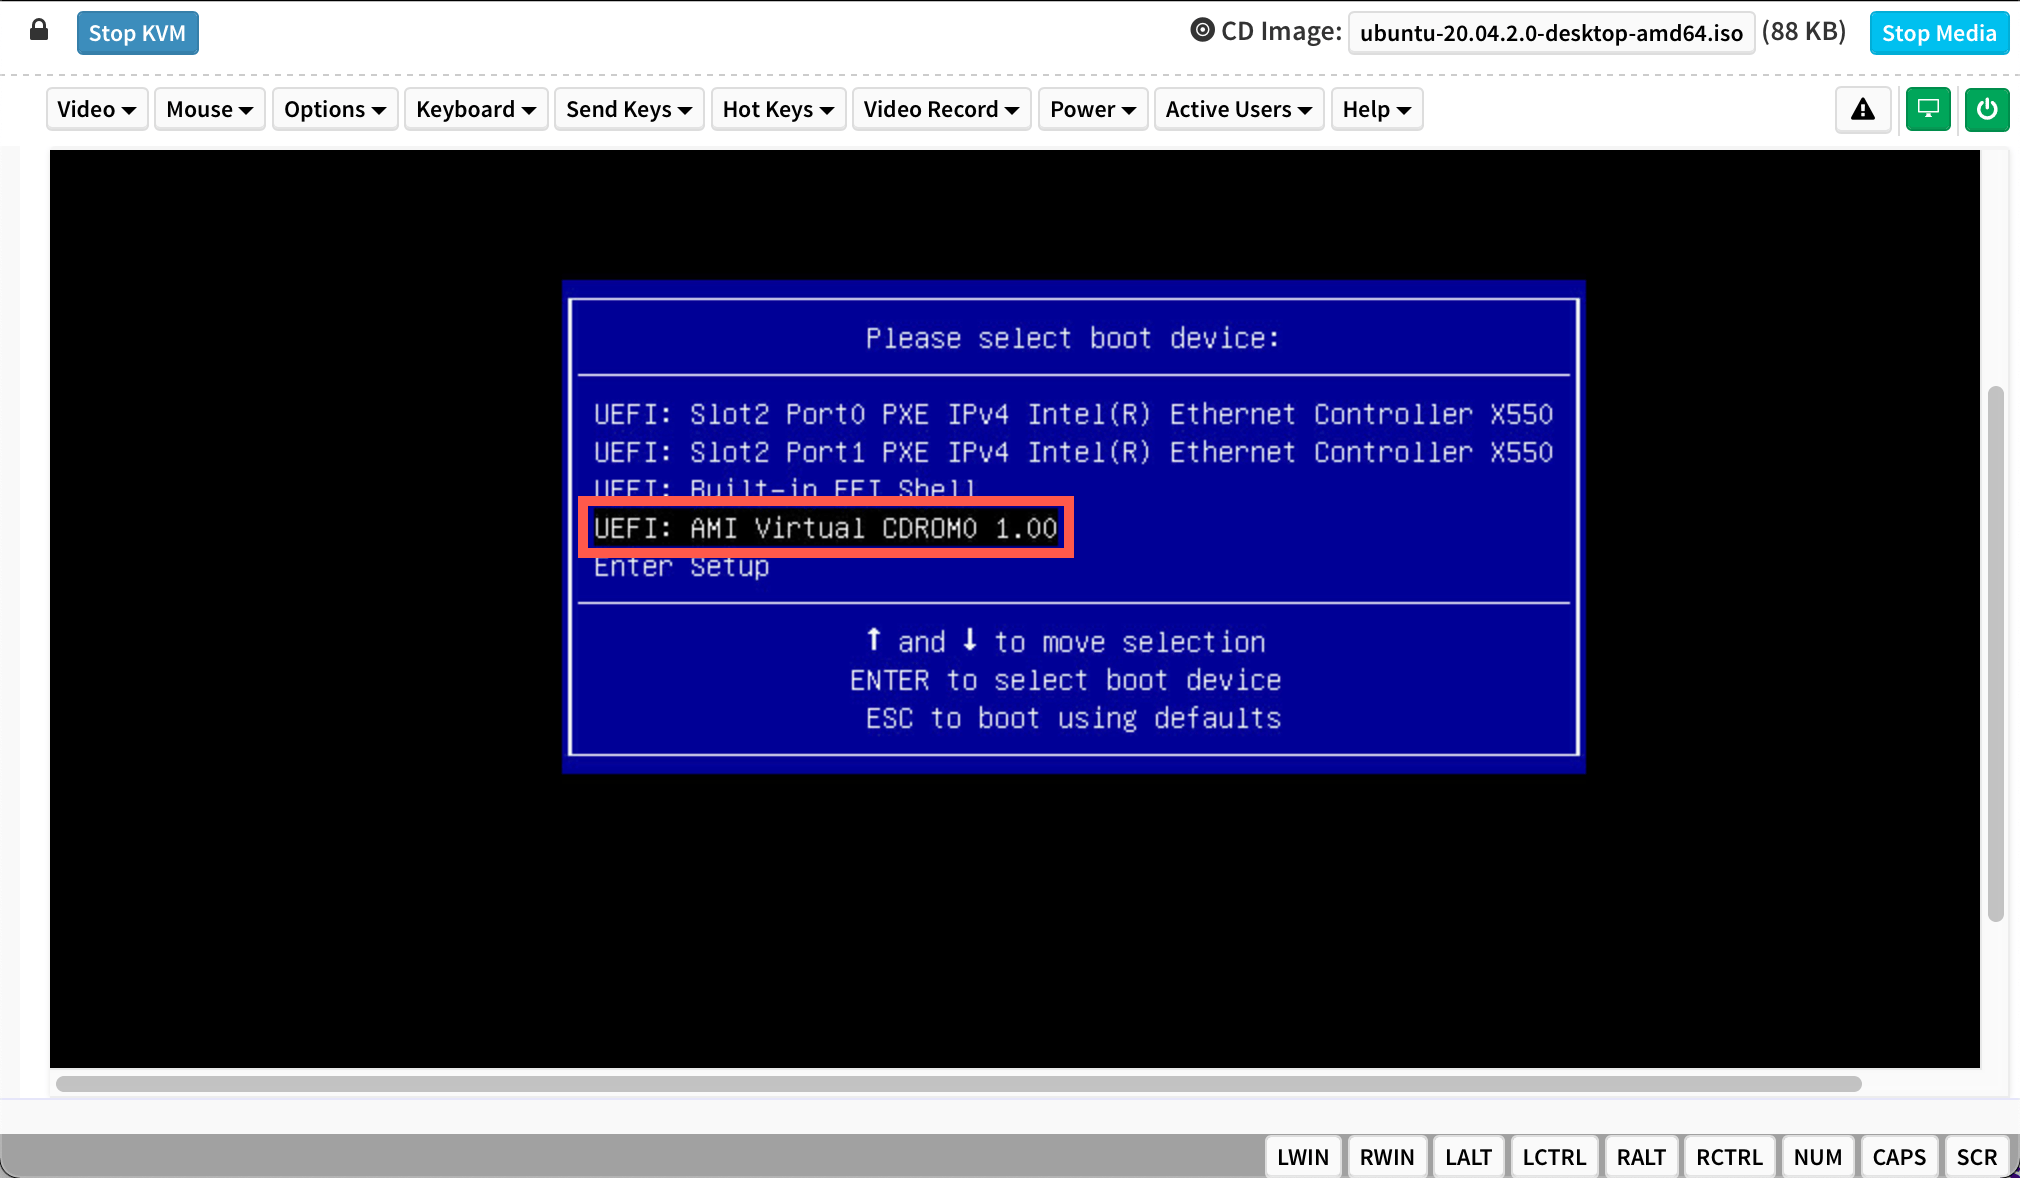
Select the boot device AMI Virtual CDROM0 to boot from the ISO file:
The server will boot into installation mode. Follow the operating system's installation wizard to complete the installation.
See Also
Still need help?Create a support ticket