Installing OpenLiteSpeed with WordPress on Ubuntu or Debian Linux
OpenLiteSpeed combines speed, security, scalability, optimization, and simplicity in one friendly open-source package. The source code of the project is released under the GPLv3 license and available publicly on GitHub.
The application provides a web-based administration interface, compatibility with Apache rewrite rules, as well as customized PHP processing for improved performance.
Before you start
To complete the actions presented below, you must have:
- A Scaleway account logged into the console
- Owner status or IAM permissions allowing you to perform actions in the intended Organization
- An SSH key
- An Instance running on Ubuntu or Debian Linux
- A domain name configured and pointed to your Instance
sudoprivileges or access to the root user
Installing OpenLiteSpeed and PHP8.1
- Start with installing the OpenLiteSpeed repository:
wget -O - https://repo.litespeed.sh | sudo bash - Update the package cache and install OpenLiteSpeed via
apt.apt update && apt install openlitespeed - Install PHP8.1 from the repository using
apt.apt install lsphp81 lsphp81-common lsphp81-curl lsphp81-mysql lsphp81-opcache lsphp81-imap lsphp81-opcache
Setting up MariaDB
-
Start by installing the MariaDB database server via
apt.apt install mariadb-server -y -
Run the setup utility to configure the MariaDB server and set a password for its root user.
mysql_secure_installation -
Connect to MariaDB as
rootuser with the password configured in the previous step.mysql -u root -pThe MariaDB shell displays.
Welcome to the MariaDB monitor. Commands end with ; or \g. Your MariaDB connection id is 49 Server version: 10.1.40-MariaDB-0ubuntu0.18.04.1 Ubuntu 18.04 Copyright (c) 2000, 2018, Oracle, MariaDB Corporation Ab and others. Type 'help;' or '\h' for help. Type '\c' to clear the current input statement. MariaDB [(none)]> -
Create an SQL database for WordPress and grant it the required permissions.
CREATE DATABASE wordpress; GRANT ALL PRIVILEGES ON wordpress.* TO wordpress@localhost IDENTIFIED BY '<a_secure_password>'; -
Leave the MariaDB shell.
exit;
Testing the OpenLiteSpeed installation
- Start OpenLiteSpeed by running the following command:
systemctl start lsws - A test site is running at
http://instance_ip:8088. Open the test site in your browser. You can run different demo applications like a CGI-script, a check of the installed PHP version, password authentication, file upload, and so on.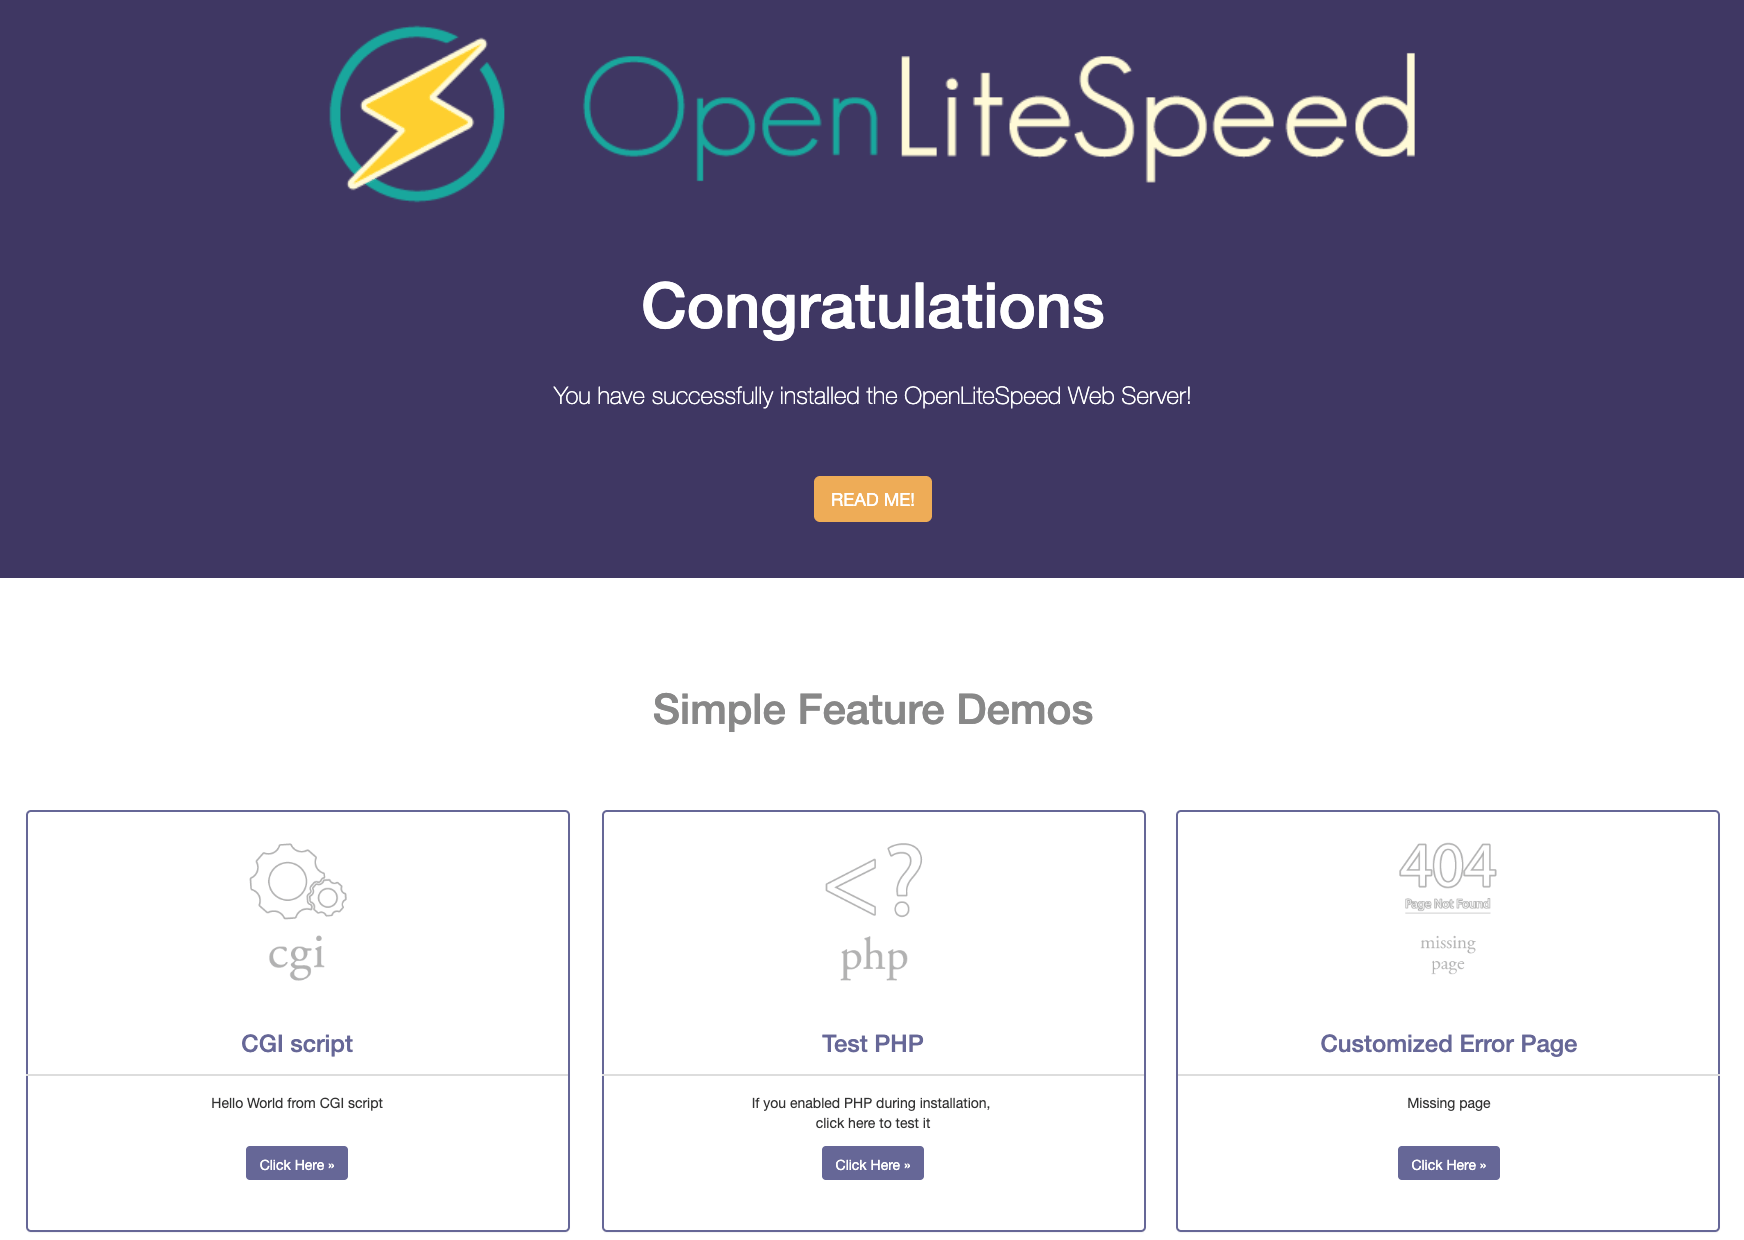
Accessing the OpenLiteSpeed administration interface
Open the administration interface in your web browser at https://instance_ip:7080.
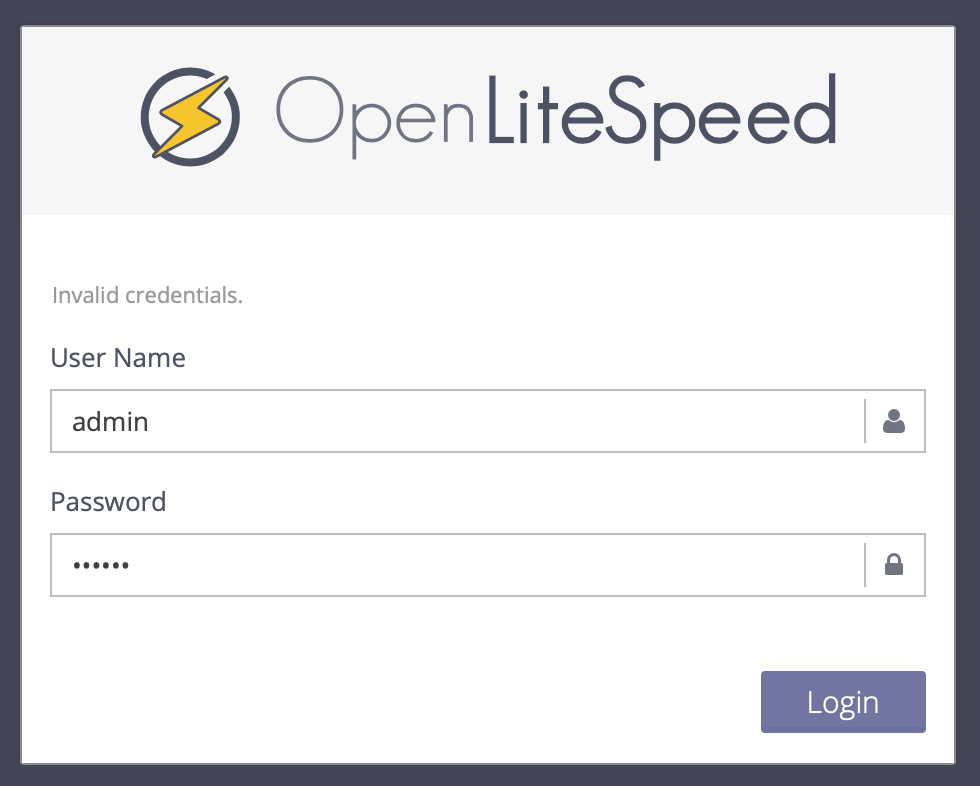
Log in using the following credentials:
- Username:
admin - Password: A randomly generated password is stored in the
/usr/local/lsws/adminpasswdfile.
The administration interface displays.
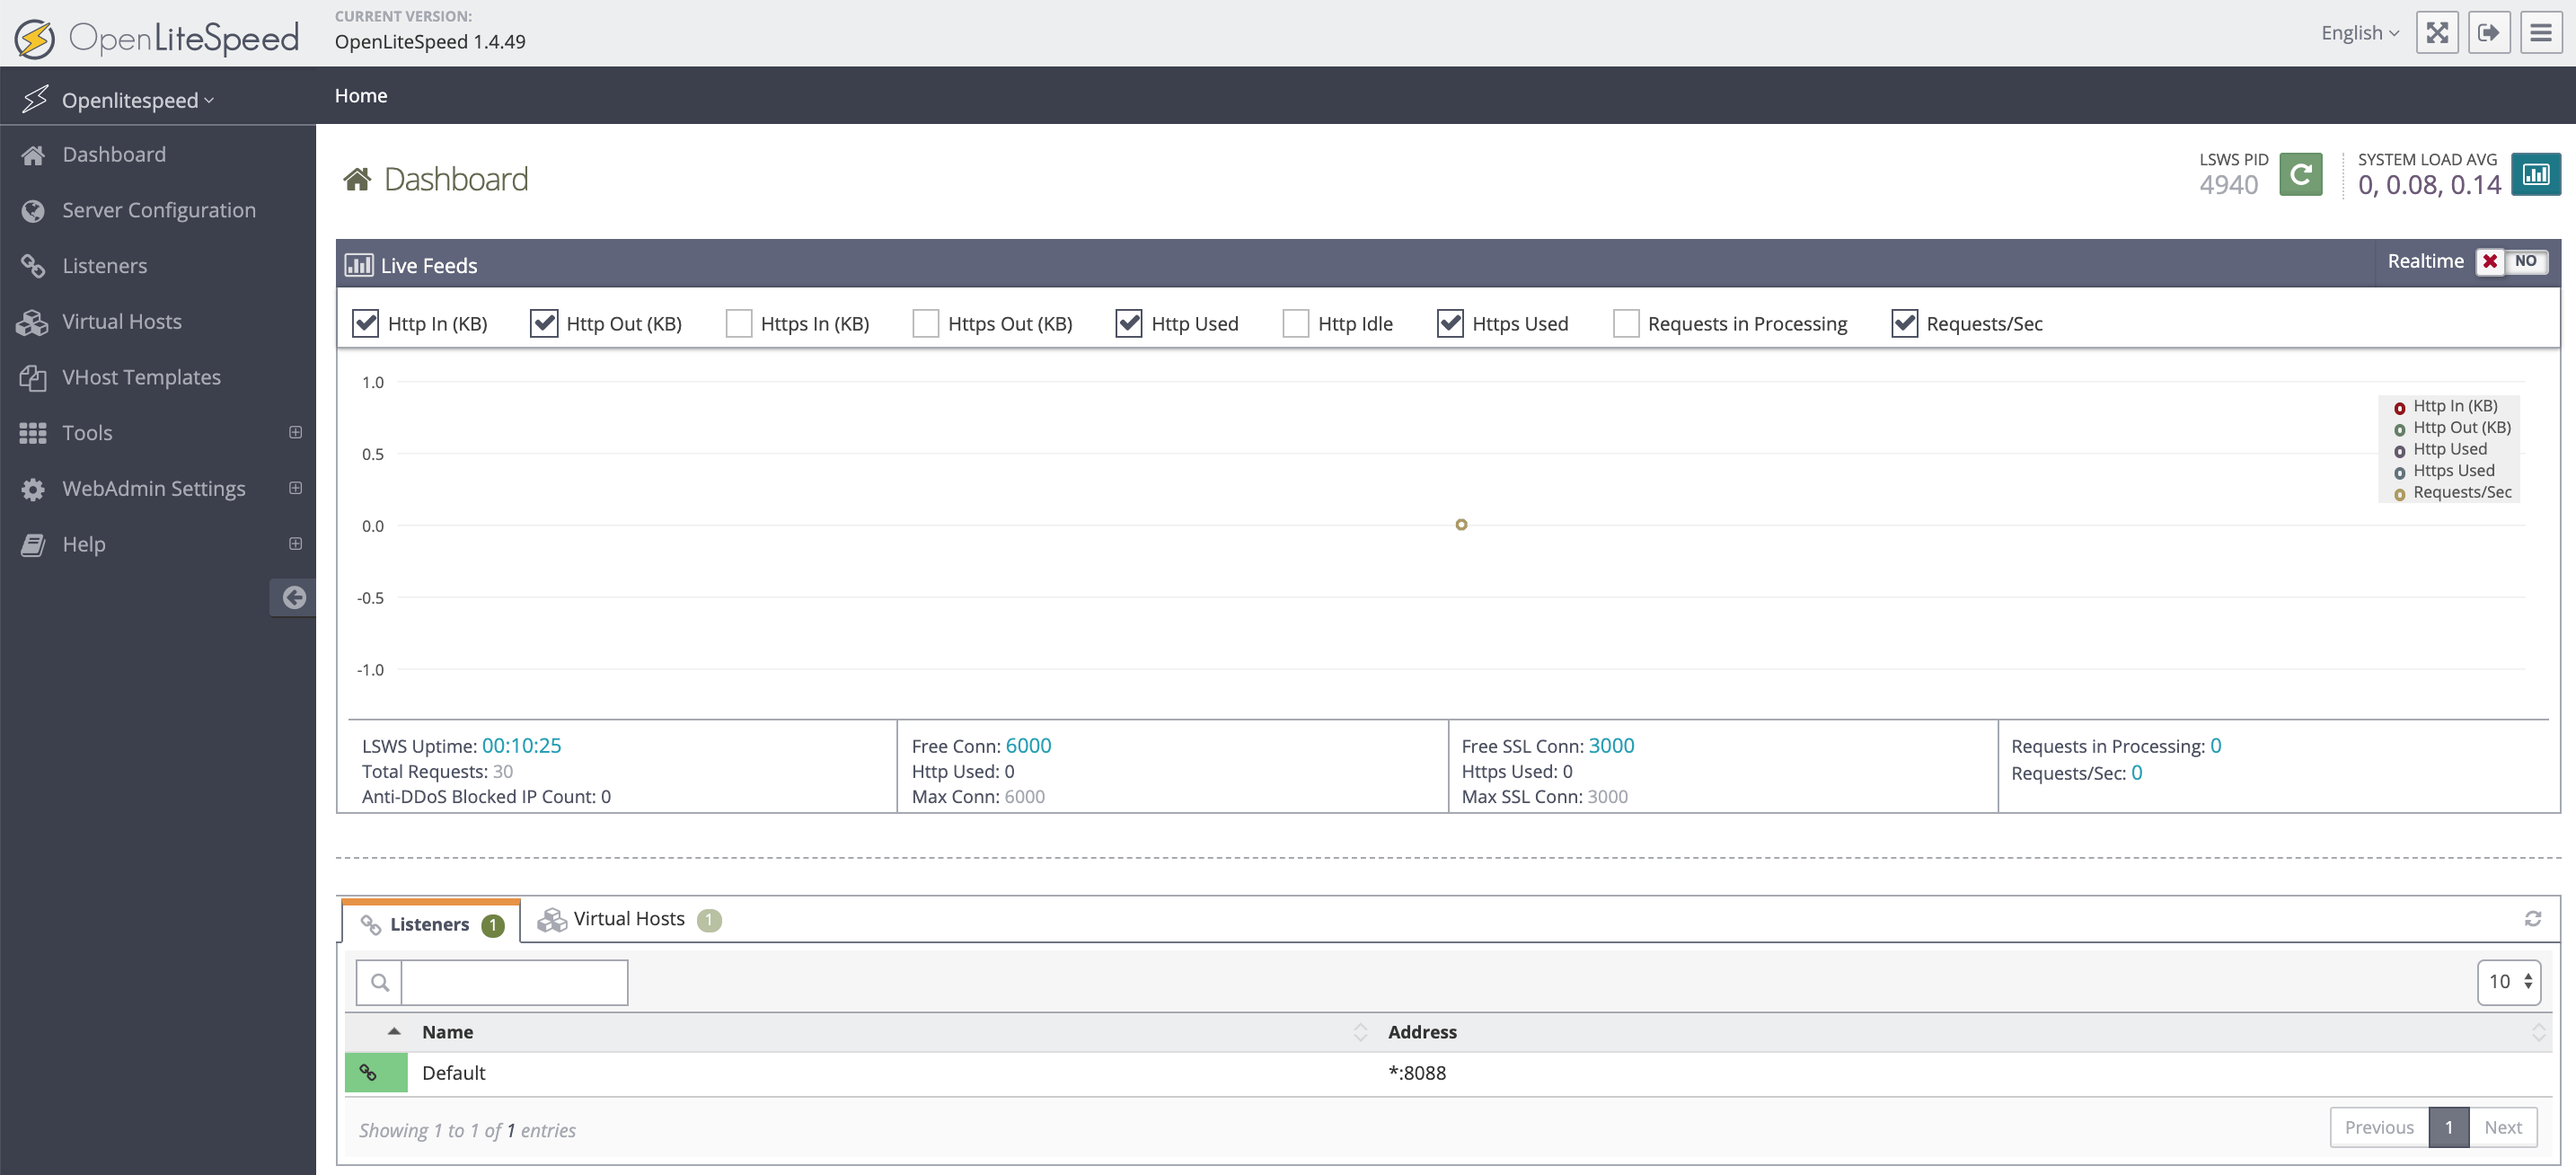
The status of OpenLiteSpeed is visible in the interface and you can configure additional settings.
Creating a virtual host in OpenLiteSpeed
-
Enter the OpenLiteSpeed directory.
cd /usr/local/lsws -
Create a directory structure for the new virtual host. You can name it as you want. In this example, it is called
wordpress.example.com:mkdir wordpress.example.com mkdir wordpress.example.com/html -
Open the OpenLiteSpeed configuration assistant in a web browser and click Virtual Hosts to enter the virtual host configuration. The virtual host list displays.
-
Click + to create a new virtual host.
-
Enter the details of the virtual host and click the disk icon:
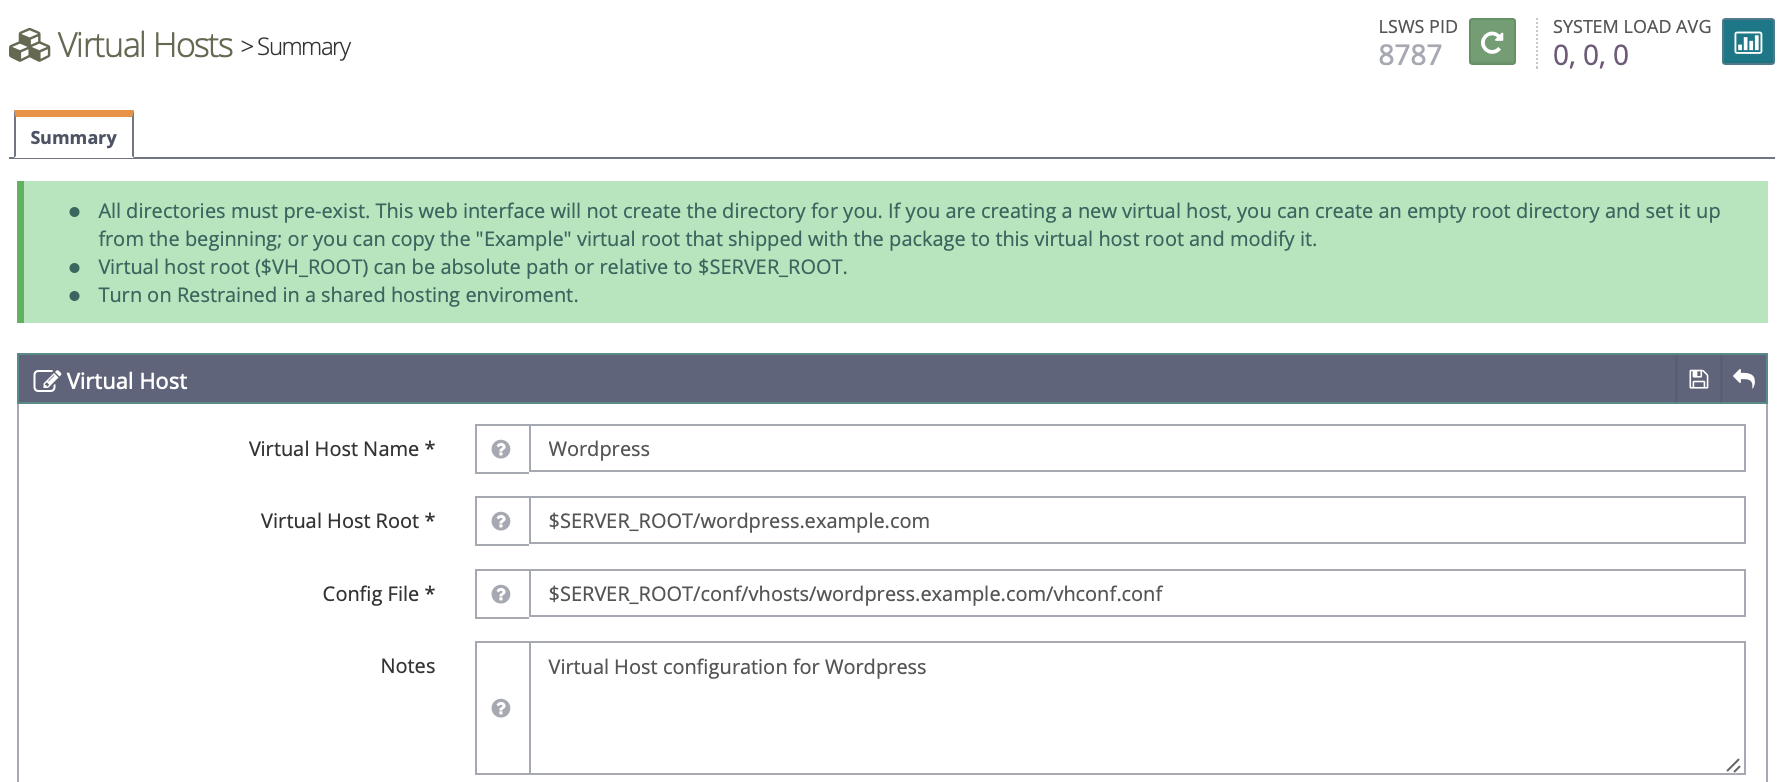
- Virtual Host Name: A unique identifier for the virtual host, i.e.
WordPress - Virtual Host Root: The root directory of the virtual host, i.e.
$SERVER_ROOT/wordpress.example.com - Config File: The path to the configuration file of the virtual host, i.e.
$SERVER_ROOT/conf/vhosts/wordpress.example.com/vhconf.conf
- Virtual Host Name: A unique identifier for the virtual host, i.e.
-
Click Click to create to let OpenLiteSpeed automatically generate a configuration file. As the configuration file is not yet created, OpenLiteSpeed proposes to create a new one. Click the disk icon to save.

-
Go back to the virtual host configuration and click the General tab to configure the Document Root for the virtual host. Click the disk icon to save the configuration once set:

-
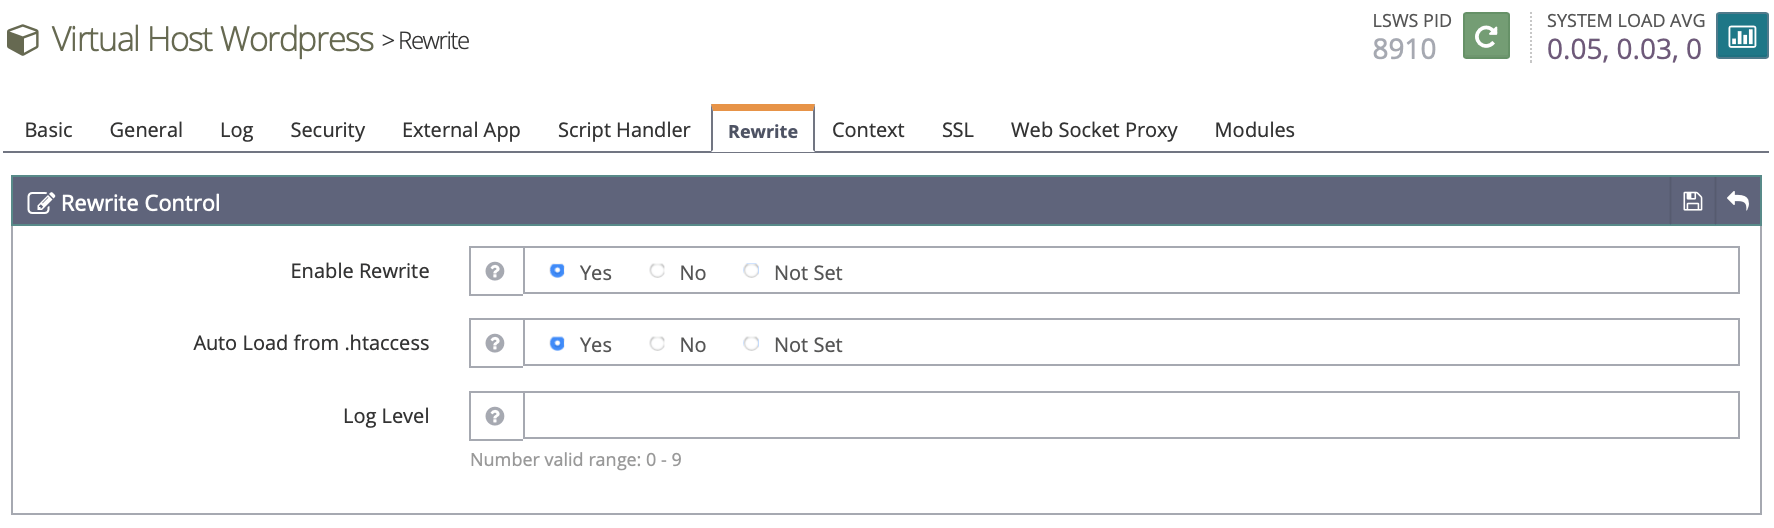
Click the Rewrite tab in the virtual host configuration. Then activate the Enable Rewrite and Auto Load from .htaccess options and save the configuration:
Creating a listener in OpenLiteSpeed
A listener defines the port on which the application launches. To make WordPress available on the standard HTTP port (Port 80), a new listener has to be configured in OpenLiteSpeed.
-
Enter the Listeners section of the administration panel, then click + to configure a new listener:

-
Enter the details of the new listener:
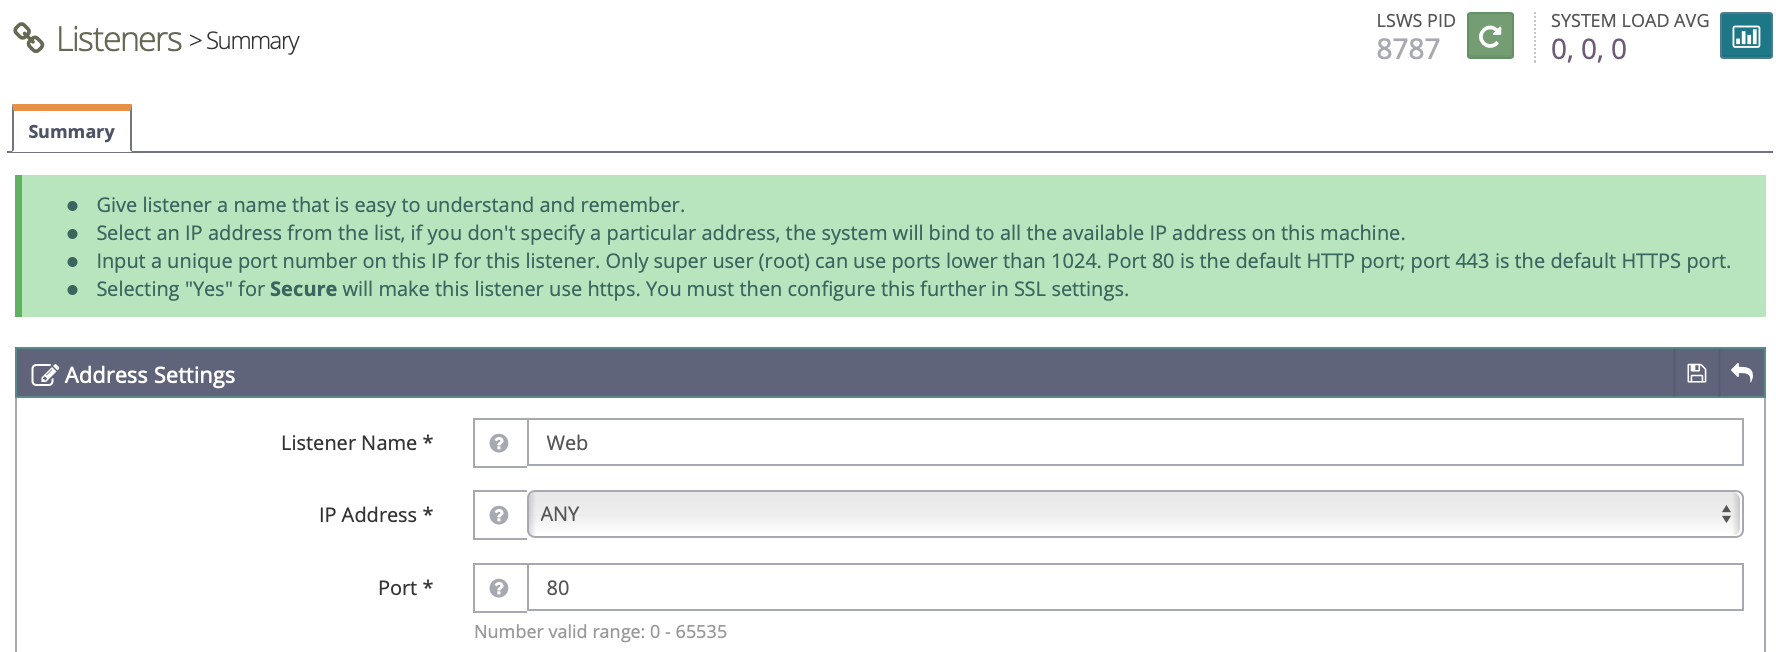
- Name: A name for the listener, i.e.
Web - IP Address: Define an IP address to listen on, or select
ANYto listen on all IP addresses configured on the instance. - Port: Set the port to listen on, i.e.
80to listen on the standard HTTP port - Binding: Choose the OpenLiteSpeed child processes to bind the listener on. Leave the default value to bind the listener to all processes.
- Secure: Select if a secured connection shall be used. A TLS/SSL certificate is required for a secure connection. Set the value to
Noto use plain HTTP. - Notes: This field can be used to add notes to a listener.
- Name: A name for the listener, i.e.
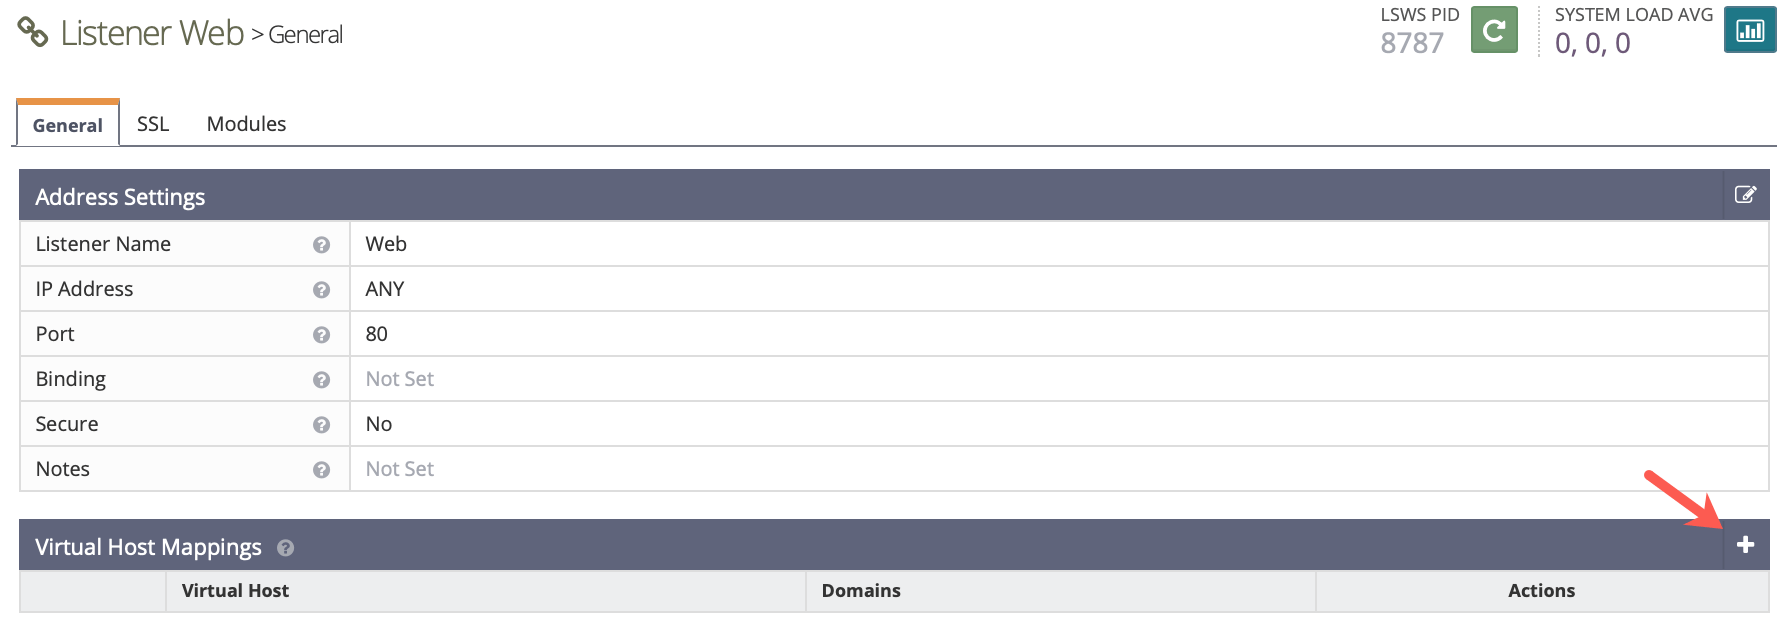
Once all values are set, save the configuration by clicking on the disk icon. 3. Map the listener to a virtual host and set the domain name by clicking on + in the Virtual Host Mappings section:
- Choose the Virtual Host from the drop-down list (i.e.
WordPress) and enter the domain name to use for the virtual host. Once set, click the disk icon to save the configuration: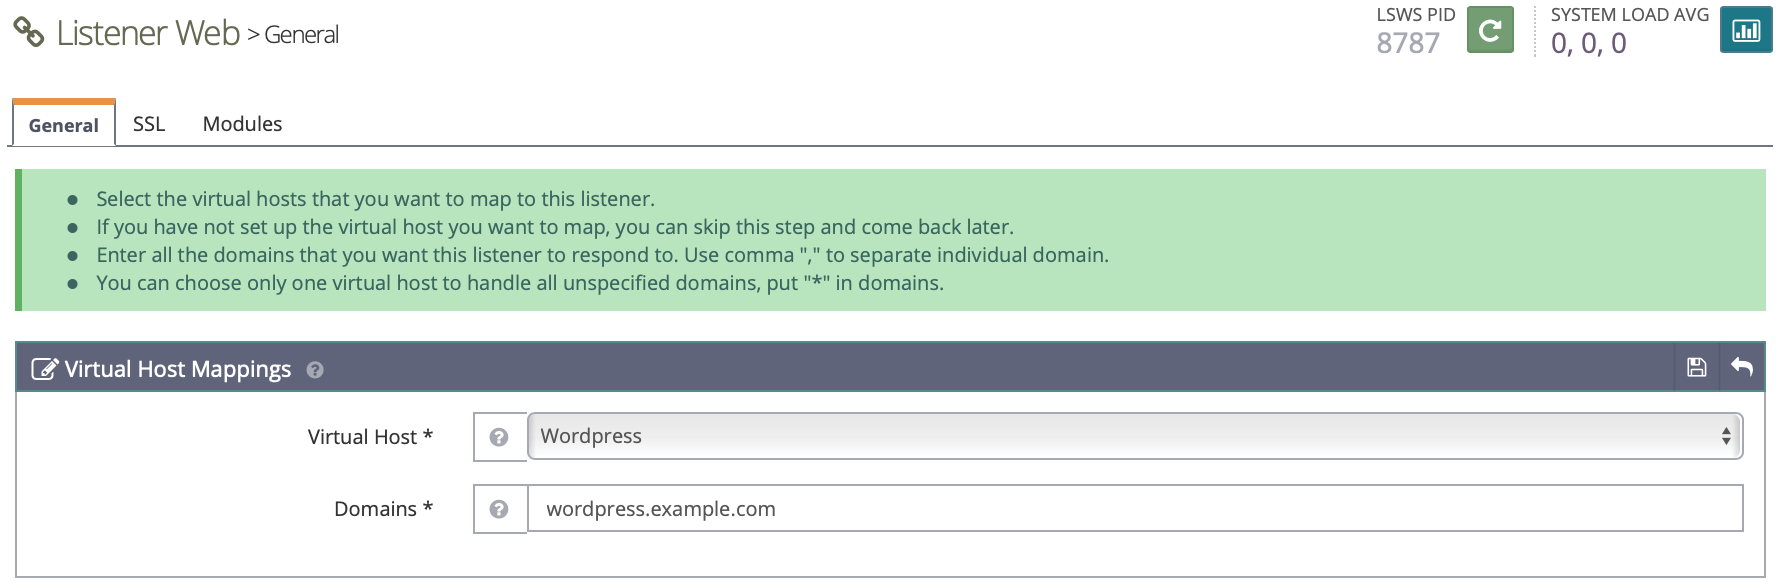
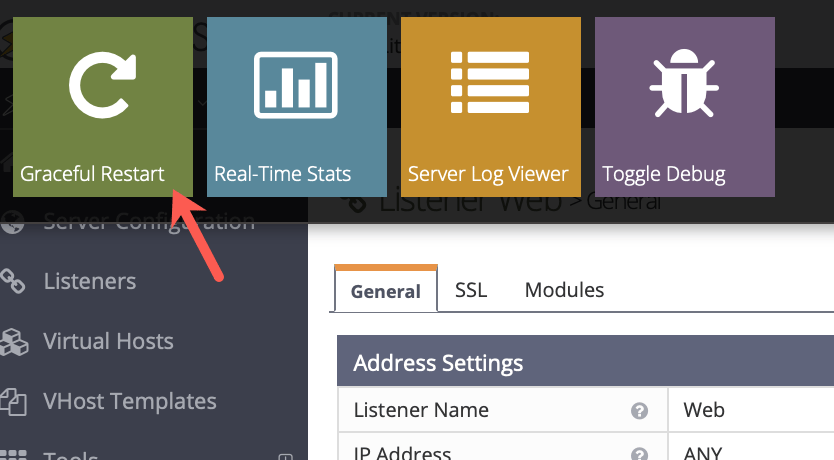
- Launch a graceful restart of OpenLiteSpeed by clicking on the logo, then on the corresponding button:
Downloading and installing WordPress
- Enter the web directory of the virtual host:
cd /usr/local/lsws/wordpress.example.com/html - Download and unpack the latest WordPress release:
wget http://wordpress.org/latest.tar.gz tar xvzf latest.tar.gz - Set the ownership of the WordPress folder and the files within it to the user
nobodyand the groupnogroup. This is required so that OpenLiteSpeed can modify files within this folder:chown -R nobody:nogroup wordpress - Open a web browser and go to
http://instance_ip/wordpress. The WordPress installer displays. Choose the language for your blog and click Continue. WordPress displays some information about the tasks that will be performed by the automatic installer.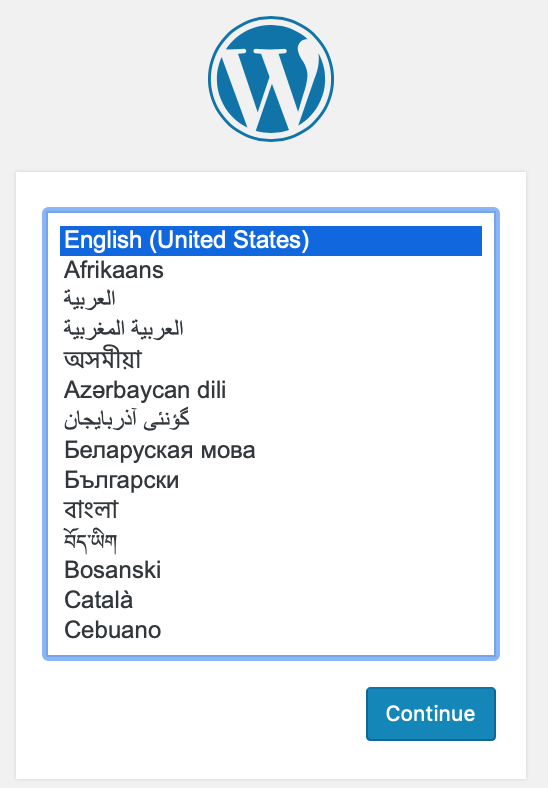
- Click Let's Go to move forward.4. Open a web browser and go to
http://instance_ip/wordpress. The WordPress installer displays. Choose the language for your blog and click Continue. WordPress displays some information about the tasks that will be performed by the automatic installer. - Click Let's Go to move forward.
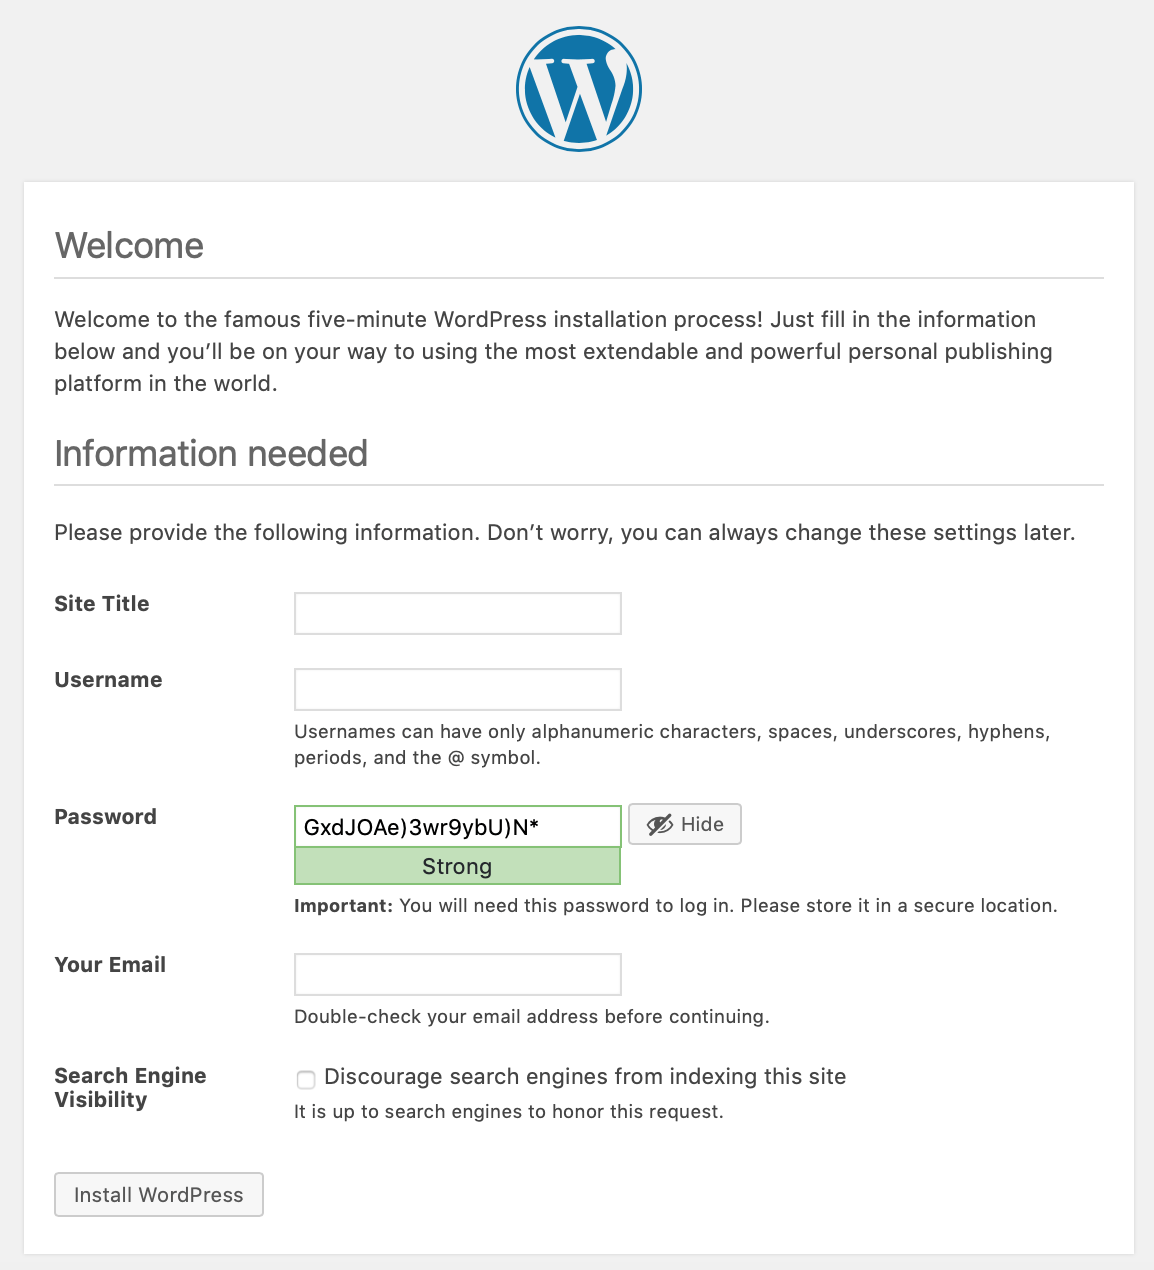
- Enter the details of your blog and click Install WordPress to launch the installation:
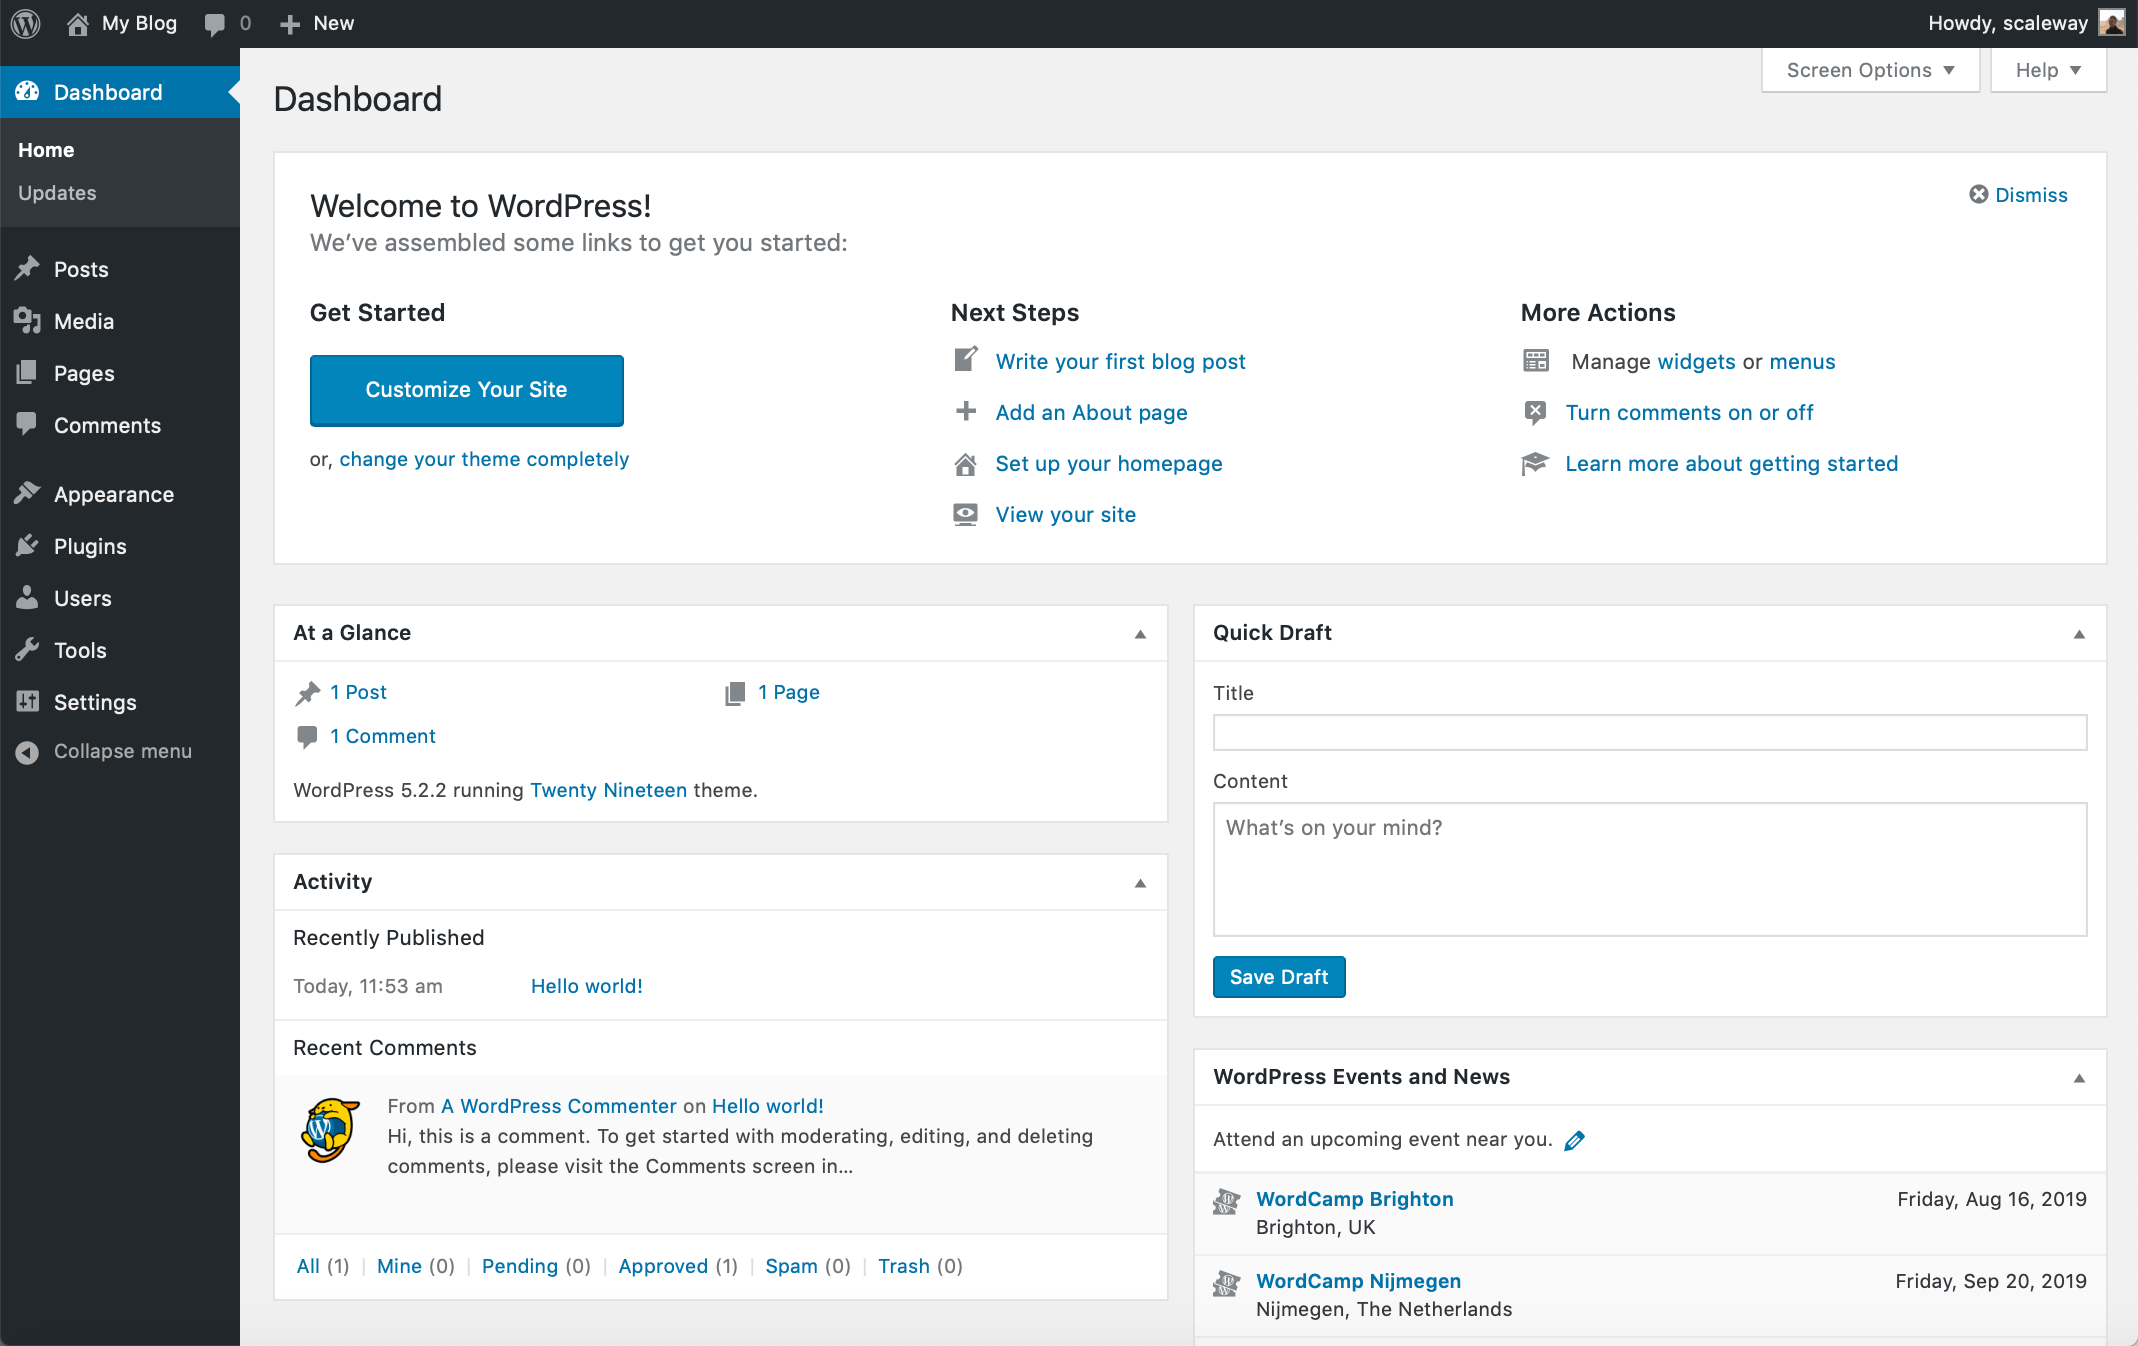
- Log in to WordPress to begin writing your blog:
You now have successfully configured a basic setup of OpenLiteSpeed and installed a WordPress blog on it. For more information about OpenLiteSpeed, refer to the official documentation.
Visit our Help Center and find the answers to your most frequent questions.
Visit Help Center