One-click OpenVPN deployment on Scaleway Instances using InstantApp
OpenVPN is an open-source software application that allows you to create Virtual Private Network (VPN) connections, to securely access the internet from a remote connection.
The OpenVPN InstantApp is a fast and simple way to protect your online privacy and surf anonymously.
OpenVPN InstantApp comes with:
- An Ubuntu 22.04 base operating system
- an OpenVPN server
- a client configuration tool to set up your client
Before you start
To complete the actions presented below, you must have:
- A Scaleway account logged into the console
- Owner status or IAM permissions allowing you to perform actions in the intended Organization
- An SSH key
- Installed a VPN client on your local machine
- Click Instances in the Compute section of the side menu. The Instances page displays.
- Click Create Instance. The Instance creation wizard displays.
- Choose the OpenVPN image in the InstantApps tab:
- Follow the remaining steps to create your Instance.
Create a VPN user
- Connect to your Instance via SSH. You see the following message:
###############################################################################
#                      SCALEWAY OPENVPN INSTANTAPP                            #
###############################################################################

You may run the scw-ovpn command to manage your OpenVPN service.

    $ scw-ovpn help

Read our tutorial: https://www.scaleway.com/en/docs/tutorials/openvpn-instant-app-
Run the
scw-ovpn statuscommand to check if your OpenVPN server is ready:root@scw-charming-haibt:~# scw-ovpn status Your server is done configuring ! You can now start using it. Take a look at what scw-ovpn features: scw-ovpn -
Check the features of the
scw-ovpntool.root@scw-942e6e:~# scw-ovpn This wrapper helps you manage your openvpn server. Use these commands to create an user and get a link to its configuration: scw-ovpn create MYUSER scw-ovpn serve MYUSER If you do not want to transfer your configuration over cleartext HTTP, type this command on your own machine: ssh root@51.15.51.220 scw-ovpn show MYUSER > MYUSER.ovpn You could also copy-paste the output of: scw-ovpn show MYUSER Or even use port forwarding to tunnel your requests to the port the http server listens on when running 'scw-ovpn serve ...'. Choose the way you like and understand ! scw-ovpn status shows the status of the initial openvpn configuration scw-ovpn create CLIENTNAME create a new certificate with name CLIENTNAME scw-ovpn list list all available and revoked clients in separate lists scw-ovpn revoke CLIENTNAME revoke the certificate for CLIENTNAME. This client will not be able to connect afterward. scw-ovpn show CLIENTNAME shows the openvpn config file for client CLIENTNAME scw-ovpn serve CLIENTNAME starts an HTTP server you can download your openvpn client configuration from scw-ovpn add-instance PROTOCOL PORT ID add an openvpn instance listenning on PORT with PROTOCOL. protocol must be one of udp and tcp. scw-ovpn del-instance ID removes the openvpn instance with subnet id ID scw-ovpn list-instances list all running openvpn Instances -
Run the following command to create a new openvpn user:
scw-ovpn create CLIENTNAMEIt will automatically generate the configuration for the client
CLIENTNAME. -
Download the configuration file from your server either via SSH or by starting an HTTP server that provides a
URLto download the files directly on your computer.scw-ovpn serve CLIENTNAMEroot@scw-942e6e:~# scw-ovpn serve ovpn You can now download the openvpn client configuration at : > > http://51.15.51.220:4242/69a24160-0a77-11e8-b599-5b914f6cdb17/ovpn.ovpn > > > > > Press ENTER to stop serving the config file > > > Serving HTTP on 0.0.0.0 port 4242 ... > > > -
Download the configuration file from the
URLdisplayed in the MOTD. We assume that you have already installed a VPN client. -
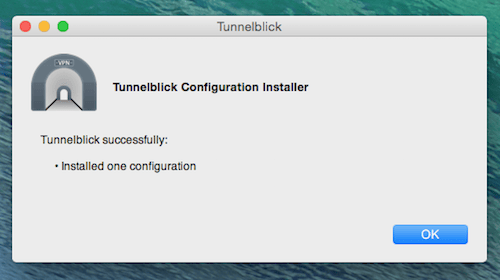
Open the configuration with your VPN client.

-
Start a new connection using the VPN profile we just installed once the configuration is loaded.

You are now connected and all your traffic is routed through the OpenVPN server. Check that your public IP matches the public IP of the server to ensure your configuration is correct.
Visit our Help Center and find the answers to your most frequent questions.
Visit Help Center