Organizations and Projects - Quickstart
When you create a Scaleway account, an Organization, of which you are the Owner, is created for you.
An Organization is made of one or several Projects that contain your resources. This page helps you get started with using Projects and managing your resources.
How to generate an SSH key
To establish connections with Instances, Elastic Metal servers, and Mac minis, you must generate an SSH key for your Project. Creating and uploading the SSH key to your Project before resource creation has the advantage of prompting you to associate the uploaded SSH key with the resource during the creation process. This simplifies the management of SSH access for you.
Before you start
To complete the actions presented below, you must have:
- A Scaleway account logged into the console
- Owner status or IAM permissions allowing you to perform actions in the intended Organization
SSH keys allow you to securely connect to your Instances without using a password.
You can generate the SSH key pair on your local machine. The process will depend on your operating system.
How to generate an Ed25519 SSH key pair on macOS and Linux
On macOS and Linux, you can generate the SSH key pair directly from the terminal.
-
Open the terminal application by clicking on the corresponding icon.
-
Type the following command and press Enter to generate a new key:
ssh-keygen -t ed25519 -C "login@example.com" -
When prompted to enter a file path in which to save the key, either specify a path or press Enter to accept the default location (
~/.ssh/id_ed25519).Enter file in which to save the key (~/.ssh/id_ed25519): -
Enter a passphrase when prompted. This step is optional but recommended for increased security. If you do not want to set a passphrase, press Enter directly.
Enter passphrase (empty for no passphrase): -
Confirm the passphrase by entering it again when prompted, and press Enter:
Enter same passphrase again:The key pair will be generated in the specified filepath. The key pair consists of:
- The public key, named
id_ed25519.pub - The private key, named
id_ed25519
- The public key, named
-
Display the content of the public key with the following command and copy it:
cat ~/.ssh/id_ed25519.pub -
Copy the content of the public key displayed. You will need this in the next step. It should look something like this:
ssh-ed25519 AAAAC3NzaC1lZDI1NTE5AAAAINPZxtCMs5sIfsMWpq7SHuqFFpBtSTmFqXWOYdf6dX4i login@example.com
How to generate an Ed25519 SSH key pair on Windows
On Windows, you can use the third-party application PuTTYgen to generate an SSH key pair.
-
Download and install PuTTY on your local computer. The PuTTYgen application is automatically installed along with the main PuTTY application.

-
Launch PuTTYgen by double-clicking the application icon.
-
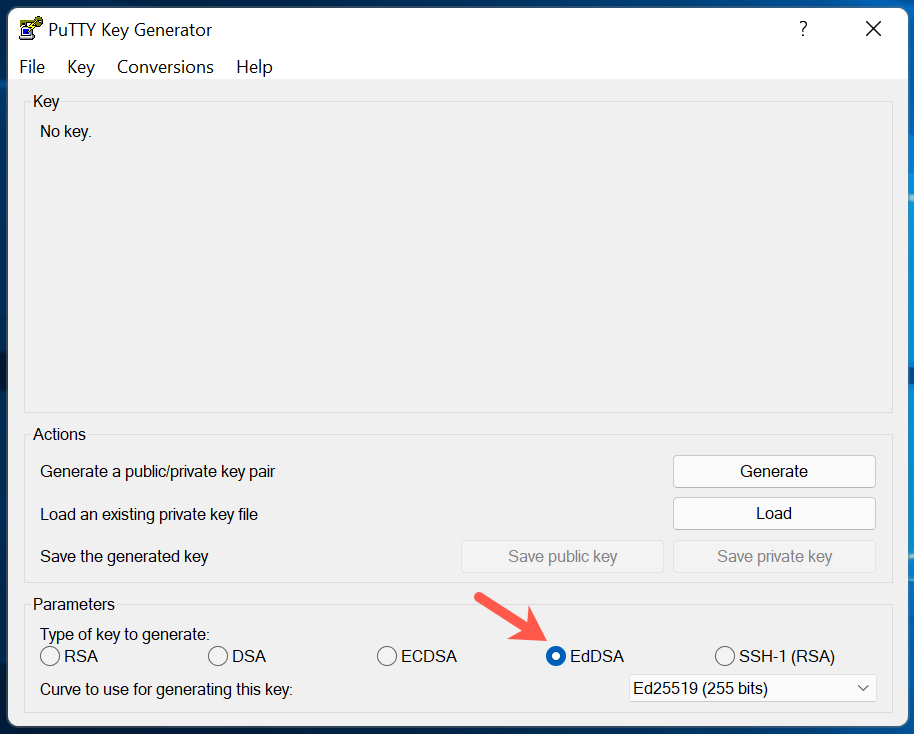
Select EdDSA and click the Generate button. You can also add a passphrase before generating the key to increase security.
-
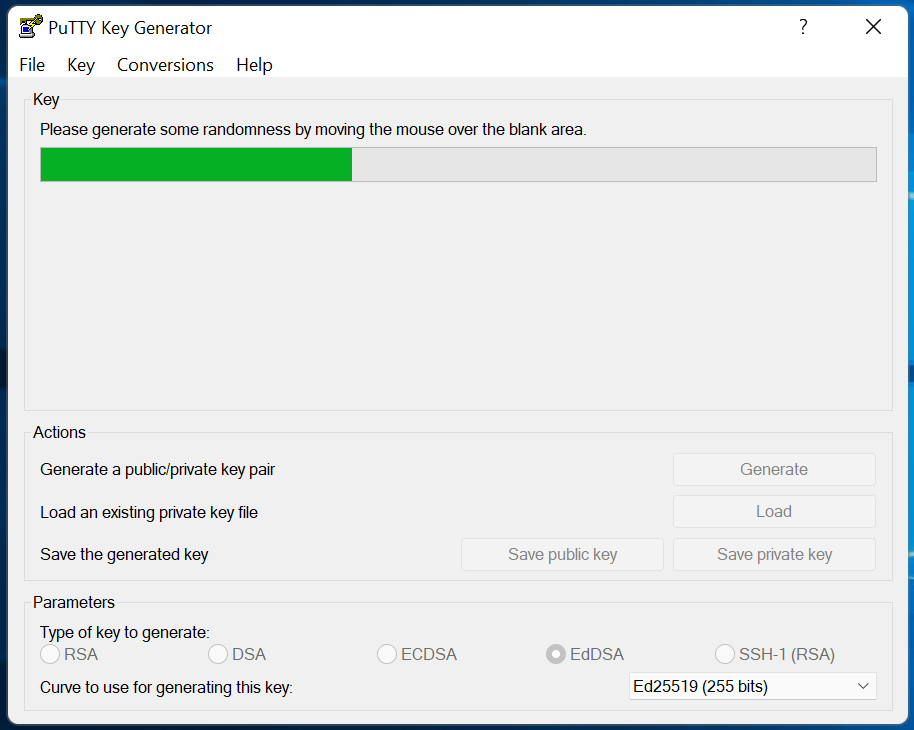
Move the mouse around the blank area as instructed to generate randomness.
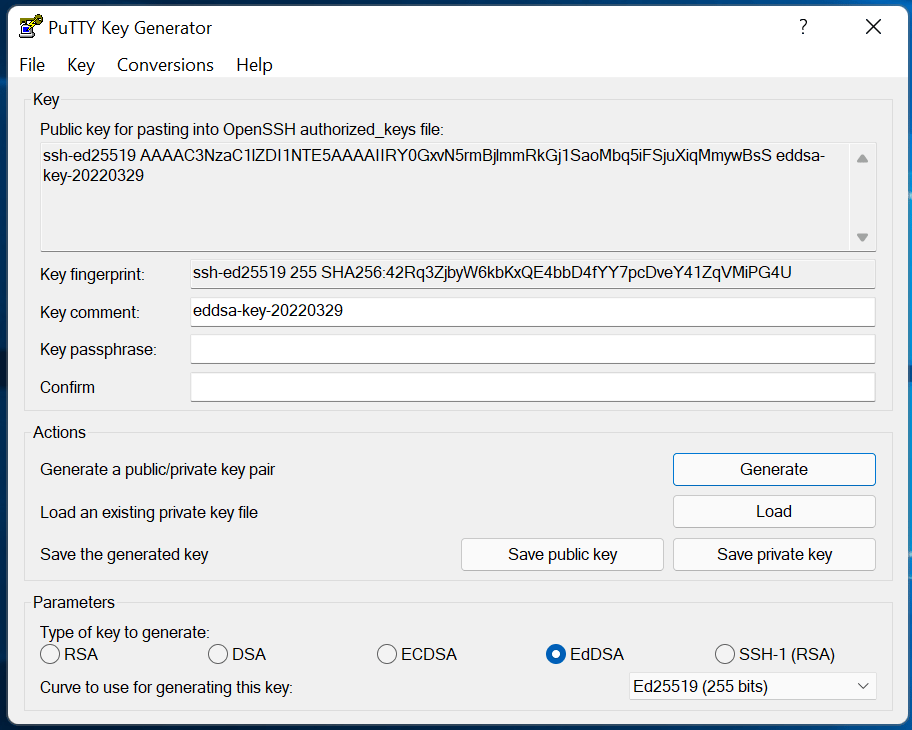
The public and private key are generated, and the following screen will display:
-
Complete the steps on the screen to finish:
- Fill in the Key comment field with a name to help you identify this key pair.
- Click the Save public key button and save it in the folder of your choice.
- Click the Save private key button to save it in the same folder.
- Select the content of the public key (the sequence of characters under "Public key for pasting into OpenSSH authorized_keys file") and copy it, as you will need this in the next step.
How to upload the public SSH key to your Scaleway Project
You must upload the content of the public part of the SSH key pair you just created to the Scaleway interface. This is then associated with your Project and can be transferred to your Instances during the boot process.
-
From the Scaleway console, navigate to the Credentials tab of your Project dashboard.
-
Scroll down to the SSH key section, and click Add a new SSH key.
-
Paste the content of the public key (which you copied in the previous step) into the pop-up box, and optionally add a description. Then click Add an SSH key.
You will now be able to connect to your Instances via SSH
How to add resources to your Project
To add a new resource to your Project, first ensure you are currently editing the correct Project.
-
Click Project Dashboard in the Scaleway console side menu to check if you are logged in the correct Project.
-
You can also check if the name of your Project appears in the Selected Project drop-down menu.
-
Select the resource you want to create from the console side menu.
-
Click the resource and follow the deployment instructions.
Once the resource is created, it is automatically included in your Project.