Transactional Email - Quickstart
Transactional Email is a platform that allows Scaleway clients to send transactional emails with high quality deliverability.
In this quickstart, we show you how to configure your domain with Transactional Email, how to add SPF, DKIM and MX records to your domain, and how to delete your domain.
Before you start
To complete the actions presented below, you must have:
- A Scaleway account logged into the console
- Owner status or IAM permissions allowing you to perform actions in the intended Organization
- A domain name
How to configure your domain with Transactional Email
- Click Transactional Email in the Domains & Web Hosting section of the console side menu. The Transactional Email overview page displays.
- Click Select a plan. The Transactional Email creation wizard displays.
- Select a plan. Two plans are available:
- Essential - pay-as-you-go plan designed for occasional or low-volume email sending needs. This plan offers simplified management and a single webhook per domain.
- Scale - fixed-price plan tailored for high-volume email sending. Includes 100K emails. Additional emails are charged. This plan includes a dedicated IP address and unlimited webhooks per domain. It also features advanced blocklist management, allowing for manual additions.
- Click Choose a plan and add a domain.
- Select whether to Use a Scaleway domain or Add a domain external to Scaleway.
- Enter the domain name you want to use with Transactional Email.
- Click Validate domain name to confirm.
How to add SPF and DKIM records to your domain
After you have configured your domain with Transactional Email, you are prompted to verify your domain by adding SPF, DKIM and MX records. You can choose to do so right after you have validated your domain, or at a later time.
-
Click Transactional Email in the Domains & Web Hosting section of the console side menu. Your newly-added domain displays.
-
Click your domain. You are redirected to the SPF, DKIM and MX configuration page.
-
Copy the value that applies to your case to add an SPF record.
-
Add a
TXTrecord type in the root zone of your domain on your DNS zone. -
Paste the value you have copied in the root zone of your domain.
-
Add an additional
TXTtype record in the root zone of your domain on your DNS zone. -
Copy the name that displays in the console.
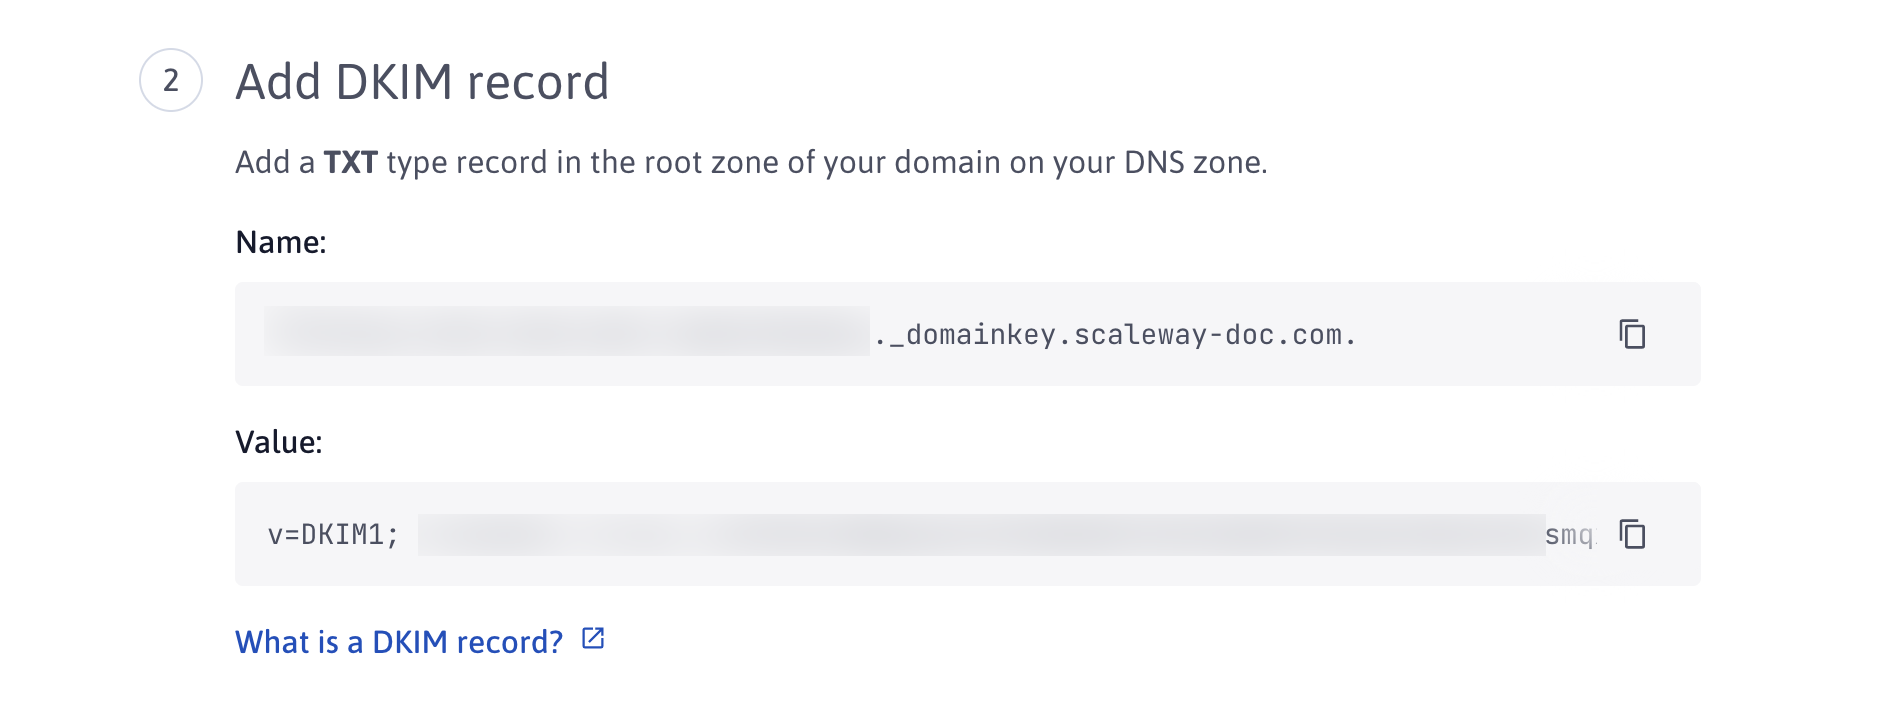
-
Paste the name you have copied in the root zone of your domain on your DNS zone.
-
Copy the value that displays in the console and paste it into the root zone of your domain on your DNS zone.

-
Check the box "I have added these DNS records to my DNS zone" to confirm.
-
Click Verify domain. Your domain displays in the list of your domains.
How to add your own MX record
- Add an MX record type in the root zone of your domain on your DNS zone.
- Enter a name of your choice in the Name field.
- Set
10as a priority for your MX record. - Enter the name of your MX followed by a trailing dot in the Hostname field.
- Save your changes.
How to improve your domain reputation
The factors used to determine your domain's reputation score vary from one service to another. The only constant common denominator is that the receiving platforms determine how your domain is used in your emails and then monitor how their users receive these emails. Each domain has several reputations associated with different mail receivers. Reputation also depends on the volume of emails you send to specific receivers.
Read our documentation to find out how to improve or maintain a good domain reputation score.