How to add a certificate to your Load Balancer
Introduction to SSL/TLS certificates
SSL/TLS certificates facilitate the establishment of secure connections between client and server. They verify the authenticity of the entities involved, and permit the encryption of data as it flows between client and server. SSL/TLS certificates are typically associated with the HTTPS protocol.
Do I need to add a certificate to my Load Balancer?
Adding an SSL/TLS certificate to your Load Balancer's frontend has the following effect:
- Secure connections (e.g. HTTPS), can be established between the client and the Load Balancer.
- The Load Balancer can therefore decrypt incoming secure traffic from the client and encrypt outgoing traffic on its way back to the client
- The Load Balancer can carry out layer 7 actions (e.g. establishing cookie-based sticky sessions) on the traffic it has decrypted.
- Depending on your Load Balancer's backend configuration, and whether your backend server also has a certificate, traffic can also be encrypted as it flows between the Load Balancer and the backend server (SSL bridging), or else left unencrypted (SSL offloading)
You may not need to add an SSL/TLS certificate to your Load Balancer's frontend if:
- Your backend server has an SSL/TLS certificate, and you want to use an SSL passthrough setup for secure connections. Note that in this case, the Load Balancer will not be able to carry out any layer 7 actions on encrypted traffic.
- Your backend server does not have an SSL/TLS certificate, but you do not want or need to allow clients to establish secure connections to the Load Balancer or your backend server.
Read the documentation about SSL bridging, offloading and passthrough configurations for more information on how to achieve these setups, and their advantages and disadvantages.
How does the secure connection work?
When your Load Balancer's frontend has a certificate, clients can securely connect to it via an encrypted connection. The underlying process is as follows:
- The client attempts to securely connect to the Load Balancer and asks it to identify itself.
- The Load Balancer sends the client a copy of its certificate in response.
- The client attempts to verify the certificate, and signals to the Load Balancer if it is satisfied it is trustworthy
- The Load Balancer returns an acknowledgment to start an encrypted session.
- Encrypted data is sent to the Load Balancer
How can I add a certificate to my Load Balancer?
Scaleway Load Balancer allows you to add certificates in two different ways:
- Generate a Let's Encrypt certificate directly from the console.
- Import an existing certificate, which can be from a Certificate Authority (CA) other than Let’s Encrypt, or be a self-signed certificate.
Note that after creating your certificate, you must add it to a specified frontend of your Load Balancer for it to take effect.
How to generate and add a Let's Encrypt certificate
Before you start
To complete the actions presented below, you must have:
- A Scaleway account logged into the console
- Owner status or IAM permissions allowing you to perform actions in the intended Organization
- Created a Load Balancer
- A domain name, which points to your Load Balancer's IP address
-
Click Load Balancers in the Network section of the Scaleway console side menu. Click the Load Balancer you want to configure. The Load Balancer information page displays.
-
Click the Load Balancer you want to add a certificate to.
-
Click the SSL Certificates tab.
-
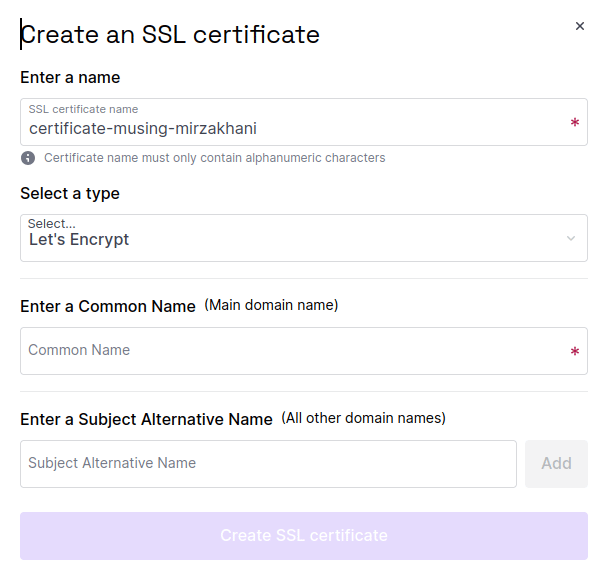
Click Create SSL certificate. A pop-up displays:
-
Enter the required information:
- Enter a name for your certificate, or use the auto-generated name suggested for you.
- Select the Let's Encrypt certificate type.
- Enter the main domain name associated with your Load Balancer, e.g.
my-website.comusing the Common Name box. - Enter additional domain names for the certificate using the Subject Alternative Name box if necessary.
-
Click Create SSL certificate.
You are returned to the SSL certificates tab where your newly-created certificate now appears. You must now attach the certificate to your frontend:
-
Click the Frontends tab.
-
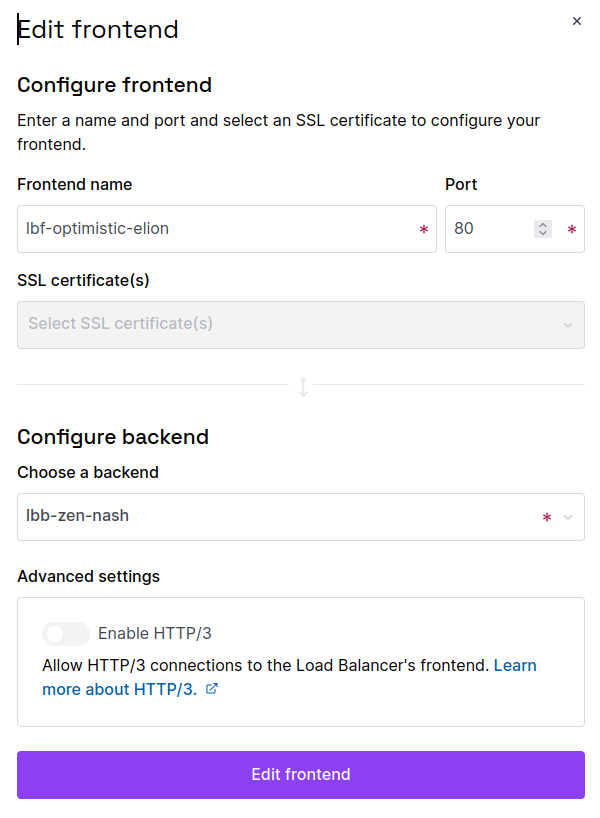
Click the three dot menu next to the frontend you want to add the certificate to, then click Edit.
-
Select the certificate you just created from the SSL Certificate(s) drop-down, then click Edit Frontend.
Your certificate is added to your Load Balancer's frontend.
How to import a certificate
Before you start
To complete the actions presented below, you must have:
- A Scaleway account logged into the console
- Owner status or IAM permissions allowing you to perform actions in the intended Organization
- Created a Load Balancer
- Either:
- An existing certificate issued by a Certificate Authority, or
- Generated a self-signed certificate
Scaleway Load Balancers allow you to import third party SSL certificates. These are certificates issued by a Certificate Authority (CA) other than Let’s Encrypt. Depending on the CA, they may offer extended validation certificates which require full verification of the requesting entity’s legal identity before issuing the certificate. These certificates can be useful for websites that require a high trust level, like e-commerce or government websites, and can be easily imported into the Load Balancer configuration from the management console.
Alternatively you can also choose to import a self-signed certificate, not signed by any publically-trusted Certificate Authority, but perhaps suitable for development and testing purposes, or internal use.
-
Click Load Balancers in the Network section of the Scaleway console side menu. Click the Load Balancer you want to configure. The Load Balancer information page displays.
-
Click the Load Balancer you want to add a certificate to.
-
Click the SSL Certificates tab.
-
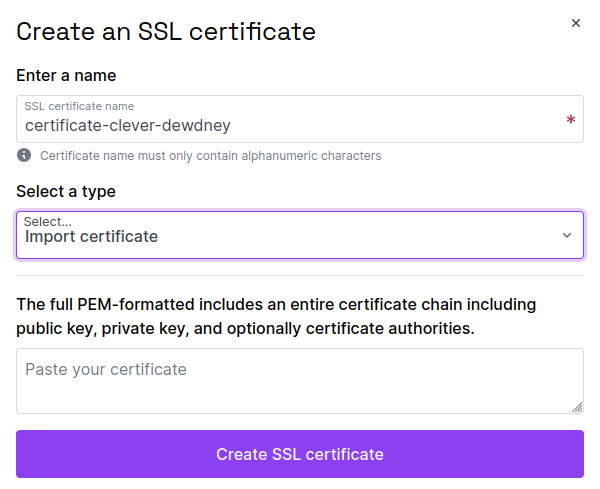
Click Create an SSL certificate. A pop-up displays:
-
Enter the required information:
- Enter a name for your certificate, or use the auto-generated name suggested for you.
- Select Import Certificate under type.
- Paste the full PEM-formatted certificate into the box provided. Include the entire certificate chain with public key, private key, and (optionally) Certificate Authorities. You may have received this information either in a combined file or in separate files from your CA. Contact them for more details on how to combine the information if you received the chain divided into multiple files.
-
Click Create SSL certificate.
You are returned to the SSL certificates tab where your newly-created certificate now appears. You must now attach the certificate to your frontend:

-
Click Frontends.
-
Click the three dot menu next to the frontend you want to add the certificate to, then click Edit
-
Select the certificate you just created from the SSL Certificate(s) drop-down, then click Edit Frontend.
Your certificate is added to your Load Balancer's frontend.
How to create a self-signed certificate
If you are using the import certificate option, you may wish to generate your own self-signed certificate to import to your Load Balancer. These certificates are not signed by any publicly-trusted Certificate Authority, but may be suitable for development and testing purposes, or internal use. A self-signed certificate can be issued easily on any computer using the openssl tool. Follow these steps to generate a self-signed certificate:
-
From your computer, open up a command line terminal and run the following command to generate a private key file and a CSR file:
openssl req -new -newkey rsa:4096 -nodes -keyout private_key.txt -out csr.txt -subj "/C=FR/ST=Ile-de-France/L=Paris/O=MyInternetCompanyLTD/CN=www.example.com"The following subcommands are used with the
opensslbase command:req: This subcommand specifies the use of the X.509 certificate signing request (CSR) management.newkey rsa: 4096: This subcommand specifies the creation of a new key and certificate at the same time using a 4096 bit long RSA key.nodes: This option tells OpenSSL to skip the securisation of the certificate using a passphrase.keyout: This subcommand defines the location and file name of the private key fileout: This specifies the path and file name of the generated certificate request.sub: The subject for the certificate. Modify the values of this subcommand to your requirements. The Common Name (CN) represents the domain name you are issuing the certificate for.
-
Generate a file containing all Subject Alternative Names (SAN) for the certificate. These include websites, IP addresses, common names, etc. They are protected by a single SSL Certificate. To do this, create a new file called
alt_names.txt, open it in a text editor and edit the file as follows. Make sure to add all domain names and IP addresses that should be protected by the certificate.subjectAltName=IP:10.100.0.1,IP:192.168.0.1,DNS:myserver.mydomain.com,DNS:otherserver.otherdomain.com,EMAIL:name@mydomain.com,EMAIL:othename@otherdomain.com -
Save the file and exit the text editor.
-
Generate the self-signed certificate using the
openssltool:openssl x509 -req -extfile alt_names.txt -sha256 -days 365 -in csr.txt -signkey private_key.txt -out certificate.txt -
Check that you have the following files in your folder with the
lscommand.csr.txt: The certificate requestprivate_key.txt: The private key for the certificatecertificate.txt: The public key for the certificate
-
Combine the private key and certificate into a
.pemfile, which is the format required in the Scaleway console when adding the certificate to the Load Balancer:cat private_key.txt certificate.txt > cert.pemThe
cert.pemfile is created.
How to manage your certificates
View the certificate(s) that you have uploaded for your Load Balancer on the SSL certificates tab.
Use the delete icon button to delete unwanted certificates.
Troubleshooting certificate problems
See our dedicated troubleshooting documentation.