How to create and manage VPCs
VPC allows you to build your own Virtual Private Cloud on top of Scaleway's shared public cloud. Within each VPC, you can create Private Networks and attach Scaleway resources to them, as long as the resources are in an AZ within the network's region. Attached resources can then communicate between themselves in isolated and secured networks, away from the public internet. The routing feature allows the different Private Networks of a VPC to communicate with each other. More features and resources will be coming to the VPC product in the future.
Before you start
To complete the actions presented below, you must have:
- A Scaleway account logged into the console
- Owner status or IAM permissions allowing you to perform actions in the intended Organization
How to identify your default VPCs
Before 13 May 2025
If you created your Scaleway Project before 13 May 2025, one default VPC was automatically created in it for each region (Paris, Amsterdam and Warsaw).
Click VPC in the Network section of the Scaleway console side menu. Your VPC dashboard displays:
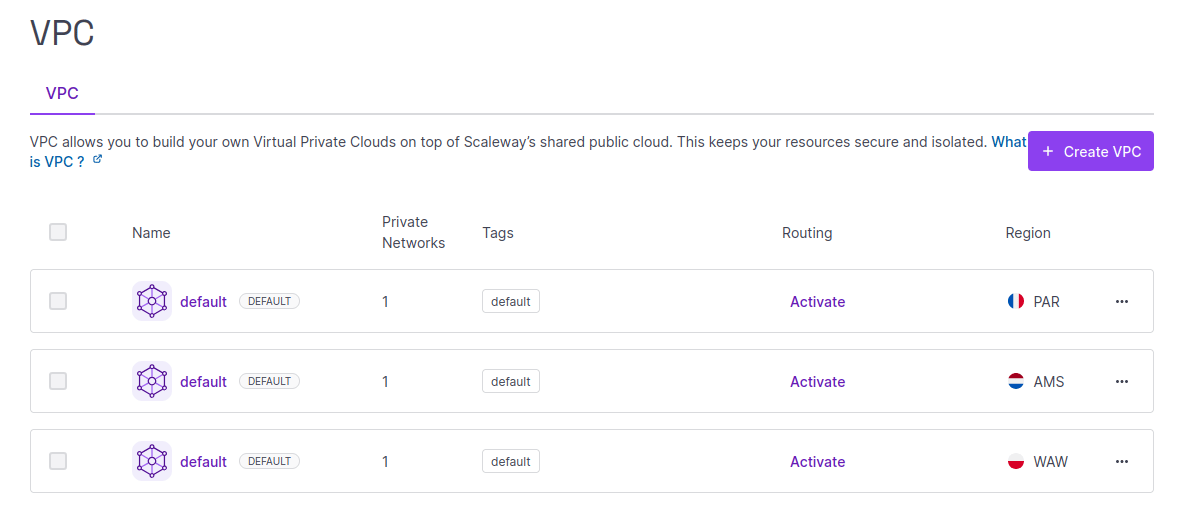
You see three default VPCs (each with a DEFAULT badge next to it), one for each of the following regions:
- Paris
PAR - Amsterdam
AMS - Warsaw
WAW
Each of these VPCs is named default, though you can edit the name if you wish, or delete the default VPCs.
After 13 May 2025
If you created your Scaleway Project after 13 May 2025, default VPCs are no longer pre-created for you. You must create a VPC before you can create a Private Network.
How to create a VPC
-
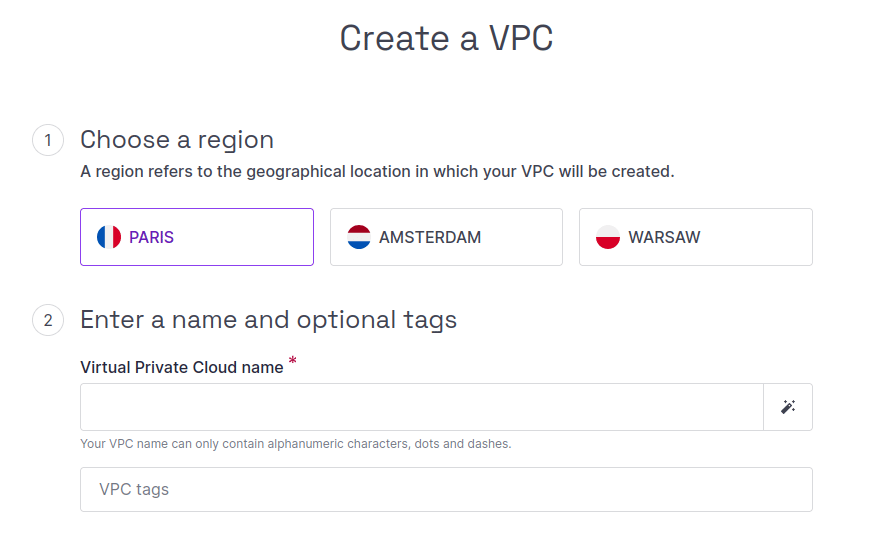
Click VPC in the Network section of the Scaleway console side menu.
-
Click plus icon Create a VPC. The VPC creation wizard displays.
-
Choose a region in which to create your VPC.
-
Enter a name for your VPC (or use the wand icon to generate a random name). Optionally, you can also add tags to help organize your VPCs. Each tag should be separated by a space.
-
Click Create VPC to finish.
Your VPC is created, and you are redirected to its Overview page.
How to edit a VPC's name and tags
-
Click VPC in the Network section of the Scaleway console side menu. A list of your VPCs displays.
-
Click the VPC you want to edit. The VPC's Private Networks dashboard displays.
-
Click the Overview tab.
-
Make the following edits as required:
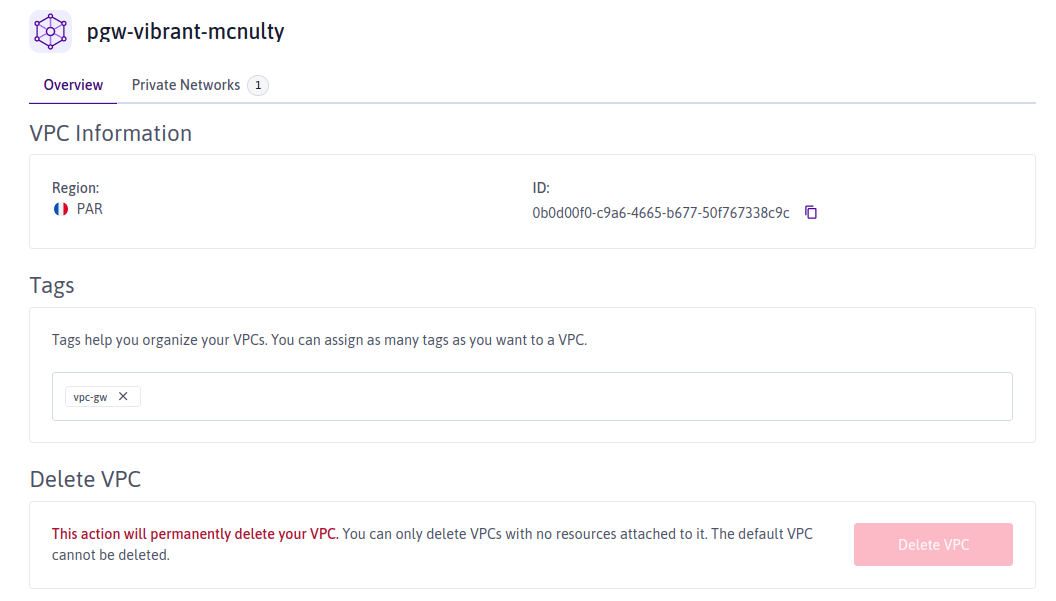
- Hover your mouse over the VPC's name at the top of the page, and click the edit icon icon that displays. Edit the name as required, and click validate icon when you're done.
- Click into the box marked Tags and start typing. Hit the spacebar to create the tag. Click the X next to any tag to delete it.