NavigationContentFooter
Jump toSuggest an edit

How to create credentials for Messaging and Queuing

Reviewed on 01 February 2024Published on 11 August 2022

This page shows how to create Messaging and Queuing credentials, which give their bearer (e.g. services and platforms) access to your Messaging and Queuing service. The process of creating credentials differs depending on the messaging protocol (NATS, SQS or SNS).

You can create multiple sets of credentials for each of your Messaging and Queuing services.

Before you start

To complete the actions presented below, you must have:

  • A Scaleway account logged into the console
  • Owner status or IAM permissions allowing you to perform actions in the intended Organization
  • A NATS account or have activated SQS/SNS

How to create credentials for a NATS account

Credentials for NATS accounts are not granular: they necessarily give full read and write access. The bearer of these credentials can publish and receive messages, as well as manage topics and streams, for this account.

  1. Click Messaging in the Serverless section of the Scaleway console side menu. The list of Messaging and Queuing protocols displays.

  2. Use the drop-down menu to select the region of the NATS account for which you want to create credentials.

  3. Click NATS. The list of your NATS accounts in the pre-selected region displays.

  4. Click the NATS account you want to generate credentials for. The account’s Overview page displays.

  5. In the Credentials panel, click Generate credentials. A pop-up displays.

  6. Enter a name for these credentials, and click Generate credentials.

    The credentials are created and a button displays prompting you to download them in a .creds file.

    Important

    The generated credentials are displayed only once. Make sure to download and safely store them before closing the window.

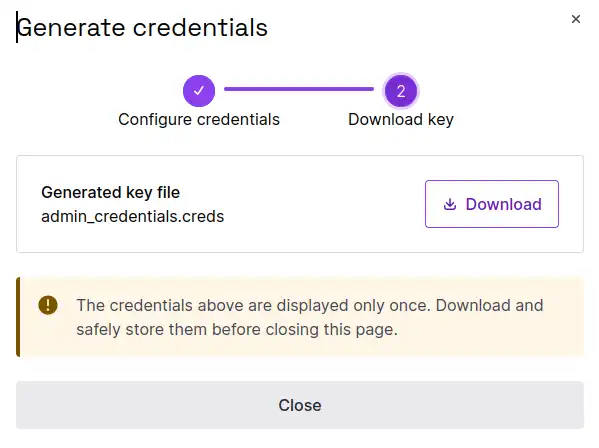
  7. Click Download and save the file, before closing the window.

    You are returned to your NATs account’s overview page. The name of your newly-generated credentials and their access level is displayed in the Credentials panel.

How to create credentials for SQS or SNS

Credentials for SQS or SNS are granular: you can define the level of access that they should give.

  1. Click Messaging in the Serverless section of the Scaleway console side menu. The list of Messaging and Queuing protocols displays.

  2. Use the drop-down menu to select the region in which you want to create credentials.

  3. Click SQS or SNS depending on which service you want to create credentials for.

  4. Click Generate credentials. A pop-up displays, such as the one below for SQS.

  5. Enter a name for these credentials.

  6. Select the required permissions for the credentials. You must choose at least one of Write, Read and Manage. You are free to select any combination of these permissions.

  7. Click Generate credentials.

    The credentials are created. The access key and secret key are displayed, and you are invited to copy them.

    Important

    This is your only chance to view and save the secret key. Make sure that you copy it and save it somewhere securely.

  8. Copy and save the credentials, before closing the window.

    You are returned to your Messaging and Queuing SQS or SNS service’s Credentials tab. The name of your newly-generated credentials, along with the access key and access level are displayed.

See also
How to get started with Messaging and QueuingHow to manage credentials
Docs APIScaleway consoleDedibox consoleScaleway LearningScaleway.comPricingBlogCarreer
© 2023-2024 – Scaleway