Creating and deploying an Angular application on Serverless Containers
Angular 19 is the latest development platform that scales from single-developer projects to enterprise-level applications. The platform provides enhanced performance, better server-side rendering, and a robust component-based framework.
Prerequisites
Before you start
To complete the actions presented below, you must have:
- A Scaleway account logged into the console
- Owner status or IAM permissions allowing you to perform actions in the intended Organization
- An SSH key
- A Container Registry namespace
- Installed Angular 18 and Node.js on your local machine
- Installed Docker for building and pushing the Docker image
Creating a demo application
-
Initialize the Angular application:
ng new demo-app -
Enter into the application directory:
cd demo-app -
Run the development server:
ng serve -
Open
http://localhost:4200in your browser to verify the application. PressCTRL+Cto stop the server. -
Add an NGINX configuration file
nginx-configuration.confinside thedemo-appdirectory with the following content:map $sent_http_content_type $expires { default off; text/html epoch; text/css max; application/json max; application/javascript max; ~image/ max; } server { listen 80; location / { root /usr/share/nginx/html; index index.html index.htm; try_files $uri $uri/ /index.html =404; } expires $expires; gzip on; } -
Create a Dockerfile. Learn more about creating Dockerfiles
# Build and compile the frontend
FROM node:18-alpine as build-stage
WORKDIR /app
COPY package*.json /app/
RUN npm install -g @angular/cli
RUN npm install
COPY ./ /app/
RUN ng build --output-path=./dist/out --configuration production

# Serve with NGINX
FROM nginx:stable
COPY --from=build-stage /app/dist/out/ /usr/share/nginx/html
COPY ./nginx-configuration.conf /etc/nginx/conf.d/default.conf
Building and Publishing the Docker Image
-
Build the Docker image:
docker build -t demo-app:latest . -
Tag the Docker image:
docker tag demo-app:latest rg.fr-par.scw.cloud/demo-namespace/demo-app:latestReplace
demo-namespacewith your namespace name. -
Push the image to the Scaleway registry:
docker push rg.fr-par.scw.cloud/demo-namespace/demo-app:latest
Deploying the application on Serverless Containers
-
Click Containers in the Serverless section of the side menu of the Scaleway console. A list of your container namespaces displays.
-
Click the name of the namespace in which you want to deploy the application. The list of your containers displays.
-
Click Deploy a Container. The container deployment wizard displays.
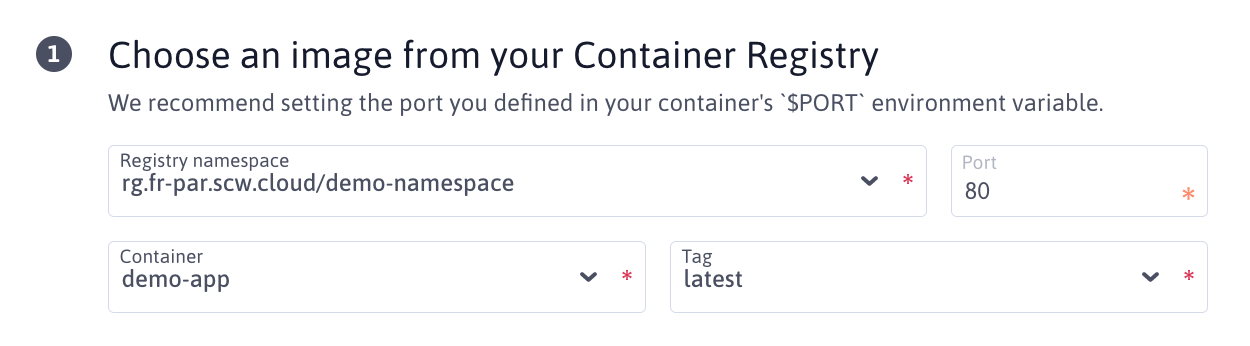
Provide the following information to deploy the container:
- Choose the pushed image in your registry's namespace and set the port value to 80.
- Choose a name and an optional description for the container
- Define the container's resources
- Configure the scaling of your application
- Leave the other options at their default values
- Choose the pushed image in your registry's namespace and set the port value to 80.
-
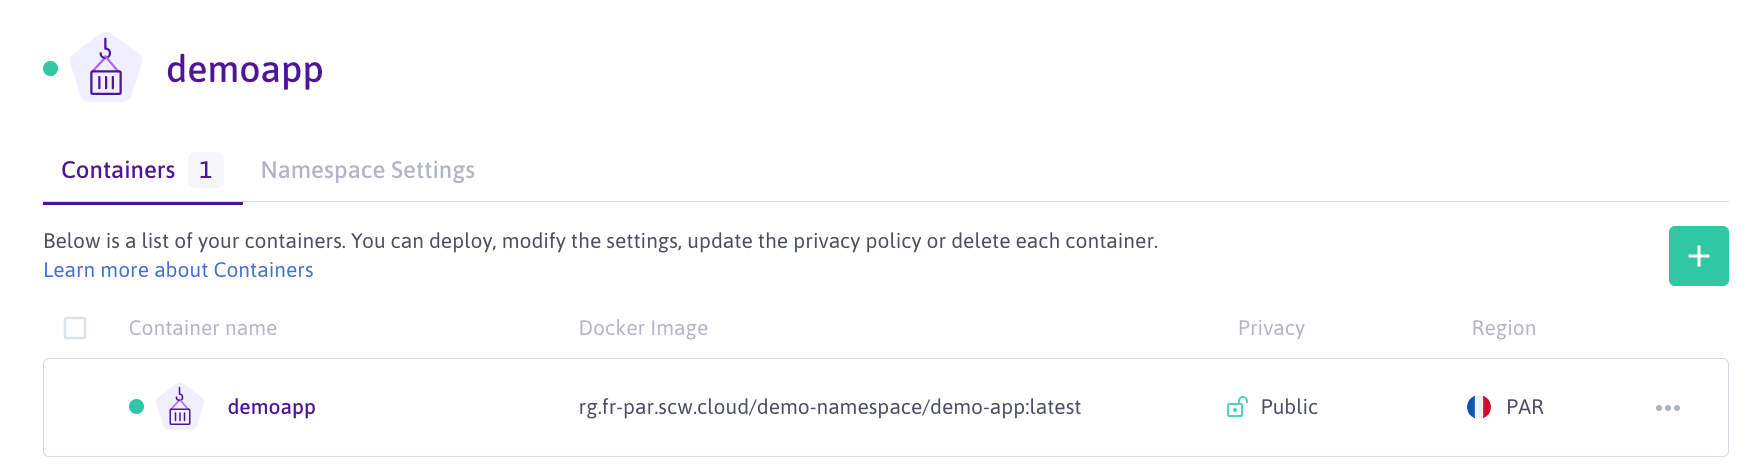
Click Deploy a Container to deploy your application. Your application displays in the list of containers:
-
Click on the container's name. The container information page displays. Click the Container Settings tab. The container endpoint displays in the container information block.
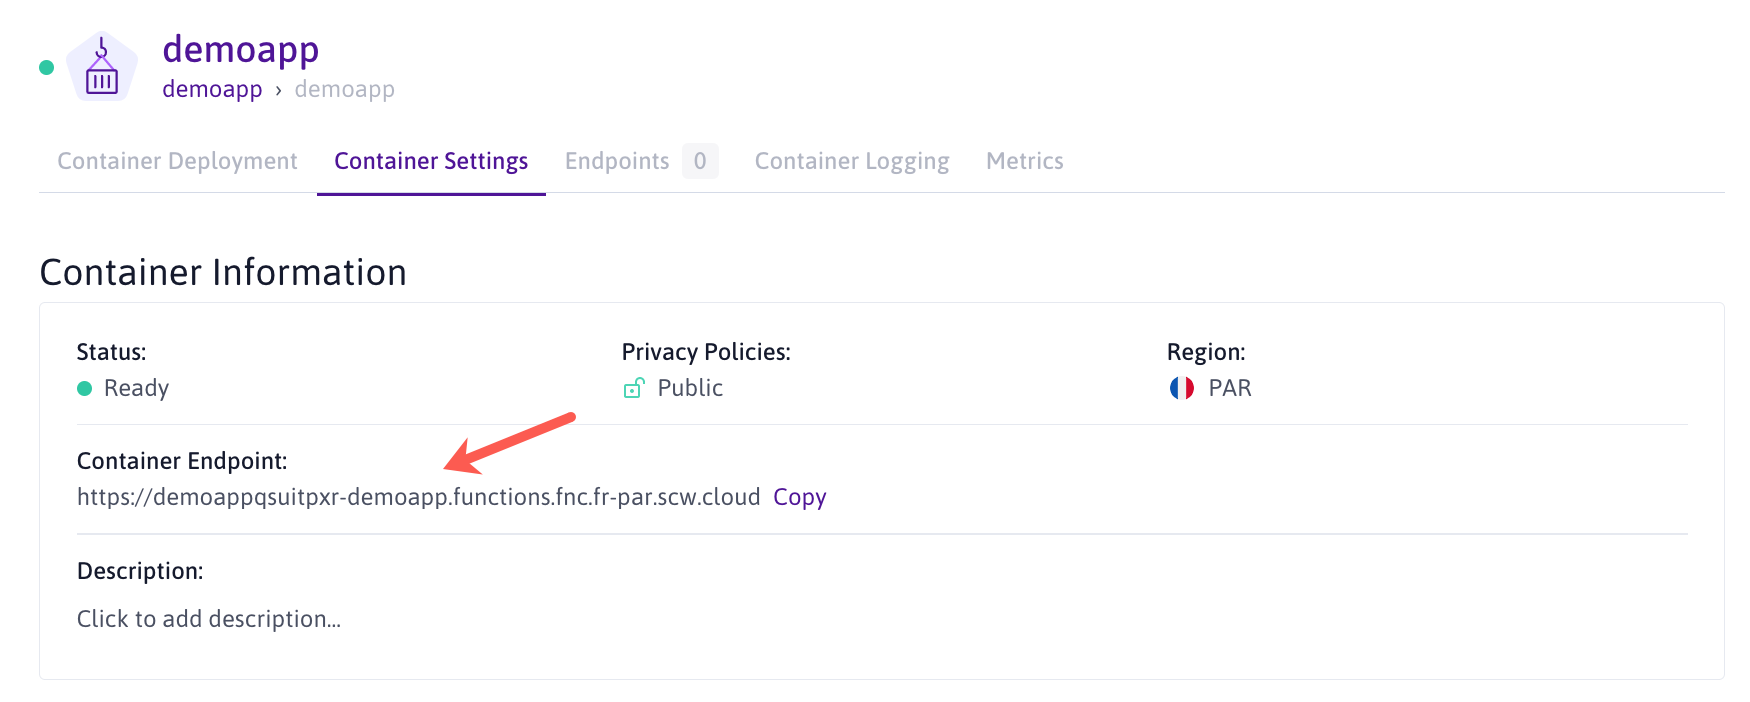
Copy the endpoint URL and open it in a web browser. The Angular application displays. It can now automatically scale based on the application's load and within the ranges set for the deployment.
Visit our Help Center and find the answers to your most frequent questions.
Visit Help Center