Installing and Configuring a CouchDB Cluster on Ubuntu Bionic or Focal Fossa
Apache CouchDB is an open-source database solution that was built with ease of use and scalability in mind. It is a database that completely embraces the web. It allows you to store your data with JSON documents and to access these documents with your web browser.
It uses a document-orientated NoSQL database architecture with JSON to store data, and JavaScript as query language by using MapReduce and HTTP for its API. It is written in the Erlang programming language.
Unlike traditional relational databases (e.g. MariaDB), as a NoSQL database, CouchDB does not store data and relationships in tables. Each database is a collection of independent documents and each maintains its own data and self-contained schema.
Documents are the primary unit of data in CouchDB and consist of any number of fields and attachments. Each document field has a unique name and can contain values of varying types (text, number, boolean, lists, etc). There is no limitation on the size of a field or the count of its elements.
CouchDB uses a form of multiversion concurrency control (MVCC) as the document update model, so it does not lock the database file during writes or reads. It remains the task of the application to resolve conflicts in documents. Resolving a conflict generally involves first merging data into one of the documents, and then deleting the obsolete one.
CouchDB also supports multi-primary replication which allows it to scale across multiple machines to build high-performance systems.
Before you start
To complete the actions presented below, you must have:
- A Scaleway account logged into the console
- Owner status or IAM permissions allowing you to perform actions in the intended Organization
- An SSH key
- 3 Instances running on Ubuntu Bionic (18.04) or Ubuntu Focal (20.04)
sudoprivileges or access to the root user
Installing CouchDB on the Instances
-
Make sure that your system is up-to-date, and install the HTTPS transport module for apt.
apt update && apt upgrade -y && apt install -y curl apt-transport-https gnupg -
Set up the CouchDB repository and key.
curl https://couchdb.apache.org/repo/keys.asc | gpg --dearmor | tee /usr/share/keyrings/couchdb-archive-keyring.gpg >/dev/null 2>&1 source /etc/os-release echo "deb [signed-by=/usr/share/keyrings/couchdb-archive-keyring.gpg] https://apache.jfrog.io/artifactory/couchdb-deb/ ${VERSION_CODENAME} main" | tee /etc/apt/sources.list.d/couchdb.list >/dev/null -
Update the APT package manager and install CouchDB.
apt update && apt install -y couchdbThe installer asks you if you want to install CouchDB as a standalone application or in a clustered configuration.
-
Select
Clusteredand press Enter. The cluster configuration can be done later from the web interface.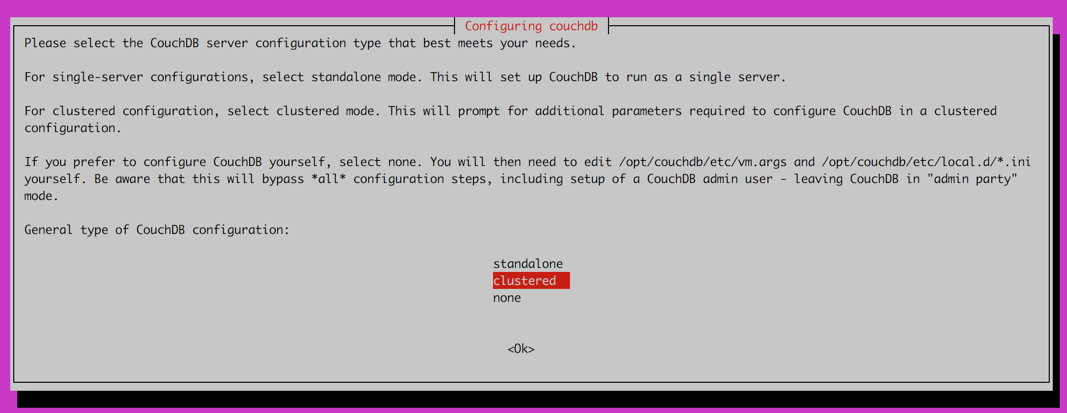
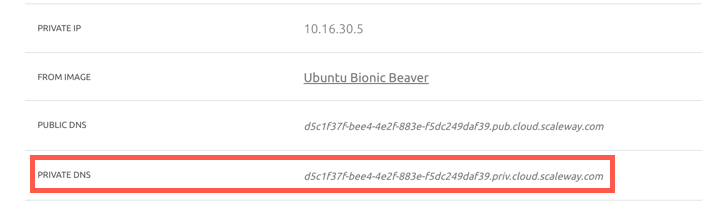
You are prompted to enter the Erlang Node Name of your server. As the cluster will communicate on the internal Scaleway network, you should use the Instance's internal FQDN for this as follows:
-
Copy the Instance's internal FQDN, which you can find in the Instance's Overview page on the Scaleway console under Private DNS.
-
Return to the installer, and enter
couchdb@<instance-internal-fqdn>as the CouchDB Erlang node name, ensuring you replace<instance-internal-fqdn>with the private DNS address you just copied.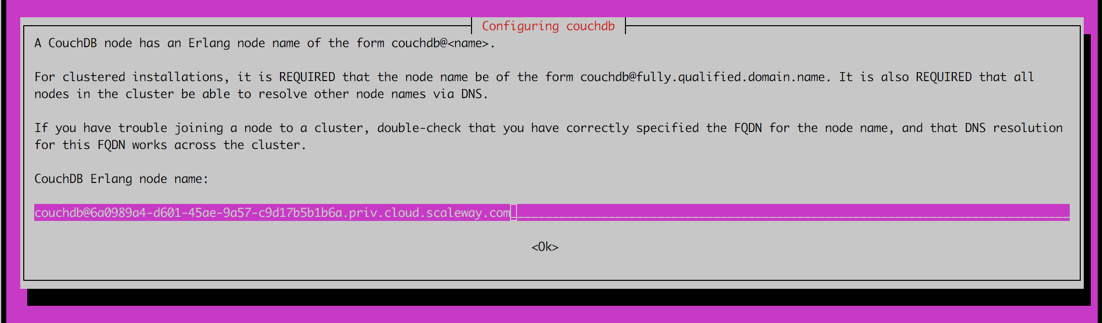
-
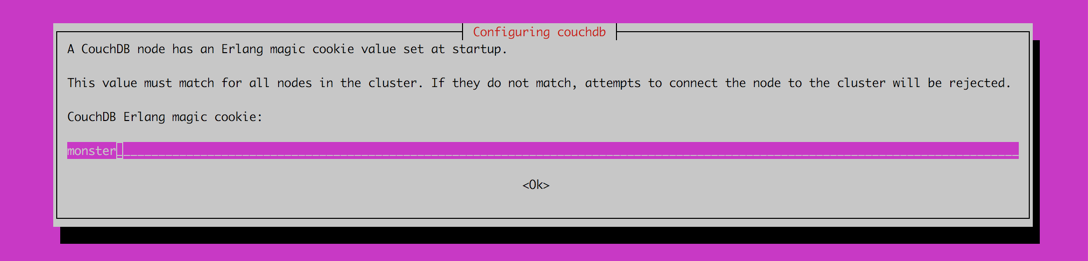
Set the Erlang Magic Cookie. This is a unique identifier to authenticate for your cluster, all nodes must have the same cookie.
-
Configure the network interfaces on which CouchDB will be bound. To run a cluster it is important to bind it to
0.0.0.0.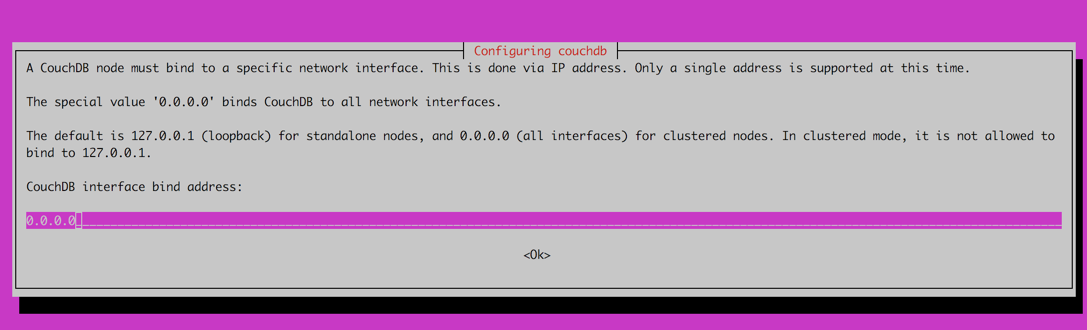
-
Enter an admin password of your choice for CouchDB, press enter, re-type the password and press Enter again to continue the installation.
-
Verify that the CouchDB server is running once the installation is complete.
curl http://<your-instance-ip>:5984/
If you see an output like the following the installation has completed:
{
  "couchdb": "Welcome",
  "version": "3.2.1",
  "features": ["scheduler"],
  "vendor": { "name": "The Apache Software Foundation" }
}
Installing a Nginx proxy to access the web interface on the primary server
To protect the web interface of CouchDB from unauthorized access, it is required to configure a secure Nginx proxy to restrict access.
- Install nginx and apache2-utils:
apt-get install -y nginx apache2-utils - Generate a
.htpasswdfile to protect your installation from unauthorized visors. Run the following command to create a password for the useradmin:htpasswd -c /etc/nginx/.htpasswd admin - Type the password for the admin user, then press Enter and re-type the password to confirm.
- Edit the file
/etc/nginx/sites-enabled/defaultand put the following content in it:server { listen 4000 default_server; server_name coachdb.local; location / { proxy_pass http://localhost:5984; proxy_redirect off; proxy_set_header Host $host; proxy_set_header X-Forwarded-For $proxy_add_x_forwarded_for; proxy_set_header X-Forwarded-Proto $scheme; auth_basic "Access restricted"; auth_basic_user_file /etc/nginx/.htpasswd; } } - Reload the configuration of Nginx:
service nginx reload - Access Project Fauxton, the configuration interface of CouchDB by going to
http://YOUR_SERVER_IP:4000/_utils/#/setupin your browser. Log in with the useradminand the password that you have set during the installation: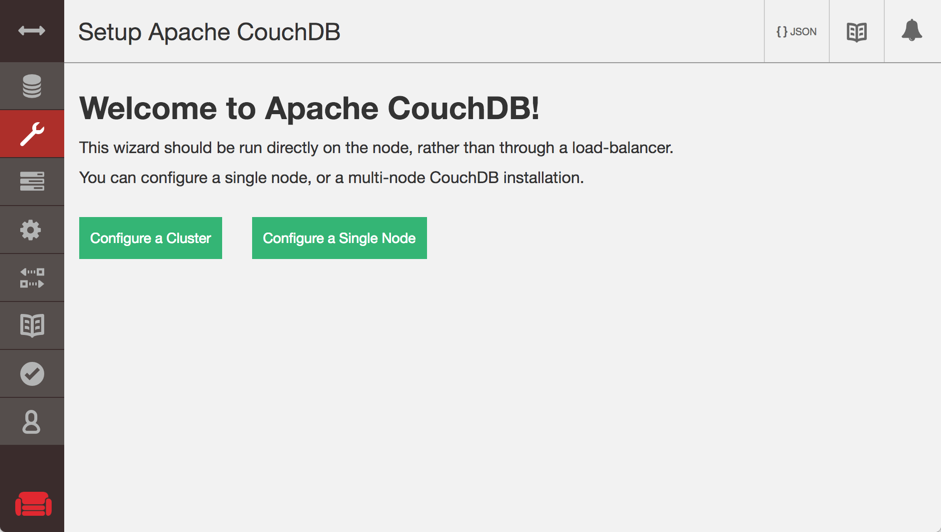
Creating a CouchDB cluster
You can easily create a CouchDB cluster from the Fauxton Interface.
-
Click the Configure a Cluster button to be redirected to the following form:
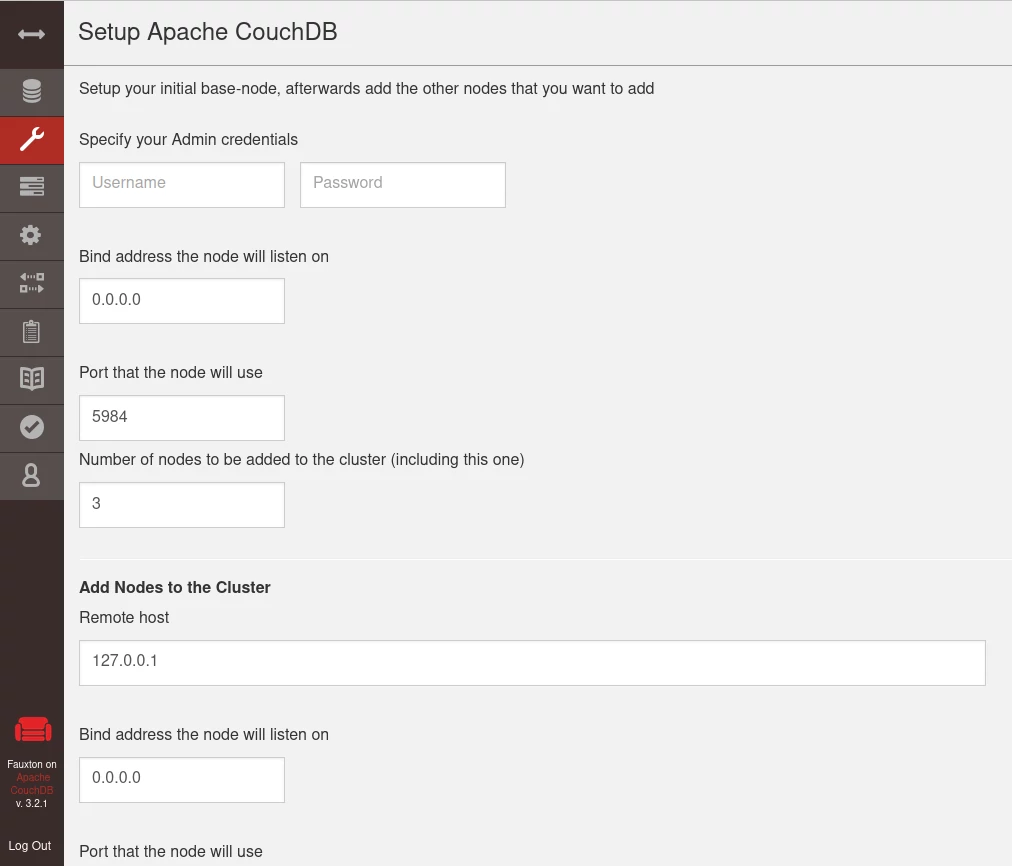
-
In the top part of the form, enter the credentials for the admin user, the interface on which you want the node to listen, the port, and the total number of nodes in the cluster.
-
In the second part enter the details of each node:
Remote Hostwill be the DNS name of the remote node (couchdb@<instance-private-dns>)Bind Addressmust be0.0.0.0Portcan be left at the default value of5984
-
Click Add node and repeat this step for each node of the cluster.
-
Click Configure Cluster to build the cluster once all nodes are added.
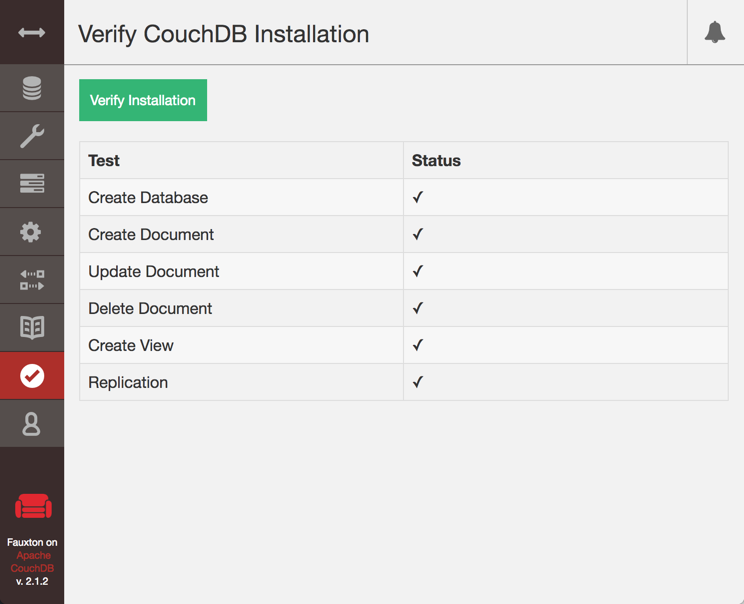
Once the cluster has been created, verify the installation from the Fauxton interface:
-
Click Verify in the menu on the left, then on Verify Installation.
If the cluster is working properly, all tests will be checked:
Creating a new database from the Fauxton interface
You can create a database from the Fauxton interface with the following steps:
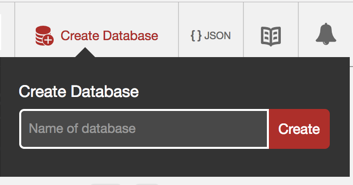
- Click Managed Databases in the side menu, then Create Database in the top right.
- Enter a name for the new database.
- Click Create.
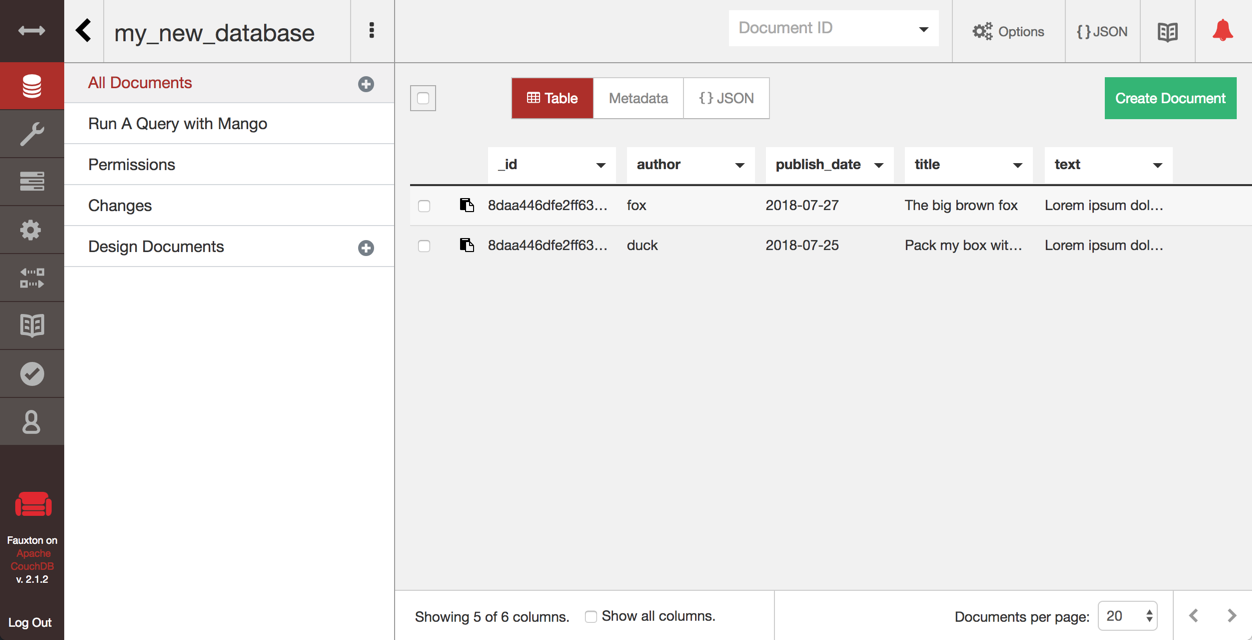
Managing a database from the Fauxton interface
You can manage a database directly from the Fauxton interface. It provides options to view, edit, and add documents directly from this interface:
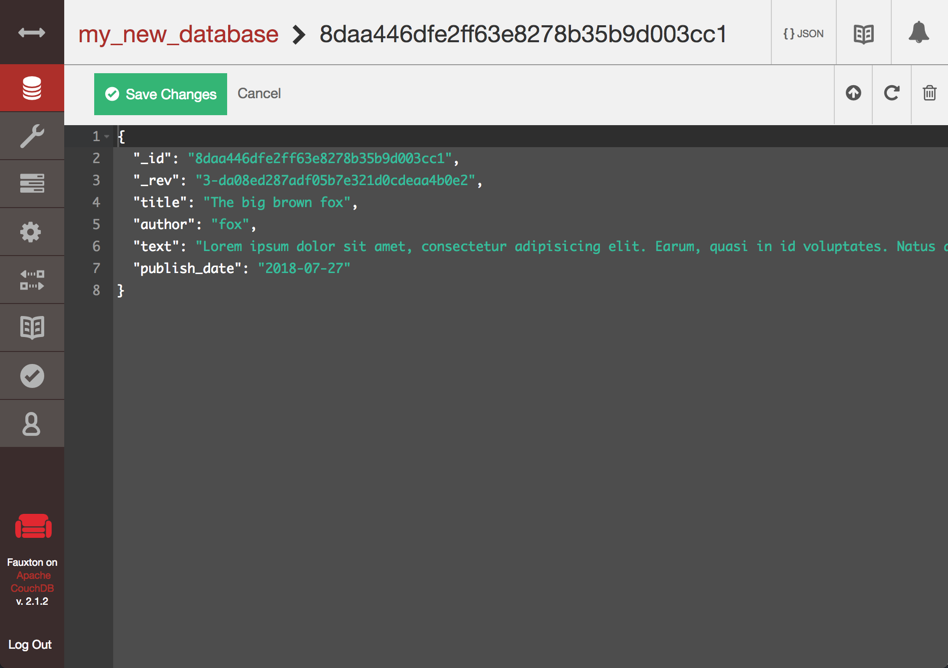
Editing a document from the Fauxton interface
To edit a document from the Fauxton interface, click the corresponding line to edit the content of the document directly from the web interface:
Using the CouchDB API
As seen, CouchDB provides an HTTP API, and it is possible to use it with curl. To authenticate with the API, it is required to provide your credentials in the form user:password@host.
Getting a list of all Databases on the server
To retrieve a list of all databases on the server type:
curl -X GET http://admin:password@127.0.0.1:5984/_all_dbsIt returns a list like the following:
["_replicator", "_users"]Creating a database
Use the following command to create a new database, Replace database_name with the desired name for the new database.
curl -X PUT http://admin:password@127.0.0.1:5984/database_nameIf everything went well, the following output displays:
{ "ok": true }Getting database information
To get information related to a database, run:
curl -X GET http://admin:pasword@127.0.0.1:5984/my_databaseA JSON output similar to the following is returned:
{
  "db_name": "my_database",
  "update_seq": "0-g1AAAALreJy10D8OgjAchuFGHbyFXqANhRboJIP30F__BUkVo0HjpDfRm-hN9CZY0tU4wfJ-2zN8DiE0LccaLVXdqFLLQnNFbZJZLI1hmJnY4jxPDLZcq5gJDTYRZH_YnIhydaPJUYEzZ7gQVW-d10aA5Kxt2wpQv66c-8rFDzqFSOQCGNZpRDHjYLAAnmElNM0kl1Sm8J8uOno1CL3u6OsQ9G7ii25-vH7v_e_APwL_HIh_Bf49EP8JfPd99QW04OuF",
  "sizes": {
    "file": 34360,
    "external": 0,
    "active": 0
  },
  "purge_seq": 0,
  "other": {
    "data_size": 0
  },
  "doc_del_count": 0,
  "doc_count": 0,
  "disk_size": 34360,
  "disk_format_version": 6,
  "data_size": 0,
  "compact_running": false,
  "cluster": {
    "q": 8,
    "n": 3,
    "w": 2,
    "r": 2
  },
  "instance_start_time": "0"
}
Getting a list of all nodes in a cluster
To get a list of all the nodes in a cluster, run:
curl -X GET http://admin:password@127.0.0.1:5984/_membershipIt will return a JSON list like the following:
{
  "all_nodes": [
    "couchdb@6a0989a4-d601-45ae-9a57-c9d17b5b1b6a.priv.instances.scw.cloud",
    "couchdb@d5c1f37f-bee4-4e2f-883e-f5dc249daf39.priv.instances.scw.cloud",
    "couchdb@fc978f3f-e70b-4281-b8e7-fedbfddea536.priv.instances.scw.cloud"
  ],
  "cluster_nodes": [
    "couchdb@6a0989a4-d601-45ae-9a57-c9d17b5b1b6a.priv.instances.scw.cloud",
    "couchdb@d5c1f37f-bee4-4e2f-883e-f5dc249daf39.priv.instances.scw.cloud",
    "couchdb@fc978f3f-e70b-4281-b8e7-fedbfddea536.priv.instances.scw.cloud"
  ]
}Securing the cluster
A limitation of CouchDB is that a clustered infrastructure must be bound to all interfaces of your node. This means anyone knowing your secret cookie can join your cluster, as there is no access restriction by default.
To secure it, it is recommended to install a firewall on each node to restrict communication with external clients.
- Install ufw on the node:
apt-get install ufw - Set the rules:
ufw allow OpenSSH #to allow SSH connections ufw allow from 10.0.0.0/8 to any port 5984 #to allow the connection from the 10.0.0.0/8 subnet. You can also specify the individual IPs of your Instances. ufw allow 4000 #allow the connection to port 4000 for the web interface. - Activate the firewall rules:
ufw enable
Connections from the internet to your CouchDB cluster are now limited. As an additional security measure, you can disable the public IP address of the nodes as they communicate via the internal IP with each other.
For more information on how to configure and use CouchDB for your applications, refer to the official documentation.
Visit our Help Center and find the answers to your most frequent questions.
Visit Help Center